Investigations into Socket 939 Athlon 64 Overclocking
by Jarred Walton on October 3, 2005 4:35 PM EST- Posted in
- CPUs
System Assembly
Once you have all the parts, it's time to put everything together. We're going to assume that you know the basic process, but here's our order for assembling a new system.
With the system up and running, install the OS and drivers. We use SATA drives almost exclusively for new PCs, which is why it's important to check the BIOS settings. Installing XP and the drivers is pretty simple, so we're not going to go into much detail. Use your CD and key, and then when XP is installed, you use the driver CD that comes with your motherboard. That will get you network, sound, and chipset drivers. You might want to check for newer versions online once you have networking installed, or else download them in advance on another PC and copy them to the new system. We also grab all the latest Windows Updates for any system with Internet access, though not necessarily for performance testing. Since we're only using one board, we installed all the Windows Updates along with a bunch of other software that we'll use in benchmarking. We also recommend switching your SATA hard drive to port 3 or 4 (or one of the extra ports) once Windows is installed. SATA ports 1 and 2 generally don't behave well when you begin overclocking beyond a certain threshold, and with the drivers installed, Windows should boot fine whether your primary drive is connected to port 1 or 3 or something else.
You'll note that up to this point, we haven't even talked about overclocking our new system. If you don't realize this already, let's make this clear: get your OS installed and running and test all your programs before you start overclocking! Setting up a new PC is a complex process, and even experienced system builders encounter problems. You don't want to have the Windows XP install program crash at 95% complete due to an overclock. It's not nearly as bad to have the system crash once you have it working, which is why we say to wait. Even then, it is possible to have an overclocked system crash and corrupt files, forcing you to reinstall applications or even XP from scratch. (It happened at least once in my testing, though not with socket 939.) There's a risk, but for many, the potential rewards outweigh the risk.
Once you have all the parts, it's time to put everything together. We're going to assume that you know the basic process, but here's our order for assembling a new system.
- Remove all components from boxes and lay them out on the workbench in an orderly fashion. (Check for order errors.)
- Install the CPU into the motherboard socket with the motherboard resting on the padded foam cushion with which it shipped.
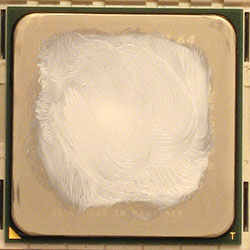
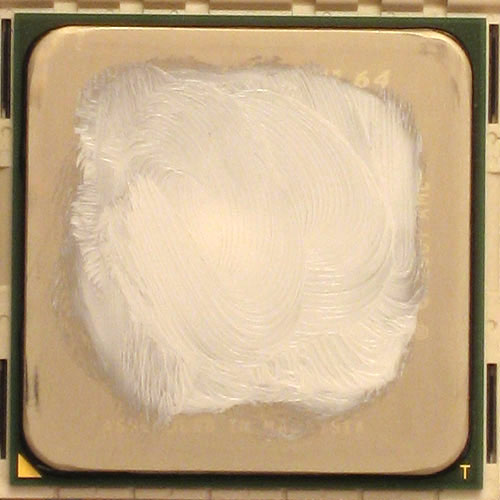
Click to enlarge. - Apply a small amount of thermal paste to the center of the CPU heat spreader, then smooth it out a bit using your finger, a razor blade, etc. The idea is to get a thin layer on the heat sink, and you don't need to cover the whole CPU surface; once the HSF is installed, the thermal grease will flatten out to cover the rest of the CPU surface and you don't want a lot of extra grease. (Technically, AMD voids your CPU warranty if you don't use approved thermal grease. We've never had to deal with a failed Athlon 64 chip yet, so we can't comment on how they would respond. Overclocking is already voiding the warranty, so we're not worried about "approved" thermal compounds.)
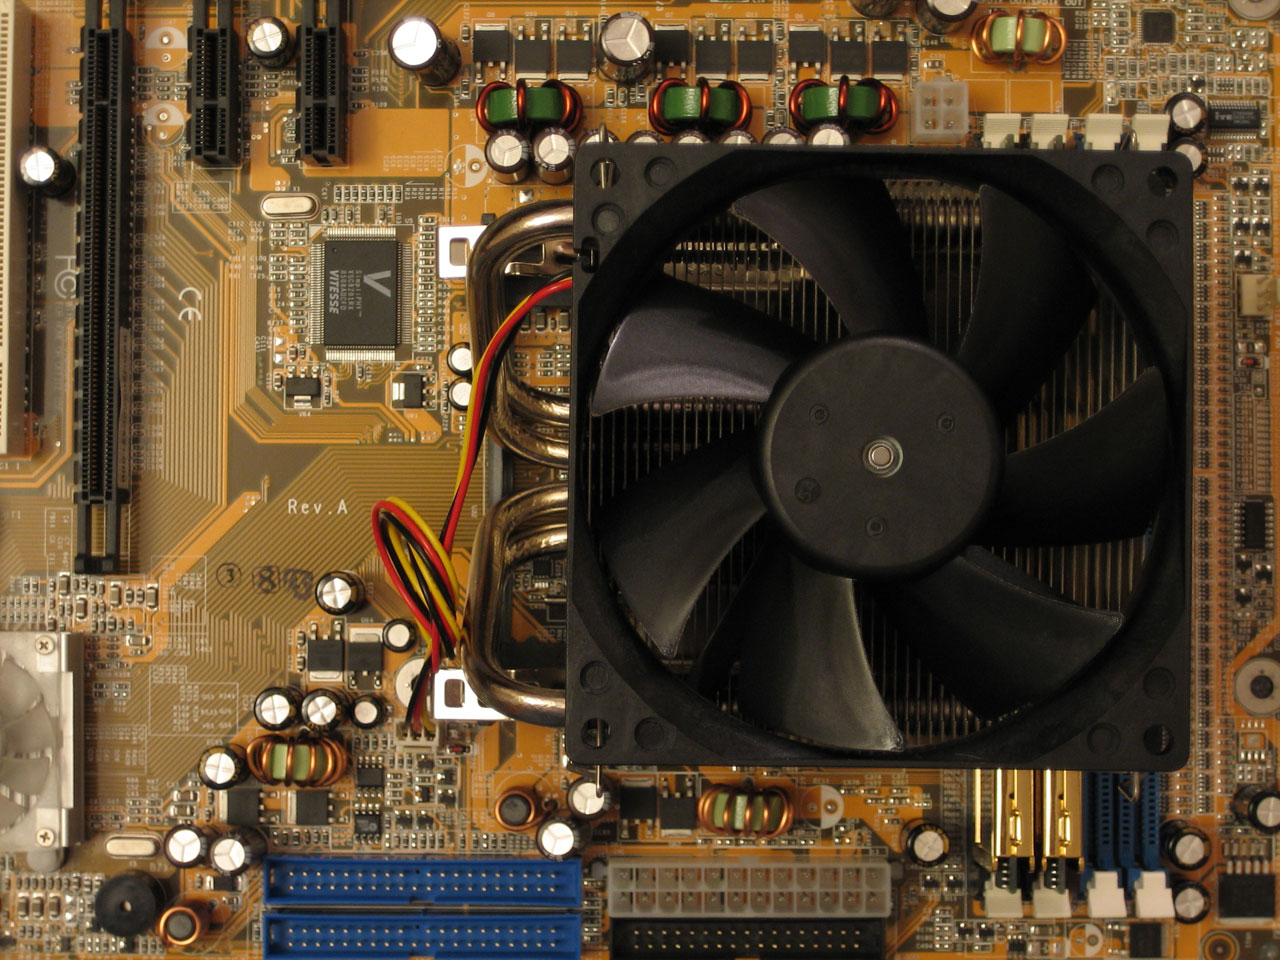
- Install the heat sink onto the CPU - carefully. Depending on which HSF that you decide to purchase, you may need to change the mounting bracket, back plate, etc. One of the reasons why we like the Thermalright HSF is because you don't need to change the back plate (which is sometimes "glued" onto the motherboard). Don't forget to connect the fan to the 3-pin CPU header on the motherboard.
- Install the RAM into the appropriate slots. For the DFI board, that would be slots 3 and 4 (the two closest to the CPU). Other manufacturers number their slots differently and may separate the RAM for dual channel operation. Read the manual for your motherboard.

Click to enlarge. - If your case doesn't already have the power supply installed, it's generally best to install that now. Otherwise, the HSF for the CPU can get in the way. This varies by case, of course, but we almost always find it easier to get the PSU in before anything else.
- Install the motherboard mounts (usually little brass colored screws/bolts) into the case. Only put the mounts in places that match up to the holes on the motherboard. The DFI INFINITY has seven holes and thus requires seven mounts. You don't want extra mounts installed, as they could create a short on the bottom of the motherboard. Also, swap out your case's backplate for the one provided with your motherboard. (We have yet to encounter a case with a backplate that matches any motherboard that we've purchased.)
- Place the motherboard carefully into the case; you may have to work a little to get the backplate to line up with the rear I/O panel of the motherboard. Don't force anything. Once the board is in place, install the screws that secure the motherboard. Note that before installing the motherboard, depending on the case and your dexterity, it might be easier to connect the wires for the front panel of the case - power and HDD LEDs, reset and power switches, and speaker are almost always present. In our experience, the colored wires are usually the positive feed and the black (or white) wires are for ground. (I still get the LEDs backwards half the time, I think. If your HDD/Power lights don't come on, reverse the pins.)
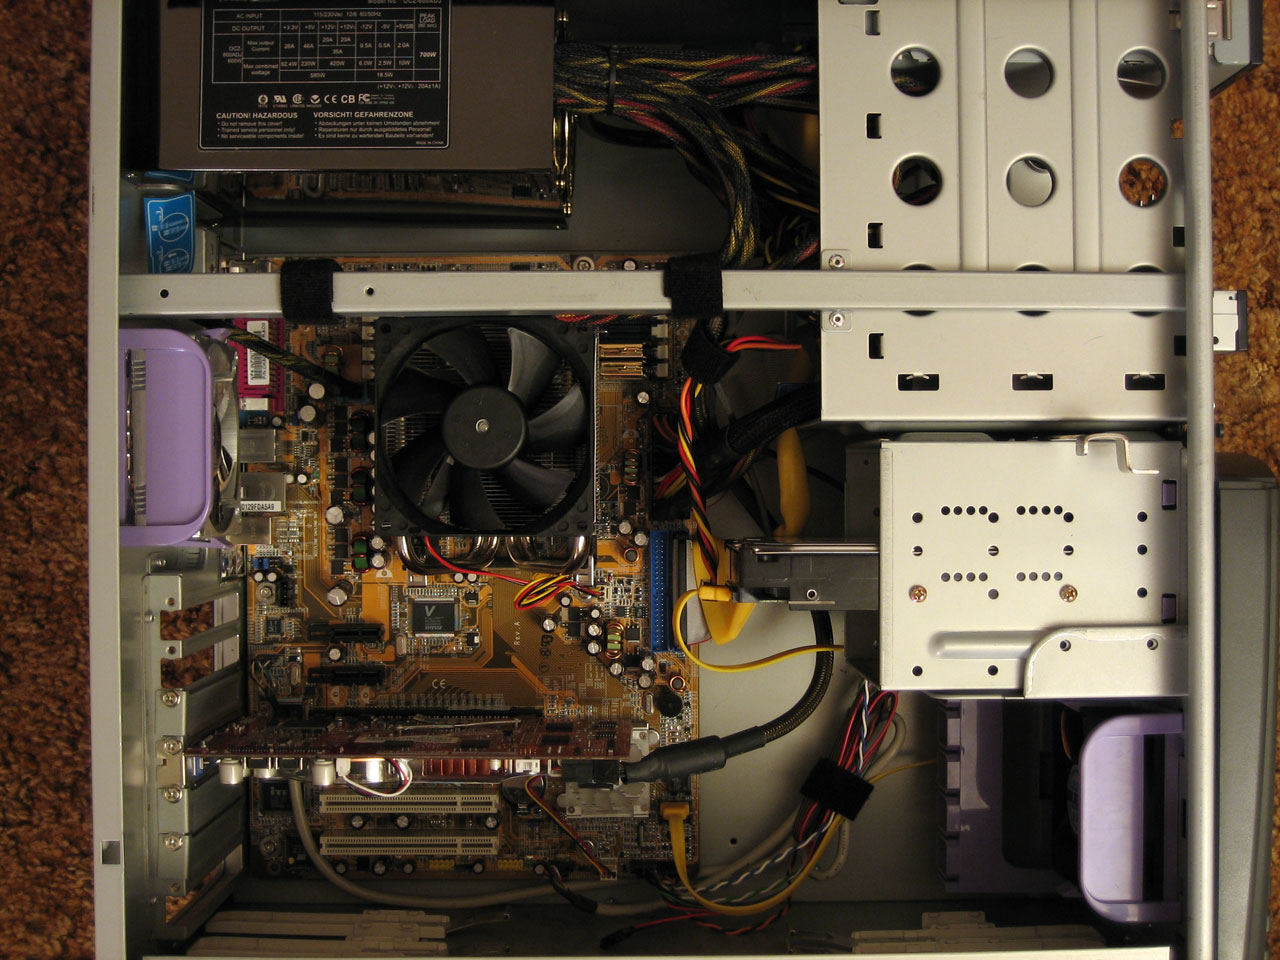
- Install your graphics card, hard drive(s), DVD drive(s), cables, etc. We try to keep all the cables tidy, and you can use zip ties, velcro wraps, or even twisty ties if you don't mind a slightly ghetto approach. You might want to wait a minute before really securing all cables, just to be sure that all of the parts work properly. For now, plug the main SATA drive into SATA port 1. (If you're dead set on using RAID for your OS drive, you'll need a floppy disk with a driver on it.)
- Install any other fans or components, and make sure everything has power. Check the voltage switch on the rear of the PSU to make sure that it's set to 115V (or 230V depending on your location). Then plug in the power cord from the wall to the rear of your PSU, hold your breath, and turn on the system. Verify that all the fans are spinning.

Click to enlarge. - If the computer doesn't turn on, check that everything is seated properly and begin troubleshooting. Take it slow and don't jump to conclusions (i.e. "My RAM is bad!") Check the connections from the front panel of the case, as you might have simply installed the power switch cable incorrectly. Check all the other cables as well. If you have spare parts that you know work properly, try swapping them one at a time. Try running with just the CPU, graphics and RAM installed (no HDD or DVD). You might also want to remove the motherboard from the case and try powering on the system with the board sitting on the padded cushion (and anti-static bag) on your work area. If that works, check for anything in the case that might be grounding the board. You can try fully disassembling the PC and trying again, with the hope that perhaps you'll find your error in the process. Beyond that, you're on your own. Try the forums for help if you can't figure it out, but be patient and polite.
With the system up and running, install the OS and drivers. We use SATA drives almost exclusively for new PCs, which is why it's important to check the BIOS settings. Installing XP and the drivers is pretty simple, so we're not going to go into much detail. Use your CD and key, and then when XP is installed, you use the driver CD that comes with your motherboard. That will get you network, sound, and chipset drivers. You might want to check for newer versions online once you have networking installed, or else download them in advance on another PC and copy them to the new system. We also grab all the latest Windows Updates for any system with Internet access, though not necessarily for performance testing. Since we're only using one board, we installed all the Windows Updates along with a bunch of other software that we'll use in benchmarking. We also recommend switching your SATA hard drive to port 3 or 4 (or one of the extra ports) once Windows is installed. SATA ports 1 and 2 generally don't behave well when you begin overclocking beyond a certain threshold, and with the drivers installed, Windows should boot fine whether your primary drive is connected to port 1 or 3 or something else.
You'll note that up to this point, we haven't even talked about overclocking our new system. If you don't realize this already, let's make this clear: get your OS installed and running and test all your programs before you start overclocking! Setting up a new PC is a complex process, and even experienced system builders encounter problems. You don't want to have the Windows XP install program crash at 95% complete due to an overclock. It's not nearly as bad to have the system crash once you have it working, which is why we say to wait. Even then, it is possible to have an overclocked system crash and corrupt files, forcing you to reinstall applications or even XP from scratch. (It happened at least once in my testing, though not with socket 939.) There's a risk, but for many, the potential rewards outweigh the risk.


101 Comments
View All Comments
Powered by AMD - Monday, October 3, 2005 - link
Do not forget The Athlon XP 1700+ 1.5Volts, DLT3C, mines is OC from 1467 Stock to 2250 Mhz and pretty cool with an old Thermaltake Blower...It can ever reach 2450 Mhz but with 1.8 Volts.
hey, at 2250 Mhz its a 53% OC too!!
Great article but it will be useful for me only when I need an Athlon 64 :p
donkeycrock - Monday, October 3, 2005 - link
i noticed that frys is selling x-connect (500 Watts)psu for 25 dollars after rebate. it is extremely heavy, and not many reviews say if they are very good PSU's for overclocking, anybody have knowladge about this PSU.thanks
brad
cryptonomicon - Monday, October 3, 2005 - link
nice article jarred, and you worded the disclaimers perfectly, bravo.and its nice to see those ram comparisons. good to see those results on the latest a64 platform and confirm once again that the ram makes only a few percentage points difference, if that. shelling out all your dough on a good GPU, then buying the lowest model venice, a DFI board, and value ram is the way to go.
Googer - Monday, October 3, 2005 - link
http://www2.amd.com/us-en/assets/content_type/Down...">AMD Thermal Grease List PDFRupertS - Wednesday, October 26, 2005 - link
Interesting, AMD only recommends thermal grease for short term use 'where the heat sink is removed and attached multiple times over a short period'. They definitely do not recommend it for long term use.StriderGT - Monday, October 3, 2005 - link
Both me, Zebo and many others have clarified long time ago in Anands forum the pointless struggle of purchasing extreme memory parts in Athlon64. Dividers and value ram will do the trick of excellent ocing giving you 95%++ of the performance someone gets with expensive and overvolted ram modules. Nice seeing anandtech come up with an article backing up the threads like this one (http://forums.anandtech.com/messageview.aspx?catid...">http://forums.anandtech.com/messageview...mp;threa...PS For those owning MSI Neo3 m/bs -and even the rest- I have created back then an excel calculating the actual memory frequency with the various BIOS settings. Enjoy
http://www.geocities.com/gtstrider/">http://www.geocities.com/gtstrider/
JarredWalton - Monday, October 3, 2005 - link
Yeah, I've seen quite a few threads around the 'net on this, but AT hadn't covered it very well, and I hoped to get something "official" out there. (None of the enthusiast sites have really covered this that well, as far as I could see.) Since I've been fooling around with various AMD CPU overclocks for a year now, I figured others might like to see the possibilities. High-end, high-cost is well and good for dreams, but like most people I live a bit closer to reality. $200 is about as much as I'm willing to pay for a CPU in most cases.andyc - Monday, October 3, 2005 - link
So you can basically overclock the 3000 to the same speeds the 3200 can? So it's not even worth it to go with the 3200?JarredWalton - Monday, October 3, 2005 - link
Well, perhaps. 9x300 requires a better motherboard than 10x270, though most boards than can handle 270 MHz CPU bus speeds will also handle 300 I think. For value overclockers, though, I don't think I'd bother spending the extra $50 on the 3200+, no. Spend it on the GPU instead (if you play games).Mogadon - Monday, October 3, 2005 - link
Great article Jarred, thanks for putting in all the hard work and time.I have one question regarding voltages. As I understand it, you wouldn't recommend running a VCore above 1.65V for a long term overclock. I understand the warnings and possible effects on the CPU with running a high VCore but I wanted to know if this is around the VCore that you would run on, say, your overclocked system?
The majority of people on the forums here don't really recommend going above 1.55V or 1.6V, i was wondering if you had any comments about this.