Investigations into Socket 939 Athlon 64 Overclocking
by Jarred Walton on October 3, 2005 4:35 PM EST- Posted in
- CPUs
System Assembly
Once you have all the parts, it's time to put everything together. We're going to assume that you know the basic process, but here's our order for assembling a new system.
With the system up and running, install the OS and drivers. We use SATA drives almost exclusively for new PCs, which is why it's important to check the BIOS settings. Installing XP and the drivers is pretty simple, so we're not going to go into much detail. Use your CD and key, and then when XP is installed, you use the driver CD that comes with your motherboard. That will get you network, sound, and chipset drivers. You might want to check for newer versions online once you have networking installed, or else download them in advance on another PC and copy them to the new system. We also grab all the latest Windows Updates for any system with Internet access, though not necessarily for performance testing. Since we're only using one board, we installed all the Windows Updates along with a bunch of other software that we'll use in benchmarking. We also recommend switching your SATA hard drive to port 3 or 4 (or one of the extra ports) once Windows is installed. SATA ports 1 and 2 generally don't behave well when you begin overclocking beyond a certain threshold, and with the drivers installed, Windows should boot fine whether your primary drive is connected to port 1 or 3 or something else.
You'll note that up to this point, we haven't even talked about overclocking our new system. If you don't realize this already, let's make this clear: get your OS installed and running and test all your programs before you start overclocking! Setting up a new PC is a complex process, and even experienced system builders encounter problems. You don't want to have the Windows XP install program crash at 95% complete due to an overclock. It's not nearly as bad to have the system crash once you have it working, which is why we say to wait. Even then, it is possible to have an overclocked system crash and corrupt files, forcing you to reinstall applications or even XP from scratch. (It happened at least once in my testing, though not with socket 939.) There's a risk, but for many, the potential rewards outweigh the risk.
Once you have all the parts, it's time to put everything together. We're going to assume that you know the basic process, but here's our order for assembling a new system.
- Remove all components from boxes and lay them out on the workbench in an orderly fashion. (Check for order errors.)
- Install the CPU into the motherboard socket with the motherboard resting on the padded foam cushion with which it shipped.
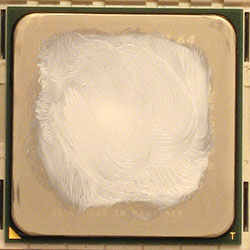
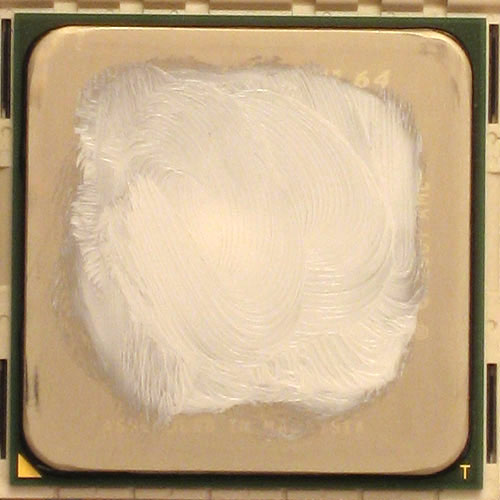
Click to enlarge. - Apply a small amount of thermal paste to the center of the CPU heat spreader, then smooth it out a bit using your finger, a razor blade, etc. The idea is to get a thin layer on the heat sink, and you don't need to cover the whole CPU surface; once the HSF is installed, the thermal grease will flatten out to cover the rest of the CPU surface and you don't want a lot of extra grease. (Technically, AMD voids your CPU warranty if you don't use approved thermal grease. We've never had to deal with a failed Athlon 64 chip yet, so we can't comment on how they would respond. Overclocking is already voiding the warranty, so we're not worried about "approved" thermal compounds.)
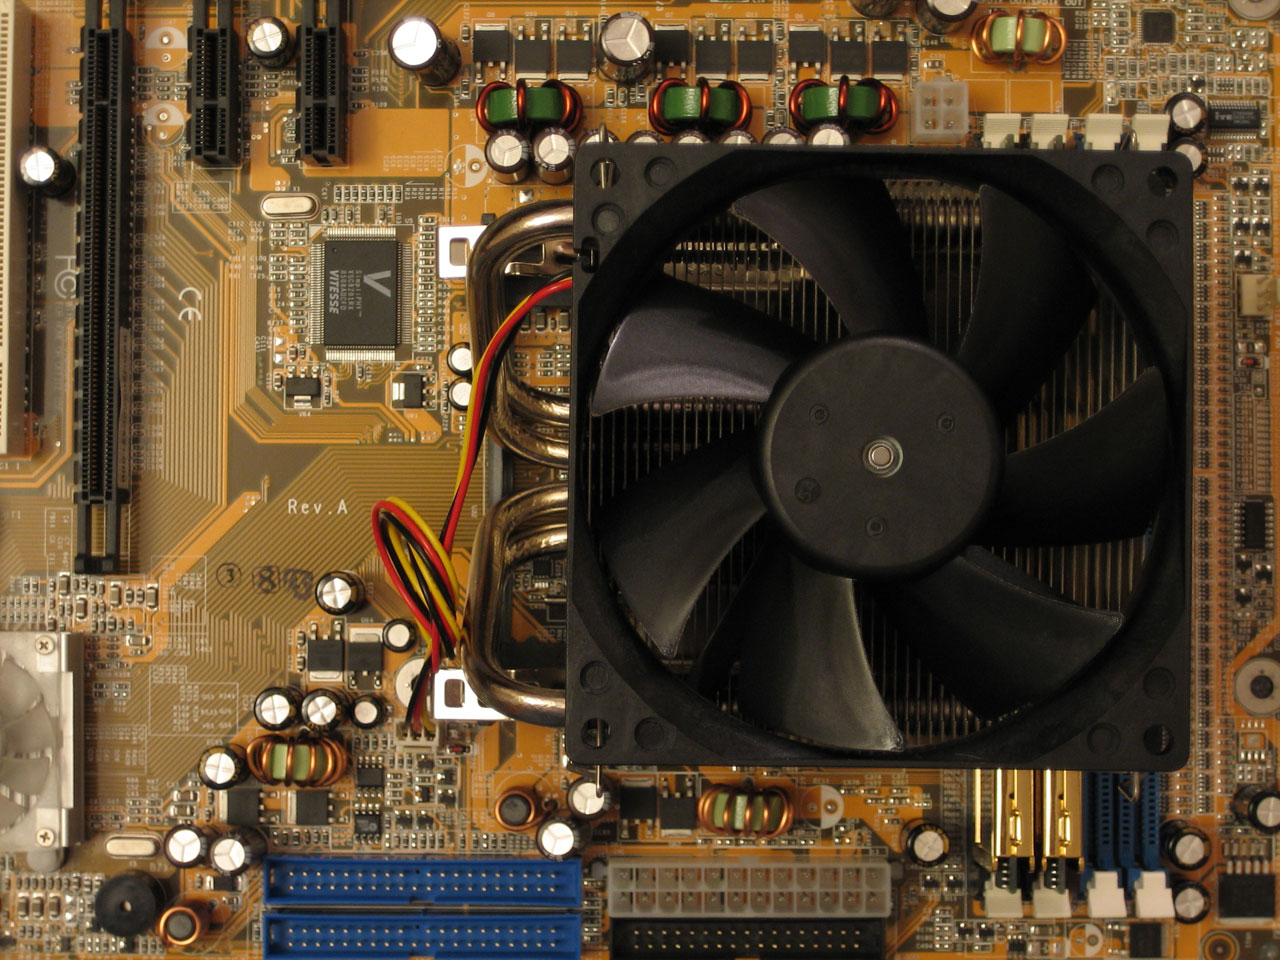
- Install the heat sink onto the CPU - carefully. Depending on which HSF that you decide to purchase, you may need to change the mounting bracket, back plate, etc. One of the reasons why we like the Thermalright HSF is because you don't need to change the back plate (which is sometimes "glued" onto the motherboard). Don't forget to connect the fan to the 3-pin CPU header on the motherboard.
- Install the RAM into the appropriate slots. For the DFI board, that would be slots 3 and 4 (the two closest to the CPU). Other manufacturers number their slots differently and may separate the RAM for dual channel operation. Read the manual for your motherboard.

Click to enlarge. - If your case doesn't already have the power supply installed, it's generally best to install that now. Otherwise, the HSF for the CPU can get in the way. This varies by case, of course, but we almost always find it easier to get the PSU in before anything else.
- Install the motherboard mounts (usually little brass colored screws/bolts) into the case. Only put the mounts in places that match up to the holes on the motherboard. The DFI INFINITY has seven holes and thus requires seven mounts. You don't want extra mounts installed, as they could create a short on the bottom of the motherboard. Also, swap out your case's backplate for the one provided with your motherboard. (We have yet to encounter a case with a backplate that matches any motherboard that we've purchased.)
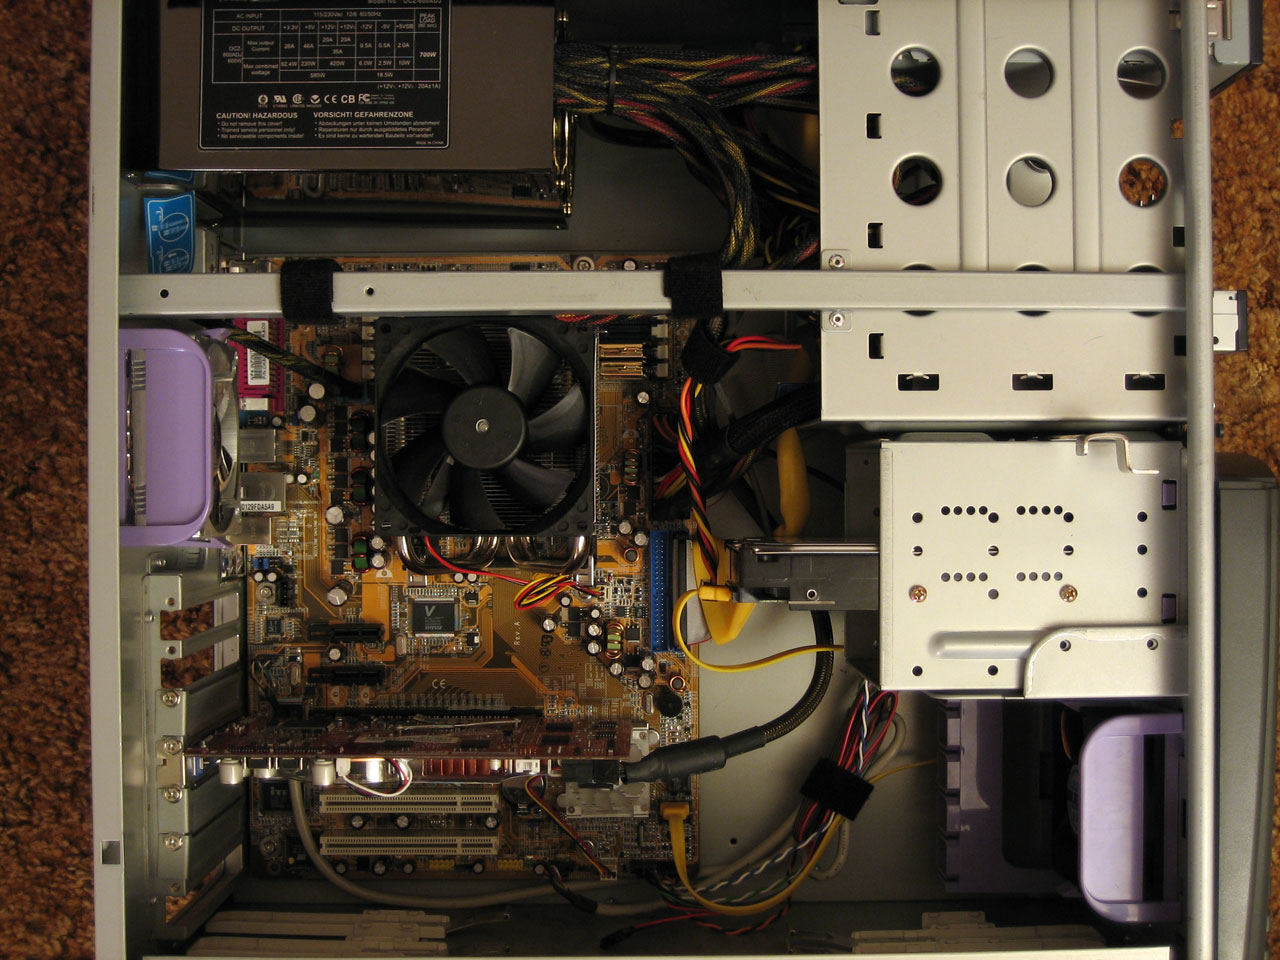
- Place the motherboard carefully into the case; you may have to work a little to get the backplate to line up with the rear I/O panel of the motherboard. Don't force anything. Once the board is in place, install the screws that secure the motherboard. Note that before installing the motherboard, depending on the case and your dexterity, it might be easier to connect the wires for the front panel of the case - power and HDD LEDs, reset and power switches, and speaker are almost always present. In our experience, the colored wires are usually the positive feed and the black (or white) wires are for ground. (I still get the LEDs backwards half the time, I think. If your HDD/Power lights don't come on, reverse the pins.)
- Install your graphics card, hard drive(s), DVD drive(s), cables, etc. We try to keep all the cables tidy, and you can use zip ties, velcro wraps, or even twisty ties if you don't mind a slightly ghetto approach. You might want to wait a minute before really securing all cables, just to be sure that all of the parts work properly. For now, plug the main SATA drive into SATA port 1. (If you're dead set on using RAID for your OS drive, you'll need a floppy disk with a driver on it.)
- Install any other fans or components, and make sure everything has power. Check the voltage switch on the rear of the PSU to make sure that it's set to 115V (or 230V depending on your location). Then plug in the power cord from the wall to the rear of your PSU, hold your breath, and turn on the system. Verify that all the fans are spinning.

Click to enlarge. - If the computer doesn't turn on, check that everything is seated properly and begin troubleshooting. Take it slow and don't jump to conclusions (i.e. "My RAM is bad!") Check the connections from the front panel of the case, as you might have simply installed the power switch cable incorrectly. Check all the other cables as well. If you have spare parts that you know work properly, try swapping them one at a time. Try running with just the CPU, graphics and RAM installed (no HDD or DVD). You might also want to remove the motherboard from the case and try powering on the system with the board sitting on the padded cushion (and anti-static bag) on your work area. If that works, check for anything in the case that might be grounding the board. You can try fully disassembling the PC and trying again, with the hope that perhaps you'll find your error in the process. Beyond that, you're on your own. Try the forums for help if you can't figure it out, but be patient and polite.
With the system up and running, install the OS and drivers. We use SATA drives almost exclusively for new PCs, which is why it's important to check the BIOS settings. Installing XP and the drivers is pretty simple, so we're not going to go into much detail. Use your CD and key, and then when XP is installed, you use the driver CD that comes with your motherboard. That will get you network, sound, and chipset drivers. You might want to check for newer versions online once you have networking installed, or else download them in advance on another PC and copy them to the new system. We also grab all the latest Windows Updates for any system with Internet access, though not necessarily for performance testing. Since we're only using one board, we installed all the Windows Updates along with a bunch of other software that we'll use in benchmarking. We also recommend switching your SATA hard drive to port 3 or 4 (or one of the extra ports) once Windows is installed. SATA ports 1 and 2 generally don't behave well when you begin overclocking beyond a certain threshold, and with the drivers installed, Windows should boot fine whether your primary drive is connected to port 1 or 3 or something else.
You'll note that up to this point, we haven't even talked about overclocking our new system. If you don't realize this already, let's make this clear: get your OS installed and running and test all your programs before you start overclocking! Setting up a new PC is a complex process, and even experienced system builders encounter problems. You don't want to have the Windows XP install program crash at 95% complete due to an overclock. It's not nearly as bad to have the system crash once you have it working, which is why we say to wait. Even then, it is possible to have an overclocked system crash and corrupt files, forcing you to reinstall applications or even XP from scratch. (It happened at least once in my testing, though not with socket 939.) There's a risk, but for many, the potential rewards outweigh the risk.


101 Comments
View All Comments
Crassus - Tuesday, October 4, 2005 - link
First of all, thank you for such a long article. I appreciate the work you put into this. What I'd really like to see in one of the planned articles would be an in-depth coverage of the options an enthusiast-grade mainboard BIOS offers nowadays for the RAM timings (and maybe PCIe) - beyond the standard timings covered in this article.PrinceGaz - Tuesday, October 4, 2005 - link
The finer memory-timings offered by enthusiast mobos are generally vendor specific so your best bet is to check a forum or other site dedicated to your motherboard. For DFI mobos for instance, you can find a thread which gives detailed coverage of memory settings on DFI-Street forums http://www.dfi-street.com/forum/showthread.php?t=2...">hereCheesePoofs - Tuesday, October 4, 2005 - link
Why stability test with 3dmark (an app that tries to stress teh CPU as little as possible) and pcmark (an ok pc-stressing app) instead of the combo of memtest86+, superpi, and prime95? Seems to me that if you want to find out whether yoru CPU really is stable, you'd want to stress it as hard as possible (which those three will do).Also, from what I've read from Zebo's thread in the CPU forums, 2T really doesn't have a significant impact on performance. Could you clarify this?
JarredWalton - Tuesday, October 4, 2005 - link
I've seen systems that run Prime95 and SuperPi 100% stable crash under 3DMark looping, as well as under PCMark. I imagine 2.80 GHz will crash under those if I run them all concurrently. My personal experience is that SuperPi and Prime95 only stress a few paths of the CPU, hence the inclusion of benchmarks with 11 different applications that can all fail with an unstable overclock. 3DMark GPU tests are not as demanding of the CPU, but the CPU tests are very demanding IMO. (That's part of why the top scores on the 3DMark ORB never include the CPU tests.)2T command rate, as you can see in quite a few instances, really killed performance. Perhaps tweaking other special timings beyond CL, tRCD, tRP, and tRAS might make the impact less, but you could likely tweak the same things with 1T at a lower memory speed. Command rate comes into play on every single memory access, so doubling that delay will certainly have an impact on performance.
fitten - Tuesday, October 4, 2005 - link
Good answer. Most have no clue as to how a CPU actually works. Ideally, a synchronous circuit is rated at a clock speed that the longest path will function properly (give correct results). There may be 1000s of pathways that can run at higher frequencies but that one can hold it back. Running the clock rate up may cause that one pathway not to be able to meet something like a data setup and hold time on one line (of the 32 or 64) in the data path and now you have an unstable setup that you may not detect. As always with overclocking, a crash is the best result you can get because you know you've pushed too far. Unless you are testing pretty much every instruction with every possible data against a control to compare against (some pathways can take longer depending on the data that it is being operated on), there are many errors that you may not detect... and all it takes is one, out of the possible billions, to make your machine not stable. Sure, it may be a rarely seen case of instruction+data but it exists.Programs like the Pi calculators and such do make your CPU work a lot, but the calculations are fairly repetitive and hardly a broad sample of the ISA.
I'm all for doing whatever you want with your own machine. Heck, I used to overclock all the time, too. I just find all of the lack of knowledge in synchronous circuits... interesting... when people talk about overclocking.
Saist - Monday, October 3, 2005 - link
for those who read this portion here :****
Because of the GPU limitation, we're going to be testing at 640x480, 800x600, and 1024x768. We'll also test many of the titles with 4xAA enabled, which should serve as a reality check. Even with a super fast CPU, many games are going to be completely GPU limited with the X800 Pro when we run 4xAA, especially at resolutions 1024x768 and above. Frankly, we wouldn't bother enabling 4xAA unless you can at least reach 1024x768 anyway.
****
Did anyone else think... okay.. lets stick a Radeon 9600, GeforceFX, or XGI Volari in there so that we actually will be limited? I mean... please. X800 alone goes above what most users have in their systems today. If we are buying "new" components, then yeah, the X800 is on my short list, but how about doing some reviews over hardware people actually have in their hands.
OvErHeAtInG - Tuesday, October 4, 2005 - link
If you're overclocking a new A64 Venice... somehow I think you're not still running your XGI Volari for games. Remember bench numbers are really only useful if they reflect framerates you would actually want to play with.JarredWalton - Tuesday, October 4, 2005 - link
The reason I used an X800 Pro is because I feel it's a good match for the chip, RAM, and motherboard. I can toss in a 7800GTX to show what the CPU on its own is capable of, but you can get cards that pretty much equal the X800 Pro for under $200. X800 GTO and GTO2 can match and even beat the X800 Pro.I view overclocking (and computer building in general) from a bang-for-the-buck perspective. It doesn't make sense to me to spend $100 upgrading from the 3000+ to the 3500+ if I'm going to be completely GPU limited. $200 on a graphics card is not that much money, when you really get down to it. 180 million transistor chip with 256MB of 980MHz RAM, all mounted on a large PCB? At least I can feel I'm getting a lot of stuff for $200. A CPU is far cheaper to produce (though more expensive to design). Profit margins on CPUs are notoriously high.... Personally, the X800 Pro is a decent card, but I really want something faster these days. Same goes for the 6800GT. But then, not everyone feels that way.
---------
Thought #2 (for Saist): If X800 is above what most people have, other than those buying new computers... well, what about the motherboard and processor? Socket 939 with nForce4 is a more recent configuration than X800/6800 cards. Not to mention Venice has only been out for something like 8 months.
If you're looking to spend $120+ on a new Venice chip and you've only got a 9600 Pro (or even a 9800 Pro), you're wasting your money on the wrong part (at least from a gaming perspective). A socket 754 Sempron with an X800 Pro would be far better for gaming than a Venice core with anything less than an X800/6800. Outside of gaming... well, graphics don't matter outside of gaming much, which is why Winstones, PCMark, and AutoGK are included.
Honestly, I'm not entirely sure if you were complaining about the use of a GPU that was too fast, or that it wasn't fast enough. For frequent gaming, I wouldn't recommend anyone go lower than about the X800 GTO these days. 6600GT is (IMO) now relegated to the budget/moderate-gaming setup, as many games are simply unplayable above 1024x768. I really don't like to drop below 1280x1024/1280x960 if I can avoid it. If I've misunderstood your complaint, let me know; if we simply have a difference of opinion... well, there's not much to do about that. :)
yanman - Tuesday, October 4, 2005 - link
any chance you can add in benches for 7800GT/GTX? after all, in your discussion you correctly asset that money is much better spent on high spec'd GPU to match the cpu speed that you've managed to overclock to - having used bargain rate ram and venice.i have a venice 3000+ clocked at 2686mhz, 7800gt and 2x1gb sticks of average ram (legend/hynix). until i upgraded the ram a few weeks ago i had it running for prehaps a month and a half totally solid with 2x512mb sticks of same type, at 2696mhz (337x8, ram at 225mhz (2:3) 2.5-3-4-7-1T)
the reason i ask for 7800GT and GTX is 2 fold, so we can see it from an nvidia side too (different cpu scaling maybe?), and also to show the scaling for a top-end card even if only as a reference point. It just seems a bit one-dimensional only using 1 card.
One last thing, well done to Zebo who made the excellent "Quick and dirty A64 overclocking guide" (used to be sticky in the forums) which I and many people I know used to overclock their venices with.. i'd be stuck without it!
JarredWalton - Tuesday, October 4, 2005 - link
I'm planning on doing 7800GTX testing with an X2 3800+ OC article. For gaming, it will perform identically to the 3200+ Venice. Hopefully, I'll be done in the next ~week or so.