AnandTech Guide to Better Photos: Night Photography
by Stephen Caston on February 18, 2005 12:05 AM EST- Posted in
- Digital Camera
Take Two: Removing Hot Pixels
One of the problems that you may run into when shooting long exposures is the appearance of “hot pixels” in your images. These are pixels on the image sensor that suffer from charge leakage after being exposed to light for a certain amount of time. The effect is bright out-of-place pixels appearing throughout your images. You may notice that these hot pixels are appearing in the same places in each of your long exposures. Although this can be frustrating, there is something you can do about it. In fact, the consistency of the location of the hot pixels is beneficial because it allows us to use a method called “dark frame subtraction” in order to remove them. Some cameras will perform a dark frame subtraction automatically, but we are going to show you how to do it manually.Immediately after taking your normal long exposure frame, cover your lens and take an additional “dark” frame with the same exposure settings. A change in temperature may result in more or less hot pixels (higher temperatures result in more), so be sure to take the dark frame right after your original image. Taking the dark frame with the same exposure settings will be easiest if your camera has a manual exposure mode. Otherwise, you can try to lock the exposure before covering the lens. In some cameras, this can be done by half-pressing (and holding) the shutter button or pressing the “AE Lock” button. The idea here is that the dark frame will be used later as a map of all the hot pixels. This makes it very easy to remove them later. Now that you’ve taken your original image and a dark frame, let’s look at some ways to remove those dreadful hot pixels.
NOTE: For this section, we will be referring to steps that can be used in either Photoshop or Photoshop Elements. Photoshop is the industry standard for graphics design and likewise, it carries a hefty price tag. Photoshop Elements is a simplified version of Photoshop that offers many of the same useful features at a fraction of the cost.
- Open your original image and your dark frame.
- Select the “Move” tool from the tools palette (or press “v”).
- Click and drag the dark frame over into your original image while holding down the Shift key. By holding Shift, the dark frame will center itself automatically on top of your original image. This is important so that the hot pixels will be aligned perfectly in both images.
- On the layers palette, change the blend mode of the dark frame layer to “Difference”. At this point, you should no longer see the hot pixels in your image. You can adjust the Opacity of the dark frame layer until the image looks good to you.
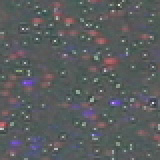
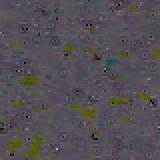
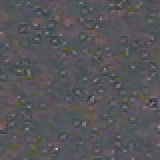
| Dark Frame Subtraction (200% crops) |
||
 Original image |
 Dark frame at 100% opacity |
 Dark frame at 50% opacity |
In the 200% crops above, we have demonstrated a dark frame subtraction. The original image suffers from a high frequency of blue and red blobs. In the second crop, we added the dark frame layer and set the blend mode to “Difference”. With the opacity at 100%, you can see that the blue and red blobs are gone. However, in their place are dark pits and greenish blobs. By setting the opacity to 50%, we were able to find a good balance to produce a much cleaner image. As we stated before, temperature plays a large role in the amount of hot pixels that will occur. Even so, each sensor will be different and consumer digicams tend to suffer from hot pixels more than prosumer and professional models.


20 Comments
View All Comments
Jeff7181 - Friday, February 18, 2005 - link
I didn't quite understand the flashlight/lighter technique... are you pointing them at the lense, or holding them under the lense, or...?apriest - Friday, February 18, 2005 - link
I just happen to live "far from civilization in the wilderness of Maine"! Haha! We do have a beautiful dark sky and it's great for star gazing. I've taken quite a few good pictures with slides on my old Canon AE-1, but haven't had much luck with my new digital Nikon D-70. I was going to attempt Gatak's suggestion of stacking multiple photos to create a virtual longer exposure, but haven't had the time to attempt it. Max Lyons has a wicked cool website with some software he has written to do just that. http://www.tawbaware.com/index.html Check out Image Stacker. Lots of other great software there too.PrinceGaz - Friday, February 18, 2005 - link
I find that it is possible to take night pictures of buildings (pubs) without a tripod or a convenient place to rest the camera on or against, just by using continuous shooting mode. The important thing is to hold your breath while the shots are being taken, and at all costs prevent any rotational movement of the camera (a few millimeters sideways or up/down movement is okay though).Provided the exposure isn't too long (1/2 sec is the most I ever usually need, around about 1/4 sec is more common) there's almost always one or two of any set of five shots that is pin sharp. If all of them are blurred, just fire off another set of shots until you get a good one. That's the beauty of digicams, you could never do that with old film cameras :)
stephencaston - Friday, February 18, 2005 - link
We used a Canon 10D for the star pictures. Thanks for all the comments and remember we are open to suggestions for future guides.Gatak - Friday, February 18, 2005 - link
Good article =) Night photography can be fun and give many interesting effects.A small tip. If your camera doesn't support very long exposures, or if it gives very high noise levels with lots of hot pixels you can take several (5-10 or more!) pictures with low exposure. Then you can add them together in Photoshop or with special tools to create a virtual long exposure. The result would have very little noise and high dynamic range too.
hoppa - Friday, February 18, 2005 - link
It should be noted in the article that, even though the guide is aimed towards beginners, the photos are taken with a DSLR capable of getting far smaller aperatures than ANY normal digicam could. f25 in that dusk shot? Very few digicams go above f8.7, and therefore couldn't even come close to getting those shots.They are neat photos but they seem like a waste of space to me; anyone who plops down $1000+ on a camera isn't going to be learning techniques from AT photo guides.
eosguy - Friday, February 18, 2005 - link
Good article.Also, it is important to cover the viewfinder in SLR cameras when taking long exposures. Also, try not to point the lens towards any light source to minimize occurance of Flare like in your cloud shot.
Souka - Friday, February 18, 2005 - link
Look forward to reading this... lotta open windows to peek into.....*JK*
sideshow23bob - Friday, February 18, 2005 - link
What camera was used on the long-lasting exposure pics at the end of the article?Nice article...yeah I-40.
gustavowoltmann1996 - Friday, March 26, 2021 - link
Really to do photography is an art. I love to do this and I am a Yoga Teacher (Gustavo Woltmann)