The GIGABYTE Z170X-UD5 TH Motherboard Review: An Entry to Thunderbolt 3
by Ian Cutress on February 19, 2016 9:00 AM EST- Posted in
- Motherboards
- Gigabyte
- Thunderbolt
- Skylake
- Z170
- Thunderbolt 3
GIGABYTE Z170X-UD5 TH BIOS
A proportion of this page was posted with our GIGABYTE Z170X-Gaming G1 review due to similarities within the same generation of products. Text has been updated to match the specific features for this review.
The graphical BIOS has been a permanent competitive fixture in the modern motherboard market – the ability to do more with less and provide a seamless experience to both enthusiasts and new users is a point that manufacturers can provide both a selling point and that unique aspect that makes it stand above the crowd. The big four motherboard manufacturers have now all adopted the same philosophy of an easier mode for a front screen that sits above an Advanced mode which is more enthusiast focused.


While GIGABYTE does typically have an easy mode, called the startup guide, with its motherboards, for the Z170X-UD5 TH it was absent and we were left solely with the classic mode. With this mode, it should be pointed out that sometimes there is a disjoint when you enter between what you see and what the system thinks is selected – about 50% of the time it will show the first tab, MIT, rather than the one which is actually selected, System Information. Pressing left or right to select a tab usually fixes this.
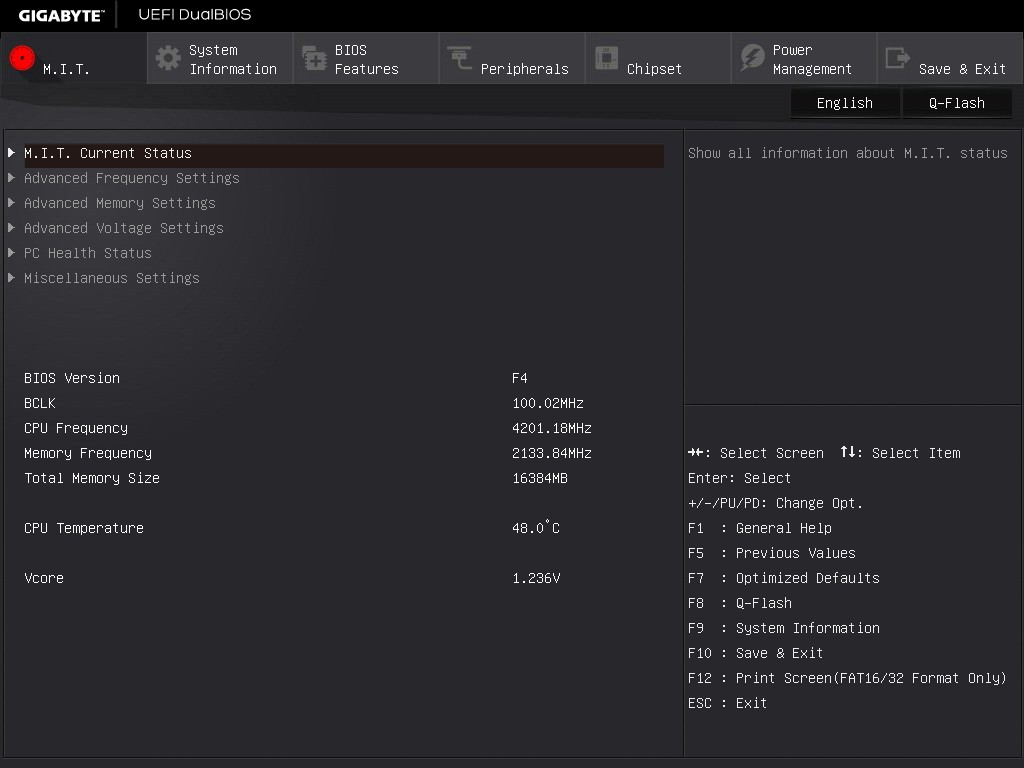
The first tab from the left is MIT, the intelligent tweaking menu that provides some information about the system but acts as the main hub for overclocking options. The three main menus here are Frequency, Memory and Voltage, which all do what they say and offer options relating to those features.
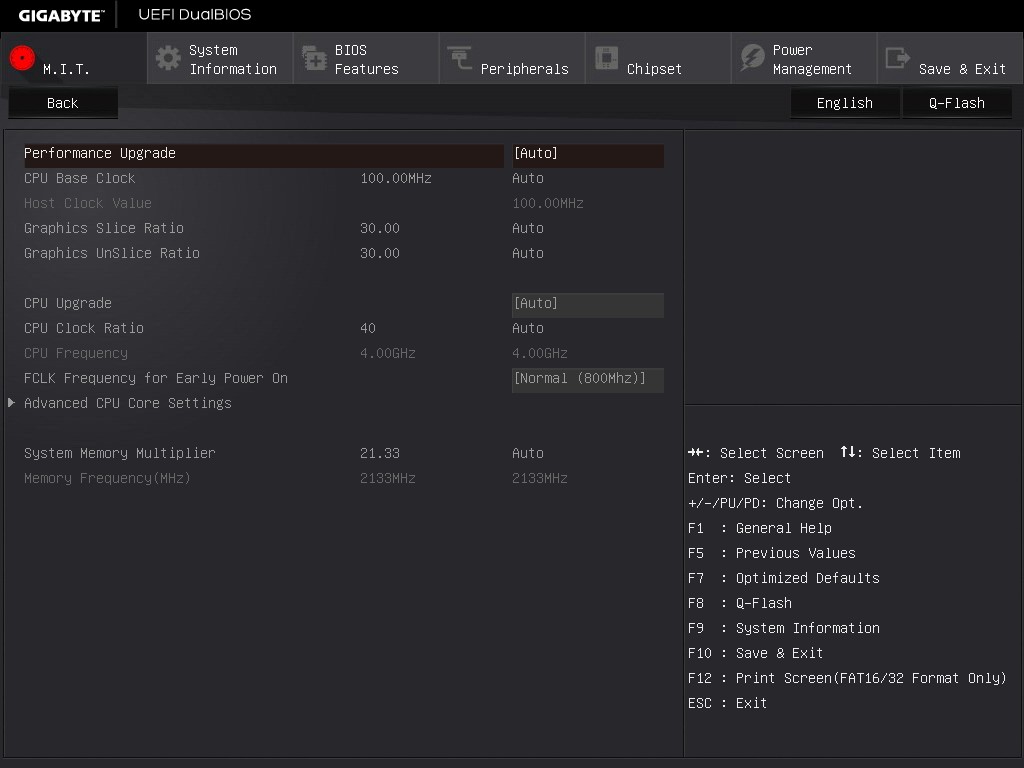
The Frequency sub-menu offers base-clock and multiplier options for the CPU, including FCLK and advanced core settings. For an extra element, the DRAM multiplier can be selected here also, such that as the base frequency is adjusted the user can see the effect on the memory frequency. Automatic overclock pre-sets are also here under the Performance Upgrade drop down and the CPU Upgrade drop down.
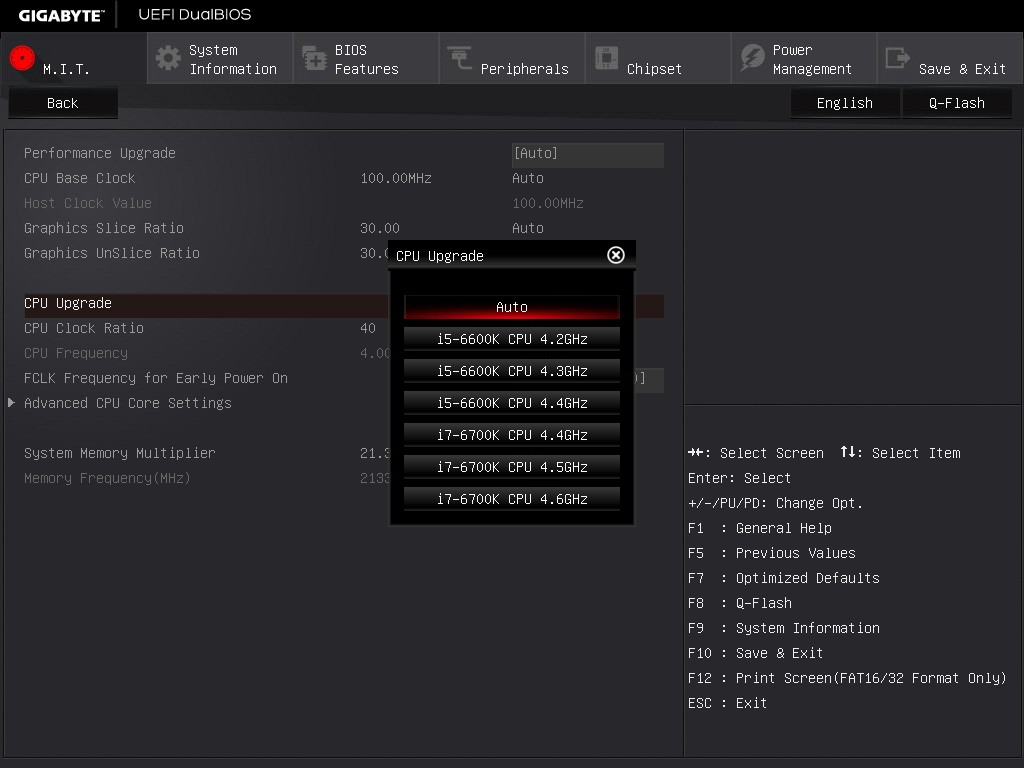
This latter option offers 4.2 GHz to 4.4 GHz for the i5-6600K and 4.4 GHz to 4.6 GHz for the i7-6700K. The downsides of using these options is that GIGABYTE doesn’t show the changes made to enable these (such as voltage or LLC), in which GIGABYTE is unique in that regard compared to the others of the big four manufacturers.
In our previous reviews, it was noted that a typical overclocker will want to adjust frequency and voltage often in the same sitting. With the GIGABYTE BIOS, that requires moving into this frequency menu for the first part, and navigating to different menus for the voltage. It would be ideal if the GIGABYTE BIOS duplicated some of those options, at least the CPU vCore and CPU Load-Line Calibration, to the frequency menu just as the memory multiplier has been duplicated.
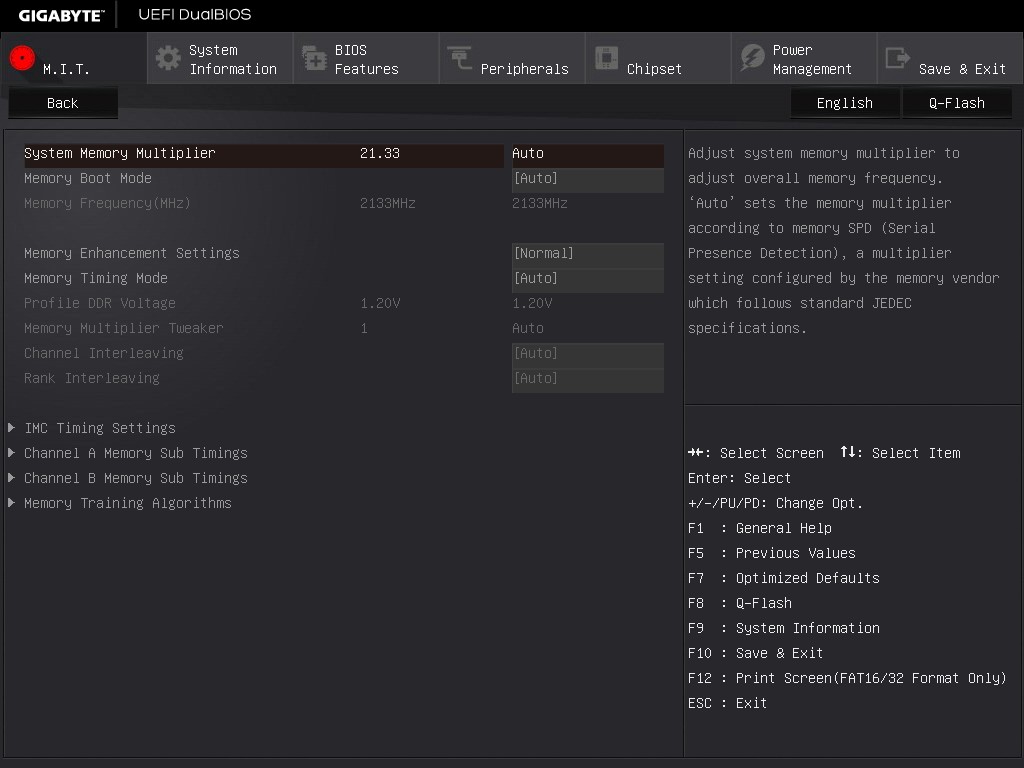
The Memory sub-menu gives options to enable XMP, adjust memory sub-timings but also implement a form of memory enhancement. To the best of my abilities, this seems to be an option that adjusts a number of tertiary sub-timings that might affect certain workflows. As with any overclocking, this is not guaranteed and your mileage may vary.
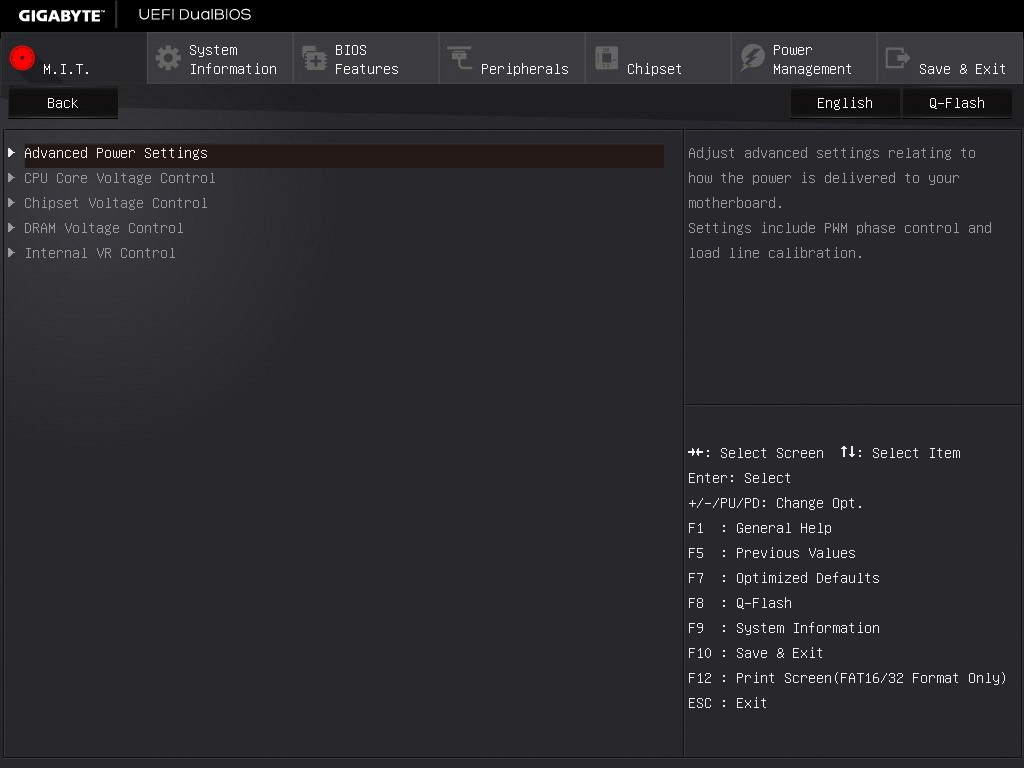
The Voltage sub-menu actually opens another set of sub-menu options, including power, core voltage and DRAM voltage. We’ve spoken to GIGABYTE about their method of doing it this way in the past, and the answer is to make options easier to find by separating them out – personally some of these options could be joined up and still fit on screen very easily, such as a ‘simple’ and ‘advanced’ voltage sub-menu that provides some options duplicated but the simple set is just the few that most overclockers will want to use.
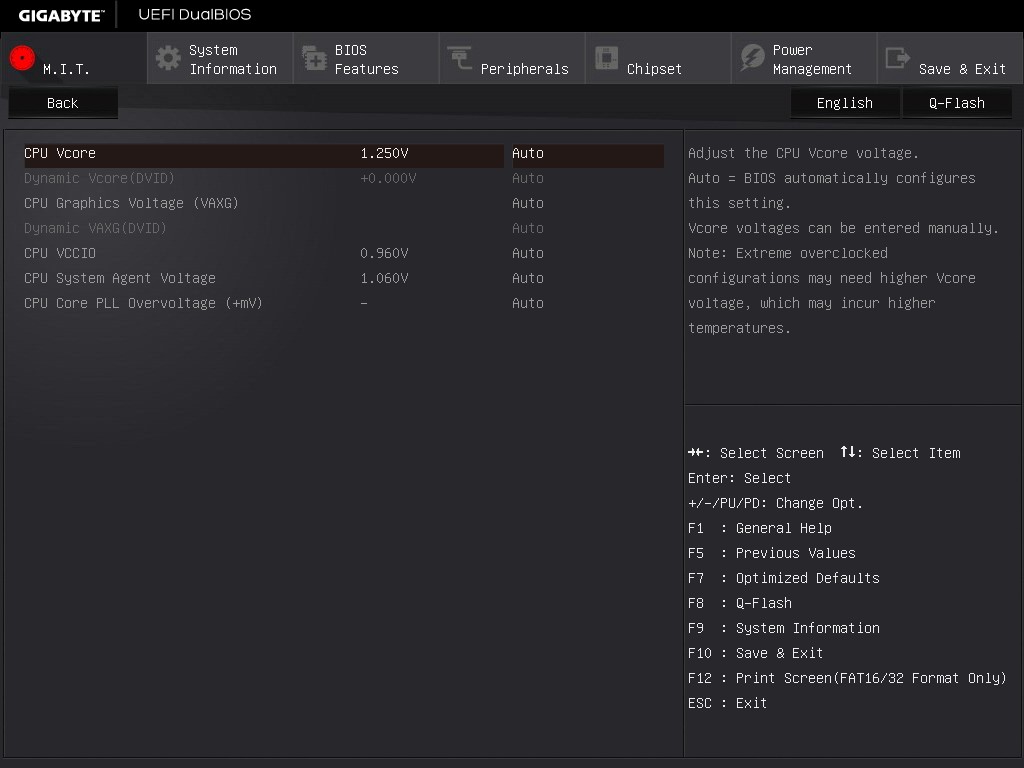
Nevertheless we find the processor load line calibration in the power settings menu, the processor voltage (CPU, GPU, Ring and PLL) in the Core Voltage Control, memory voltage in the DRAM menu and anyone extreme enough to enter the voltage regulation control can go nuts, with plenty of options that few engineers understand.
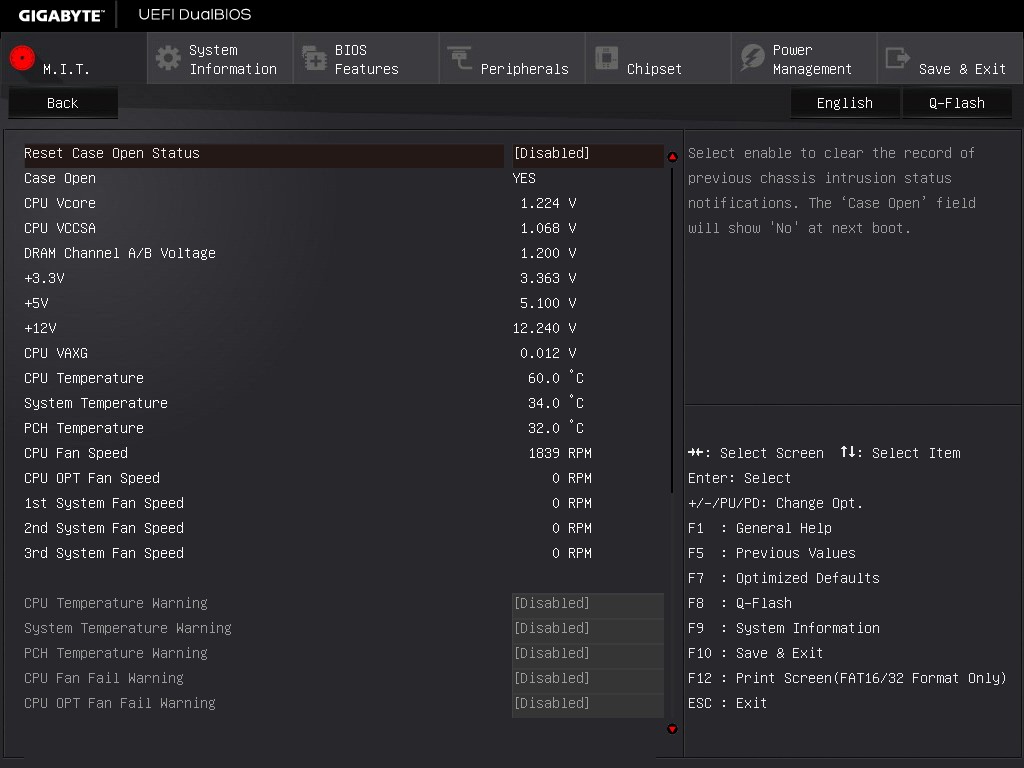
The MIT tab also offers a PC Health menu which contains all the sensor readings as well as the fan controls.
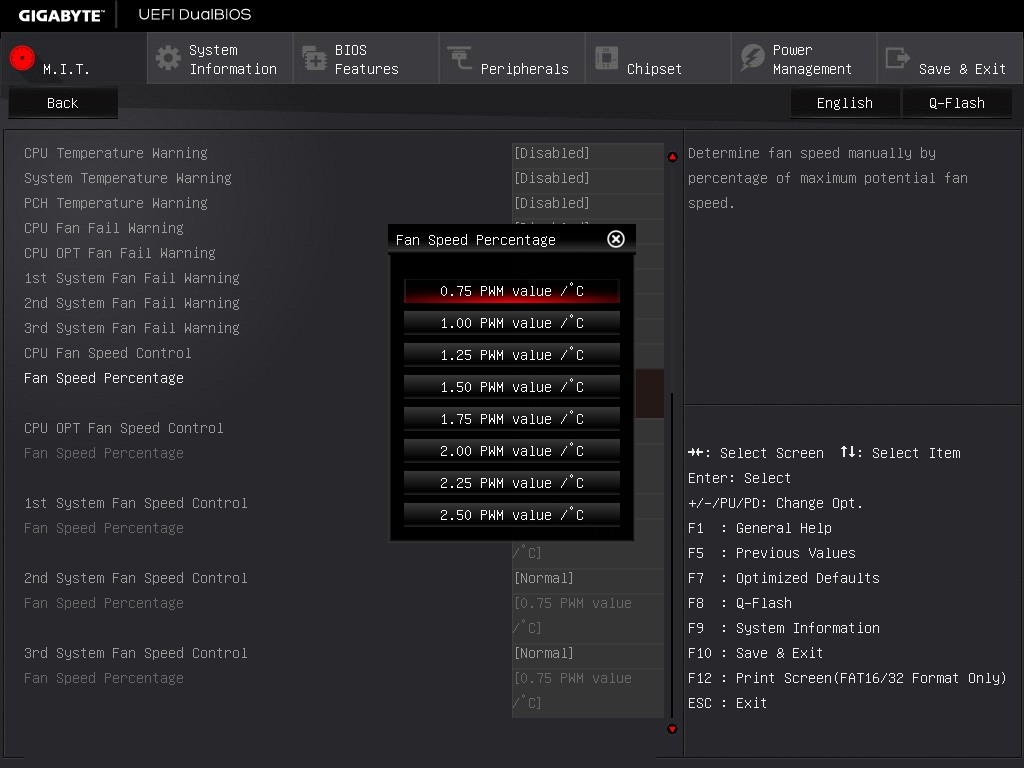
GIGABYTE is still lacking an interactive fan control option in the BIOS, while the other manufacturers have such a system with several points users can modify with a mouse. Instead from GIGABYTE we have a series of options relating to PWM/°C, which is a confusing metric if you do not understand fans. To explain it, basically the system can apply a value of 0 PWM to 255 PWM to the fan which relates to the fan voltage. This scale is not always linear, and what makes it frustrating is that the fan’s response is also non-linear to the voltage applied. Technically GIGABYTE could detect the fan RPM as a function of PWM and do the mathematics to provide gradients with actual RPM values, but instead we get basic PWM values. Just to put it into context, some fans are at 0 RPM until 40% PWM (40% of 255 is 102), and then shoot to 60% of their peak RPM speed. So at a gradient of 1 PWM value per degree, you would only see the fan turn on at 102 degrees, which by then it’s too late as the machine might have shut down due to overheating. Fan speed control is a very easy concept to fix, but for whatever reason is left like this.
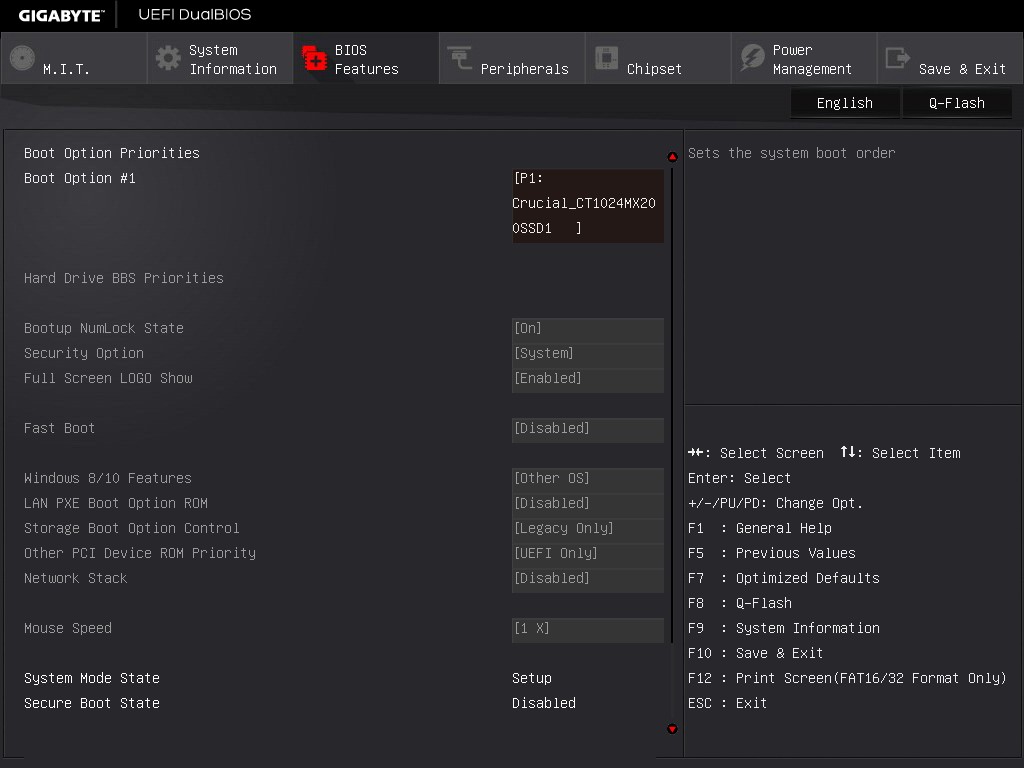
After MIT, the next important tab is the BIOS Features one which allows boot sequence adjustments as well as fast boot, Windows 10 and secure boot options. A newer option here is the Mouse Speed option, designed to assist mouse movement in the BIOS.
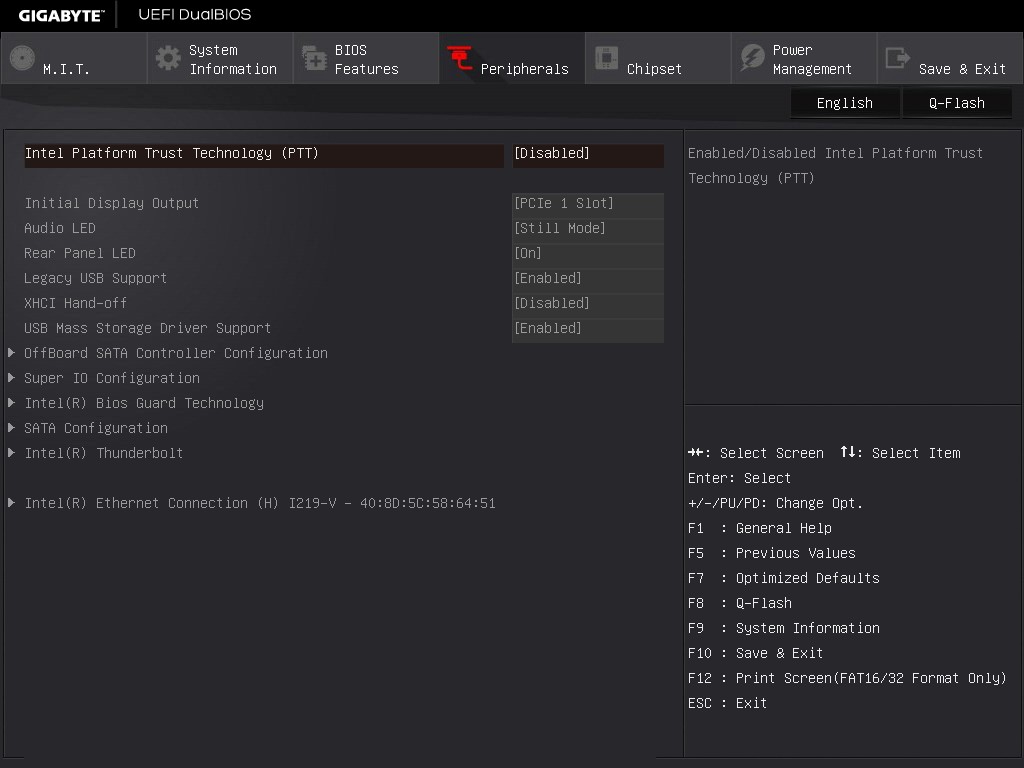
The Peripherals tab is where the extra controllers can be adjusted as well as the LED lighting, SATA Controller configuration (AHCI/RAID), NVMe support and Thunderbolt support.
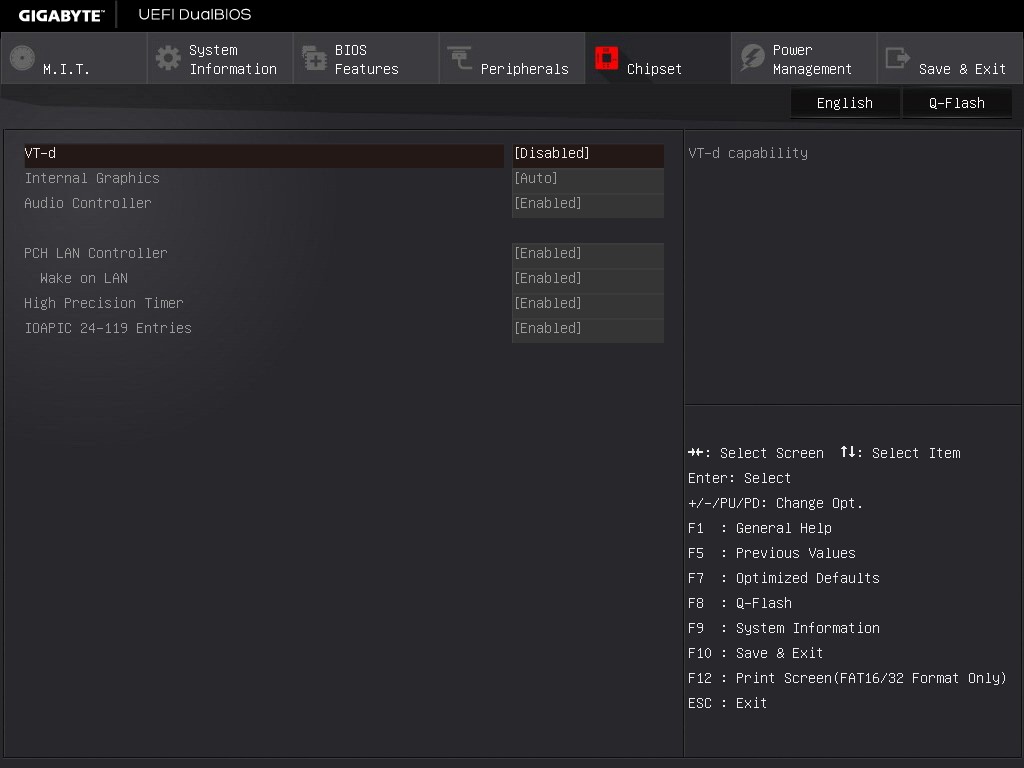
The Chipset tab is for integrated graphics and audio options, as well as virtualization through VT-d (which is disabled by default).
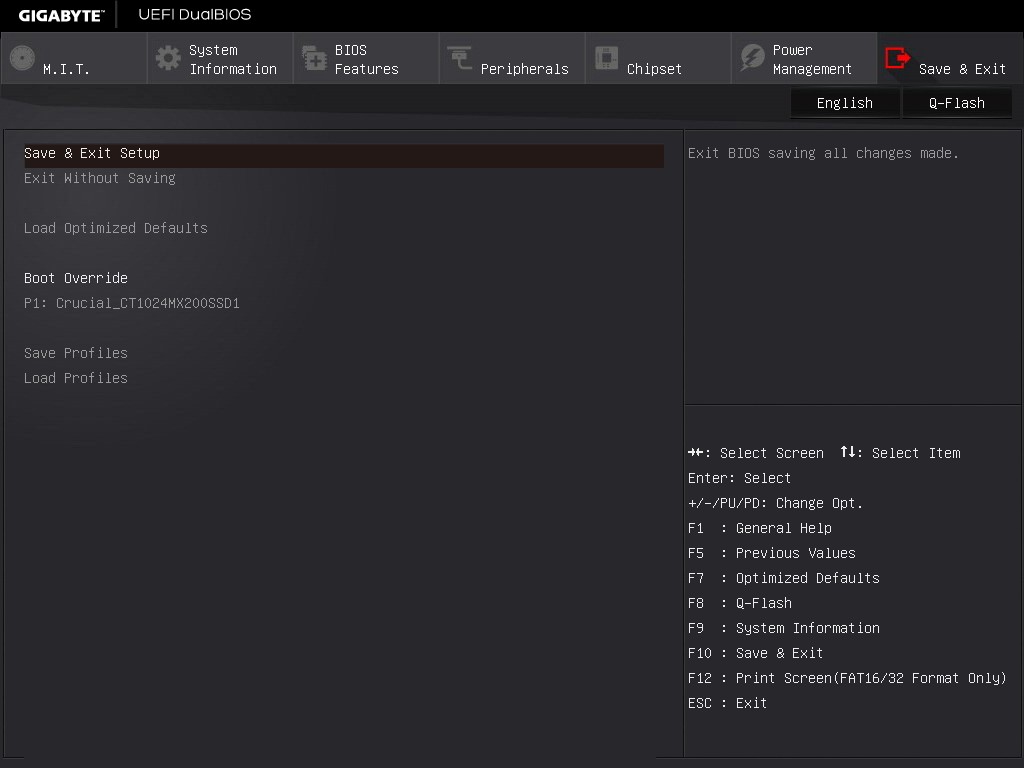
For boot override options, in order to boot from a single device for just one boot, these can be found in the Save and Exit menu.
A full series of images for this can be found in the BIOS gallery.


29 Comments
View All Comments
Folterknecht - Friday, February 19, 2016 - link
With a DPC Latency of ~250 I 've my doubts.alamilla - Friday, February 19, 2016 - link
To clarify, I was referring to round trip audio latency.Thunderbolt can achieve 2-3 ms of latency (without the heavy CPU penalty when compared to USB) which is essential in recording environments where several plug ins may be being used on a DAW channel strip whilst tracking.
Universal Audio, Apogee and Pro Tools have used it on their audio interfaces for years but unfortunately only support OS X.
With TB3 now more readily available there may be more widespread adoption as thus far only MOTU (and to a degree Focusrite) have provided support for Windows.
dtgoodwin - Friday, February 19, 2016 - link
If Intel wants TB3 to be successful, they need to include it for no extra cost above the AR controller.extide - Monday, February 22, 2016 - link
Huh, not sure I understand. You buy the AR controller you get TB3, maybe you meant they should include it directly in the chipset?dreamcat4 - Friday, February 19, 2016 - link
Hi there,It is also at least worth mentioning that there are certain other Gigabyte boards which also have the thunderbolt capability. It is formally advertised on their Z170X Gaming 7, and Gaming G1. Which are the premium / more expensive ones.
However I also heard from another Gigabyte owner that with a newest BETA bios, he got his G170X Gaming 5 to also register / recognize TB3 support. It had been switched on too around that same time as the other ones. Just not advertised by Gigabyte and/or certified by Intel.
I mention it because many people already buy the Gaming 5 for other reasons. Indeed its very popular out of all Gigabyte's entire Z170 range. So for those guys who already have something else... might as well upgrade your BIOS and give it a try.
You also need to download the TB3 Driver Utility from Gigabyte's support website. Its the same version for all of these Gigabyte boards. Can get it from the UD5-TH's support page / tab.
Note: TB3 doesn't work on Gaming 3 (or lower), as I have checked myself. It is likely missing such optional TCON / PHY and different PCI-e lanes wiring / layout. So with those ones the Alpine Ridge chip can only provide USB 3.1.
klagermkii - Friday, February 19, 2016 - link
One of the only reasons I would get Thunderbolt 3 on a desktop is as a cheap-ish way to get 10Gbps networking between two devices. Could you do a test on TB3 networking to see if it's any good and the kind of performance one gets from SMB3 on it?I_Know_God - Thursday, February 25, 2016 - link
I know its not as sexy, but you can use SMB multi-channel to get pretty good results without the cost. I plugged two NIC's into my NAS and two into my desktop and got 180MB/s transfer speed to and from.Cost is about as much as an extra network card and cable someplace.
torchedguitar - Friday, February 19, 2016 - link
Can anyone confirm that this board's HDMI 2.0 port handles the full 18 Gbps speed? A lot of things that claim "HDMI 2.0" can support the features, but run at the lower 10.2 Gbps speed of HDMI 1.4b. An easy way to test this is to connect it to a 4K TV, run full 3840x2160 at 60 Hz, and verify there is no chroma subsampling (i.e. you want 4:4:4, not 4:2:0). A way to check for chroma subsampling if the driver doesn't make it obvious (Intel's software is weak there) is to make an image with purely-blue text in a small font on a purely-red background: it will look as expected with RGB or YUV4:4:4, but will be totally unreadable with YUV4:2:0.KimGitz - Saturday, February 20, 2016 - link
Yes it offers 18Gb/s of bandwidth. It also supports native cinematic 21:9 ratio.GoMoeJoe - Friday, February 19, 2016 - link
Any Z170 based mobo what still uses a shared M.2 is unacceptable.Especially the way these clowns did it on this product ...