The ASUS Z170-A Motherboard Review: The $165 Focal Point
by Ian Cutress on October 20, 2015 2:00 PM EST- Posted in
- Motherboards
- Asus
- ATX
- Skylake
- Z170
BIOS
The system BIOS needs to perform a number of tasks. First, it needs to give access to the options that user needs, and actually implement those features when an option is changed. Secondly, the easier a user can access the options they want through a relevant interface, the better (aka ‘the user experience’). The motherboard industry has a handful of main players, a number of second tier players and several OEMs who all have to craft the BIOS into something their users want. On the enterprise side, as well as laptops or vertically integrated industries (health, finance, oil/gas), very little effort is made on the user experience side as the only person going into the BIOS should be a system administrator who should know what they are doing regardless of the interface. For the consumer market however, more users and system integrators have to go into the BIOS in order to enable various features on their builds either by virtue of bandwidth or there’s a special something that needs to be enabled which can’t be done through software (such as extreme memory profiles or NVMe).
This has led to several representations of what a ‘BIOS’ should be. (For clarification, even though these are UEFI/EFI graphical variants, BIOS is still the common term used by the manufacturers and support teams for any entry into the F2/Del firmware options on a modern PC.) At this point in history, most motherboard manufacturers have gone down the bimodal route, offering an easy and an advanced mode that caters to two main parts of the user spectrum based on experience. ASUS was one of the first companies to do this, and we’ve covered every iteration since.
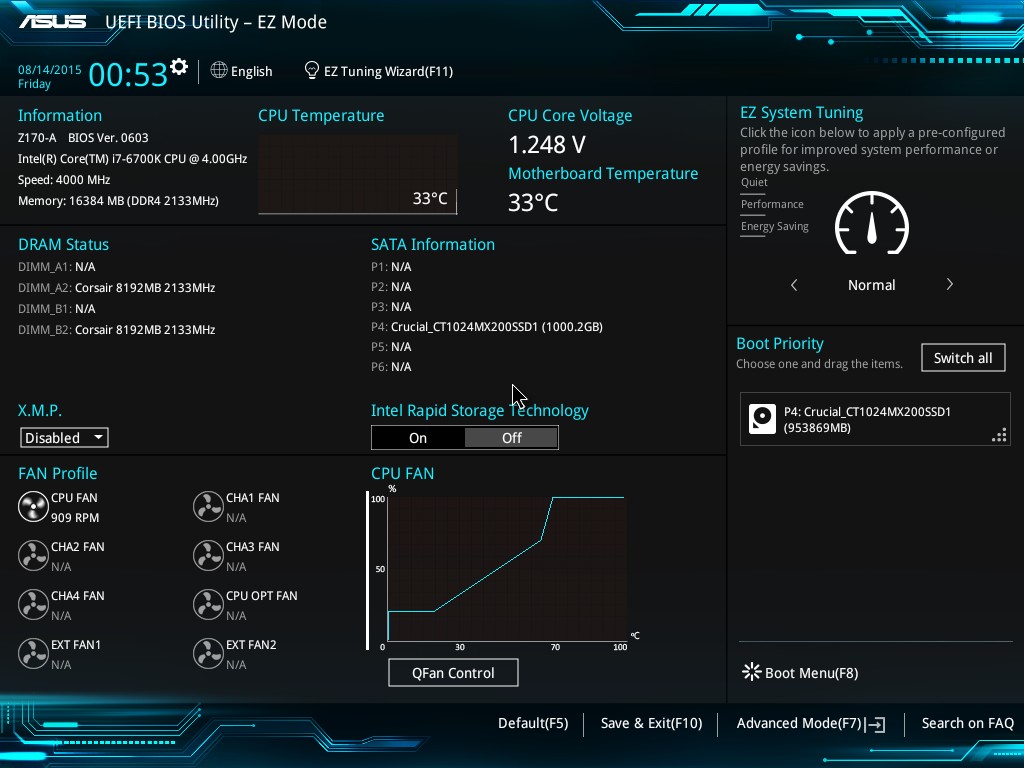
For Z170, this iteration looks a lot like what we have seen in X99. The first front screen is EZ Mode, which contains a wealth of information. On the top left is the name of the motherboard, the BIOS version, the CPU installed, the current maximum speed of that CPU, the amount of DRAM installed, the speed of the DRAM, a graph of the current CPU temperature, the CPU voltage and the motherboard temperature. Underneath this is a per-slot breakdown of the memory installed, then an XMP button for memory modules that support it. There is also a breakdown per SATA port, although this does not extend to PCIe storage devices as of yet. The current fan speeds are in the bottom left, while next to it is a graph of the CPU fan profile. Selecting the QFan Control option underneath this gives the fan profile modifier:
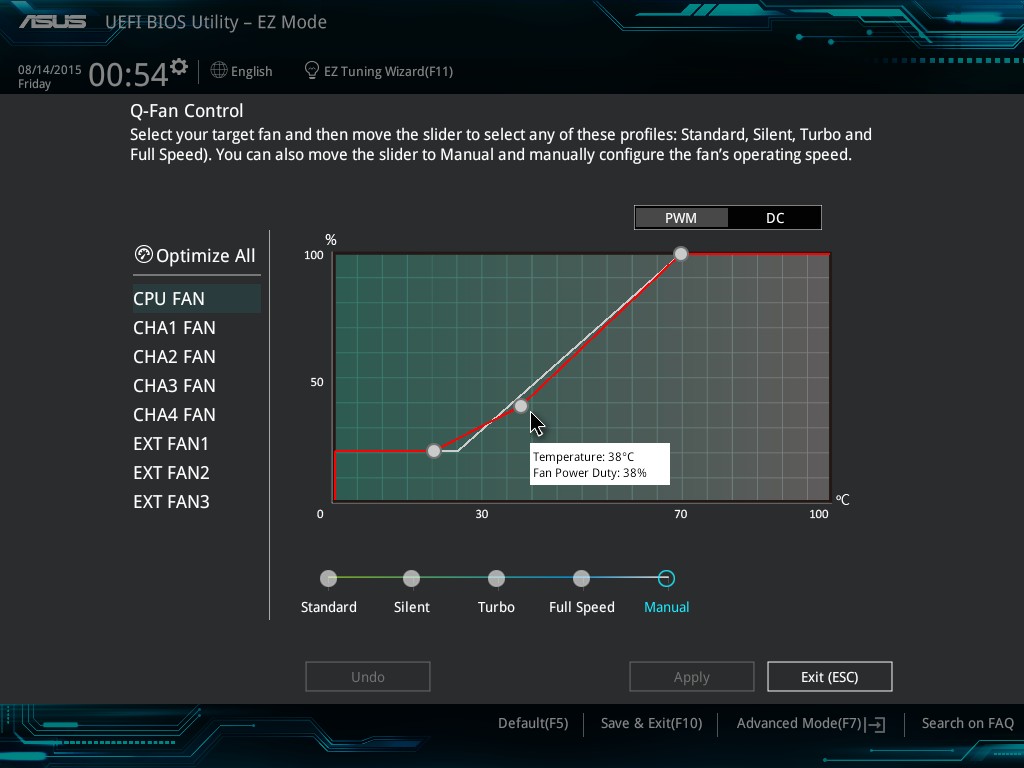
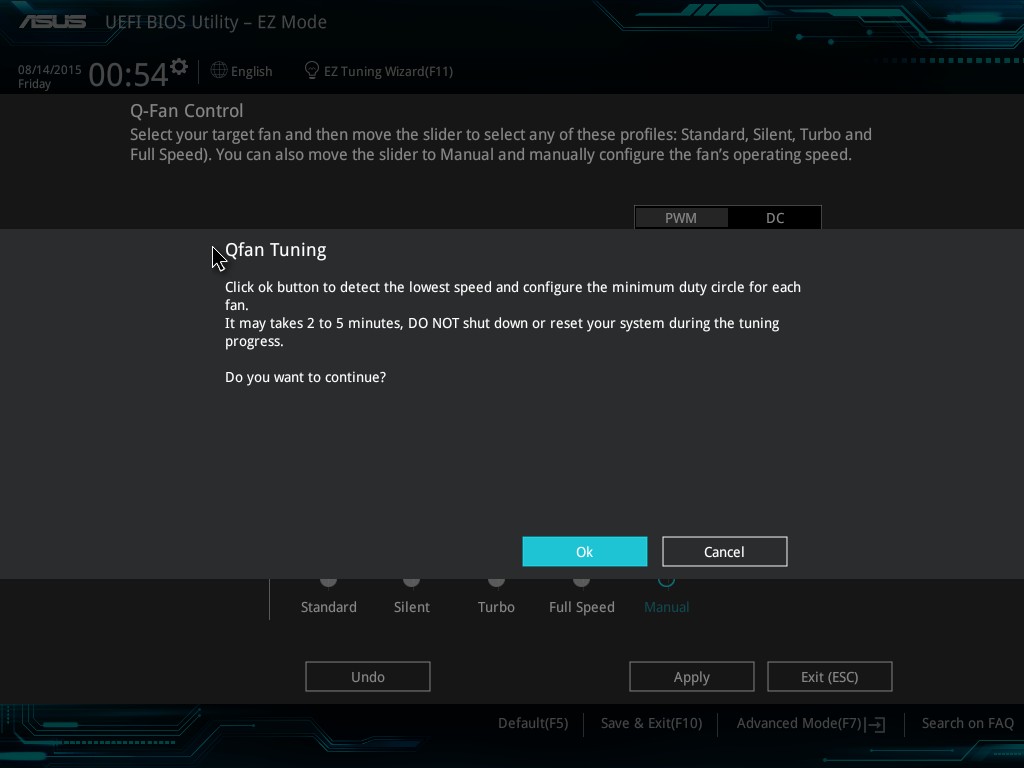
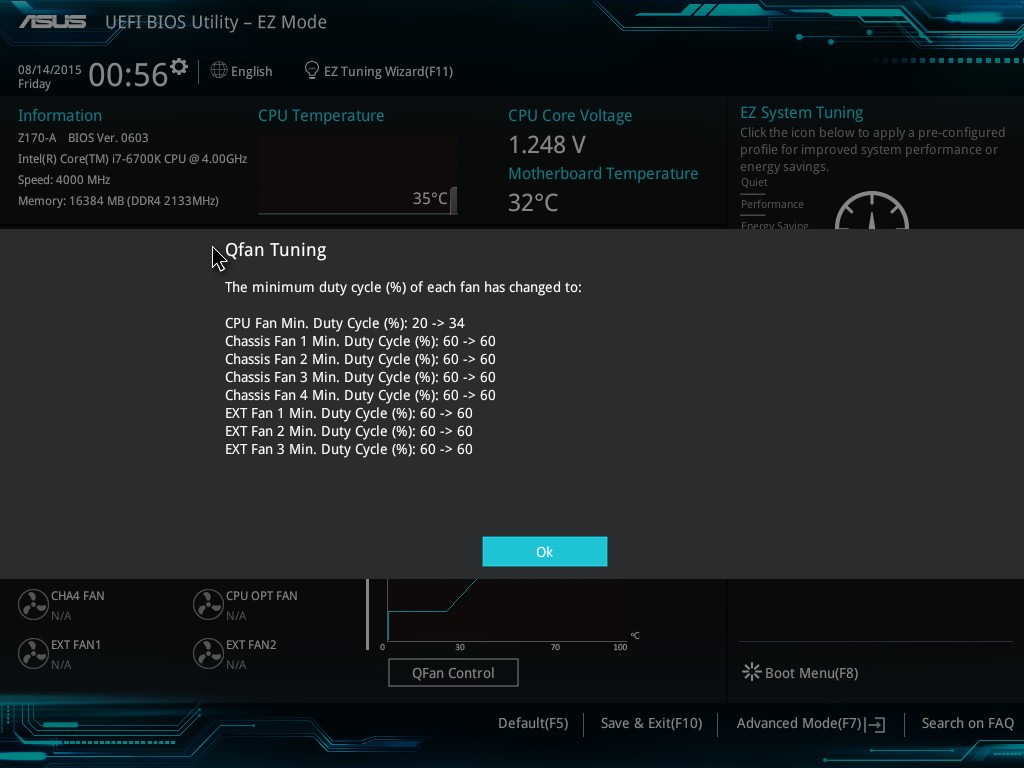
All the fan headers support PWM and DC control, with each of the fan segments allowing for adjustments or predefined fan speeds. New for Z170 is the ‘Optimize All’ option, which performs automatic fan profile selection we had in the advanced section of the BIOS previously.
We still haven’t got a button to allow for the same fan profile to be applied across the board (such as full speed on all fans), but I've been told that it will come in a future update.
Also in the BIOS is the EZ Tuning Wizard that takes a user through the step-by-step overclocking or RAID selection options.
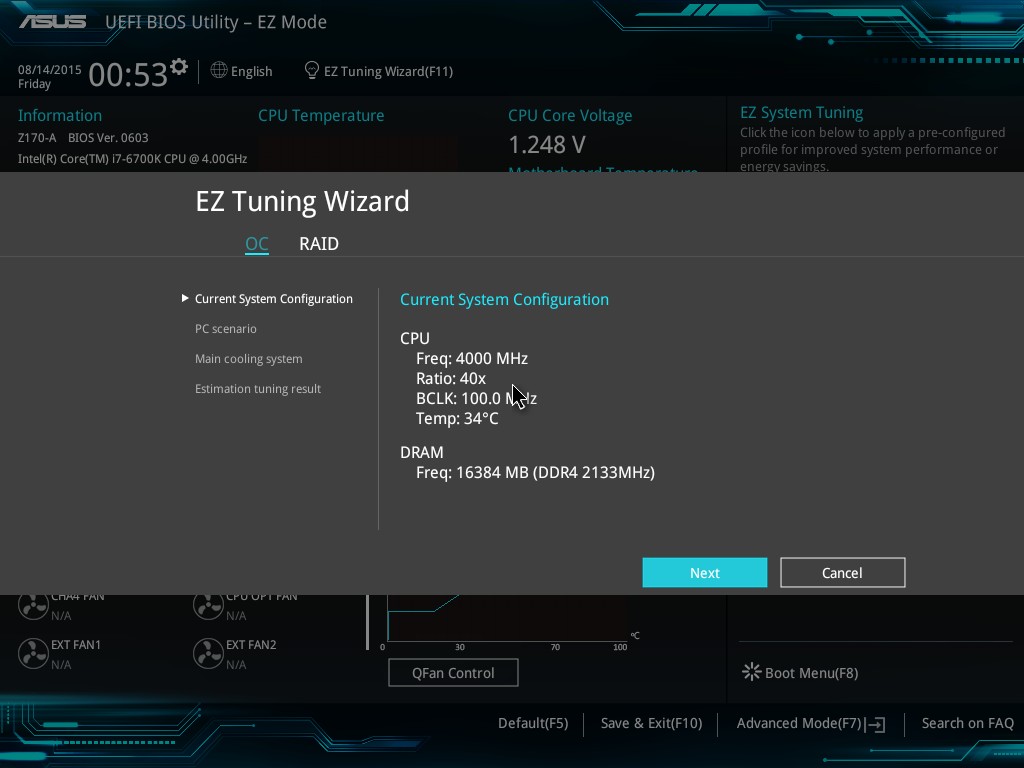
For the overclocking options, the BIOS will ask the user to select the type of overclock they want to focus on (daily computing vs. gaming/media) as well as the level of CPU cooling (stock cooler, tower cooler, water cooler, unknown). The combination of these two will give a recommended overclock, and an option to apply the change:

In this case we chose daily computing and a box cooler, and the system suggested a 7% boost to CPU speed and no change on the DDR4-2133 DRAM we had installed.
Beyond EZ Mode is the Advanced Mode, which in this case also has some minor tweaks to the Z170 platform but no significant changes.
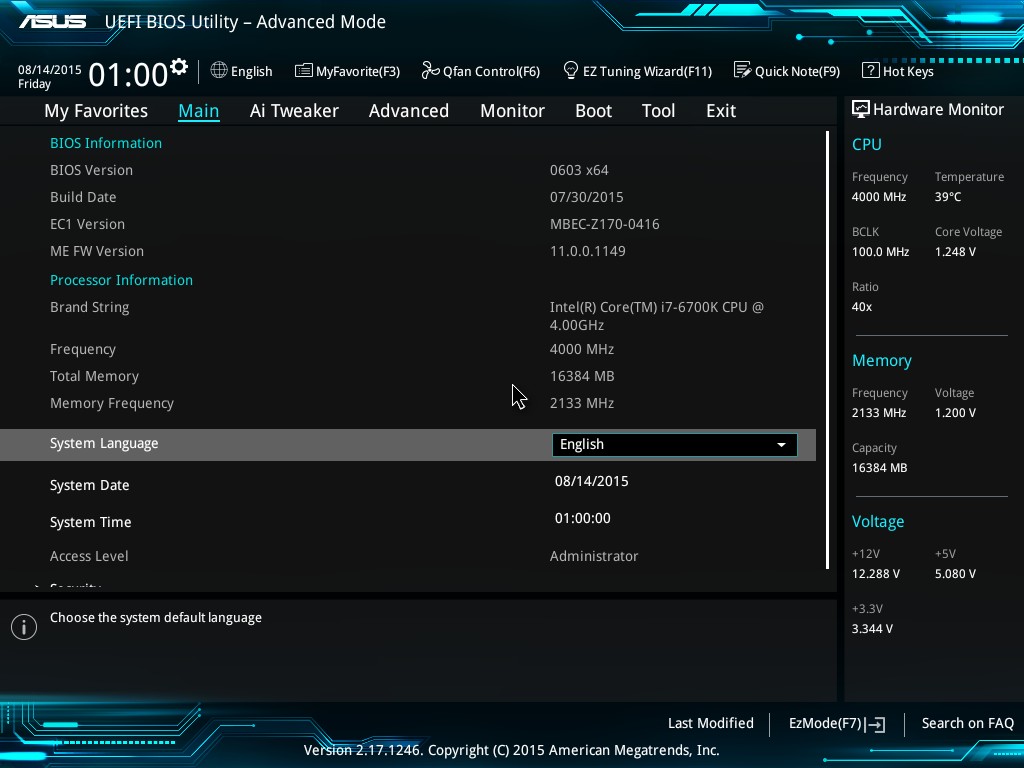
At the top of the screen are the selection tabs, with the main window in the center, a hardware monitor on the right and an information banner at the bottom. From within Advanced Mode, a user can select a series of commands to be copied into the ‘My Favorites’ menu and choose to boot into this instead of EZ Mode:
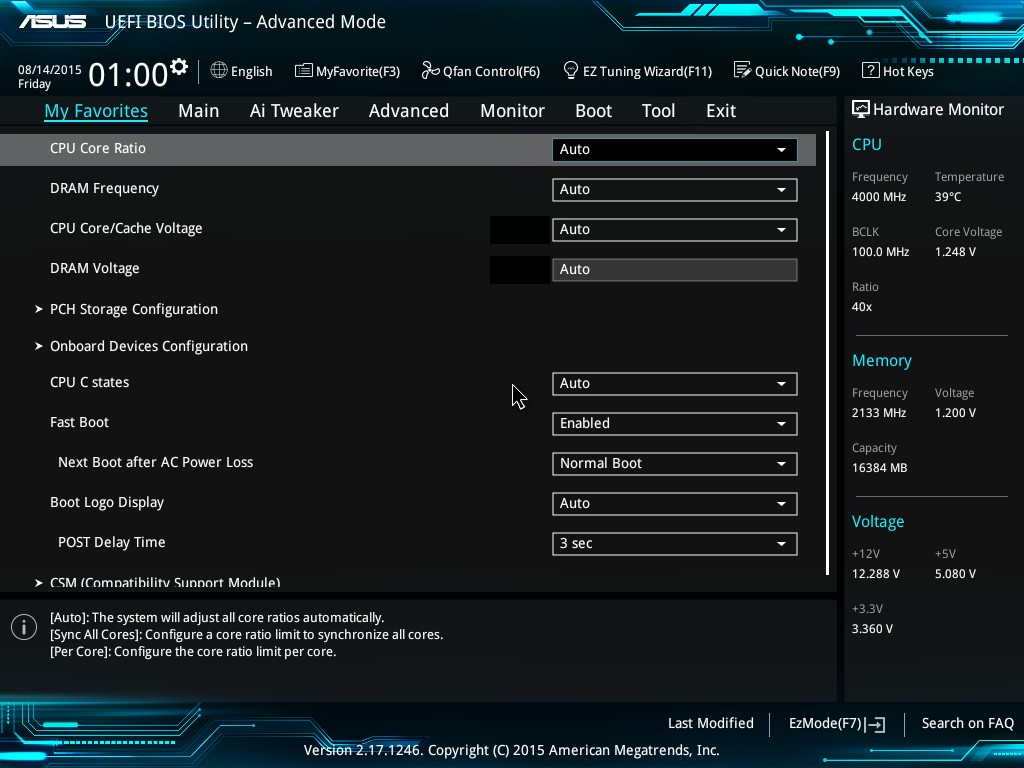
For users looking to overclock, this will be pre-populated with ASUS-recommended overclocking options as shown above, which is new for Z170. These are normally found in the AI Tweaker menu.
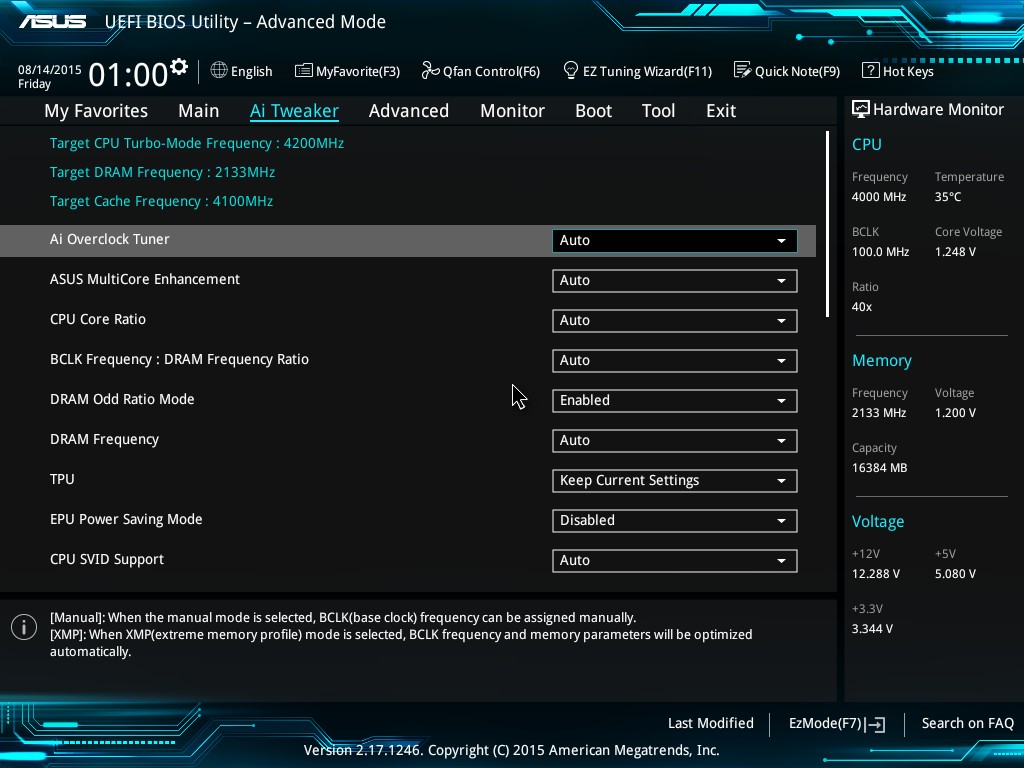
There isn’t much more to see here than on previous ASUS Z97/X99 motherboards – a series of options to select CPU/DRAM/Cache frequencies, then voltages, then a sub-menu for power options, a sub-menu for DRAM options, a sub-menu for a ‘Tweaker’s Paradise’ and a further sub-menu for internal CPU power management. Nothing out of the ordinary here.
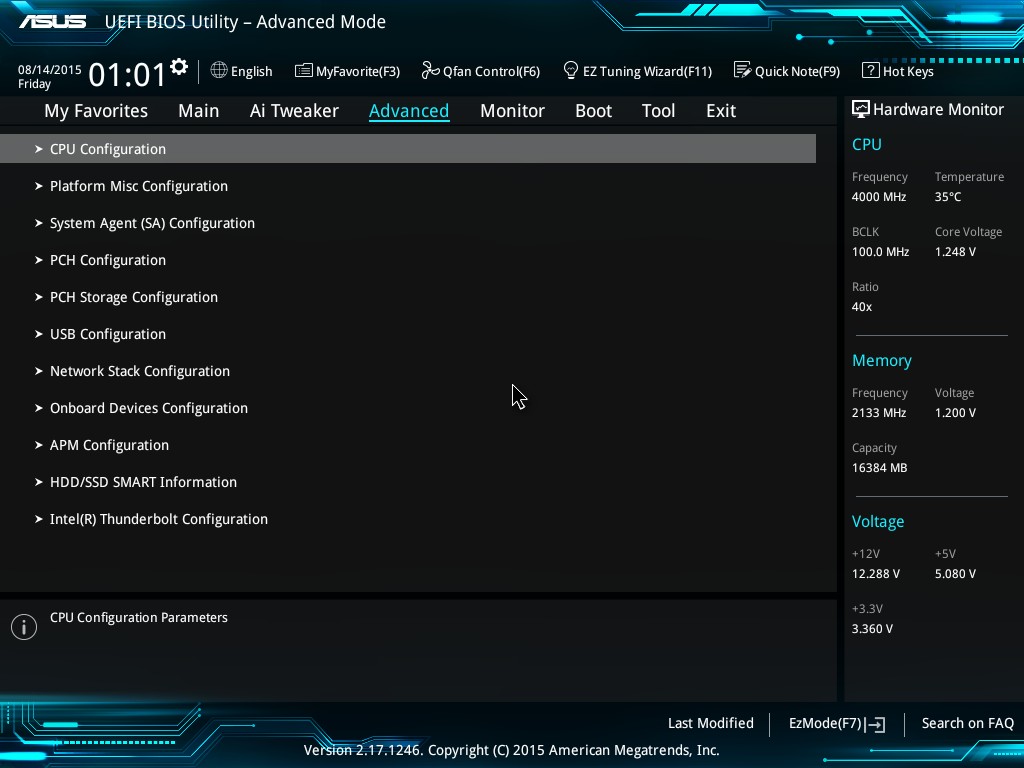
The Advanced Menu is also similar to previous models, with standard options for CPU core enabling, hyperthreading, SATA configurations, RAID, per-port USB control and the Onboard Devices Menu for per-controller adjustments.
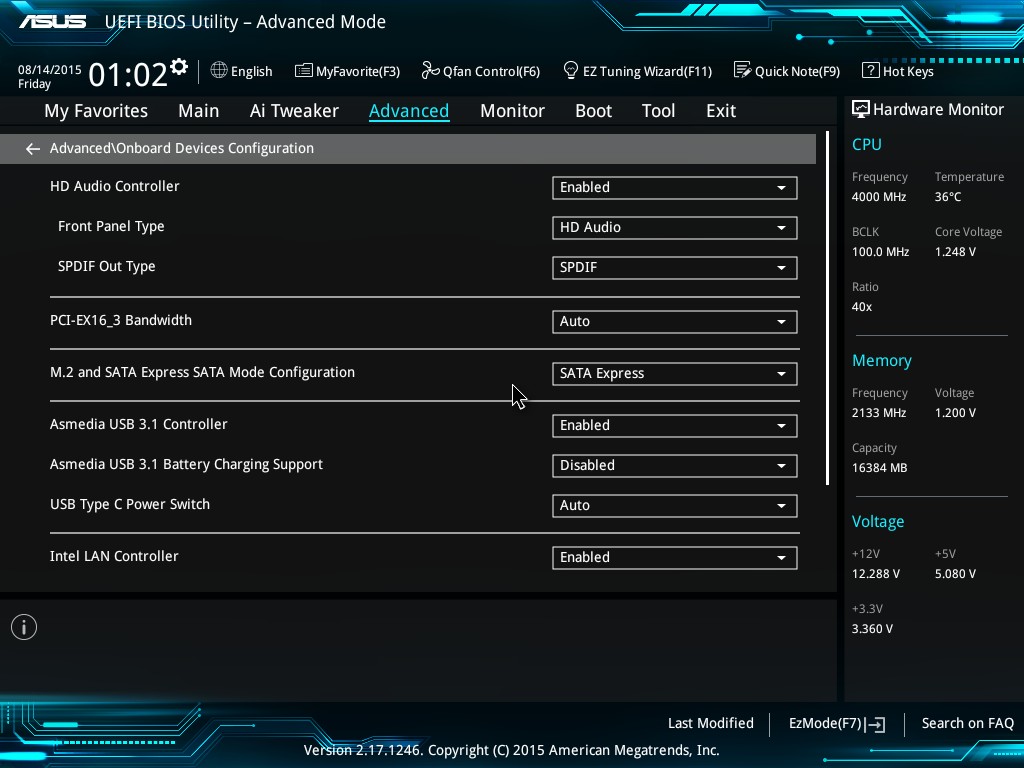
For users wanting to enable SATA M.2 drives, or SATA Express, this Onboard Devices menu will be the place to come to ensure full-bandwidth is being required. For users wanting to implement any U.2 drives via an M.2 Hyper Kit, the PCH Storage Configuration Menu has the option to enable it:
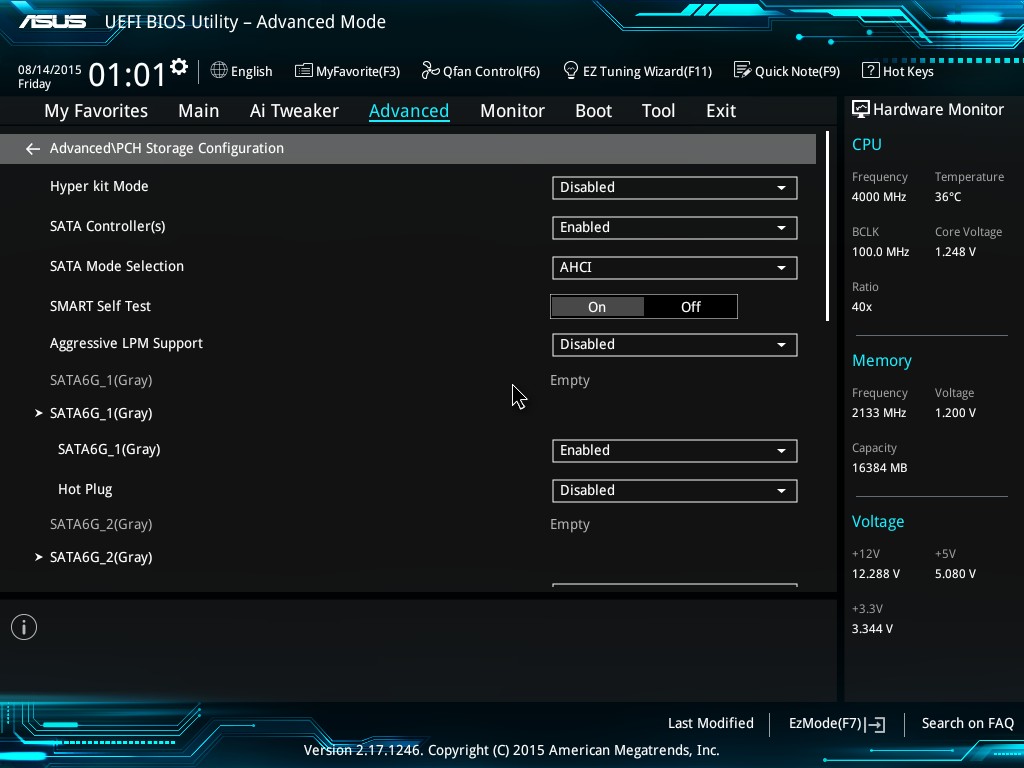
This will also give another menu to enable NVMe.
ASUS has also added a HDD/SSD SMART reader, showing information on read errors and power cycles:

The Monitor tab at the top is for menu adjustments of the temperature sensors and fan controls. Again, this has been carried over from previous platforms.

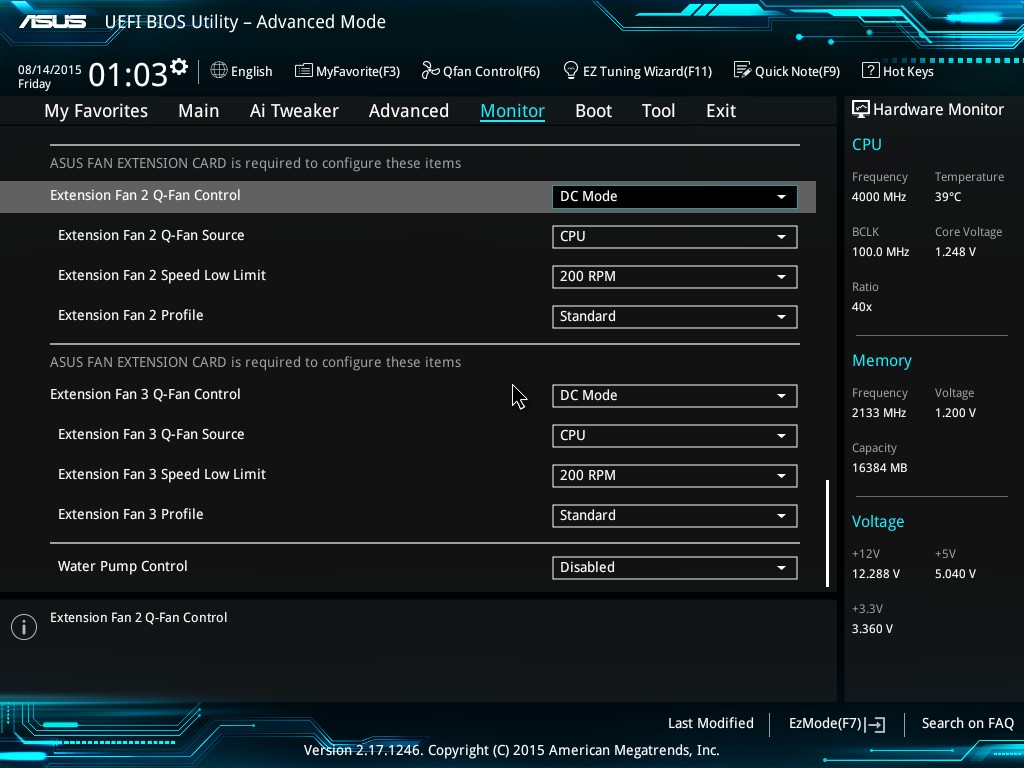
If a FAN_EXT card is equipped to the board, these can be adjusted here also.
ASUS has made some small changes to the Tools menu:
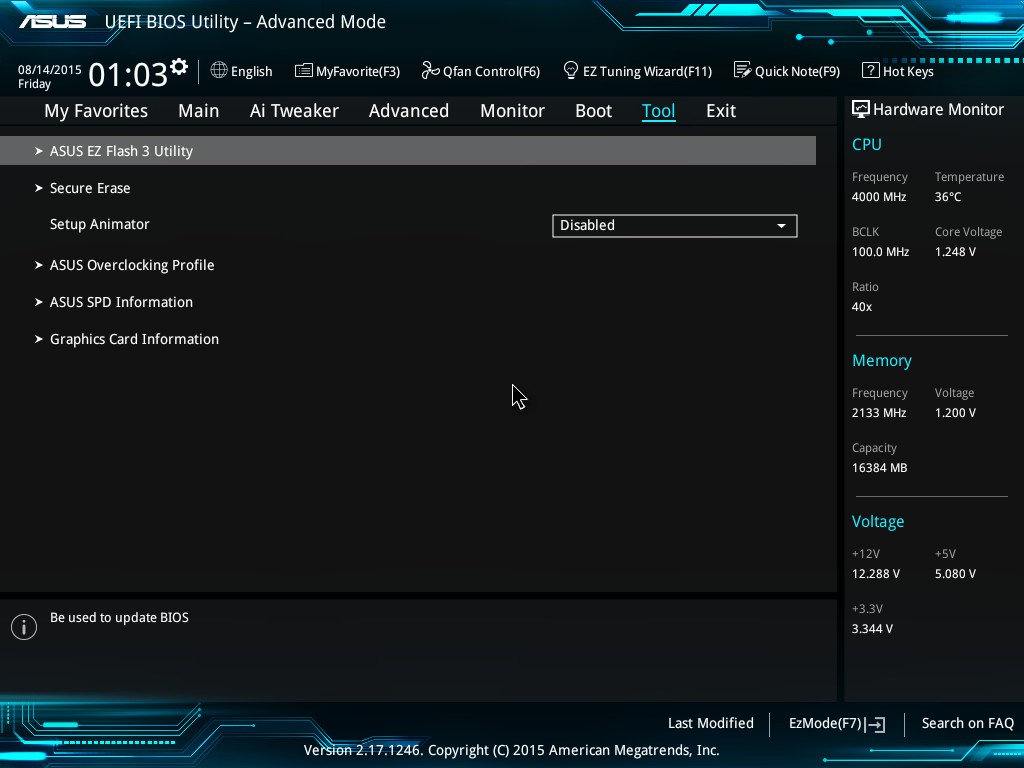
Secure Erase has now moved to the channel motherboards having previously been an ASUS ROG-only option before. The EZ Flash 3 utility gets an update as well, enabling instant updates through a network connection to the latest BIOS versions.


Elsewhere in the Tools menu we have GPU Post which can give a direct breakdown of the PCIe devices installed in the system.
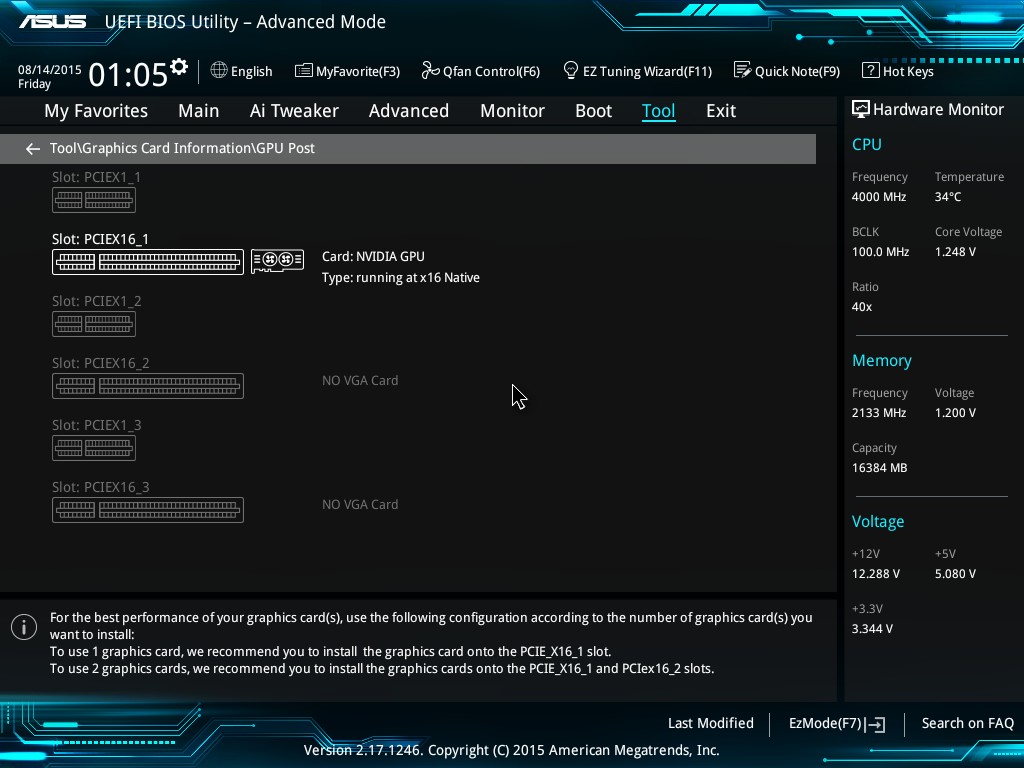
We are still missing a form of a ‘Board Explorer’ we see on MSI and ASRock motherboards that shows exactly what is detected at POST and what is not, which means that ASUS’ detection tools are more spread out than the others.


29 Comments
View All Comments
ciderrules - Tuesday, October 20, 2015 - link
This is the MB I bought for my new Skylake system. Always had good luck with ASUS in the past, and it's performed well so far with no issues noted (crosses fingers).Only complaint (and it's not really a fault) is it feels a little "flimsy/flexible", as if the board itself wasn't as thick as it could be. Couple with a Dark Rock Pro 3 heatsink in a tower case, and suddenly there's a lot of stress on the MB causing it to flex from the weight of the heatsink. Remedied this by making a small custom bracket from the sink to my case to take some of the weight off.
blppt - Tuesday, October 20, 2015 - link
Sadly, that may be a trend for ASUS's lower end stuff---the Z97-E I picked up a while back had a flimsy-feeling PCB, and slightly loose SATA connector housings. Havent had a single problem with it yet, but that cheap feeling is not exactly a great first impression.By contrast, the similarly-priced Z97X-Gaming 7 from Gigabyte I bought for my other Intel box felt much sturdier.
Samus - Wednesday, October 21, 2015 - link
It isn't a trend of Asus. This is industry-wide. There is no longer a need for 10 layer PCB's. With so much integrated into the CPU and everything being such low power, most reference designs are only 4-6 layers thick anymore. All of these first-out products are heavily based on, if not nearly identical too, the chipset reference. In a few months we may start seeing more "creative" boards of higher caliber.Billie Boyd - Friday, November 27, 2015 - link
There are a couple of good MB that I can recommend and some of this are seen on http://www.consumerrunner.com/top-10-best-desktops... too.Kutark - Sunday, November 1, 2015 - link
I used to be a dyed in the wool Asus guy, until around 2007 or so. The last few builds I did for myself and for friends from around 2005-2007, in 6 systems we had 4 Asus boards go bad within 1-6 months of use. By then I switched to Gigabyte and in over 13 MB's I've only had an issue with 1 (the IDE controller started going out), which was RMA'd and replaced.BillyONeal - Tuesday, October 20, 2015 - link
Ooh. I like the "Other AnandTech Reviews for Intel’s 6th Generation CPUs" inset.Oogle - Tuesday, October 20, 2015 - link
FYI, as of this post, the 14-1 pin TPM connector has no part that can fit it. So in order to do bitlocker on your system drive, you will need a password or usb drive to access the drive on boot.PVG - Tuesday, October 20, 2015 - link
My board of reference in this price bracket is the ASRock Z170 Extreme4. It offers a bit more for the same money.jabber - Wednesday, October 21, 2015 - link
Just wish some of them would drop the VGA/DVI sockets. Hate having legacy stuff I'll never use, bad enough with built in audio.Gigaplex - Friday, November 6, 2015 - link
I agree with VGA, but I still use DVI. I find HDMI a pain to use, as everything keeps trying to be too clever, assuming some percentage of overscan or understand, using the wrong pixel format (YUV vs RGB) etc. My monitors aren't new enough for DisplayPort, so it's DVI for me.