Since the status LEDs are located elsewhere on the i-Buddie 4, the front of the system is fairly bare. In fact, besides the screen release lever, the front of the i-Buddie 4 is only home to two speaker ports. The ports are on the left and right side of the system and, unlike the ports on the top of the system, the speakers are actually pointed out in this direction. With the i-Buddie 4's generous wrist rest area, the speaker's sound was able to project just fine without being blocked during normal use.
Like the front of the system, the left side of the i-Buddie 4 also looks fairly bare of components. This is likely due to the fact that there is only so much room components can take up on a system as large as the i-Buddie 4. The left side of the system is home to a single 6-pin powered IEEE-1394 port located towards the system's front. Also here is the power-in port for the system, a port that not only accepts the system's power adapter but is also able to accept an optional external battery pack. Between these two ports and to the left of the power-in port are cooling vents. You will notice quite a few cooling vents around the i-Buddie 4: keeping a desktop system in a small space cool is no easy task.

The back of the system reveals yet another cooling vent. This time the vent is on the back right side and serves as a partial exhaust for the CPU fan. To the left of the vent is the system's internal ethernet port. A little over two inches to the left of the ethernet port is the i-Buddie 4's internal s-video out jack. There is no adapter necessary to hook the desknote up to any source capable of accepting an s-video input, a nice feature that we wish more laptops had. The next two ports are slightly recessed in a small indentation in the system's rear. The first of these two ports is a 15-pin VGA-out port and the second is a parallel port. Finally the back of the system contains an IrDA 1.3 port and two audio jacks: one for audio-out and one for microphone-in.

Surprisingly, there are no cooling vents located on the right side of the i-Buddie 4. Instead, the right side of the i-Buddie 4 greets us first with a Kensington lock port located towards the rear of the system. Next to this lie a set of four USB 2.0 ports stacked two on top of each other side by side. The pairing of the powered IEEE-1394 port and the four USB 2.0 ports should make connecting existing and future peripherals to the i-Buddie 4 a breeze. To the left of the USB ports is the modem jack followed by the system's optical drive which in our case happened to be a DVD-ROM drive. A DVD/CD-RW drive is a factory option as well.

The bottom of the i-Buddie 4 is home to a wide number of access panels and cooling vents. The large access panel. located towards the front of the i-Buddie 4 covers a memory expansion slot. Although from the looks of it one would think that the access panel. is overly large considering all it covers is the memory, but looks can be deceiving. In fact, every inch of the access panel. is used to cover the memory since the i-Buddie 4 uses desktop 184 pin DDR SDRAM. Surprised to find desktop memory in a notebook form factor? So were we, but then again the i-Buddie 4 is no notebook.
Above the memory expansion slot access panel. is a large cooling area including one cutout for fan intake and two cutouts for exhaust. To the left of the cooling area, separated by some plastic, is yet another small cooling vent cutout, this time serving as an exhaust. We would have to wait until we took the system apart before we figured out exactly what these vents cooled.
The top left side of the i-Buddie 4 is home to the hard drive access panel. The hard drive was easily slid out by removing the access panel. and pulling the drive out. As we soon found out, unlike the memory the hard drive in the i-Buddie 4 is notebook in nature. Finally, on the back right of the i-Buddie 4 is the CPU access panel. The CPU is easily accessible via this panel., making swapping of the CPU a snap.
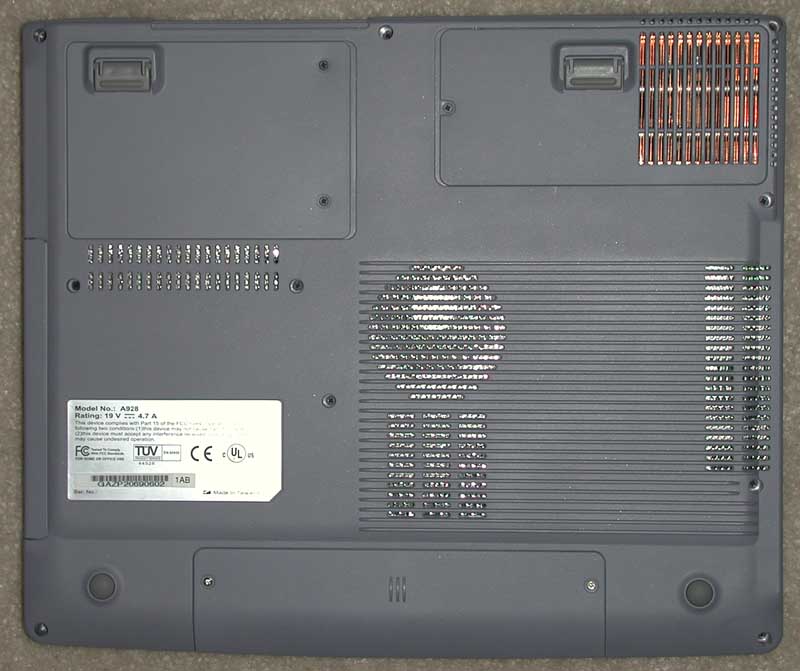
One thing you may notice about the i-Buddie 4's bottom is that there is no battery release button or battery access panel. The lack of access to the i-Buddie's battery is easily explained by the fact that the i-Buddie 4 has no internal battery. The only way that the i-Buddie 4 can be used in its shipping configuration is while attached to the wall. Pulling the plug does not put the system in suspend mode or begin a shutdown request, it simply kills all the power to the system. When ECS called the i-Buddie 4 a desknote, they weren't kidding: it can really only be used from desk to desk.
The warmest part of the i-Buddie 4 was found on the left exhaust vent. Here air leaving the system reached 109.5 degrees Fahrenheit (43.1 degrees Celsius). The system was much cooler than other notebook systems we have seen which typically get up to 130 degrees Fahrenheit or above. The fairly cool operating temperature is a result of the extreme cooling that the i-Buddie 4 is able to incorporate due to its large form factor and lack of battery.
The i-Buddie 4 is large. Measuring 13.07" x 10.81" x 1.76" and weighing seven pounds, the i-Buddie 4 is among the largest notebooks we have seen. Since the i-Buddie 4 is not designed to be carried around often, mainly just from location A to location B, ECS can get away with making the i-Buddie as large as it is. Don't get us wrong though: if the designed changed to make it less thick and slightly smaller, we certainly would not complain. It would definitely make the i-Buddie 4 easier to transport when necessary.


0 Comments
View All Comments