ZFS - Building, Testing, and Benchmarking
by Matt Breitbach on October 5, 2010 4:33 PM EST- Posted in
- IT Computing
- Linux
- NAS
- Nexenta
- ZFS
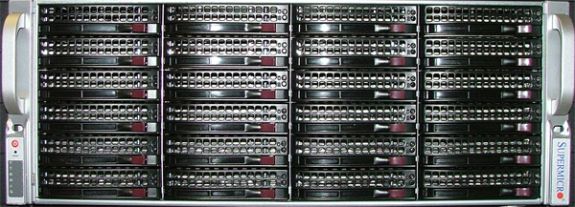
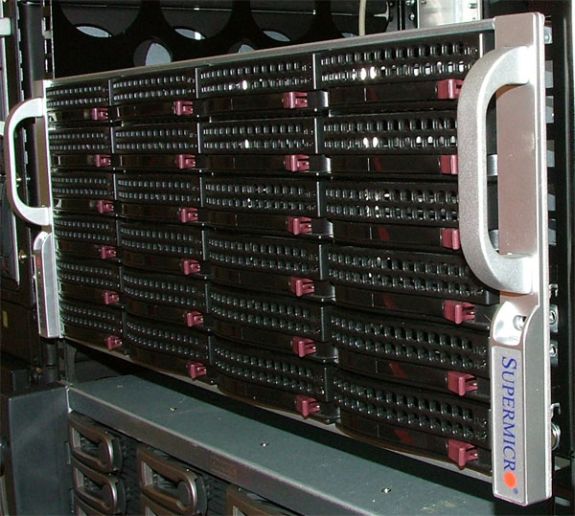
SuperMicro SC846E1-R900B
Our search for our ZFS SAN build starts with the Chassis. We looked at several systems from Supermicro, Norco, and Habey. Those systems can be found here :
SuperMicro : SuperMicro SC846E1-R900B
Norco : NORCO RPC-4020
Norco : NORCO RPC-4220
Habey : Habey ESC-4201C
The Norco and Habey systems were all relatively inexpensive, but none came with power supplies, nor did they support daisy chaining to additional enclosures without using any additional SAS HBA cards. You also needed to use multiple connections to the backplane to access all of the drive bays.
The SuperMicro system was by far the most expensive of the lot, but it came with redundant hot-swap power supplies, the ability to daisy chain to additional enclosures, 4 extra hot-swap drive bays, and the connection to the backplane was a single
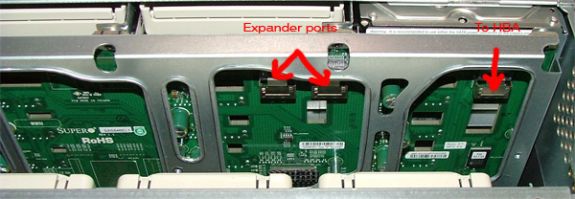
The SuperMicro backplane also gives us the ability without any additional controllers to daisy chain to additional external chassis using the built in expander. This simplifies expansion significantly, allowing us to simply add a cable to the back of the chassis for additional enclosure expansion without having to add an extra HBA.
Given the cost to benefits analysis, we decided to go with the SuperMicro chassis. While it was $800 more than other systems, having a single connector to the backplane allowed us to save money on the SAS HBA card (more on this later). To support all of the other systems, you either needed to have a 24 port RAID card or a SAS controller card that supported 5
We also found that the power supplies we would want for this build would have significantly increased the cost. By having the redundant hot-swap power supplies included in the chassis, we saved additional costs. The only power supply that we found that would come close to fulfilling our needs for the Norco and Habey units was an Athena Power Hot Swap Redundant power supply that was $370 Athena Power Supply. Factoring that in to our purchasing decisions makes the SuperMicro chassis a no-brainer.
We moved the SuperMicro chassis into one of the racks in the datacenter for testing as testing it in the office was akin to sitting next to a jet waiting for takeoff. After a few days of it sitting in the office we were all threatening OSHA complaints due to the noise! It is not well suited for home or office use unless you can isolate it.
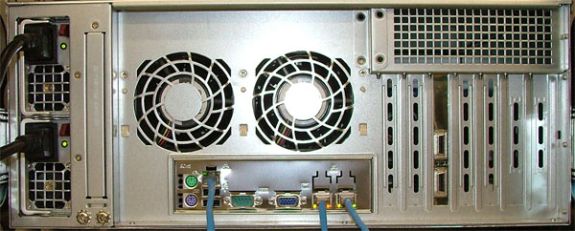
Rear of the SuperMicro chassis. You can also see three network cables running to the system. The one on the left is the connection to the IPMI management interface for remote management. The two on the right are the gigabit ports. Those ports can be used for internal
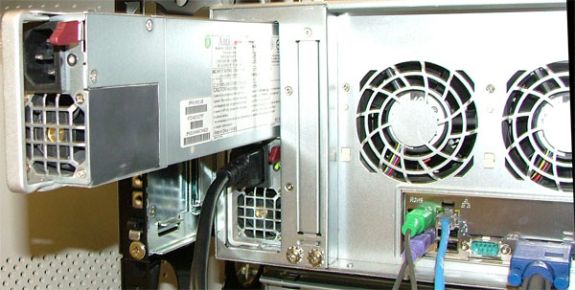
Removing the Power supply is as simple as pulling the plug, flipping a lever, and pulling out the PSU. The system stays online as long as one power supply is in the chassis and active.
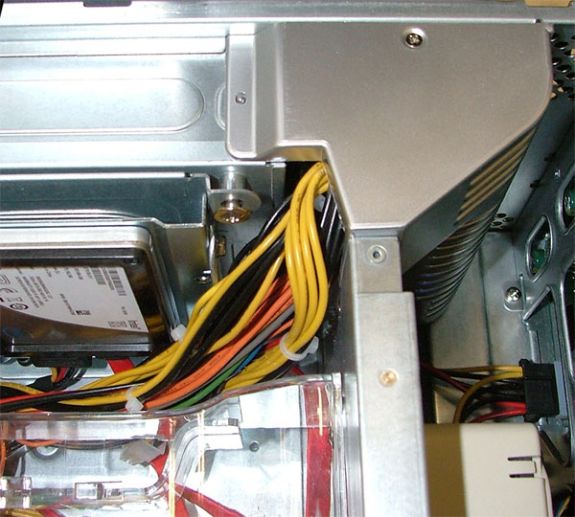
This is the Power Distribution Backplane. This allows both PSU’s to be active and hot swapable. If this should ever go out, it is field replaceable, but the system does have to go offline.
A final thought on the Chassis selection – SuperMicro also offers chassis with 1200W power supplies. We considered this, but when we looked at the decisions that we were making on hard drive selections, we decided 900W would be plenty. Since we are selecting a hybrid storage solution using 7200
Another consideration would be if you decided to create a highly available system. If that is your goal you would want to use the E2 version of the chassis that we selected, as it supports dual SAS controllers. Since we are using SATA drives and SATA drives only support a single controller we decided to go with the single controller backplane.
Additional Photos :
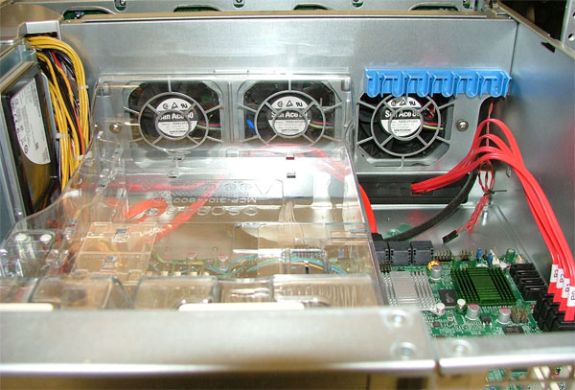
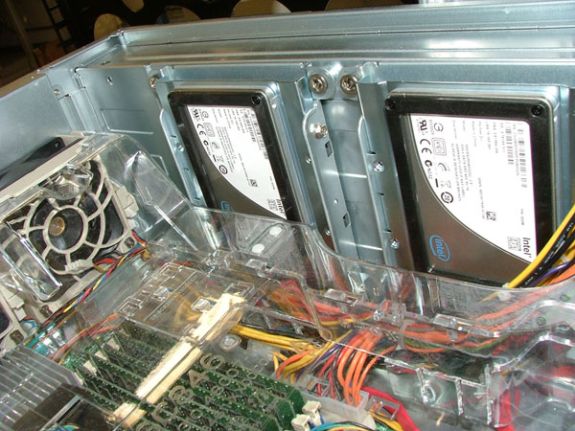
This is the interior of the chassis, looking from the back of the chassis to the front of the chassis. We had already installed the SuperMicro X8ST3-F Motherboard, Intel Xeon E5504 Processor, Intel Heatsink, Intel X25-V SSD drives (for the mirrored boot volume), and cabling when this photo was taken.
This is the interior of the chassis, showing the memory, air shroud, and internal disk drives. The disks are currently mounted so that the data and power connectors are on the bottom.
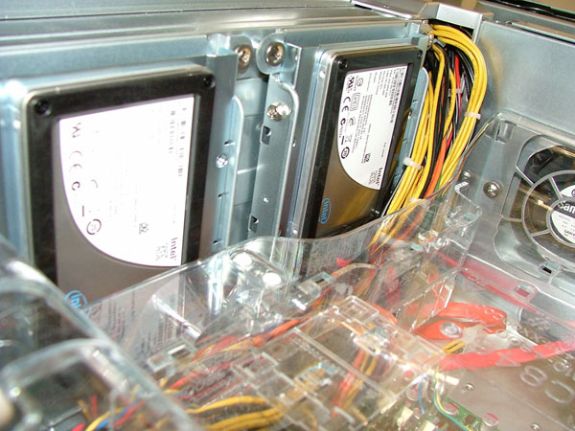
Another photo of the interior of the chassis looking at the hard drives. 2.5″ hard drives make this installation simple. Some of our initial testing with 3.5″ hard drives left us a little more cramped for space.
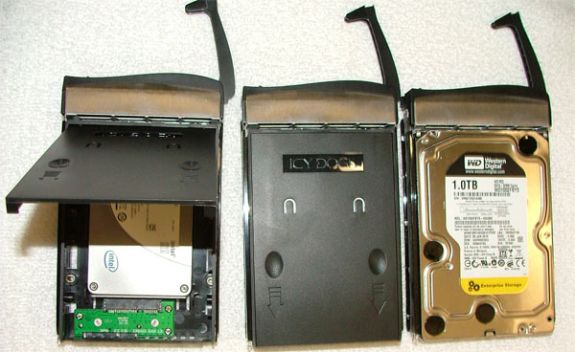
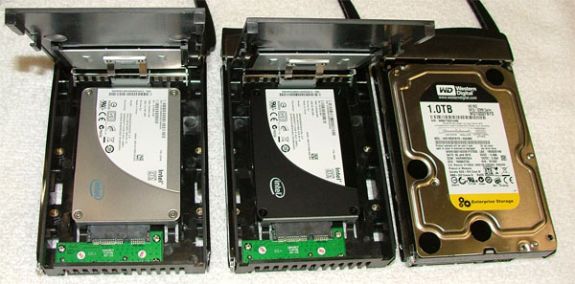
The hot swap drive caddies are somewhat light-weight, but that is likely due to the high density of the drive system. Once you mount a hard drive in them though they are sufficiently rigid for any needs. Do not plan on dropping one on the floor though and having it save your drive. You can also see how simple it is to change out an SSD. We used the IcyDock’s for our SSD location because they are tool-less. If an SSD were to go bad, we simply pull the drive out, flip the lid open quick, and drop in a new drive. The whole process would take 30 seconds, which is very handy if the need ever arises.
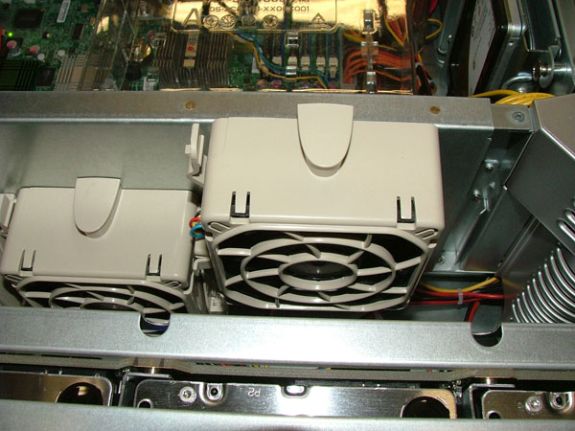
The hot-swap fans are another nice feature. The fan on the right is partially removed, showing how simple it is to remove and install fans. Being able to simply slide the chassis out, open the cover, and drop in new fans without powering the system down is a must-have feature for a storage system such as this. We will be using this in a production environment where taking a system offline just to change a fan is not acceptable.
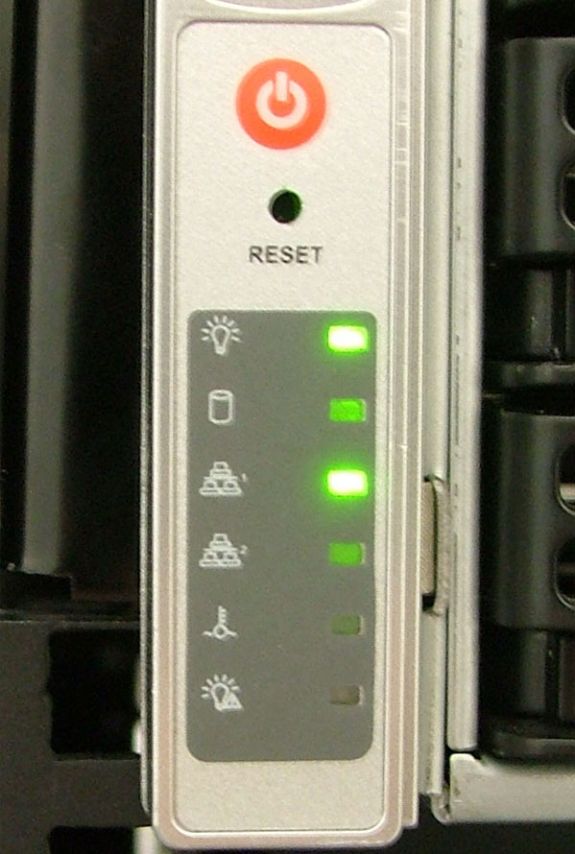
The front panel is not complicated, but it does provide us with what we need. Power on/off, reset, and indicator lights for Power, Hard Drive Activity, LAN1 and LAN2, Overheat, and Power fail (for failed Power Supply).
Motherboard Selection – SuperMicro X8ST3-F
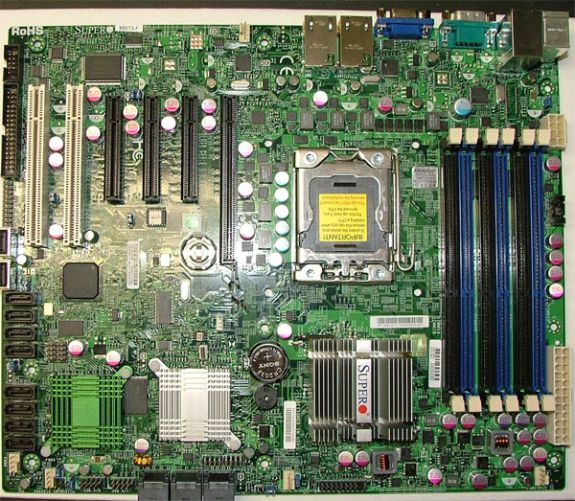
Motherboard Top Photo
We are planning on deploying this server with OpenSolaris. As such we had to be very careful about our component selection. OpenSolaris does not support every piece of hardware sitting on your shelf. We had several servers that we tested with that would not boot into OpenSolaris at all. Granted, some of these were older systems with somewhat odd configurations. In any event, component selection needed to be made very carefully to make sure that OpenSolaris would install and work properly.
In the spirit of staying with one vendor, we decided to start looking with SuperMicro. Having one point of contact for all of the major components in a system sounded like a great idea.
Our requirements started with requiring that it support the Intel Xeon Nehalem architecture. The Intel Xeon architecture is very efficient and boasts great performance even at modest speeds. We did not anticipate unusually high loads with this system though, as we will not be doing any type of RAID that would require parity. Our RAID volumes will be mirrored VDEV’s (RAID10). As we did not anticipate large amounts of CPU time, we decided that the system should be single processor based.
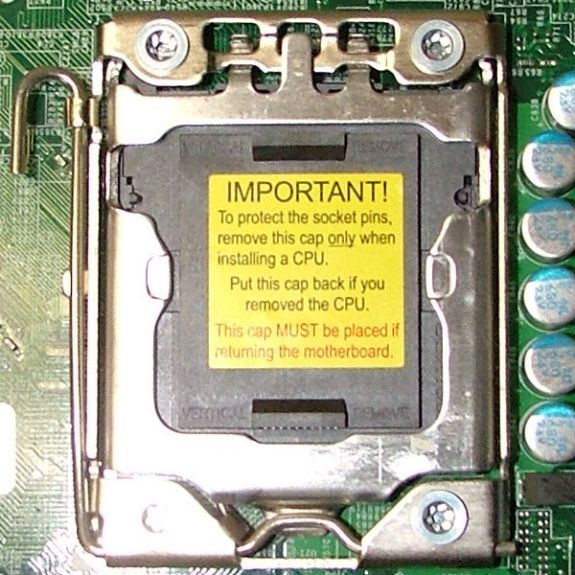
Single CPU Socket for LGA 1366 Processor
Next on the list is RAM sizing. Taking in to consideration the functionality of the ARC cache in ZFS we wanted our system board to support a reasonable amount of RAM. The single processor systems that we looked at all support a minimum of 24GB of RAM. This is far ahead of most entry level RAID subsystems, most of which ship with 512MB-2GB of RAM (our 16 drive Promise RAID boxes have 512MB, upgradeable to a maximum of 2GB).
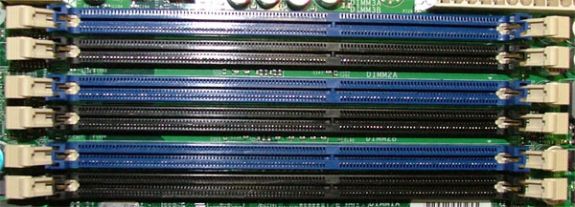
6 RAM slots supporting a max of 24GB of DDR3 RAM.
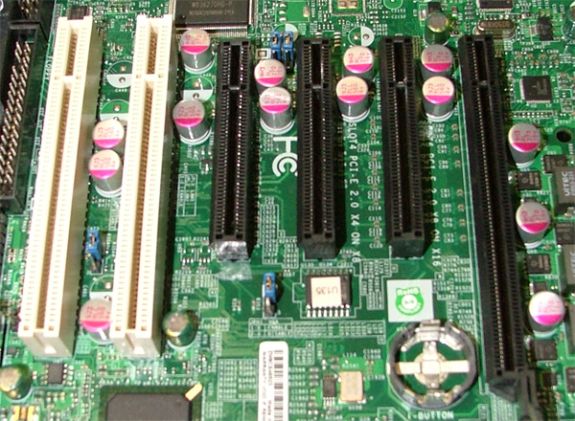
For expansion we required a minimum of 2 PCI-E x8 slots for Infiniband support and for additional SAS HBA cards should we need to expand to more disk drives than the system board supports. We found a lot of system boards that had one slot, or had a few slots, but none that had just the right number while supporting all of our other features, then we came across the X8ST3-F. The X8ST3-F has 3 X8 PCI-E slots (one is a physical X16 slot), 1 X4 PCI-E slot (in a physical X8 slot) and 2 32bit PCI slots. We believe that this should more than adequately handle anything that we need to put into this system.
PCI Express and PCI slots for Expansion
We also need Dual Gigabit Ethernet. This allows us to maintain one connection to the outside world, plus one connection into our current iSCSI infrastructure. We have a significant iSCSI setup deployed and we will need to migrate that data from the old iSCSI
Lastly, we required remote KVM capabilities, which is one of the most important factors in our system. Supermicro provides excellent remote KVM capabilities via their IPMI interface. We are able to monitor system temps, power cycle the system, re-direct CD/
Our search (and phone calls to SuperMicro) lead us to the SuperMicro X8ST3-F. It supported all of our requirements, plus it had an integrated SAS controller. The integrated SAS controller was is an
Jumper to switch from RAID to I/T mode and 8 SAS ports.
After speaking with SuperMicro, and searching different forums, we found that several people had successfully used the X8ST3-F with OpenSolaris. With that out of the way we ordered the Motherboard.
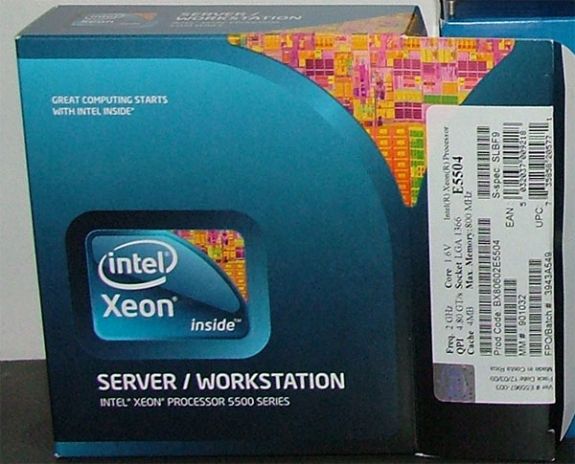
Processor Selection – Intel Xeon 5504
With the motherboard selection made, we could now decide what processor we wanted to put in this system. We initially looked at the Xeon 5520 series processors, as that is what we use in our BladeCenter blades. The 5520 is a great processor for our Virtualization environment due to the extra cache and hyperthreading, allowing it to work on 8 threads at once. Since our initial design plans dictated that we would be using Mirrored Striped VDEV’s with no parity, we decided that we would not need that much processing power. In keeping with that idea, we selected a Xeon 5504. This is a 2.0ghz processor with 4 cores. Our thoughts are that it should be able to easily handle the load that will be presented to it. If it does not, the system can be upgraded to a Xeon E5520 or even a W5580 processor, with a 3.2ghz operating speed if the system warrants it. Testing will be done to make sure that the system can handle the IO load that we will need to handle.
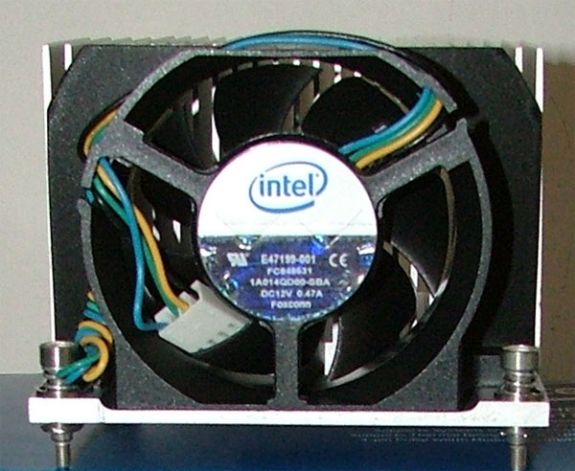
Cooling Selection – Intel BXSTS100A Active Heatsink with fan
We selected an Intel stock heatsink for this build. It has a TDP of 80Watts, which is exactly what our processor is rated at.
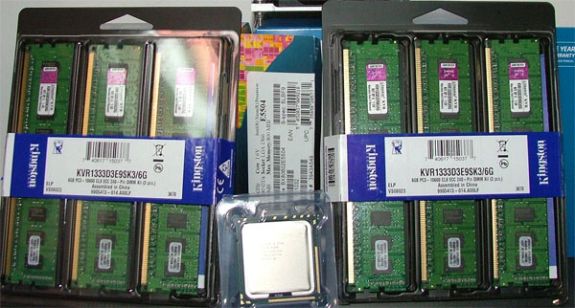
Memory Selection – Kingston Value Ram 1333mhz ECC Unbuffered DDR3
We decided to initially populate the ZFS server with 12GB of
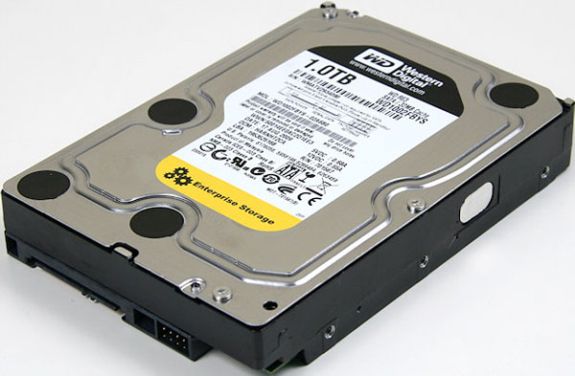
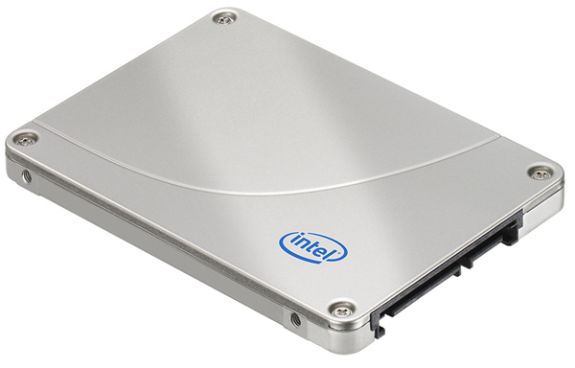
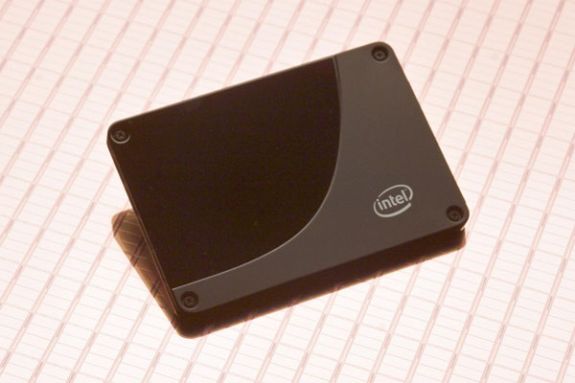
To get the affordable part of the storage under hand, we had to investigate all of our options when it came to hard drives and available SATA technology. We finally settled on a combination of Western Digital RE3 1TB drives, Intel X25-M G2 SSD’s, Intel X25-E SSD’s, and Intel X25-V SSD’s.
The whole point of our storage build was to give us a reasonably large amount of storage that still performed well. For the bulk of our storage we planned on using enterprise grade SATA
To accelerate the performance of our ZFS system, we employed the L2ARC caching feature of ZFS. The L2ARC stores recently accessed data, and allows it to be read from a faster medium than traditional rotating
To accelerate write performance we selected 32GB Intel X25-E drives. These will be the ZIL (log) drives for the ZFS system. Since ZFS is a copy-on-write file system, every transaction is tracked in a log. By moving the log to SSD storage, you can greatly improve write performance on a ZFS system. Since this log is accessed on every write operation, we wanted to use an SSD drive that had a significantly longer life span. The Intel X25-E drives are an SLC style flash drive, which means they can be written to many more times than an MLC drive and not fail. Since most of the operations on our system are write operations, we had to have something that had a lot of longevity. We also decided to mirror the drives, so that if one of them failed, the log did not revert to a hard-drive based log system which would severely impact performance. Intel quotes these drives as 3300 IOPS write and 35,000 IOPS read. You may notice that this is lower than the X25-M G2 drives. We are so concerned about the longevity of the drives that we decided a tradeoff on IOPS was worth the additional longevity.
For our boot drives, we selected 40GB Intel X-25V SSD drives. We could have went with traditional rotating media for the boot drives, but with the cost of these drives going down every day we decided to splurge and use SSD’s for the boot volume. We don’t need the ultimate performance that is available with the higher end SSD’s for the boot volume, but we still realize that having your boot volumes on SSD’s will help reduce boot times in case of a reboot and they have the added bonus of being a low power draw device.
Important things to remember!
While building up our ZFS SAN server, we encountered a few issues in not having the correct parts on hand. Once we identified these parts, we ordered them as needed. The following is a breakdown of what not to forget.
Heatsink Retention bracket
We got all of our parts in, and we couldn’t even turn the system on. We neglected to take in to account that the heatsink that we ordered gets screwed down. The bracket needed for this is not included with the heatsink, the processor, the motherboard, or the case. It was a special order item from SuperMicro that we had to source before we could even turn the system on.
The Supermicro part number for the heatsink retention bracket is BKT-0023L – a Google search will lead you to a bunch of places that sell it.
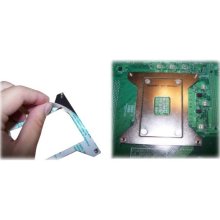
SuperMicro Heatsink Retention Bracket
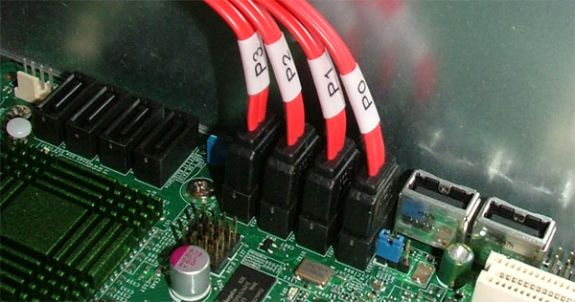
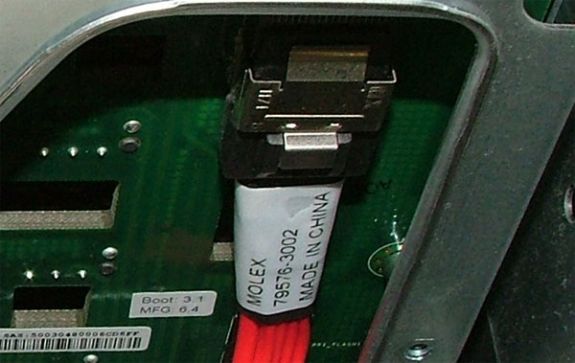
Reverse Breakout Cable
The motherboard that we chose actually has a built in
Reverse Breakout Cable – Discreet Connections.
Reverse Breakout Cable – SFF8087 End
Fixed
Dual 2.5″ HDD Tray part number – MCP-220-84603-0N
Single 3.5″ HDD Tray part number – MCP-220-84601-0N
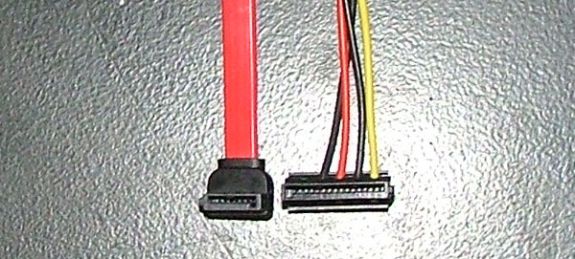
LA or RA power and data cables – We also neglected to notice that when using the 3.5″ HDD trays that there isn’t really any room for cable clearance. Depending on how you mount your 3.5″ HDD’s, you will need Left Angle or Right Angle power and data connections. If you mount the power and data connectors at the top of the case, you’ll need Left Angle cabling. If you can mount the drives so the power and data are at the bottom of the case, you could use Right Angle cabling.
Left Angle Connectors
Left Angle Connectors connected to a HDD
Power extension cables – We did not run in to this, but we were advised by SuperMicro that it’s something they see often. Someone will build a system that requires 2x 8 pin power connectors, and the secondary 8 pin connector is too short. If you decide to build this project up using a board that requires dual 8 pin power connectors, be sure to order an extension cable, or you may be out of luck.
Fan power splitter – When we ordered our motherboard, we didn’t even think twice about the number of fan headers on the board. We’ve actually got more than enough on the board, but the location of those gave us another item to add to our list. The rear fans in the case do not have leads long enough to reach multiple fan headers. On the system board that we selected there was only one fan header near the dual fans at the rear of the chassis. We ordered up a 3 pin fan power splitter, and it works great.






102 Comments
View All Comments
diamondsw2 - Tuesday, October 5, 2010 - link
You're not doing your readers any favors by conflating the terms NAS and SAN. NAS devices (such as what you've described here) are Network Attached Storage, accessed over Ethernet, and usually via fileshares (NFS, CIFS, even AFP) with file-level access. SAN is Storage Area Network, nearly always implemented with Fibre Channel, and offers block-level access. About the only gray area is that iSCSI allows block-level access to a NAS, but that doesn't magically turn it into a SAN with a storage fabric.Honestly, given the problems I've seen with NAS devices and the burden a well-designed one will put on a switch backplane, I just don't see the point for anything outside the smallest installations where the storage is tied to a handful of servers. By the time you have a NAS set up *well* you're inevitably going to start taxing your switches, which leads to setting up dedicated storage switches, which means... you might as well have set up a real SAN with 8Gbps fibre channel and been done with it.
NAS is great for home use - no special hardware and cabling, and options as cheap as you want to go - but it's a pretty poor way to handle centralized storage in the datacenter.
cdillon - Tuesday, October 5, 2010 - link
The terms NAS and SAN have become rightfully mixed, because modern storage appliances can do the jobs of both. Add some FC HBAs to the above ZFS storage system and create some FC Targets using Comstar in OpenSolaris or Nexenta and guess what? You've got a "SAN" box. Nexenta can even do active/active failover and everything else that makes it worthy of being called a true "Enterprise SAN" solution.I like our FC SAN here, but holy cow is it expensive, and its not getting any cheaper as time goes on. I foresee iSCSI via plain 10G Ethernet and also FCoE (which is 10G Ethernet + FC sharing the same physical HBA and data link) completely taking over the Fibre Channel market within the next decade, which will only serve to completely erase the line between "NAS" and "SAN".
mbreitba - Tuesday, October 5, 2010 - link
The systems as configured in this article are block level storage devices accessed over a gigabit network using iSCSI. I would strongly consider that a SAN device over a NAS device. Also, the storage network is segregated onto a separate network already, isolated from the primary network.We also backed this device with 20Gbps InfiniBand, but had issues getting the IB network stable, so we did not include it in the article.
Maveric007 - Tuesday, October 5, 2010 - link
I find iscsi is closer to a NAS then a SAN to be honest. The performance difference between iscsi and san are much further away then iscsi and nas.Mattbreitbach - Tuesday, October 5, 2010 - link
iSCSI is block based storage, NAS is file based. The transport used is irrelevent. We could use iSCSI over 10GbE, or over InfiniBand, which would increase the performance significantly, and probably exceed what is available on the most expensive 8Gb FC available.mino - Tuesday, October 5, 2010 - link
You are confusing the NAS vs. SAN terminology with the interconnects terminology and vice versa.SAN, NAS, DAS ... are abstract methods how a data client accesses the stored data.
--Network Attached Storage (NAS), per definition, is an file/entity-based data storage solution.
- - - It is _usually_but_not_necessarily_ connected to a general-purpose data network
--Storage Area Network(SAN), per definition, is a block-access-based data storage solution.
- - - It is _usually_but_not_necessarily_THE_ dedicated data network.
Ethernet, FC, Infiniband, ... are physical data conduits, they are the ones who define in which PERFORMANCE class a solution belongs
iSCSI, SAS, FC, NFS, CIFS ... are logical conduits, they are the ones who define in which FEATURE CLASS a solution belongs
Today, most storage appliances allow for multiple ways to access the data, many of the simultaneously.
Therefore, presently:
Calling a storage appliance, of whatever type, a "SAN" is pure jargon.
- It has nothing to do with the device "being" a SAN per se
Calling an appliance, of whatever type, a "NAS" means it is/will be used in the NAS role.
- It has nothing to do with the device "being" a NAS per se.
mkruer - Tuesday, October 5, 2010 - link
I think there needs to be a new term called SANNAS or snaz short for snazzy.mmrezaie - Wednesday, October 6, 2010 - link
Thanks, I learned a lot.signal-lost - Friday, October 8, 2010 - link
Depends on the hardware sir.My iSCSI Datacore SAN, pushes 20k iops for the same reason that their ZFS does it (Ram cacheing).
Fibre Channel SANs will always outperform iSCSI run over crappy switching.
Currently Fibre Channel maxes out at 8Gbps in most arrays. Even with MPIO, your better off with an iSCSI system and 10/40Gbps Ethernet if you do it right. Much cheaper, and you don't have to learn an entire new networking model (Fibre Channel or Infiniband).
MGSsancho - Tuesday, October 5, 2010 - link
while technically a SAN you can easily make it a NAS with a simple zfs set sharesmb=on as I am sure you are aware.