Building My Home Theater: The First Post
by Anand Lal Shimpi on January 4, 2008 12:00 AM EST- Posted in
- Anand
For the past couple of years I've been building a house in Raleigh, I moved in during the Summer of 2006 and ever since then it's been like living with contractors. I moved in before the house was finished (long story) and of course, there's always stuff to do around a house. The landscaping took forever to complete, the inside smelled like paint and stain for a good month and there are still bathrooms that don't have toilet paper holders. One bathroom on the ground level has a window looking out onto the driveway with no curtain...some of my friends aren't exactly comfortable using it.
Most of the house was built through a lot of deal hunting; we set up a construction company, negotiated direct pricing with virtually all vendors and contractors, bypassing the usual markups associated with new home construction. It was a lot of added work, but the savings and quality control definitely payed off. Unfortunately most raw materials you need for a house aren't readily available online, limiting price competition, but if you look at what online vendors have done for pricing on light fixtures and plumbing equipment you see how much room there is for improvement. The construction market reminds me a lot of the PC market before we had places like Newegg. I digress.
The lot I purchased had was perfectly suited for a basement, and a basement I wanted. Of course, the entire basement remained unfinished as there was other stuff that needed finishing around the house first. In July of this year I stumbled upon this thread over at AVS Forum, it was a theater construction thread by an AVS regular with the handle SandmanX. I was hooked. I had always thought about building a real home theater, but I just never got around to it, that thread however sparked an interest. The poster was amazingly passionate about building his theater, and he did a tremendous amount of research, completed the entire project himself and even created a screen manufacturing company in the process. His approach was very best-bang-for-your-buck, which can be rare when you're talking about anything home theater.
Today the thread is over 100 pages long, and I made it through every single page and every single post. I sent the link to a friend of mine (they call him Manny) and for a couple of weeks that's all the extra-curricular reading we did. We got some ideas and decided that it was time to start working on the basement. I contacted the acoustic consultant SandmanX used, as well as the designer he used, sent them dimensions of the room I was working with and got started at the beginning of August 2007. I should warn you now, if you're at all interested in building a home theater of any sort, that thread might as well be heroin - the poster makes everything seem so simple and doable.
I honestly had no idea what I was getting into, I'd never done anything like this before. I was also drawn to the DIY aspect of the whole project. You see, the more I researched into how much building a theater would cost the more I became frustrated with the way the high end HT (Home Theater) market works. Manufacturers do their best to protect their dealers, which ends up limiting the amount of price competition you see. Certain products can't be sold online, only through authorized dealers, which helps the masses but penalizes those of us who want to do things ourselves. The market is also small enough that simple items that shouldn't cost too much, end up with astronomical price tags. I discovered that high end projector screens can run well over $10,000, all that for fabric and a frame. Automation systems were also ridiculously priced, and here's where the HT and PC markets coincide. Most high end HT components are controllable via RS232 (yes! a use for those serial ports that aren't on motherboards anymore), yet automation systems that link together lighting, equipment control and your HTPC are priced way beyond what you would expect some simple programming and a cheap PC with a few USB-to-serial adapters would cost. I've got no issues paying for technology, I do have issues paying for something that I think I can do on my own (lofty goal?).
What will follow in the coming weeks and months is a journal of my theater construction experience. It's the first time I've ever done something like this, so I'm fully expecting it to be a learning experience. I've always tried to share my passions on AnandTech, so why not this one? I'll begin with a double post, just to get the ball rolling...
The Room
It all started with a room. When I designed my house I just wanted a gigantic room with no windows in the basement, this would be my theater. The plan called for a 20' x 20' room, which I thought would make a perfect theater - apparently I was wrong. There's this golden ratio of dimensions and apparently you don't want any of your room dimensions (length, width or height) to be integer multiples of one another (within some small percentage). Needless to say, my 20' x 20' room didn't exactly win any awards for being perfect. Luckily, as with most things in my house, the measurements were off a bit. So what was supposed to be 20' x 20' x 9.5', (L x W x H) ended up being more like 20' x 18 x 9.5', not a huge difference but I figured it could help me down the road.
I was lucky, as I was starting with a fairly clean slate and didn't have any major restrictions to worry about. Reading through some of the theater construction threads at AVS I'm always impressed by how very usable of a theater people can construct out of a dual purpose room, but I was fortunate enough to have a single room with no other purpose than to be my theater. I'm a fairly simple guy, I need a total of 3 rooms: a place to sleep, a place to work and a place to game (I'll eat in two of the three rooms) - so setting aside a room to watch movies isn't really a problem, given that I think I'd seriously hurt resale value if I built a house out of three gigantic rooms with a few garage stalls.
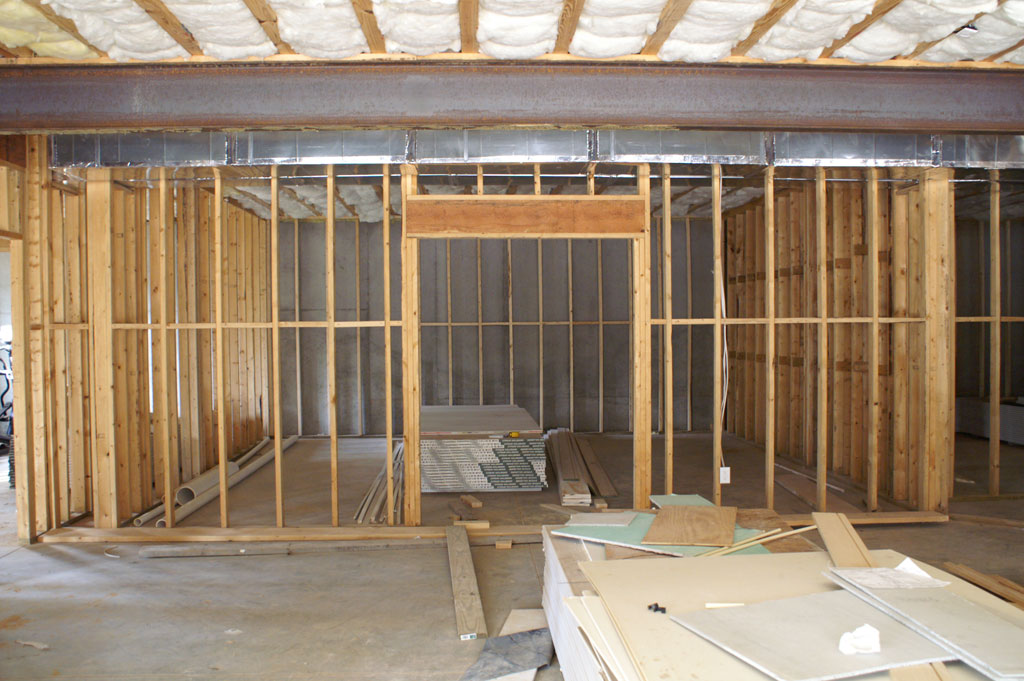
Standing outside The Room - Click to Enlarge
The theater room had studs up, and a HVAC duct running through it along one side but that's all. There's a double door opening on one side and I figured that you'd walk in parallel to the seating.

Standing inside the room looking at the left wall - Click to Enlarge
Walking in the room I imagined a screen on your left or right, and seating on the opposite side. That's about as far as I got in terms of my planning. Isn't there some expression about looking before you leap? Yeah, I didn't exactly do much of that.

Step in the theater, turn right 90 degrees and this is what you see - Click to Enlarge
The Spark
The SMX thread got me interested, and with me, once that spark is lit I get obsessed real quickly (as a side note, that's pretty much how AnandTech came to be, but I'll save that for another post).
I contacted two people that Mr. Sandman used in his theater build: Ryan Kramer and Bryan Pape. Ryan Kramer produced the gorgeous renders of the theater, and Bryan Pape handled all the acoustical engineering.
Both individuals responded and were eager to help at very reasonable rates. Ryan would charge a few hundred for a complete set of 3D renders and basic measurements, while Bryan Pape would charge a bit more for recommendations on how to setup the room for optimal acoustics (included in his fee was 5 hours of consulting on actually building the theater as well). The total expense between the two was less than $1K, but if you want to go even cheaper (and have some artistic talent) you can try sketching the room yourself and ask AVSers for advice on treating the room for sound.
To me, someone with no real artistic talent, the fees were beyond reasonable. To put things in perspective, I asked for the same sort of services from a local AV shop here in Raleigh that does many in-home theater installations. They wanted $10,000. I was quickly beginning to understand why so many people go the DIY route here.
My only concern was that I'd never done this before, and I wasn't going to have an actual blueprint to go off of - just some renders and dimensions. But, I figured the room was already framed, how hard could it be?
Bryan (sound guru) responded first, he had a fun list of questions for me to answer:
- Dimensions of the room to the inch (include height)
- Room construction (single or double drywall, 16 or 24" spacing on studs, carpet over
wood or concrete, etc.)
- Size and location of any doors or windows
- Number and type of seating
- Number of people to optimize for
- Room usage (HT, Multi-Channel music, 2 channel listening, combination? If a
combination, which way to 'lean' in the design)
- False wall up front to hide speakers and treatments?
- Type of screen (perf or not, size, etc.)
- Desired room finish (paint with visible panels, all cloth walls with hidden treatments,
etc.)
- Any 'gotchas' I should know about? Posts? Ducting?
- Brand and model of speakers and sub(s)
- 5.1, 7.1, 2.0, 2.1?
- Current state of the room construction process.
- Basic sketch of the room showing any specific issues, size and location of any doors,
etc.
Answering this list of questions was actually a lot of fun, mostly because it required no work and my imagination got to have fun watching movies in this theoretical theater I was building. Some of the items on the list I didn't really have a solid opinion on (false wall in the front, desired room finish), but the rest I'd already thought about.
I wasn't really a fan of most home theater seats I'd seen online, they were all too bulky and looked like stuff from the 80s (I'm nostalgic about the music, not the furniture). I asked around and eventually got pointed at Salamander Designs, the Matteo seat was what I was aiming for. Using Salamander's online calculator I figured I could cram 11 seats into the theater. If I'm building a theater, I'm making sure as many people can fit in it as possible (and probably charging admission to offset the cost of my latest addiction).
I'm a rookie at this so of course I chose a ridiculously large screen size, after all, isn't that the point of the theater? I was shooting for somewhere between 10 and 12 feet wide on a 2.35:1 aspect ratio screen (I'll discuss this choice later as well). Bryan wanted to know if I wanted an acoustically transparent screen, so I could place speakers behind the screen itself. At this point I hadn't decided, so we left this one as a maybe.
The room usage question was pretty straightforward: this room was for movies first, and ridiculously large screen gaming a distant second. I'm not much of a 2-channel audio guy, although Manny insists that if I had a 4K projector in the room I'd never leave and just work/listen to music in there all day.
Ryan (look and feel guy) was a little less technical in what he needed from me, his request was simple:
"At this point, the basic room dimensions (width, height, and depth) and what type of room you had in mind would be good basic starting points. Did you see this having a more classical theater look, a more family friendly space, a contemporary feel, etc. Also did you see it having items such as risers and a stage?"
Most of my house has a modern look to it, and I wanted the theater to flow with that; clean lines aplenty. A stage? Sure, why not. Risers? Of course, stadium seating here I come.
I quickly sent along information to both of them and I got responses almost as fast.
Bryan Pape was the first to respond, he gave me a brief overview of the types of challenges we'd face during the theater construction, as well as gave me an idea of the costs I'd incur when trying to properly treat the room for acoustics. You don't want the room too echoey or too dead, so you have to strategically place material on the walls that would diffuse sound. Bryan's job would be to figure out where those panels would go based on my seating arrangement, room dimensions and speaker type/positions.
The problem with the initial stages was that I was getting great advice from Bryan, but I didn't really know it since I'd never gone through the process before. I figured we'd just throw some walls up, put some cotton on them and mount a projector and be done. It turns out it's a little more complicated than that.
Meanwhile, Ryan Kramer was hard at work on the renders. I didn't give him much information other than my style is very modern (clean lines, contrasty colors) and that's how the rest of my house is designed. The first email I got from him was a 3D render of one of the Salamander Matteo seats:

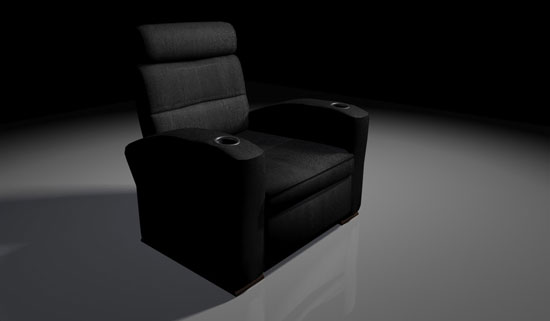
I don't think I'd ever been that excited about seeing a 3D render of a chair, but at that point, I was ecstatic. Ryan does all of his work in Cinema 4D, whose performance is modeled in the Cinebench test I run in all of our CPU reviews. Ryan told me that a full room design would take between 15 - 20 hours, spanning 2 - 4 weeks but things seemed to move much faster; a few days later he followed up with a direction he was headed in:
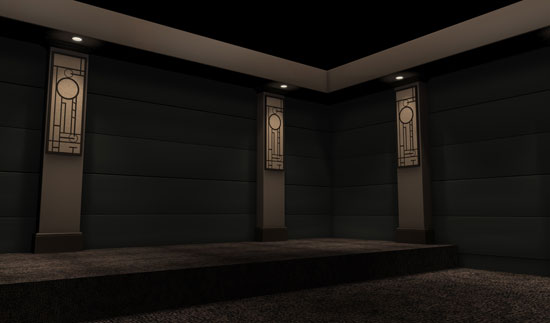
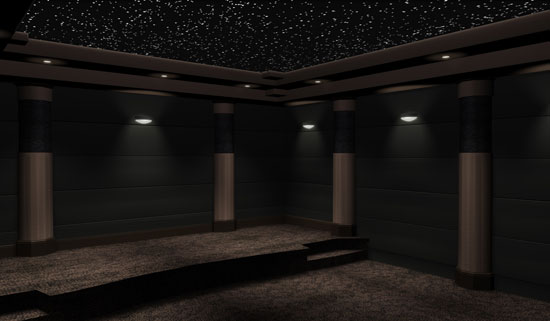
I liked the colors, but I wasn't so sure about the pattern on the columns (not to mention I had no idea how I'd make something like that and stick speakers behind it without upsetting Bryan the sound guy). Ryan played with things a little more and came up with this:
Uh oh, I loved it. Now this was a problem because when I sent the design over to Bryan Pape he rejected the columns. The problem was that the columns were only open on the very front, they needed to be open on all sides because of the speakers we were using (specifically from 3' off the ground to 7' off the ground Bryan wanted the columns to be acoustically transparent). My beloved columns had to be redesigned.
Ryan went through a few more iterations, none of which I liked nearly as much as the first one:
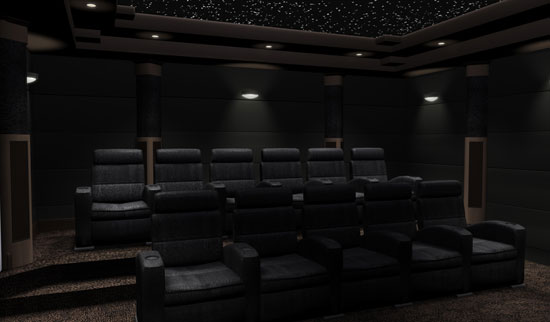
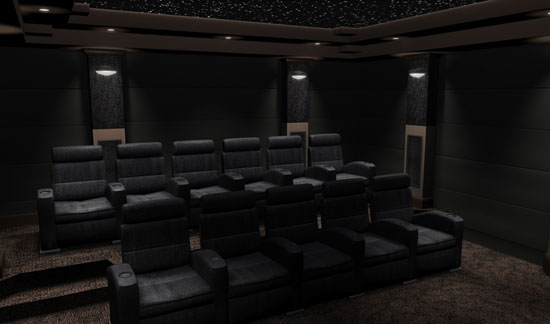
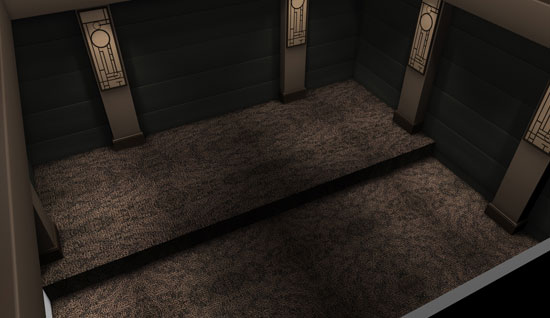
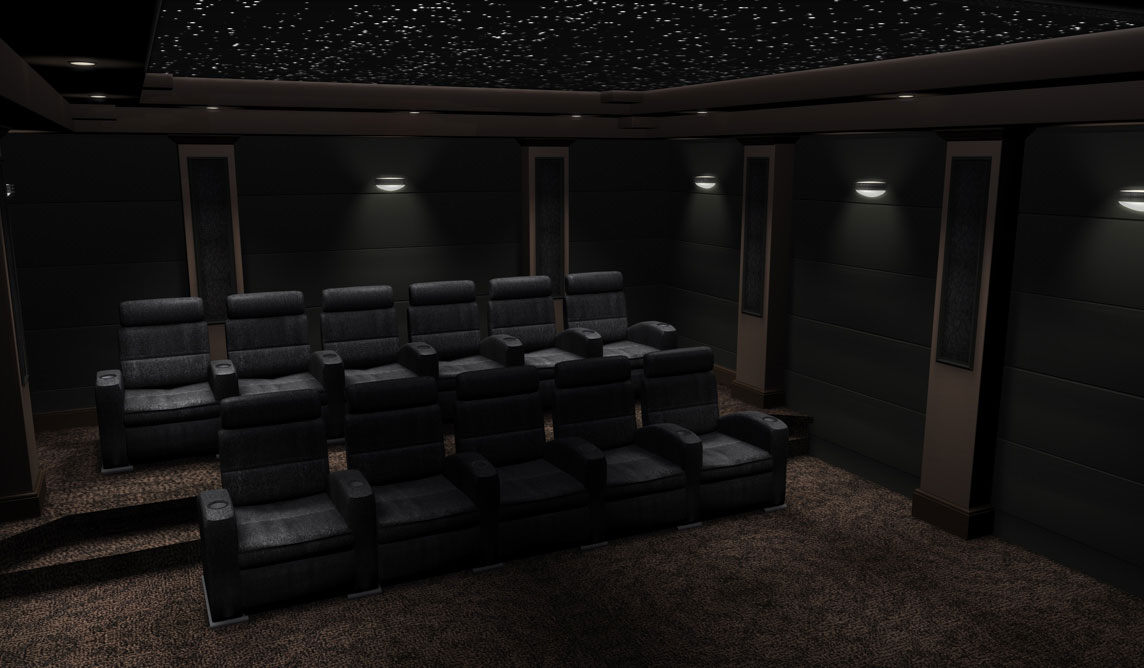
Eventually we settled on this design:
They were simple, which meant they'd be easy to build (a good thing since there was a chance I'd be doing the building) and they worked with the rest of the room. Finalizing a column decision also meant that Ryan could work on the front of the room.
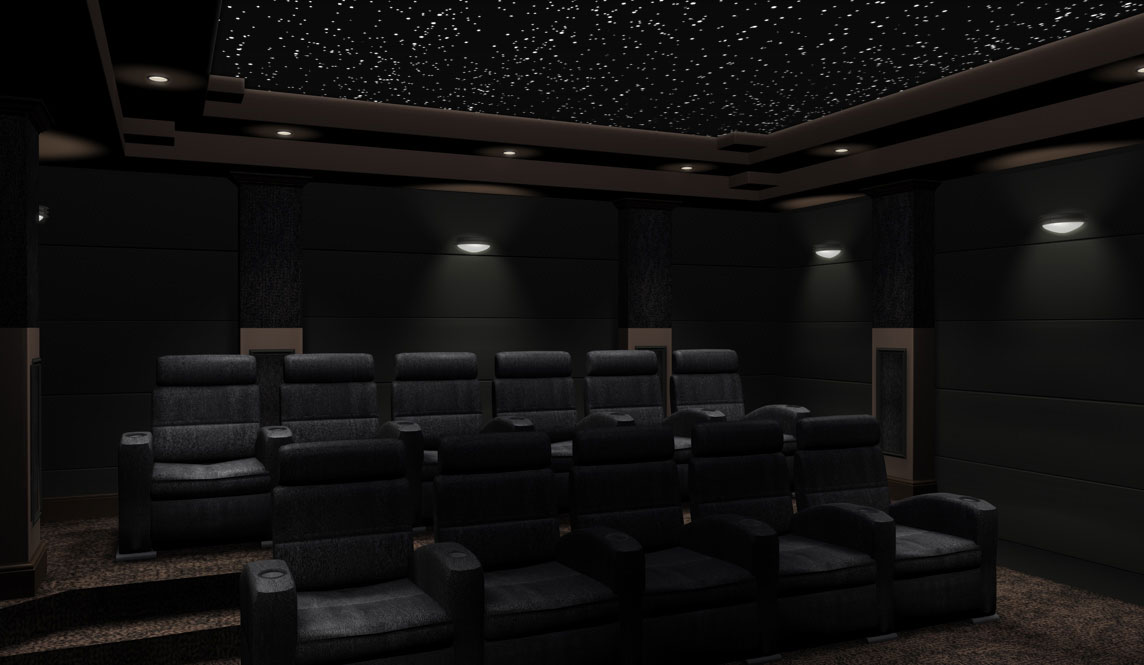
The first renders of the front of the room came back and I got all giddy like when I'm around interesting hardware or sports cars:

I noticed something was off though, the screen looked huge. That wall is supposed to be close to 20 feet wide and it is nearly all screen in the render. I asked Ryan what was up and he confirmed it, he accidentally gave me a 16 foot screen instead of the 12 foot wide screen we talked about. I got a revised render:

I liked the bigger one better, but I wasn't spending $50K on a projector so lighting up 110 square feet of screen wasn't happening. Not to mention that the front row would probably go blind after the first hour of any movie. If you're wondering, the ceiling is supposed to be a fiber optic starfield ceiling. I got the idea from the Sandman theater construction thread, he built the ceiling panels himself, so I was going to try the same (more on how that panned out later).
Note that both the false wall and the screen were curved at a 30' radius. I told Ryan that I might be doing a curved screen and that's where this came from. The false wall came from Bryan Pape; you see, I didn't want any visible speakers in the room, so a false wall gives us room to hide the front speakers, subs as well as any acoustical treatments we need in the front of the room. The false wall would be 2' away from the actual wall in the center. The radius of the false wall and screen were arbitrarily picked by Ryan, I figured once I got the projector I'd figure out what radius I wanted/needed (more on why curved later).
And thus the project began, next post I'll talk about all the fun stuff we did to keep sound in the theater from getting out. There is still a lot left to figure out, and I haven't even touched on the PC aspect of this whole thing. You better believe that I'm going to build one beefy HTPC for this theater...


49 Comments
View All Comments
geotech - Sunday, January 6, 2008 - link
I just found this article, and, wow.Simply amazing, I want one so bad.
Best idea I've heard in a long time. The chairs are great!
I'm keeping track of this one.
seanp789 - Saturday, January 5, 2008 - link
I've waited years to see something like this, a DIY HT project article. I want to do something similar in the future. Thank you for starting this.kristof007 - Saturday, January 5, 2008 - link
While I love all your blog posts a lot of them are a little too technical. However this post is awesome. Good luck and im excited for the new developments!Greenhell6 - Saturday, January 5, 2008 - link
Hey i don't work with you guys!! But i live Raleigh and would love to check it out!! Hey Anand i will hook you up with paper holders(work in building Biz) im sure this sounds creepYejensen - Saturday, January 5, 2008 - link
Thanks for spending the time detailing this. For me it is timely because I am staring at a basement room with studs and paralyzed wondering what to do next and consumed with fear whatever I do will be the wrong thing. But you've given me some good direction, and I'm going to contact the consultants you've mentioned. I really look forward to Parts II, III, etc. of the blog. Keep them coming!wetwareinterface - Saturday, January 5, 2008 - link
for the automation look into lighting controllers for stage/live venue applications. several advantages over home theater designed products.1.far cheaper
2.more features such as light rotation controlling, programmable custom scenes, colored lighting change possibilities, computer controlled via automation software on more feature rich models, several scenes stored locally on controller and can be activated by single button press
3.can be used as light show to music if you decide to do some listening in the theater
4. are easy to set up and use as they have several outputs on the rear panel and typically have several sliders and buttons on them to do seperate tasks vs. trying to program automation using onscreen prompts and a few buttons off a home theater lighting remote
5. fully customizable light levels, timing of fades or instant on off functionality etc... basically not having to rely on presets built into the remote
6. use midi as the transmission of controller signals so can be done with cable runs or using wireless midi converters
as far as the screen automation goes...
use a fixed screen and a movable cover panel or movable curtains.
less issues and far cheaper to build.
you can even use a garage door opener for a pulley system on curtains by putting a stop plate in the center where the curtains meet. open up the "clicker" and re-wire it to be "clicked" at all times and simply wire the battery leads to a universal ac/dc adapter with the ends stripped and set to the right voltage and have the lighting controller control when that power goes on too and simply mount the canabalized "clicker" near the projector.
Grooverider - Friday, January 4, 2008 - link
Fantastic work Anand, looking forward to seeing the final product. If I were better off fiscally I would love to start a similar project but for now it will remain my pipe dream. Fantastic renders!Toadster - Friday, January 4, 2008 - link
http://beautomated.com/">http://beautomated.com/he hasn't update his page in a while, but his theater her in Cali was STELLAR and built it himself for about 1/10th the cost of a professional installer... he has a good hookup for theater seating, screens, popcorn makers, etc...
Home Theater is a PASSION!
Bozo Galora - Friday, January 4, 2008 - link
Since you are squeezing out every last penny of savings during this project, it gives me an opening to ask about something I have always been curious about.During the peak of the dot com bubble, it was reported that Ray Sharkey got $55 million for his SharkeyExtreme website and that you were negotiating a $75 million payout for AT, and during that exact time the bubble burst and the deal collapsed.
True?
Still, AT must still be giving you handsome financial rewards, so I must assume the drive to DIY and save a few shekels is purely philosophical?
click on portfolio
http://www.futurehometheater.com/">http://www.futurehometheater.com/
One guy that spent a million +, including $200 grand on just audio CABLES - lol
http://www.electronichouse.com/article/an_audio_sy...">http://www.electronichouse.com/article/...dio_syst...
heres one system control that runs on IP protocol
http://www.electronichouse.com/article/ip_control_...">http://www.electronichouse.com/article/...ol_manag...
autoboy - Friday, January 4, 2008 - link
Bozo,You don't get rich by spending money like it was free. Frugal people that get rich stay frugal. They may buy more toys, but those toys are bargains. Even when you are rich there there is a satisfaction that you got more than you paid for.
Also, even if Anand DID sell for 75M, it is pretty unlikely that he owns more than 50% of the company so any payout would be less than $35M, and with $35M you can pretty much do what you want, but you are sure not going to spend $1M on a single room?! That would be retarded. I'm speaking from experience BTW.