| The first thing you'll see as you enter the BeOS GUI is this screen you can see to your right. Plain and simple, Be was looking to make a lasting yet un-intimidating impression on those who used the BeOS, mainly because, like any business oriented product, they want you coming back for more. |
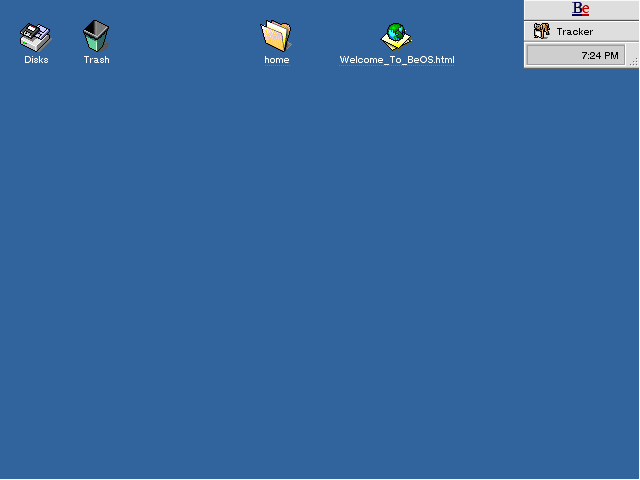
| The upper left hand corner of the screen is home to the Disks Icon. Much like the My Computer Icon under Windows, double clicking on Disks will provide a listing of all recognizable drives and partitions located on your computer. |
|
| One thing you must get used to is that the Disks Window will NOT list devices that aren't present at the time of opening it. For example, if you don't have a CD in the CD-ROM drive your CD-ROM drive will not appear in the BeOS Disks Window. Sticking a CD in the drive however will result in the drive appearing in the box, keep in mind that your CD-ROM drive (provided it has been detected properly and is supported by the OS) is still there it just remains hidden until you place a disk in the drive. The same applies to the Floppy Drive, except for the fact that you must manually mount any disks you stick in your floppy drive keeping in mind that only disks carrying the BeOS File System will be recognized as mountable. | |

Next to the Disks Icon is the oh-so-common Trash can, this is where everything you delete happens to find its way into. Selecting an item and hitting the 'ALT + T' key combination results in the Windows equivalent of hitting the delete key while selecting one or more items. Also like Windows, the BeOS doesn't physically delete the data off of your Hard Disk when you place it in the Trash can. Instead the data is kept in a special folder, able to be recovered by a quick drag and drop of the data out of the Trash and into another folder on your drive. The trash can be emptied by selecting the Empty Trash option from the Trash can's pop-up menu.
| Moving even further to the right hand of the screen, towards the BeOS Deskbar, you'll encounter two general purpose shortcuts, one to the '/home' folder on your BeOS Boot Drive (kind of like the sub-root directory) and the other to a HTML page containing an introduction to the BeOS. The BeOS is highly integrated with the Internet and the Web, most documentation is provided in the form of HTML Documents and Be provides their own Net Positive Web Browser with the OS (sound familiar?). |
Using the Deskbar, you can also force quit applications (the 3-finger salute - CTRL + ALT + DEL completely reboots the system) by holding down the right ALT, CTRL, and SHIFT buttons on your keyboard then left-clicking on the program that you want to close. The Deskbar also allows you to hide/show certain applications not to mention its ability to open up new applications while existing tasks are being performed, which is a bare definition of multitasking - the next visible strongpoint of the BeOS.


0 Comments
View All Comments