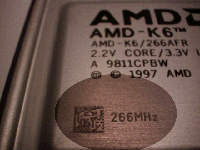
Officially not supporting any bus speeds above 66MHz it would be silly not to try the K6/266 at some of the more conventional overclocked bus speeds. Clocking the K6/266 at 75 x 4.0 (300MHz) yields a performance increase of about 3 - 5% over running your system at 66 x 4.5 due to the increased bus speed. This may not seem like much, but the processor's stability at the 75MHz bus speed makes you feel like you aren't even overclocking the processor, especially if you make use of a high quality |
 |
| Socket-7 motherboard. 75 x 4.5 (338MHz) requires a slightly heavier touch than 300MHz, a 2.3/2.4v core voltage setting should do the trick however. No real problems here. |
The 83.3MHz bus speed adds a little bit of difficulty to overclocking with the K6/266, for all settings above 266MHz (83.3 x 3.5, 83.3 x 4.0...) it is almost a requirement that you increase the core voltage to at least 2.3v. Some signs that your processor isn't receiving enough voltage are:
Doesn't complete memory count, all other components are known to work properly
Freezes at "Starting Windows 95..." prompt
Random crashes during normal Windows operation without overclocking the bus speed, and all other components are known to work properly.
Some motherboards falsely identify voltage settings as 2.1/2.2v settings, when in actuality they are more likely to be around 2.5v or 2.7v. The first MTech R581-A I tested wouldn't boot with a K6/266 installed, however a newer revision (B3) worked perfectly fine and supplied the necessary 2.2v to the CPU.
If you happen to be good with your hands you may want to consider this approach a FIC PA-2007 user proposed on the Anand Tech BBS: (warning: Anand Tech assumes no responsibility for damage caused to your system by following the below procedure, do so at your own risk):
-> I was really upset that my PA-2007 at 2.1V would probably not support the K6-266 so I spent some time today investigating further. I found out that the PA-2007 could get 2.2V please read further and find out how:
FIC PA-2007
First a few Warnings:
Remember you do everything at your own risk. If you don’t know exactly what you are doing, ask someone with experience for advise. I have done my best to avoid any mistakes in the following documentation and I cannot guarantee you will get the same results I have.
CPU Core Voltages
The core voltage can be set between 2.1V and 3.3V in 0.1V increments without soldering on your motherboard.
Motherboard Layout
This the FIC PA-2007 rev 1.2 component layout for the VR jumper block.
VR
3.5V 1 O---O 2
3.3V 3 O---O 4
3.2V 5 O---O 6
2.9V 7 O---O 8
2.8V 9 O---O 10
2.1V 11 O---O 12I measured the core voltage settings at the R267 resistor on the side closest to the CPU socket. The core voltages can only be measured with a split voltage CPU in the CPU socket and in my case I used a Pentium MMX processor. First, I made sure that when I shorted the VR jumper position 9-10 the voltage measured 2.8V and then I shorted the VR jumper position 11-12 and confirmed the 2.1V setting. I verified all voltage settings with a digital multimeter. Then I began by doing multiple jumper shorts and I tried various combinations while measuring the core voltage output at each point and documenting it all. Following are the results:
VR jumper positions
To achieve some of the voltages it is necessary to solder a resistor onto a little connector ( I found that the turbo switch connector in my PC case would fit on the VR jumpers so I cut it off and soldered the resistor to it - it worked just fine.). I admit there is some work involved in soldering the resistor onto the connector but it will be worth to get at the 2.1V to 3.3V core voltages in steps of 0.1V
Core voltage Measured voltage Jumper positions
2.1V - 2.123V: 11-12 short
2.2V - 2.196V: 11-12 shorted with a 47K ohm resistor
2.2V - 2.251V: 11-12 shorted with a 100K ohm resistor
2.3V - 2.340V: 11-12 short & 9-10 short
2.4V - 2.414V: 11-12 short & 7-8 short
2.5V - 2.501V: 11-12 shorted with a 100K ohm resistor & 9-10 short
2.6V - 2.625V: 11-12 short & 5-6 short
2.7V - 2.735V: 11-12 short & 3-4 short
2.8V - 2.791V: 9-10 short
2.9V - 2.899V: 7-8 short
3.0V - 3.072V: 11-12 shorted with 100K ohm resistor & 9-10 short & 5-6 short
3.1V - 3.134V: 11-12 short & 9-10 short & 5-6 short
3.2V - 3.205V: 5-6 short
3.3V - 3.301V: 3-4 shortAs you can see the nominated core voltage setting is not always the exact voltage i.e. 2.1V is not exactly 2.100V but is actually measured to be 2.123V. <-
Antonio Cataldo, the person that proposed the above changes made an interesting point, if our motherboards don't support the settings we need...why not make them? Using the above fix, the PA-2007 Mr. Cataldo purchased a few months back, gets a few more months of living. This is a topic that will be addressed in greater depth later on, looks like your webmaster will be making a trip down to Radio Shack ;)


0 Comments
View All Comments