Optio X: A Look at Pentax's Ultra Thin 5MP Digicam
by Stephen Caston on February 6, 2005 5:01 PM EST- Posted in
- Digital Camera
Playback Features
To switch to Playback mode from one of the recording modes, simply press the Play button. To power on the camera in Play mode without extending the lens, you can hold down the Play button and hold any of the record mode buttons for about a second.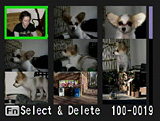 Image thumbnail view |
 Image regular view |
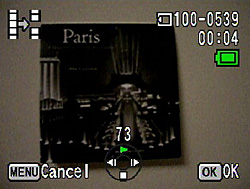
 Image magnified 8x |
By default, the camera will display images one at a time as a full-screen display. To switch to a thumbnail display with 9 images, simply press the zoom controller toward wide angle. Conversely, an image can be magnified up to 8x by pressing the zoom controller toward the telephoto end. While an image is magnified, you can scroll to different portions of the image by using the multi-controller. To jump back to a normal display of the image at regular size, press the OK button.
 Default |
 Detailed |
 No Info. |
By pressing the Display/OK button, the camera will cycle through three available displays. The default display includes basic information such as file number, battery status, date & time, and an icon at the bottom center of the screen that indicates the functionality of the multi-controller. The second display option has several additional pieces of information such as resolution, quality, white balance, metering, ISO, shutter speed, aperture, and a histogram.
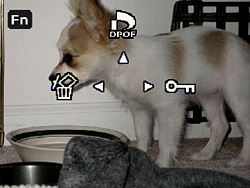
By pressing the Fn button during Playback, the above screen will be displayed. The options are Delete, DPOF, and Protect. To delete images, select the Delete option. The camera will present you with the following dialog: Delete, Cancel. In addition to simply deleting the current image, you can press the Fn button at this point to delete all media on the flash card/internal memory.
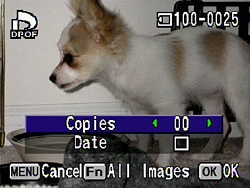
To tag images for printing with a DPOF (Digital Print Order Format) compatible printer, select DPOF from the main Fn menu. From here, you can specify the number of copies to print as well as whether or not to stamp the date on the picture. From this screen, you could also press Fn again to enter a DPOF settings screen for all images. The settings are the same as they are for single images. By selecting "Protect" from the main Fn menu, you can tag individual or all images so that they cannot be erased accidentally. Protected images, however, will still be erased if the flash card or internal memory is formatted.
By pressing in on the multi-controller, a menu will pop up with the options to record a voice memo, lock the keys, or start a slideshow. A voice memo can be recorded for as long as the remaining memory allows. To play back a voice memo, simply press up on the multi-controller. The volume can be adjusted by sliding the zoom controller up or down. While viewing an image, it can be rotated by pressing down on the multi-controller.
To view a movie clip, press up on the multi-controller to begin playing it. You can pause the clip at any time by pressing up on the multi-controller. The video clip can then be advanced forwards or backwards one frame at a time by pressing left or right. While the clip is playing, you can rewind the clip by holding left on the multi-controller.
By pressing the Menu button, there are several additional playback options available. In the tables below, we have outlined these options:
| Playback Menu 1/2 | |
| Slideshow | Interval (3, 5, 10, 20, 30 sec.) Effect (Wipe, Checker, Fade, Off) |
| Resize | 2560x1920, 2304x1728, 2048x1536, 1600x1200, 1024x768, 640x480, 320x240 |
| Trimming | Select |
| Copy image and sound | Internal to SD card, SD card to Internal, Select |
| Digital Filter | B&W, Sepia, Red, Pink, Purple, Blue, Green, Yellow, Brightness |
| Movie Edit | Save as Still Image, Divide Movies, Stitch Movies |
The Slideshow feature offers 5 different intervals and 3 different transition effects. To begin a slide show, you must press in on the multi-controller while viewing an item. Then, select Slideshow from the menu. With the Resize option, you can only select an image size that is smaller than the original image. After selecting the desired size, a dialog will ask if you want to overwrite the original file or save it as a new file.
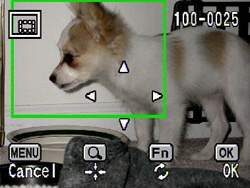
Trimming screen
When Trimming is selected, an editing screen will appear with a trimming area (displayed as a box). The size of the trimming area can be adjusted by sliding the zoom controller up or down. Additionally, you can move the trimming area using the multi-controller until you have the image framed as you want it inside the box. By pressing the Fn button, the trimming area can be rotated. After framing your image to the way you want it, press the OK button. Then, you can select an image quality setting for your new cropped image. The new image will be saved as a new file. The Digital Filter option allows you to apply a color filter or adjust the brightness of an image. You can choose to overwrite the original or to save the image as a new file.
Divide movie screen
The Optio X offers the option to divide movie clips in two or to combine separate clips into one. In addition, you can save a specific frame from a movie clip as a still image. The frame will be saved as a new file with the same resolution as the video clip (320x240).
| Playback Menu 2/2 | |
| Quick Zoom | On, Off |
| Quick Delete | On, Off |
| Alarm | Alarm 1, 2, 3; Set Time, Select Image; Snooze (On, Off) |
With the Quick Zoom option enabled, pressing up once on the zoom controller will magnify an image 8x. With this option disabled by default, the magnification process involves several increments of magnification before reaching 8x. When Quick Delete is enabled, the "Delete" option will be highlighted by default when the delete menu appears. When this option is disabled, "Cancel" will be highlighted by default. The Alarm option lets you use the camera as an alarm that can display specific pictures at the specified times.


8 Comments
View All Comments
vshah - Thursday, February 10, 2005 - link
my dad has the s410, i have the optio x. i have to admit, the canon is faster and has better image quality. usually what i end up doing is setting the res to 4mp, which is still plenty for printing. this speeds up the camera a bit...why use 4mp on a 5mp camera you ask? i just love the design, and this thing is so easy to carry around with you. i end up taking a lot more photos than i would with another camera. my primary purpose for taking photos (with this camera) is to record memories, and it excels at that.
semo - Monday, February 7, 2005 - link
thanks Souka, that camera looks sweethere in the uk it is about £200 btw.
Souka - Monday, February 7, 2005 - link
#4 Look at the Canon S410. Great image quality, small size, li-ion recharageable batt, CF cards, durable, and good software to boot.I see pricing at about $240 on-line from a variety of vendors....
Quiksel - Monday, February 7, 2005 - link
nice pix of NCSU.... :-Di miss my state days... :'(
~niko ^_^
semo - Monday, February 7, 2005 - link
from last paragraph on page:"However, considering all the downfalls and a price tag of $300+, it might be a better idea to consider other cameras."
what other cameras? i'm absolutely clueless when it comes to cameras. all i know is that i don't want a thin (compact) camera because that means high price and lower quality. i don't care too much about video and a rechargeable battery is a big plus for me. any ideas?
kcma - Monday, February 7, 2005 - link
maybe there'll be a cheaper 3/4 MP version that's almost as good in image quality =PSouka - Sunday, February 6, 2005 - link
Why buy a high MP camera if image quality is poor?TinyTeeth - Sunday, February 6, 2005 - link
310 bucks is cheap for a 5 MP camera. Promising, though it seems to lack some image quality.