The GIGABYTE Z170X-Gaming G1 Review: Quad-SLI on Skylake, and now with Thunderbolt 3
by Ian Cutress on December 1, 2015 9:30 AM EST- Posted in
- Motherboards
- Gaming
- Intel
- Gigabyte
- PLX
- PLX8747
- Z170
- Thunderbolt 3
GIGABYTE Z170X-Gaming G1 BIOS
The graphical BIOS (or UEFI/EFI, we use BIOS for clarity) has been a permanent competitive fixture in the modern motherboard market – the ability to do more with less and provide a seamless experience to both enthusiasts and new users is a point that manufacturers can provide both a selling point and that unique aspect that makes it stand above the crowd. The big four motherboard manufacturers have now all adopted the same philosophy of an easier mode for a front screen that sits above an Advanced mode which is more enthusiast focused.


GIGABYTE’s easy mode, called the startup guide, will ask on first entry for a language selection. At present only GIGABYTE does this, which is an interesting fact in itself, but can be a good thing to see.

However, it will appear every time an enthusiast has to reset the BIOS, so if there was a lock that remained persistent across BIOS resets, it might be pertinent to have one.
The Startup Guide beyond language selection is different to the other easy modes we encounter, by virtue of not providing any real system information but just a simple set of options that most users can get to grips with. Personally I prefer at least a little bit of information here, such as the motherboard name, CPU and DRAM amount as a bare minimum just to help system admins in case of an issue.
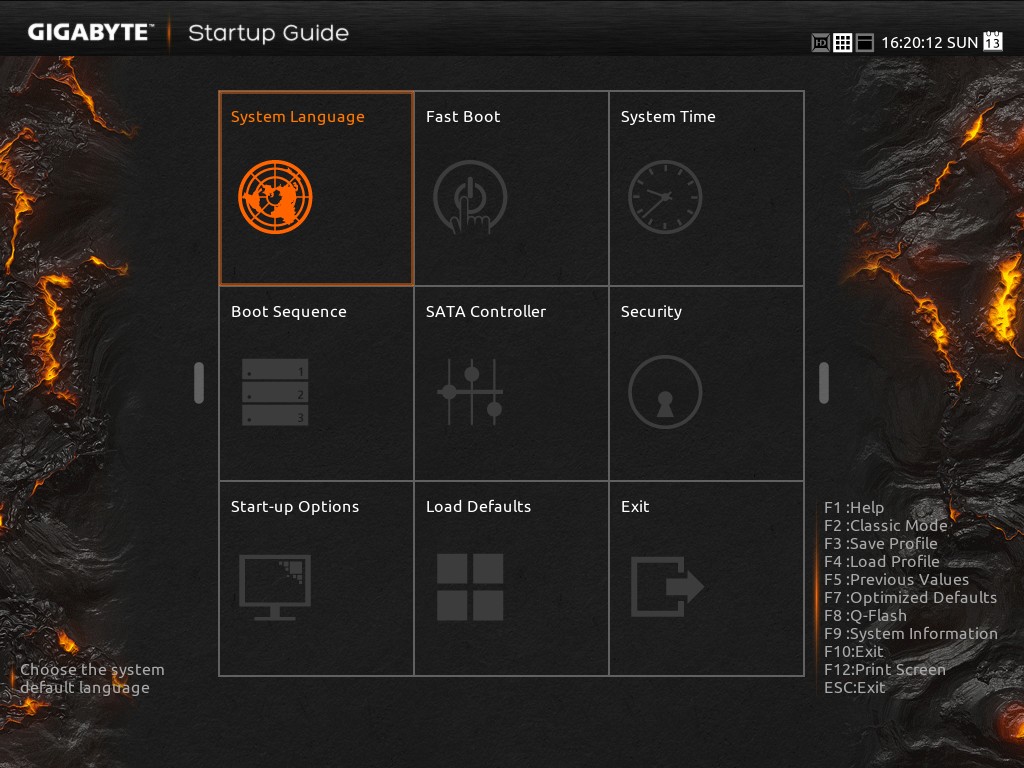
The Fast Boot sub-menu offers a simple enable/disable (which could actually be adjusted to move to the front screen with all the options as a tick/cross which changes when the option is selected), with the system time, boot sequence, load defaults and exit buttons being self-explanatory. The SATA Controller sub-menu provides options for AHCI or RAID on PCH provided ports, while Security offers a quick password implementation and Start-up Options allows the user to select which mode to enter first with the BIOS (Startup Guide, Classic Mode, Smart Tweak Regular/HD).
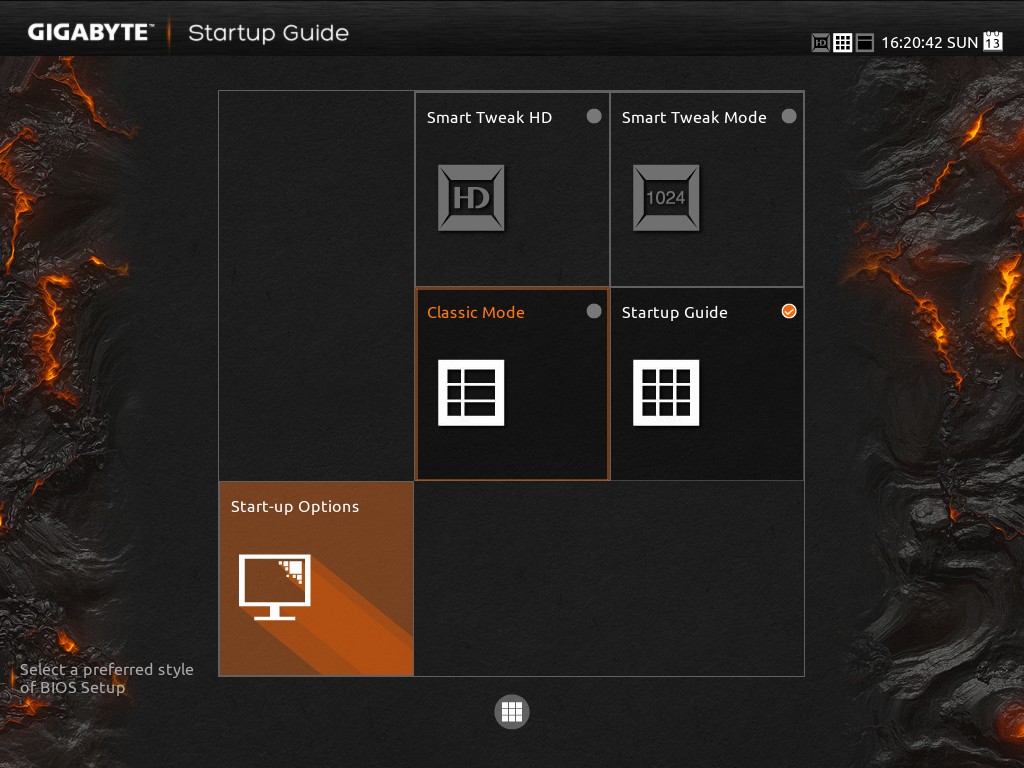
Pressing F2 brings the user out of the Startup Guide and into the Classic Mode menus. With this mode, it should be pointed out that sometimes there is a disjoint when you enter between what you see and what the system thinks is selected – about 50% of the time it will show the first tab, MIT, rather than the one which is actually selected, System Information. Pressing left or right to select a tab usually fixes this.
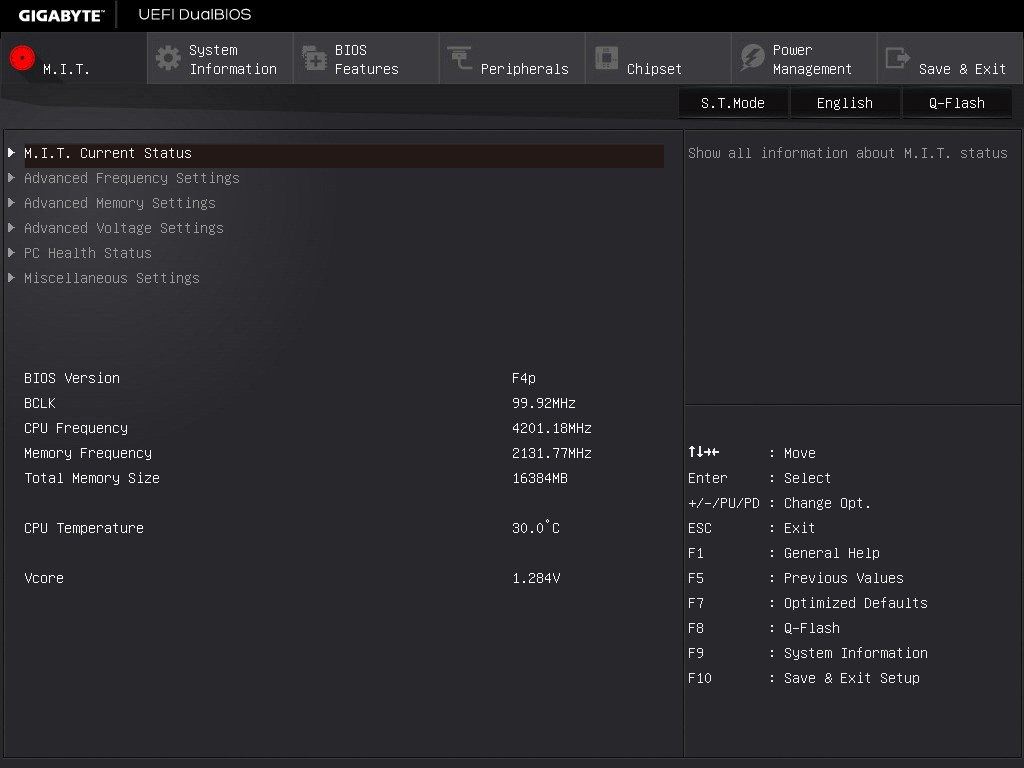
The first tab from the left is MIT, the intelligent tweaking menu that provides some information about the system but acts as the main hub for overclocking options. The three main menus here are Frequency, Memory and Voltage, which all do what they say and offer options relating to those features.

The Frequency sub-menu offers base-clock and multiplier options for the CPU, including FCLK and advanced core settings. For an extra element, the DRAM multiplier can be selected here also, such that as the base frequency is adjusted the user can see the effect on the memory frequency. Automatic overclock pre-sets are also here under the Performance Upgrade drop down and the CPU Upgrade drop down. This latter option offers 4.2 GHz to 4.4 GHz for the i5-6600K and 4.4 GHz to 4.6 GHz for the i7-6700K. The downsides of using these options is that GIGABYTE doesn’t show the changes made to enable these (such as voltage or LLC), in which GIGABYTE is unique in that regard compared to the others of the big four manufacturers.
In our previous reviews, it was noted that a typical overclocker will want to adjust frequency and voltage often in the same sitting. With the GIGABYTE BIOS, that requires moving into this frequency menu for the first part, and navigating to different menus for the voltage. It would be ideal if the GIGABYTE BIOS duplicated some of those options, at least the CPU vCore and CPU Load-Line Calibration, to the frequency menu just as the memory multiplier has been duplicated.
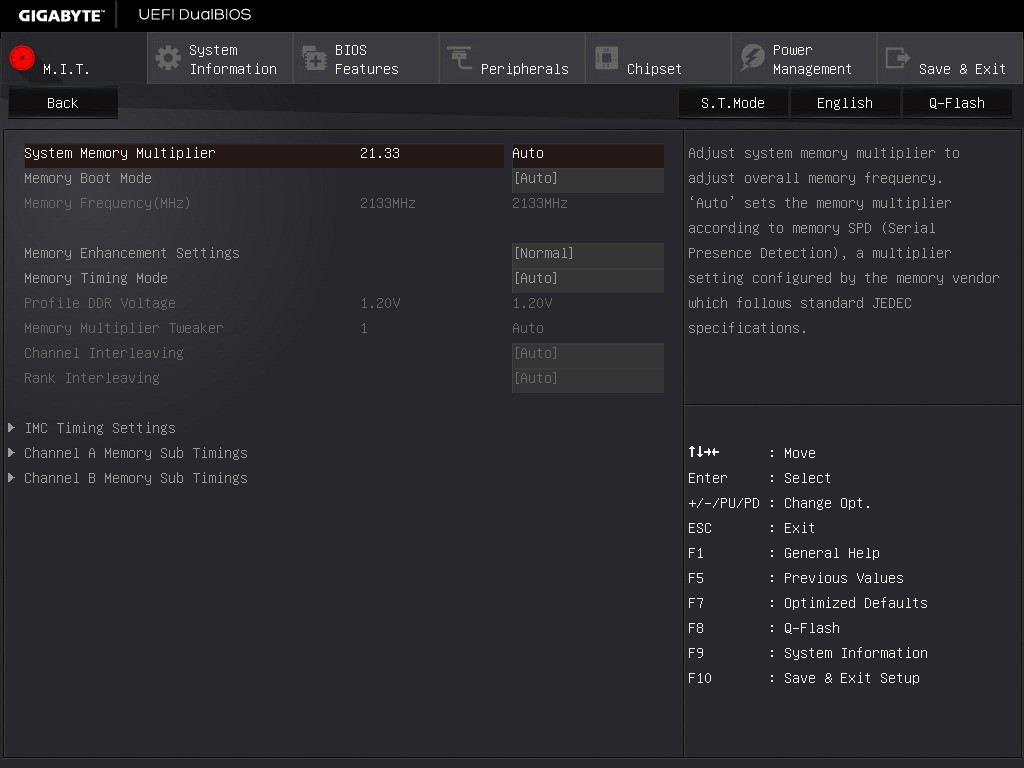
The Memory sub-menu gives options to enable XMP, adjust memory sub-timings but also implement a form of memory enhancement. To the best of my abilities, this seems to be an option that adjusts a number of tertiary sub-timings that might affect certain workflows. As with any overclocking, this is not guaranteed and your mileage may vary.
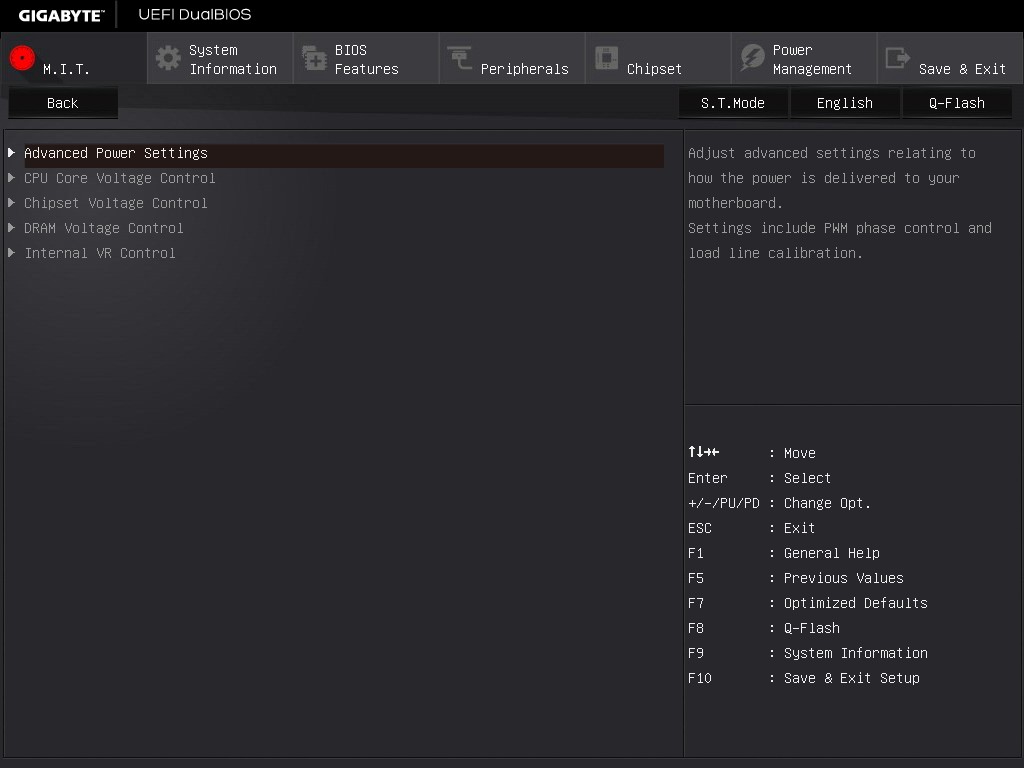
The Voltage sub-menu actually opens another set of sub-menu options, including power, core voltage and DRAM voltage. We’ve spoken to GIGABYTE about their method of doing it this way in the past, and the answer is to make options easier to find by separating them out – personally some of these options could be joined up and still fit on screen very easily, such as a ‘simple’ and ‘advanced’ voltage sub-menu that provides some options duplicated but the simple set is just the few that most overclockers will want to use.
Nevertheless we find the processor load line calibration in the power settings menu, the processor voltage (CPU, GPU, Ring and PLL) in the Core Voltage Control, memory voltage in the DRAM menu and anyone extreme enough to enter the voltage regulation control can go nuts, with plenty of options that few engineers understand.
The MIT tab also offers a PC Health menu which contains all the sensor readings as well as the fan controls.
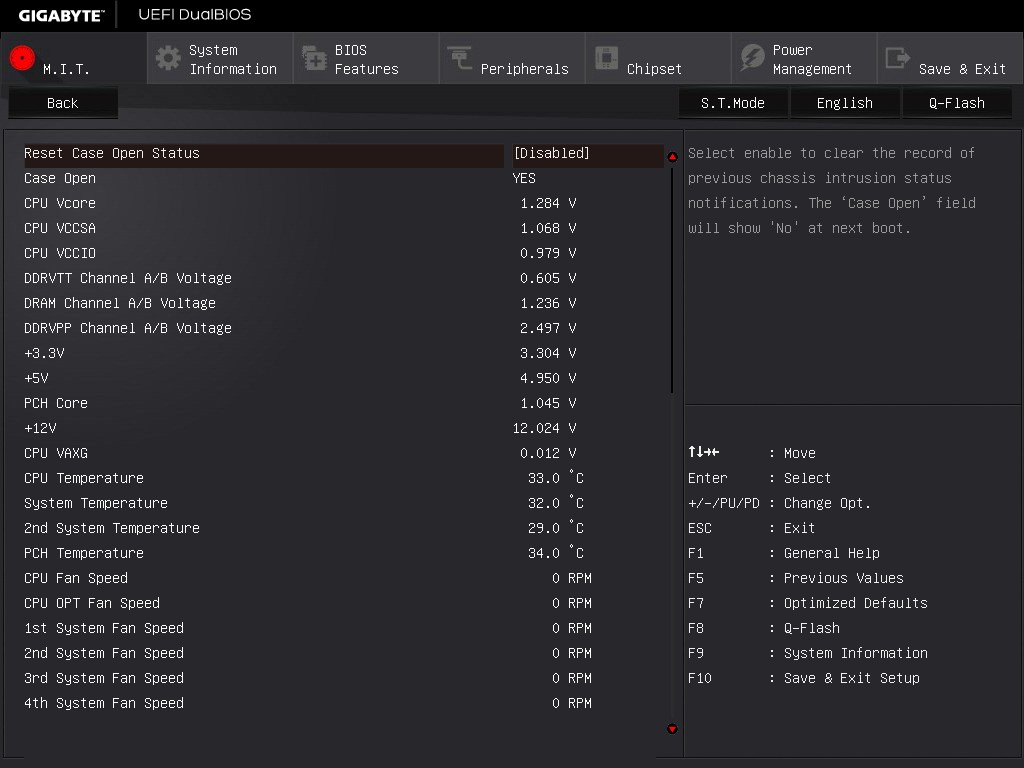

GIGABYTE is still lacking an interactive fan control option in the BIOS, while the other manufacturers have such a system with several points users can modify with a mouse. Instead from GIGABYTE we have a series of options relating to PWM/°C, which is a confusing metric if you do not understand fans. To explain it, basically the system can apply a value of 0 PWM to 255 PWM to the fan which relates to the fan voltage. This scale is not always linear, and what makes it frustrating is that the fan’s response is also non-linear to the voltage applied. Technically GIGABYTE could detect the fan RPM as a function of PWM and do the mathematics to provide gradients with actual RPM values, but instead we get basic PWM values. Just to put it into context, some fans are at 0 RPM until 40% PWM (40% of 255 is 102), and then shoot to 60% of their peak RPM speed. So at a gradient of 1 PWM value per degree, you would only see the fan turn on at 102 degrees, which by then it’s too late as the machine might have shut down due to overheating. Fan speed control is a very easy concept to fix, but for whatever reason is left like this.

After MIT, the next important tab is the BIOS Features one which allows boot sequence adjustments as well as fast boot, Windows 10 and secure boot options.
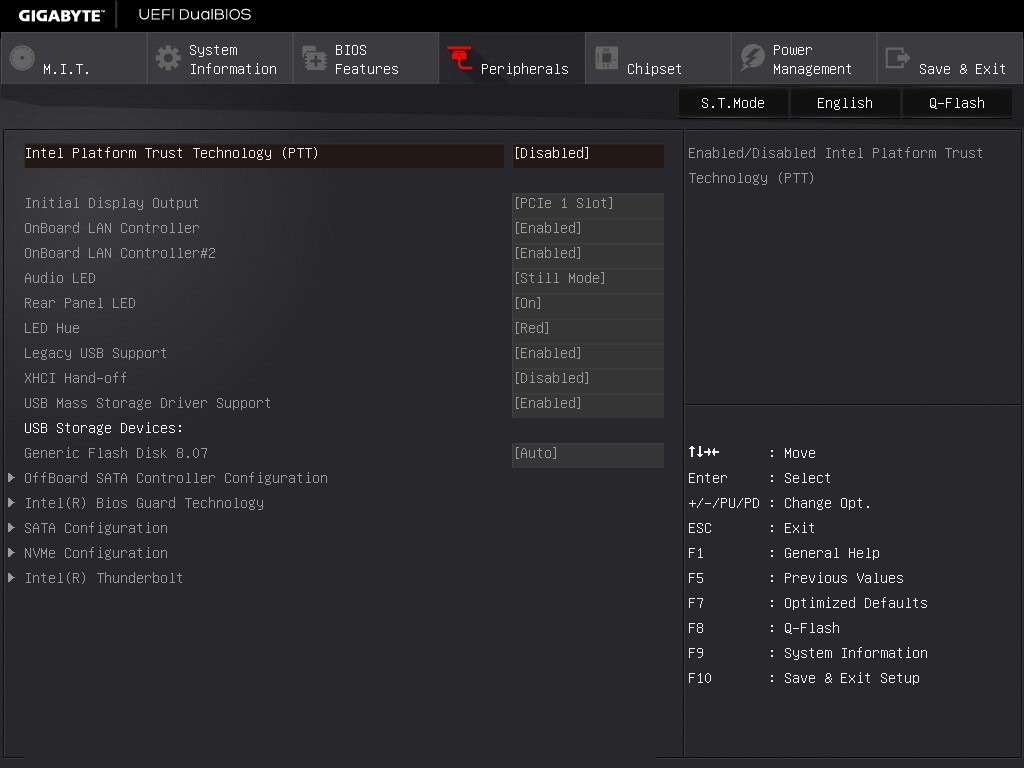
The Peripherals tab is where the extra controllers can be adjusted as well as the LED lighting, SATA Controller configuration (AHCI/RAID), NVMe support and Thunderbolt support.
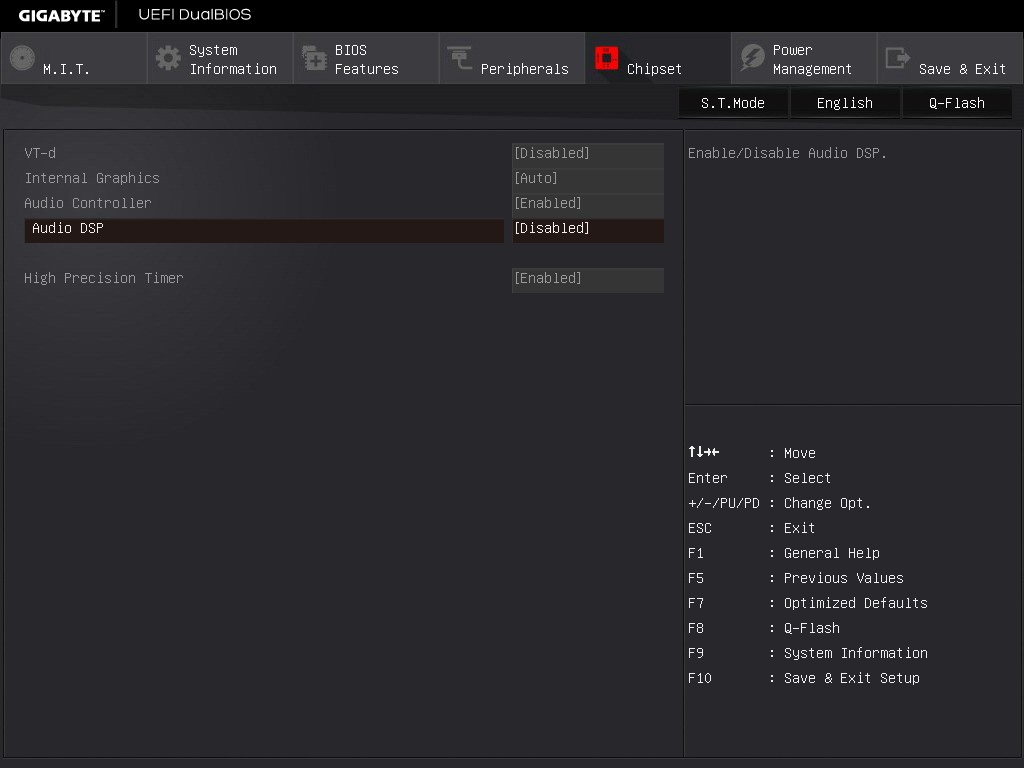
The Chipset tab is for integrated graphics and audio options, as well as virtualization through VT-d (which is disabled by default).
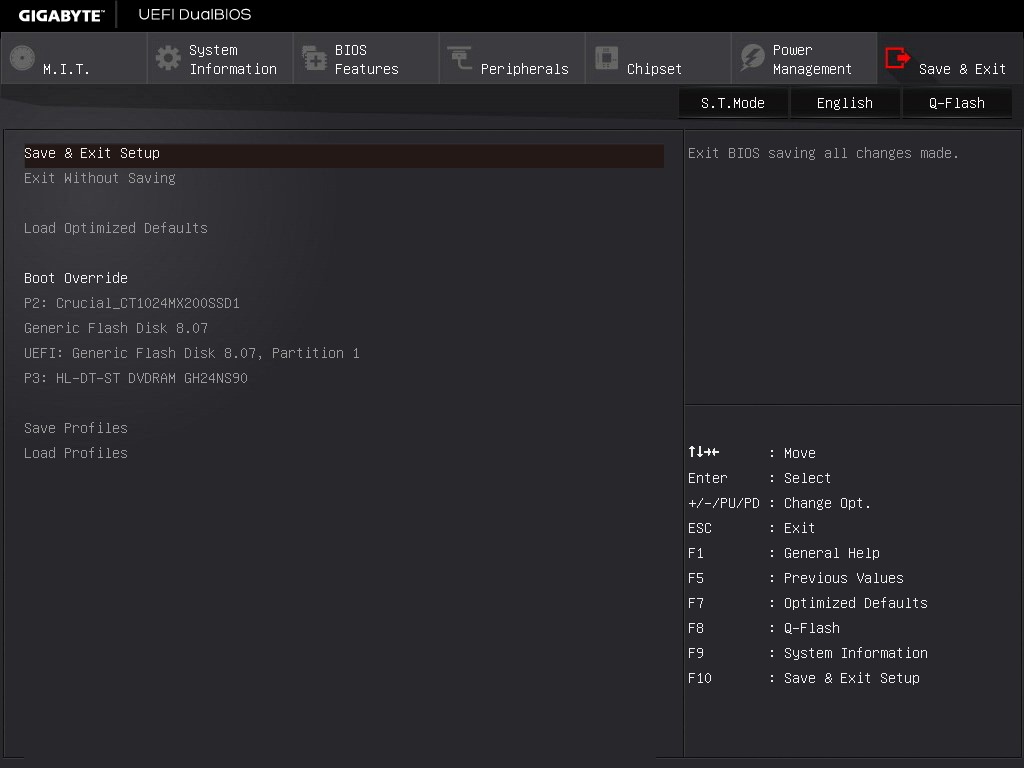
For boot override options, in order to boot from a single device for just one boot, these can be found in the Save and Exit menu.
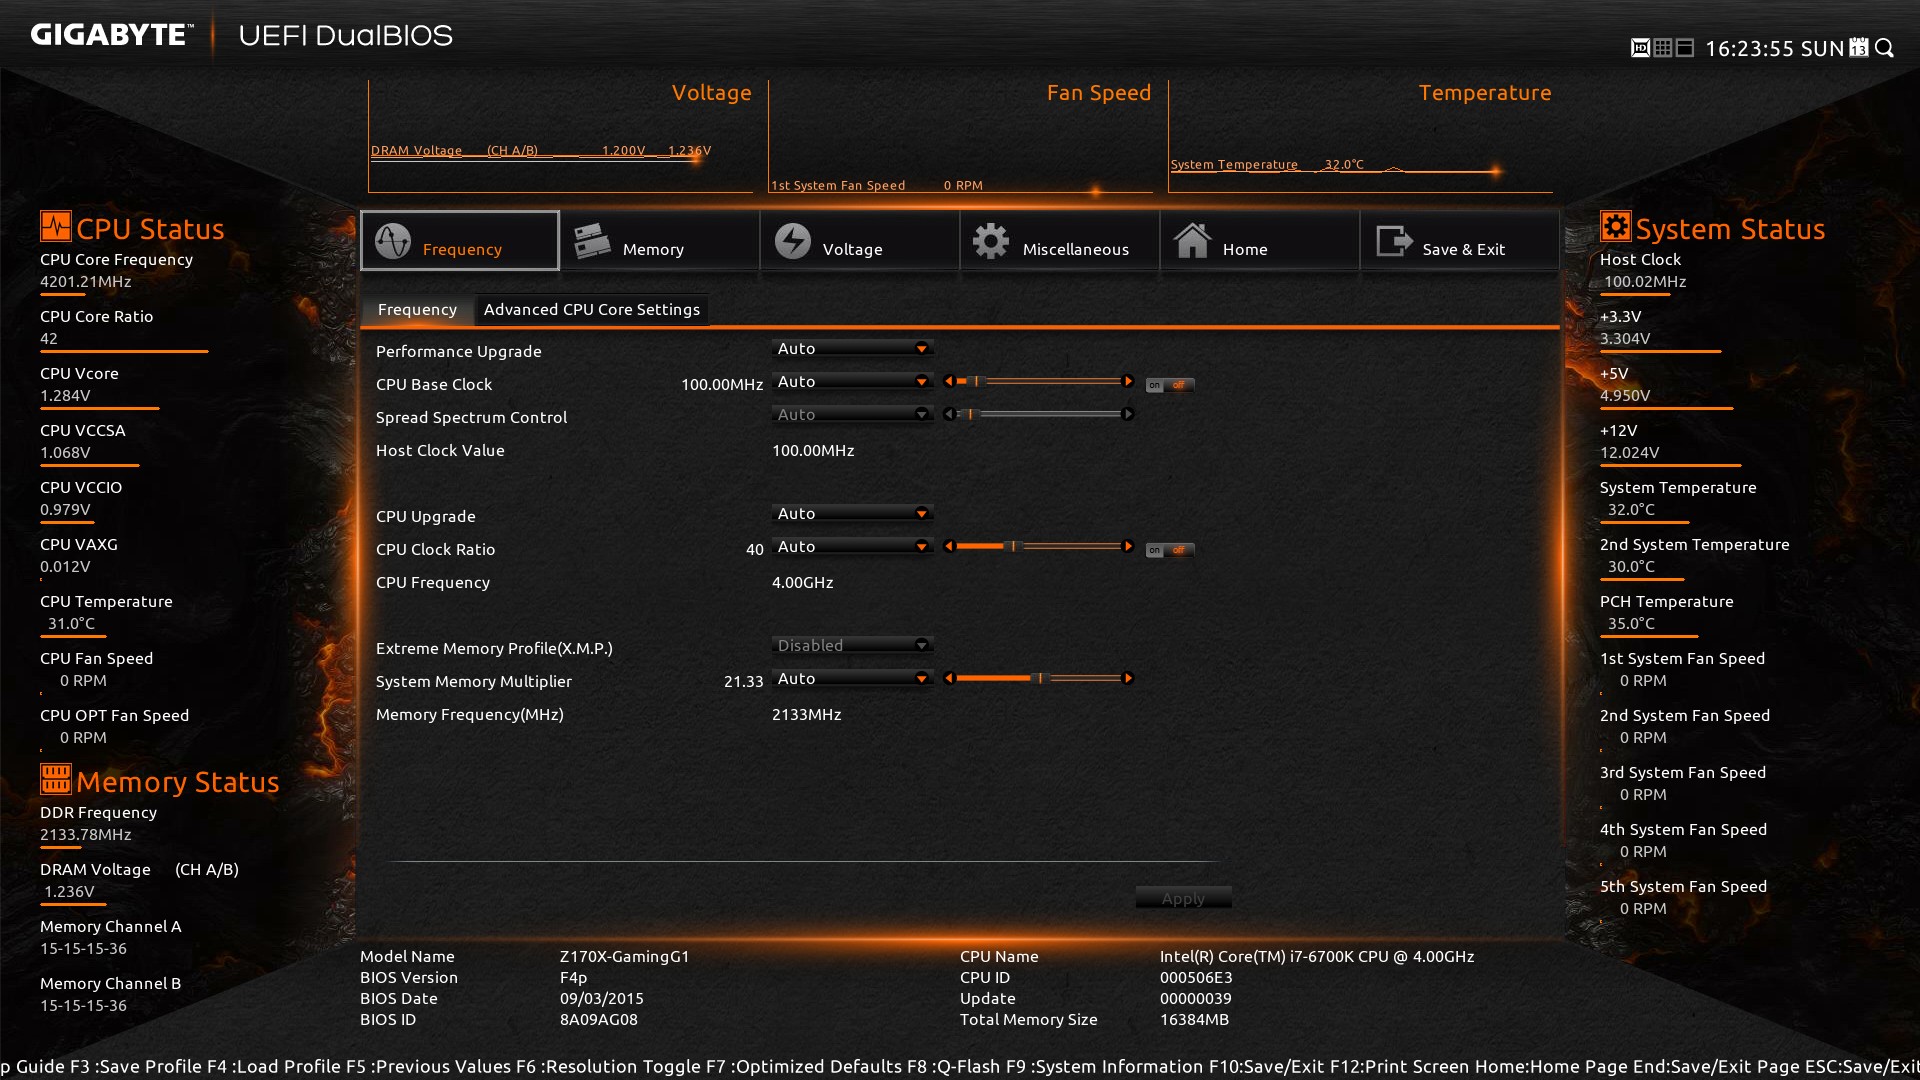
A lot of these options are mirrored in the Smart Tweak HD Mode, found by pressing F2 after Classic Mode. This is more akin to some of the other BIOSes we see, mixing an easy mode list of CPU/Memory/System status values with an advanced mode set of options. A full series of images for this can be found in the BIOS gallery.
It is no secret that GIGABYTE’s BIOSes, since the inception of the graphical BIOS, have been difficult to assimilate. Combinations of layout, interaction, color and choice of options has plagued most of the samples we have received over the years, and prove to be a barrier to a solid award beyond a mere recommendation. I have heard the line that ‘perhaps I’m not used to it’, or that there is some unconscious bias towards this way of thinking, but there’s a simpler explanation: it remains difficult for new users to understand and can irritate enthusiasts who have to cycle through menus. While it sounds harsh, and I know there are users (namely extreme overclockers for the most part) who enjoy the interface, but I would argue that the market is beyond a select few and either compromises or paradigm shifts have to happen. One potential avenue is that it is time to bring a user experience expert and designer on board, rather than limit layout ideas to a sphere of engineers. GIGABYTE is not unique in this regard, but it is a way of thinking that most are slowly starting to realize actually makes a lot of sense to improve the user experience rather than the pure engineer experience.


67 Comments
View All Comments
Ian Cutress - Tuesday, December 22, 2015 - link
I have four 290X cards? wow, where?I have the 4GB model, not four of them.
sor - Wednesday, December 2, 2015 - link
Agreed. The main reason to consider this thing is the x4 SLI. Too bad we have no idea what that looks like. Everything coming out of the review can be had for less on many other boards.jasonelmore - Tuesday, December 1, 2015 - link
Amazing looking board with the most I/O i have ever seen on a mainstream chipset.This would look sick with white tubing, in a corsair white case.
WasHopingForAnHonestReview - Wednesday, December 2, 2015 - link
Who fucking cares how it looks when the performance is subpar for the price?! What are you, an artist?!jasonelmore - Wednesday, December 2, 2015 - link
it's running a rev1 bios, and i'm not sure which performance your talking about.. All the benchmarks have it within 1 FPS, and that just boils down to variance. that's not even a 2% difference. DPC Latency is confirmed to be a intel wireless chipset and DRIVER problem, thus any board WITHOUT intel wireless doesnt have the DPC issues.linster - Tuesday, December 1, 2015 - link
Those "Quick Links to Other Pages" on page one don't work.TheEvilEngineer - Tuesday, December 1, 2015 - link
Ok, the board may be able to run a dual, triple, or quad SLI. However there isn't a skylake processor out with enough lanes to run that setup. The i7-6700k only has 16 lanes. At best, you can run a single GPU at full 16 lanes. Or dual with 8x and 8x. My personal setup on the board is a GTX 980 Ti (8x) and an intel 750 nvme drive (4x), with room for either a m2 or another intel 750. I'm not sure why they started including dual nics on consumer boards, they provide 0 benefit unless you some how have a business class 1+Gb/s internet connection. Best you can do with dual nics is configure them for smb 3.0 multi-channel.... though you'll need either another windows 10, 8.1 or server 2012 on your lan correctly configured as well to use it. I'd rather they just put in a 10 Gb/s nic instead.lilkwarrior - Thursday, December 3, 2015 - link
It's because of the PLX chip that comes with the card. It essentially extends the lanes available (& speeds) at the expense of cost & higher power consumptionJackie60 - Wednesday, December 2, 2015 - link
This is why Anandtech is losing it's way. Where is the 4 SLI bit of the review. Who would buy a $500 mobo for a CPU costing $300. Advertorial pure and simple.jasonelmore - Wednesday, December 2, 2015 - link
There are several other $500 Z170 Motherboards.. Asus's Maximus VIII Extreme for example.This has a expensive PLX chip, so it can do 16x0x16x0x or 8x8x8x8x. just fine. The PLX adds a tiny bit of latency, but nothing game breaking or noticeable.