Build-A-Rig Round 1, Zotac vs. Corsair: The $1500 PC Build Logs
by Ryan Smith & Ganesh T S on July 30, 2015 3:00 PM EST- Posted in
- Build-A-Rig
- Corsair
- ZOTAC
Building Corsair's "The Accelerator"
Build Log by Ryan Smith
Whereas Ganesh worked with Zotac’s Hey Good Lookin, I took Corsair’s build, The Accelerator. Designed by former AT staffer Dustin Sklavos, Corsair’s design is distinctly focused on performance over all else; the CPU, GPU, and RAM alone comprise nearly $1000 of the $1500 budget. What this means for performance we’ll see in our next article, the performance showcase, but as far as the build goes it means that The Accelerator is rather straightforward and simple.


Meanwhile, since Corsair makes almost every PC component short of CPUs and GPUs, The Accelerator is loaded with Corsair technology for this Build-A-Rig challenge. A Corsair case houses both a Corsair PSU and a Corsair SSD. Meanwhile providing cooling for the CPU is another piece of Corsair kit, a Corsair closed loop liquid cooler. Suffice it to say, this is truly a Corsair build.
| Corsair's 'The Accelerator' | |||
| Component | Selection | Price as Chosen |
90-Day Average |
| Processor (CPU) | Intel Core i5-4690K | $239.99 | $237.62 |
| Motherboard | GIGABYTE GA-Z97-HD3 | $89.99 | $97.99 |
| Graphics Cards (GPU) | Zotac GTX 980 Ti | $649.99 | $649.99 |
| Memory (DRAM) | Corsair Vengeance Pro 2x8GB DDR3-1866 C9 |
$104.99 | $118.36 |
| Storage (SSD/HDD) | Corsair Force LS 240 GB SSD | $94.99 | $99.51 |
| Power Supply (PSU) | Corsair CS650M Gold | $94.99 | $94.99 |
| Chassis | Corsair Carbide 200R | $59.99 | $59.99 |
| CPU Cooling | Corsair Hydro H60 | $64.99 | $64.33 |
| Operating System | Windows 8.1 64-bit OEM | $99.99 | $99.99 |
| Extras | None | ||
| Total | $1,499.91 | $1,522.77 | |

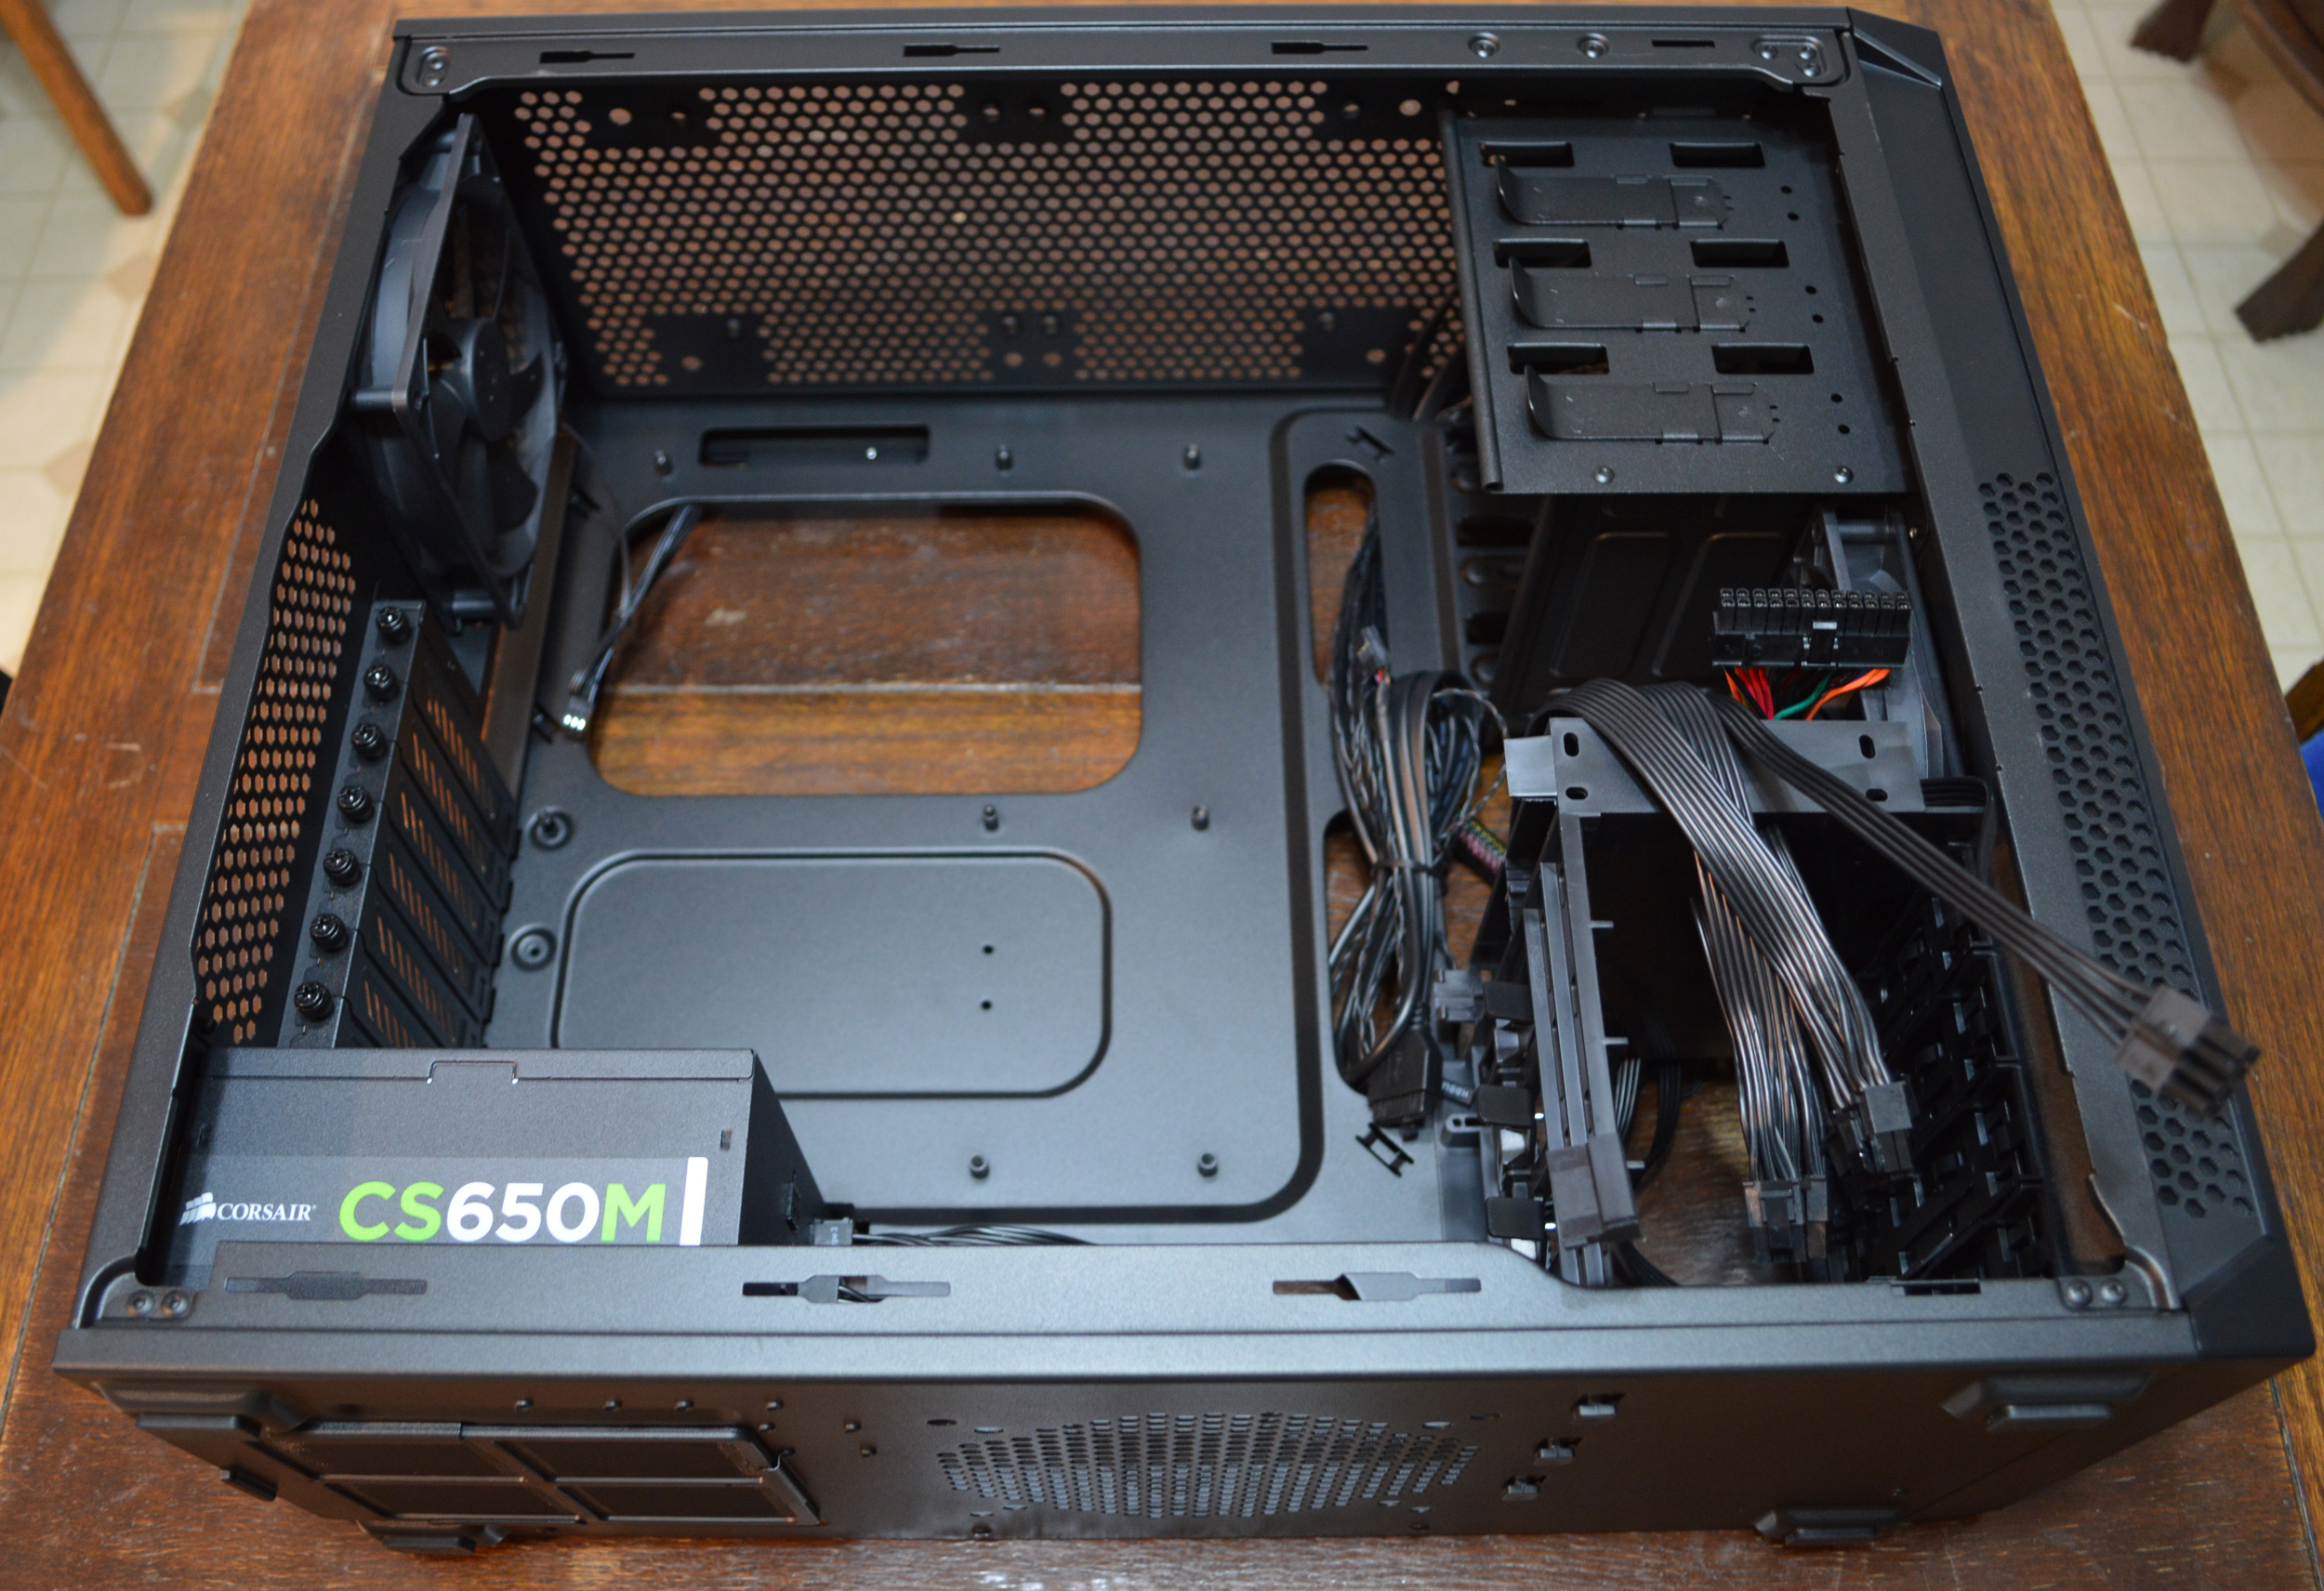
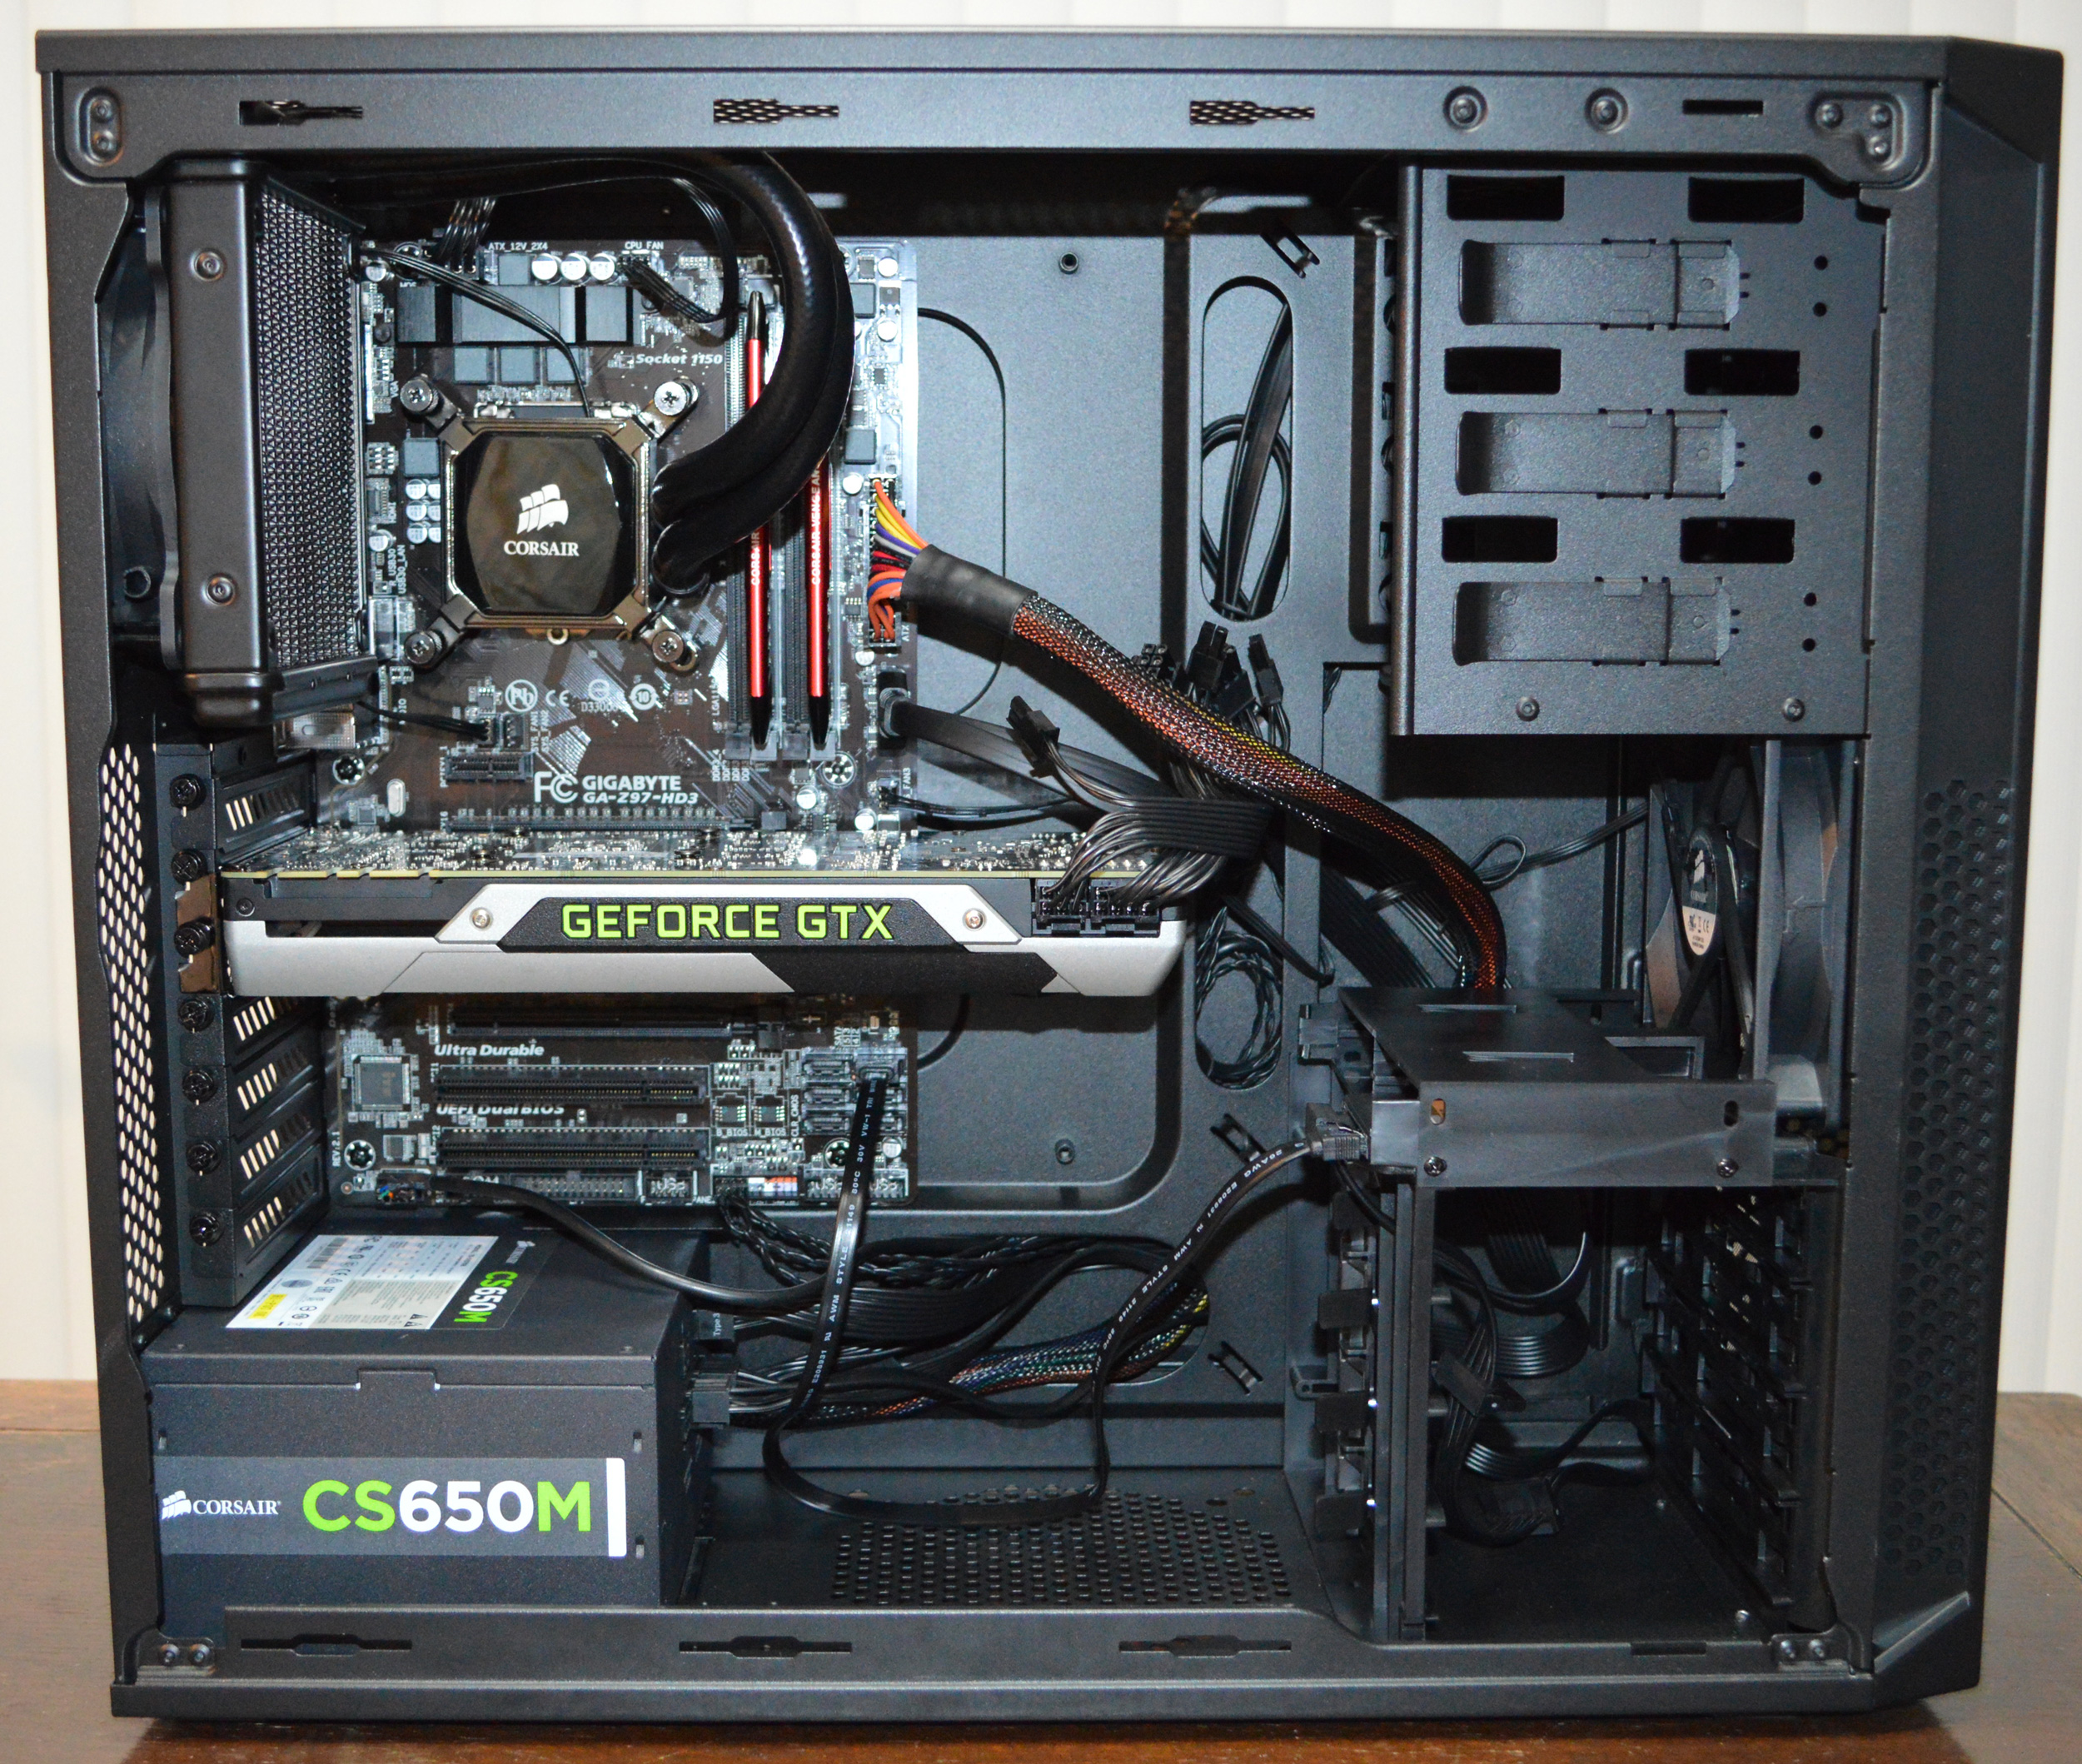
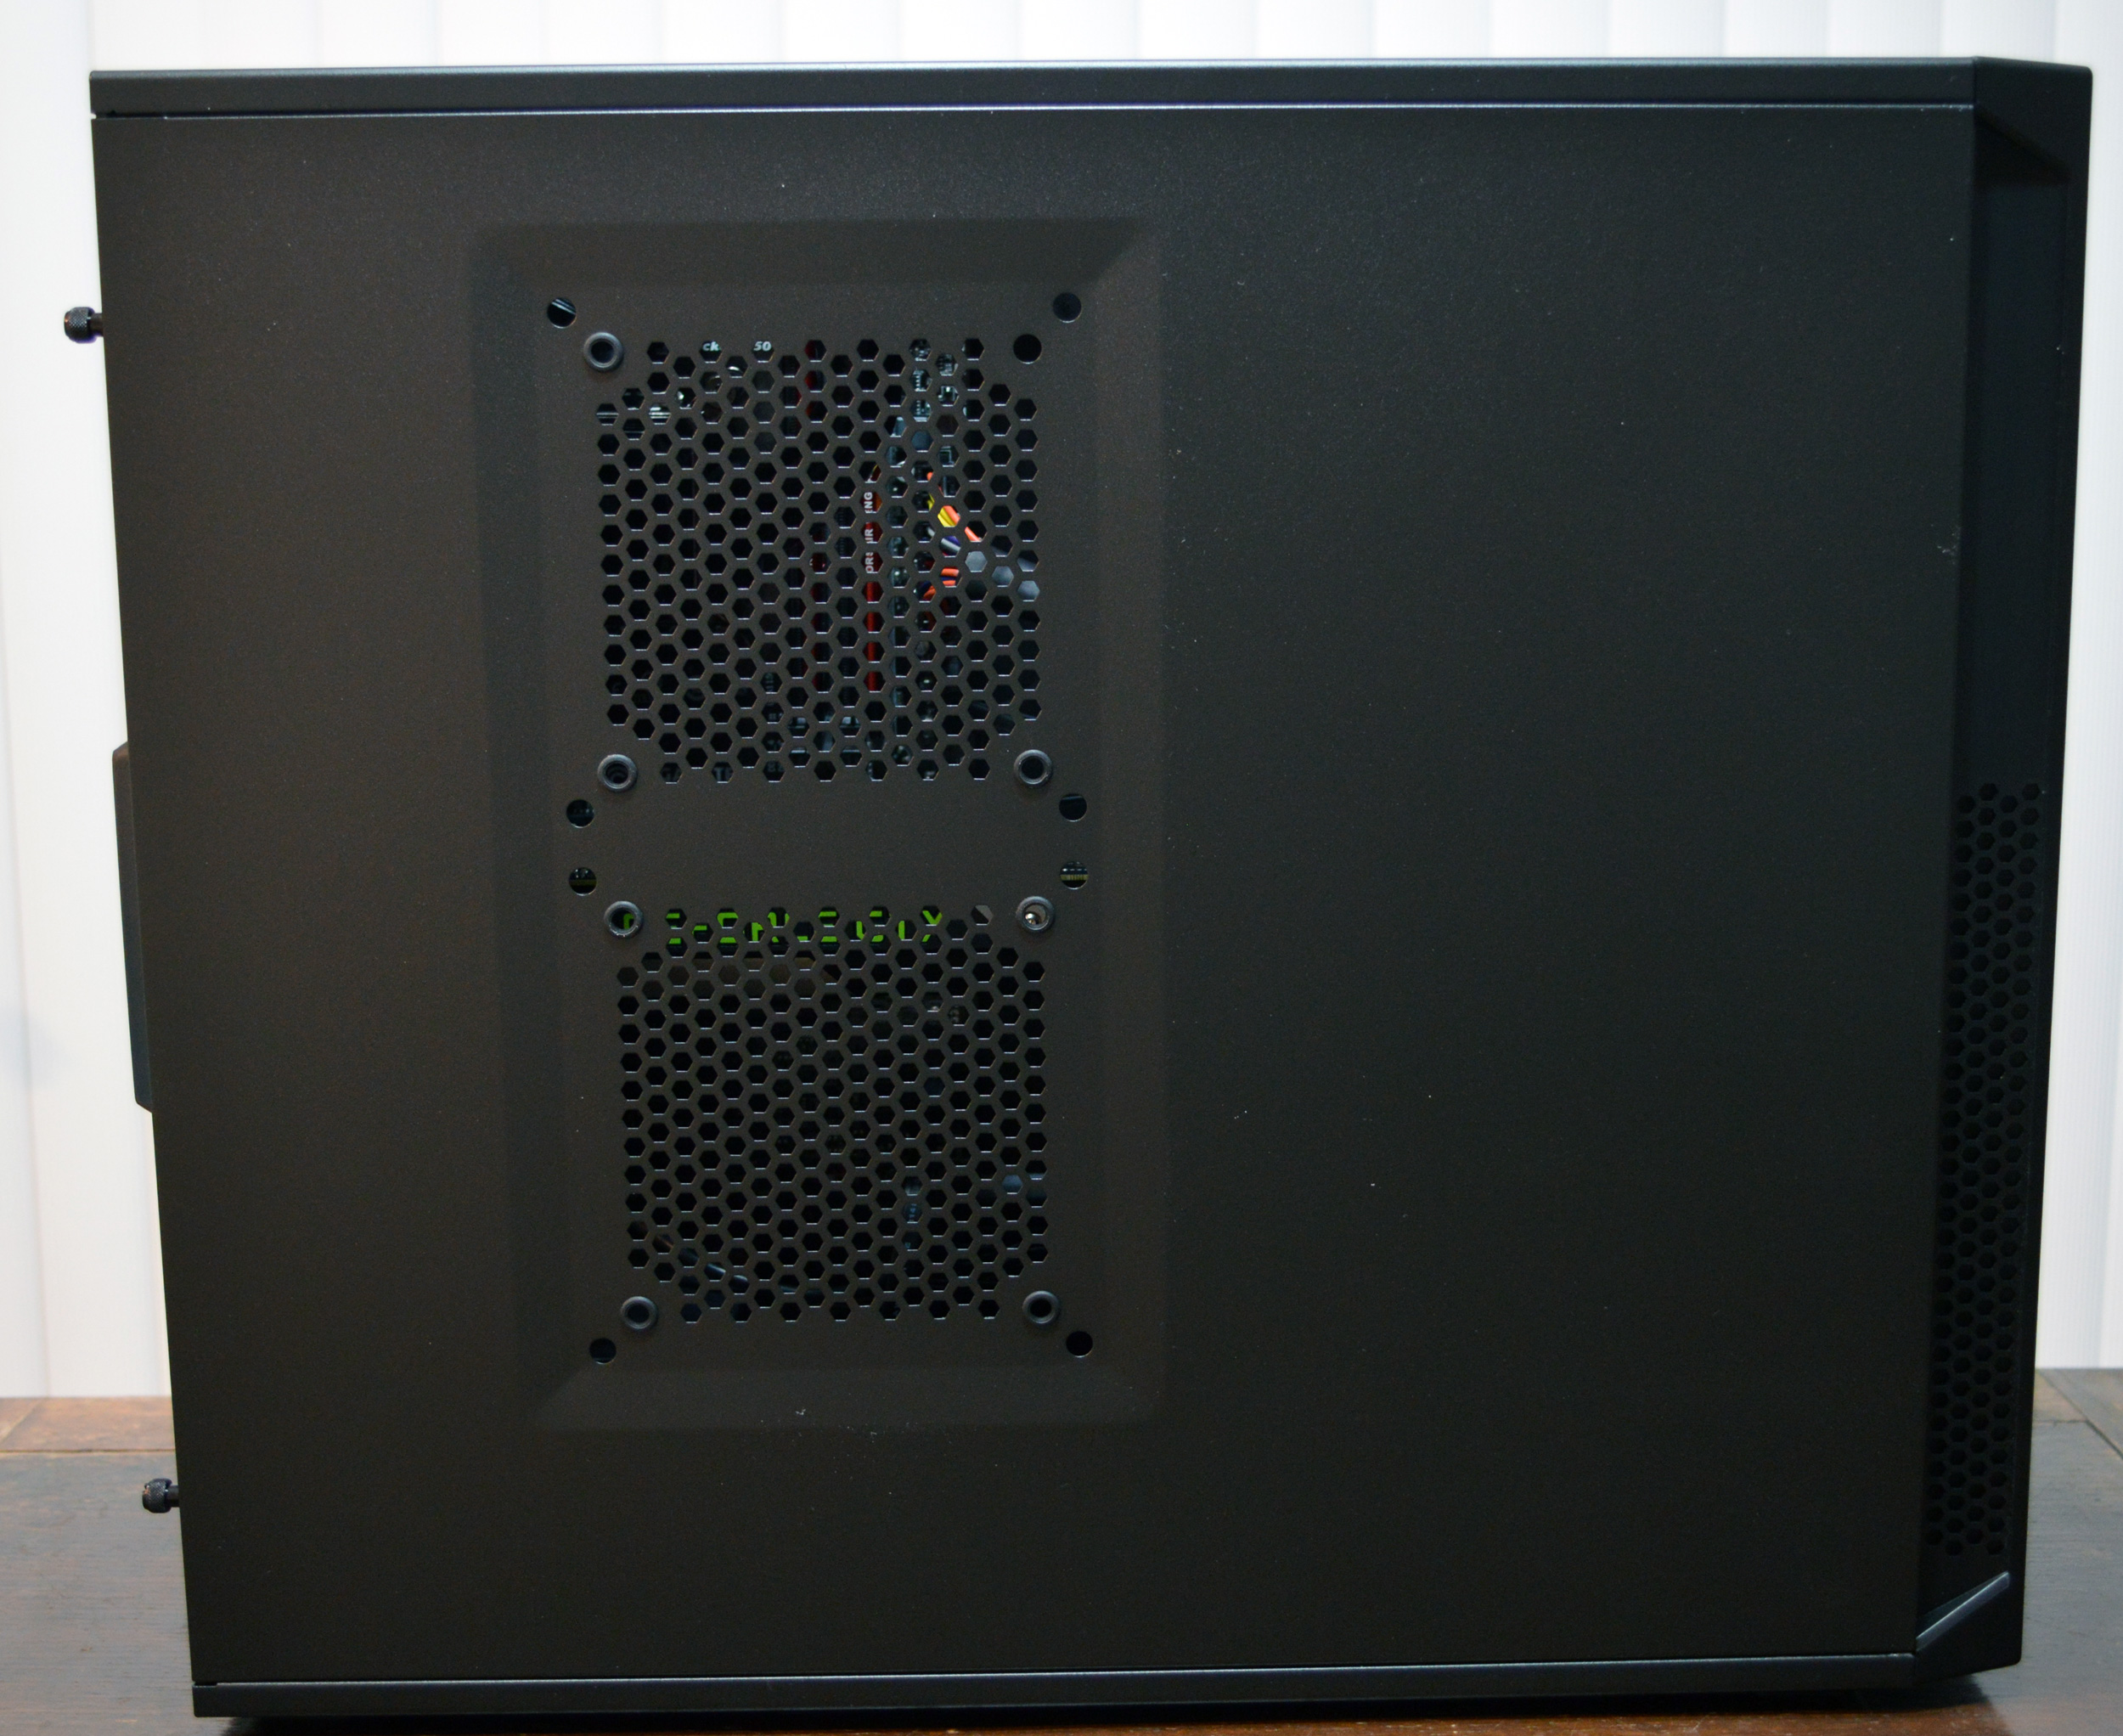
Starting with the case, The Accelerator uses Corsair’s Carbide 200R case. In keeping with Corsair’s focus on performance, Corsair has picked a simple, value-oriented mid-tower to hold their design. I don’t think the 200R qualifies as a no-frills case, but it certainly qualifies as a few-frills case. Among other things you’ll find plenty of mounting locations for fans, thumbscrews for almost everything, and even toolless mounting for the 3.5” and 5.25” drive bays. However beyond that the 200R doesn’t feature any extra frills such as advanced cable routing systems or a polycarbonate window. This is a basic case clearly meant for someone who just wants to throw together a computer that’s easy to work in and works well.
Speaking of being easy to work in, though it’s a mid-tower I’ve found the 200R convenient to work in despite my big hands. There’s plenty of space around the motherboard and I didn’t run into any sharp edges while working in it.
Powering The Accelerator is a Corsair CS650M PSU. This is a PSU that Corsair says is designed for basic and midrange systems, but don’t let that description fool you. The CS650M is a capable PSU for a straightforward gaming system and the Gold level efficiency means that it doesn’t sacrifice on efficiency even with its basic designation.
The CS650M is a semi-modular PSU, which makes it especially handy for this build. With only a CPU, video card, and a single 2.5” SSD to power, I only needed to install 3 of the PSU’s 5 modular cables, keeping down the amount of cable clutter and routing that I needed to do. For the purpose of this build I went ahead and installed both PCIe power cables, as video card best practices are that you want to use separate cables for each PCIe power socket when possible. Meanwhile the cables themselves are nothing fancy; there’s no sleeving on any cable besides the 24-pin ATX power cable, and the rest of the cables are the flat ribbon-type, making them both a bit easier to work with in the limited space behind the motherboard, and a bit harder to work with when laying them out for bending.
For The Accelerator build, I routed all of the cables behind the motherboard tray, routing them back to the front as necessary. There’s sufficient space behind the motherboard tray for cables without getting cramped, so this is pretty easy to pull off. However I am thankful that the CS650M’s 8-pin EPS power connector can be split up into a pair of 4-pin connectors. The Gigabyte board does use 8-pin EPS, however getting the combined connector through the cable routing hole at the top of the 200R case is a tight squeeze, which means it’s a lot easier to break up the cable and re-assemble it after pulling it through.
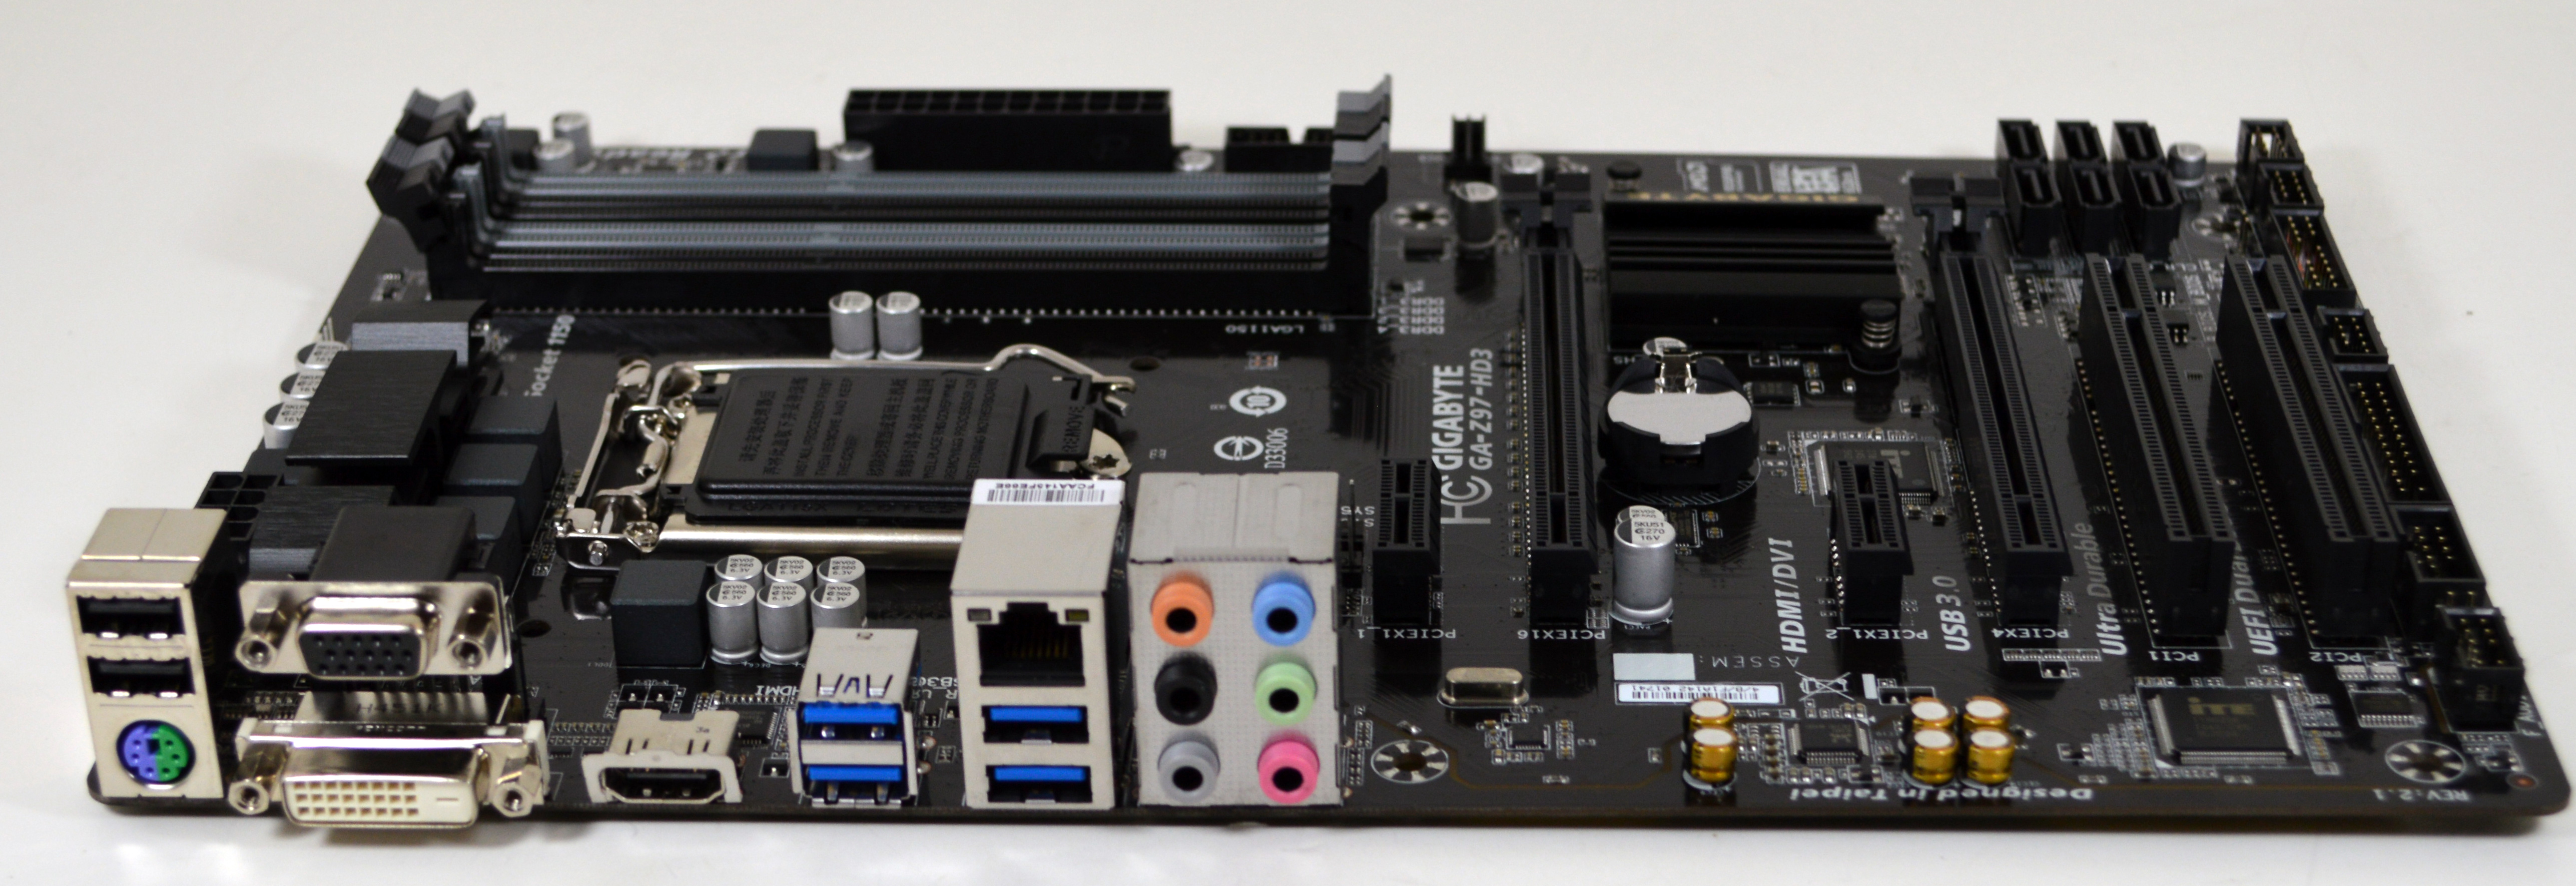
Moving on, Corsair picked out a Gigabyte GA-Z97-HD3 motherboard for their build. This is one of Gigabyte’s lower-end Z97 boards, enabling the overclocking that Z97 is known for but not bringing too much else in the way of frills. Only a single PCIe x16 slot is a true x16 slot, and is routed directly to the CPU. The other x16 slot is electrically an x4 slot being fed by the Z97 chipset, so while AMD’s Crossfire technology is supported, NVIDIA’s SLI tech is not.
Populating the GA-Z97-HD3 is Intel’s fastest 4th gen Core i5 processor, the 4690K. The i5 version of last year’s Devil’s Canyon refresh, this is Intel’s lower-cost enthusiast-level overclocking processor, featuring an unlocked multiplier, and the various overclocking enhancements that went into the chip packaging for Devil’s Canyon.
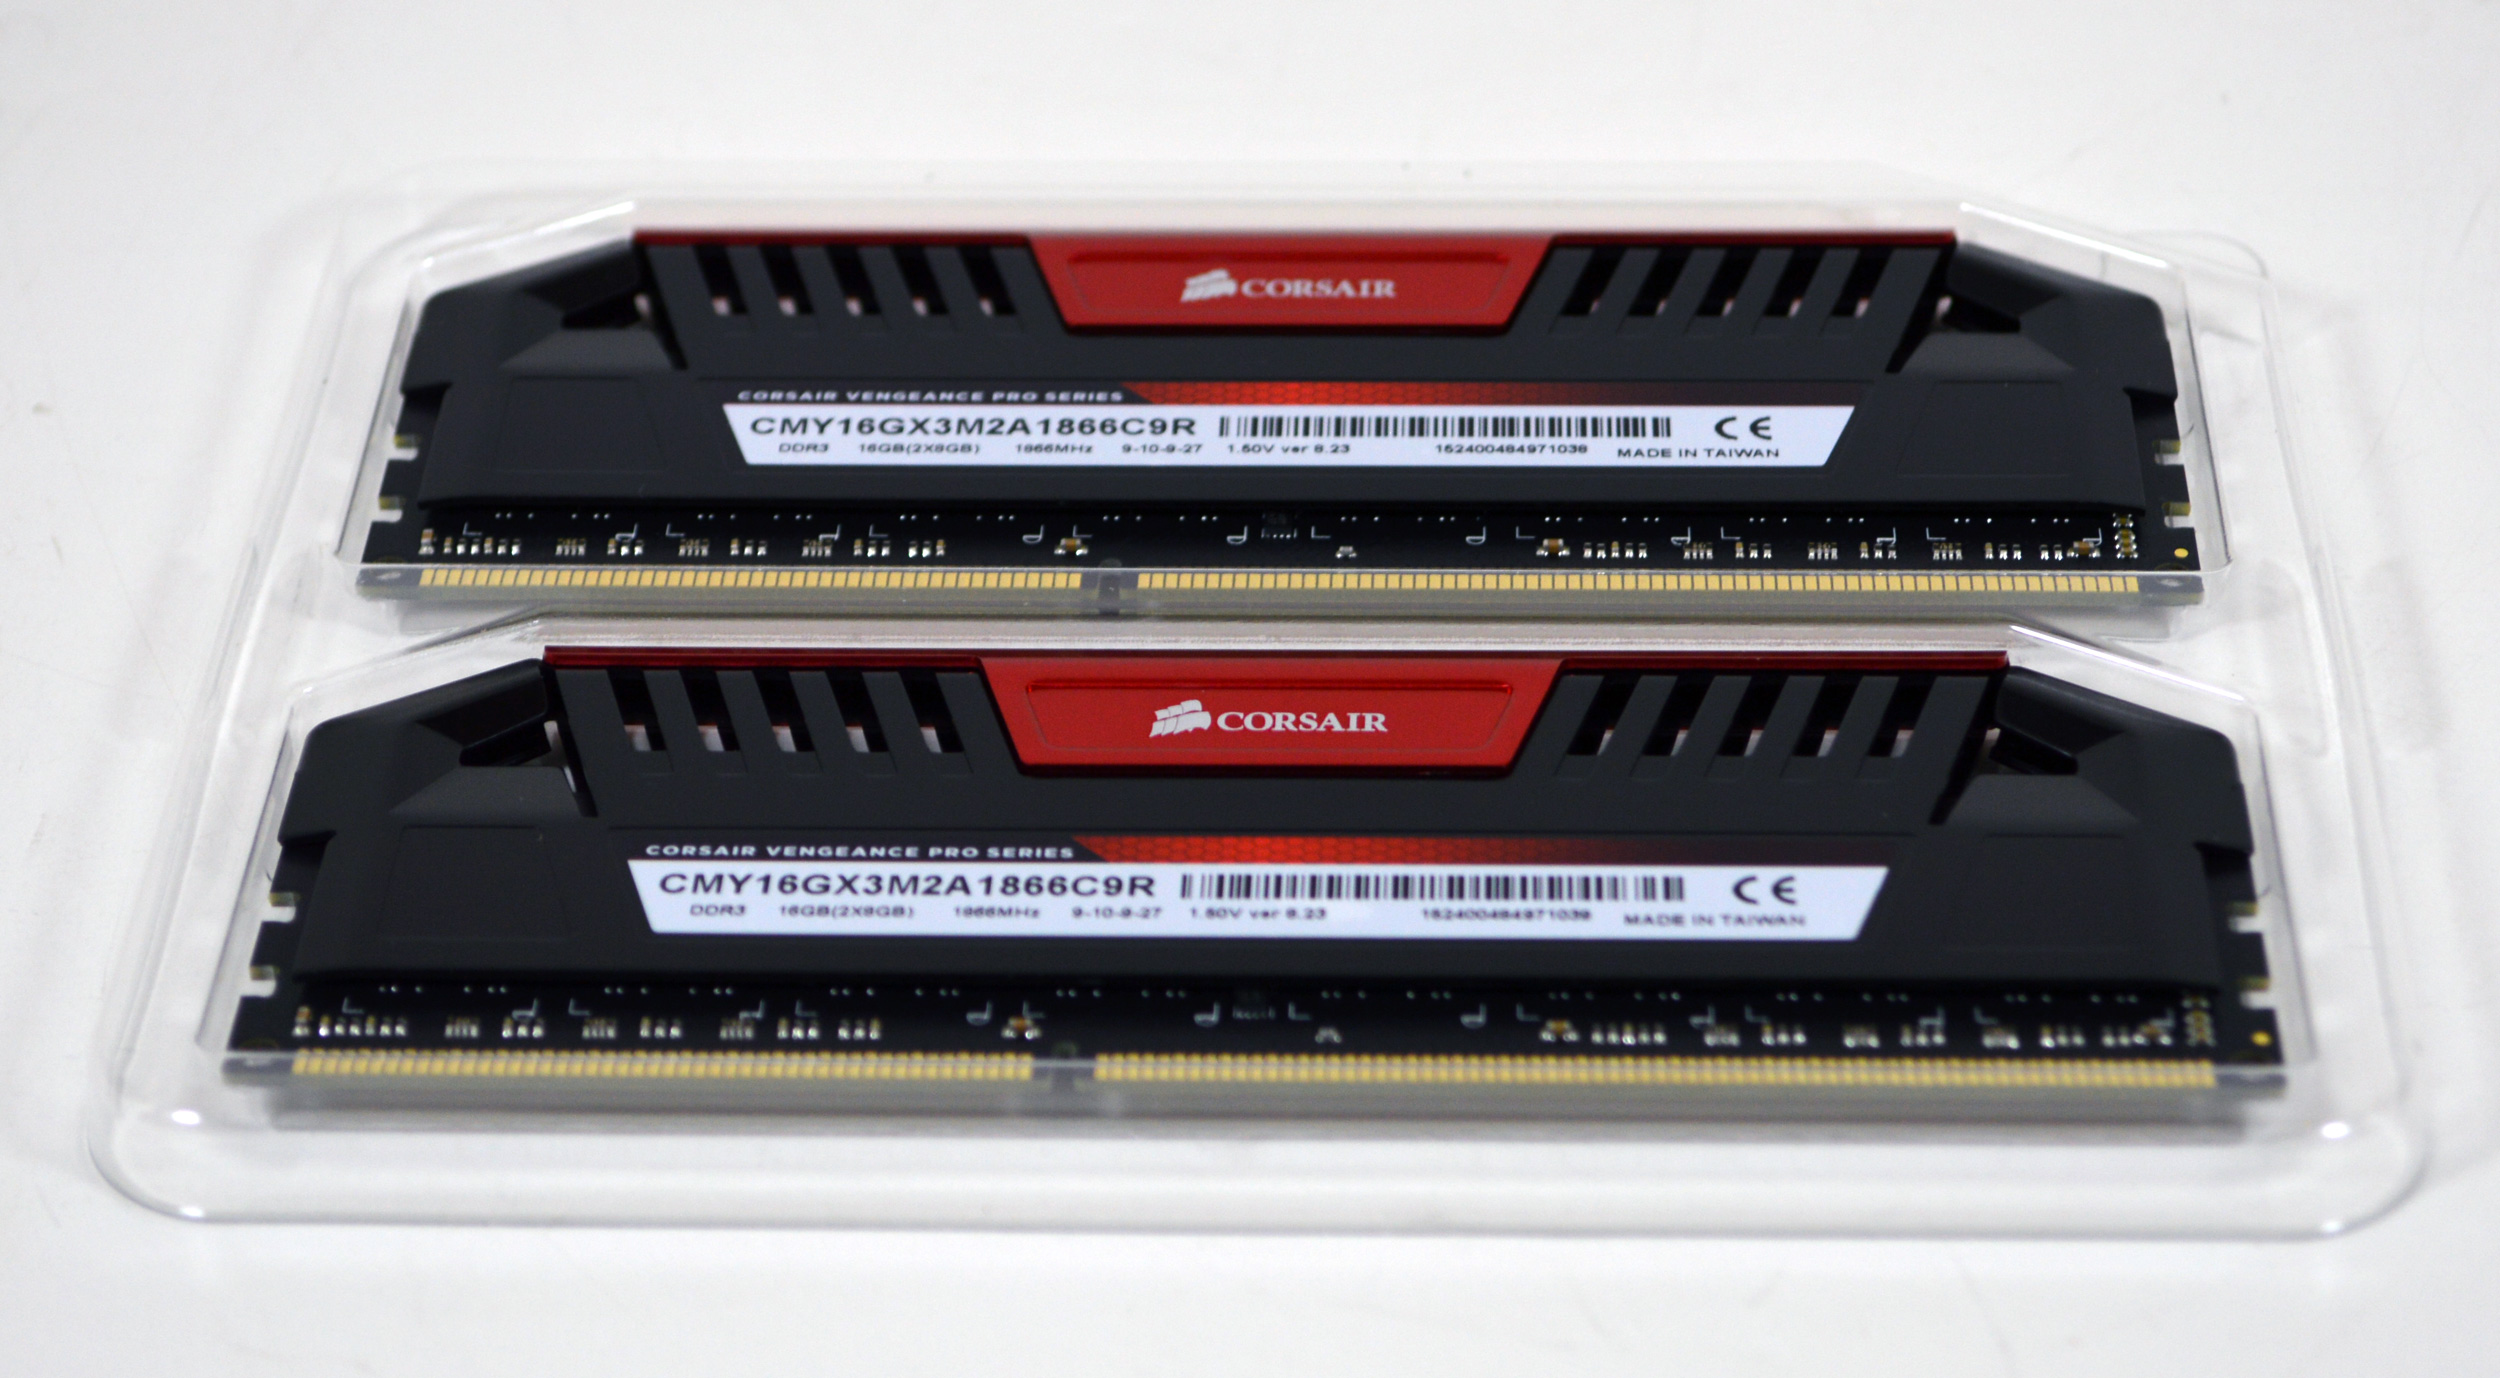
Meanwhile for memory we’re once again looking at a Corsair part, with a 2x8GB set of Corsair’s DDR3 Vengeance Pro memory. This memory does DDR3-1866 with CAS9 latency at 1.5v, hitting a nice balance of bandwidth and latency without needing any further voltage.
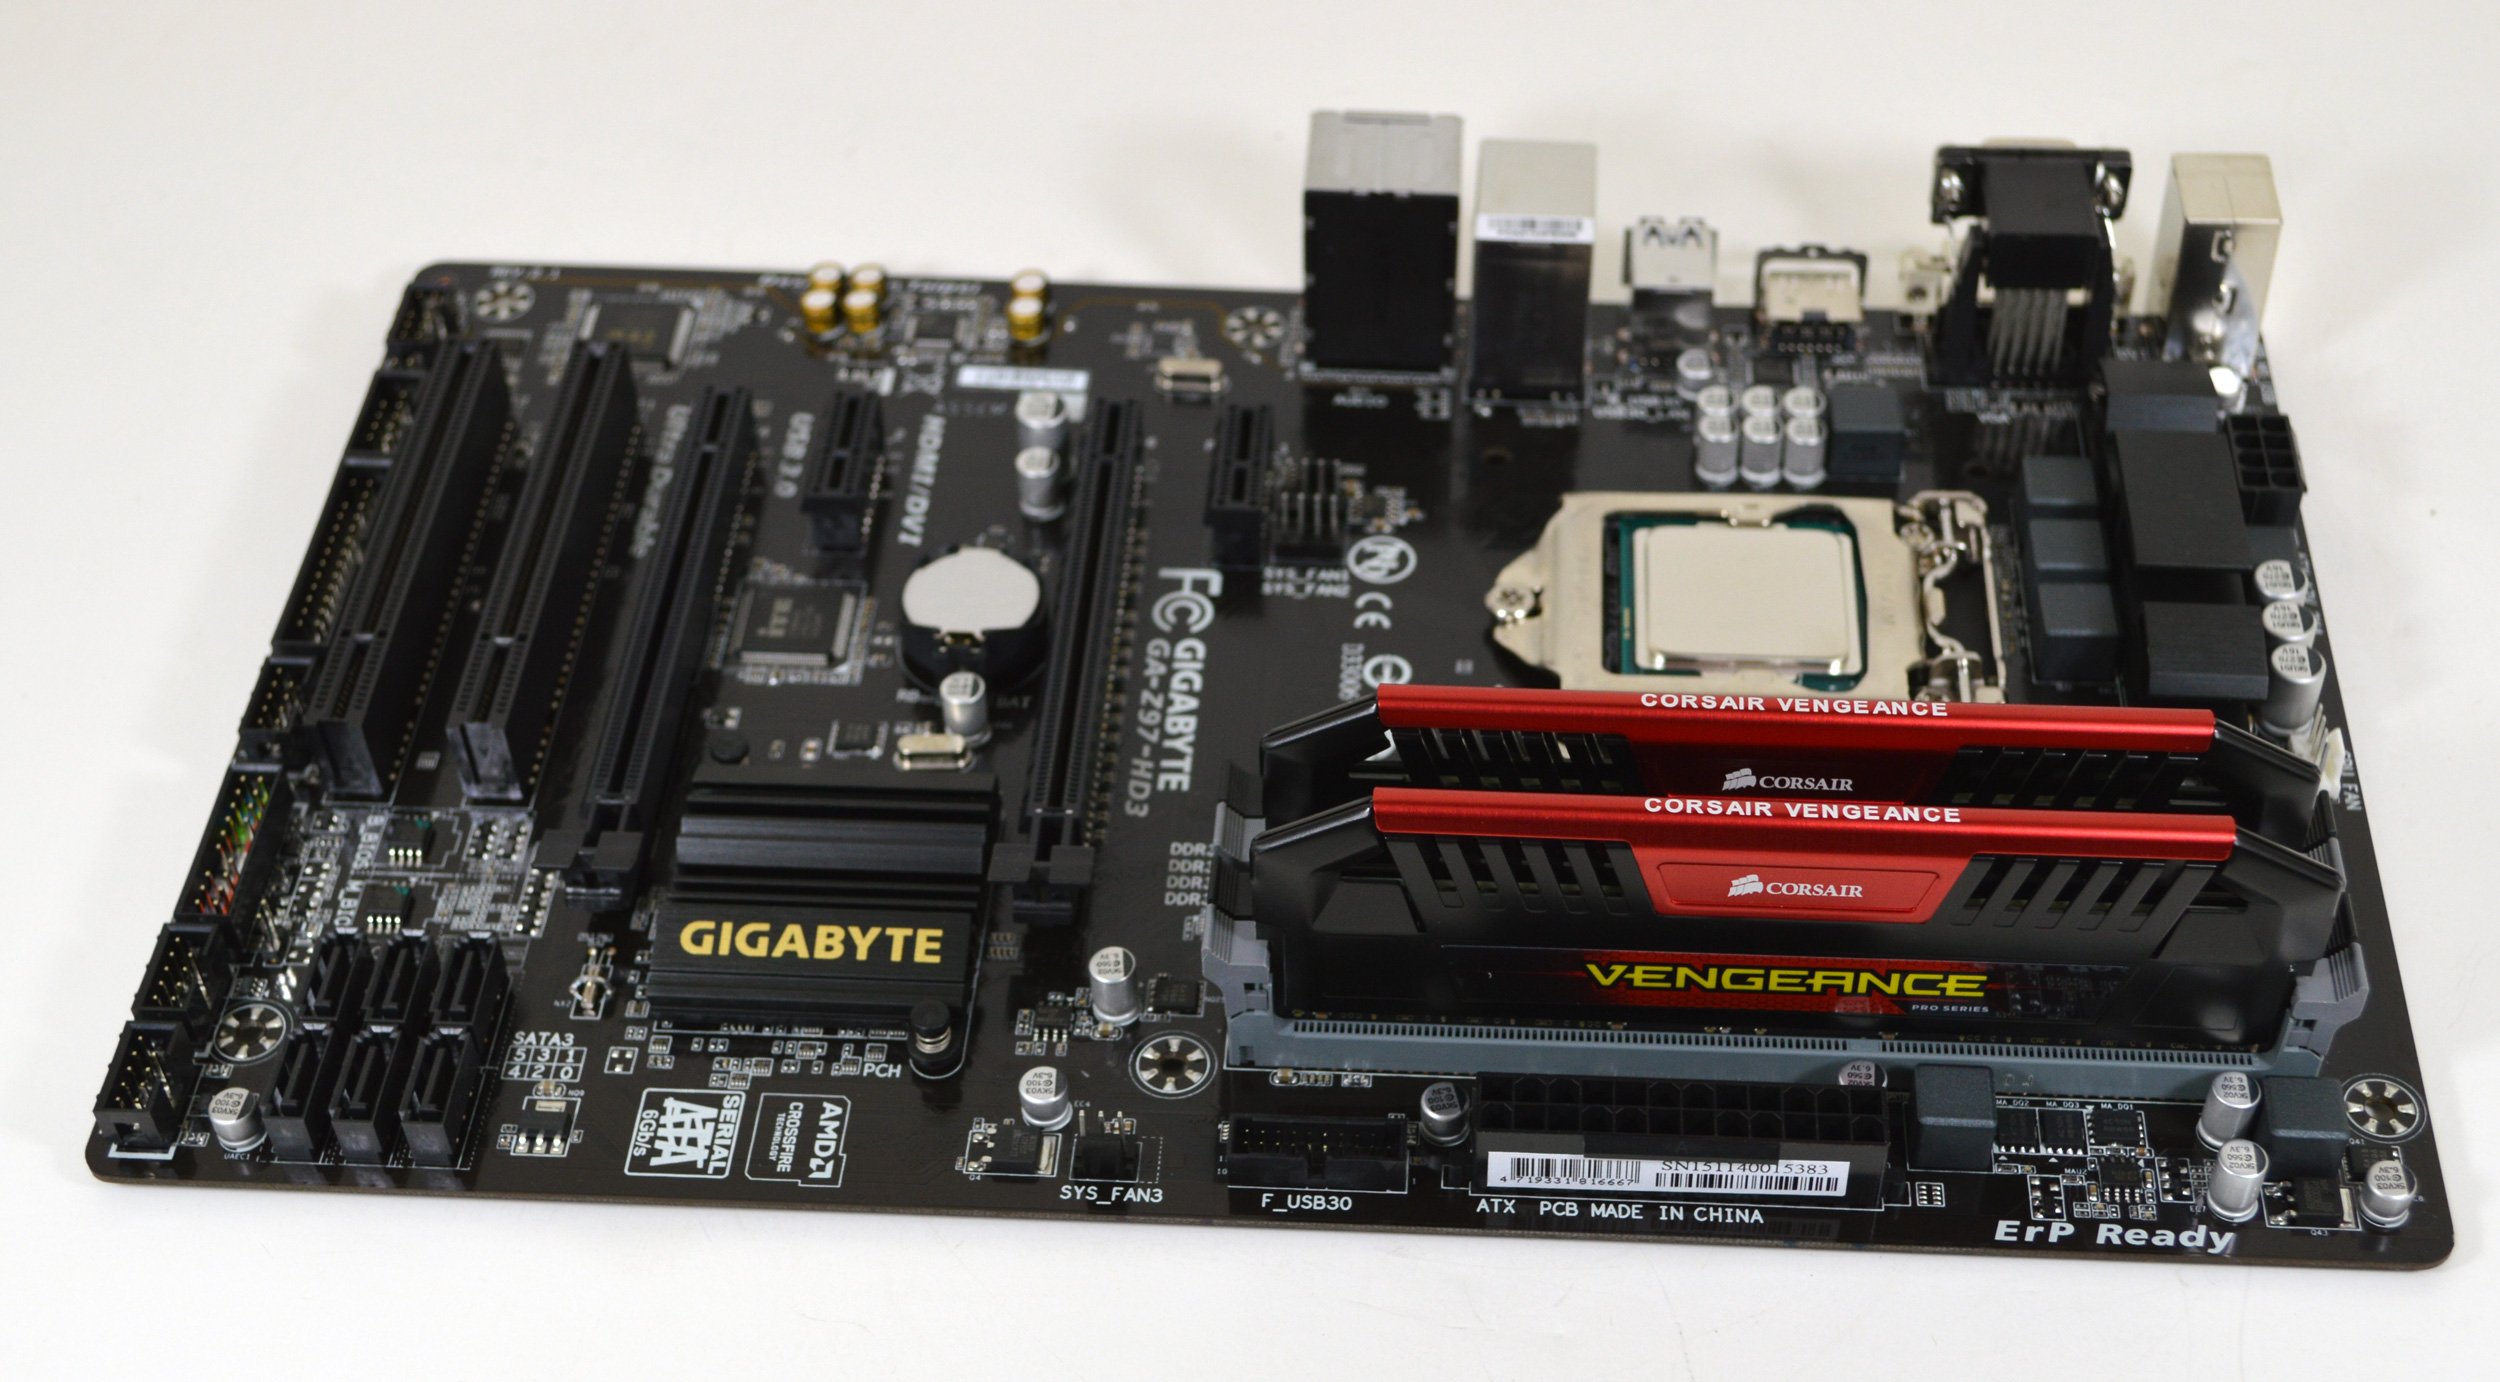
Since we’re using a Corsair closed loop liquid cooler, pre-assembly was a breeze here. After installing the Core i5 into the Gigabyte’s motherboard socket, a quick trip to the board’s manual pointed out that I should use the grey slots for the two sticks of RAM. These days it seems like about half of the motherboards I run into favor the slots closest to the CPU socket and the other boards favor the slots farther away from the socket, and in the case of the Gigabyte board it’s the latter. Which also makes this one of the few times where checking the manual really is necessary.
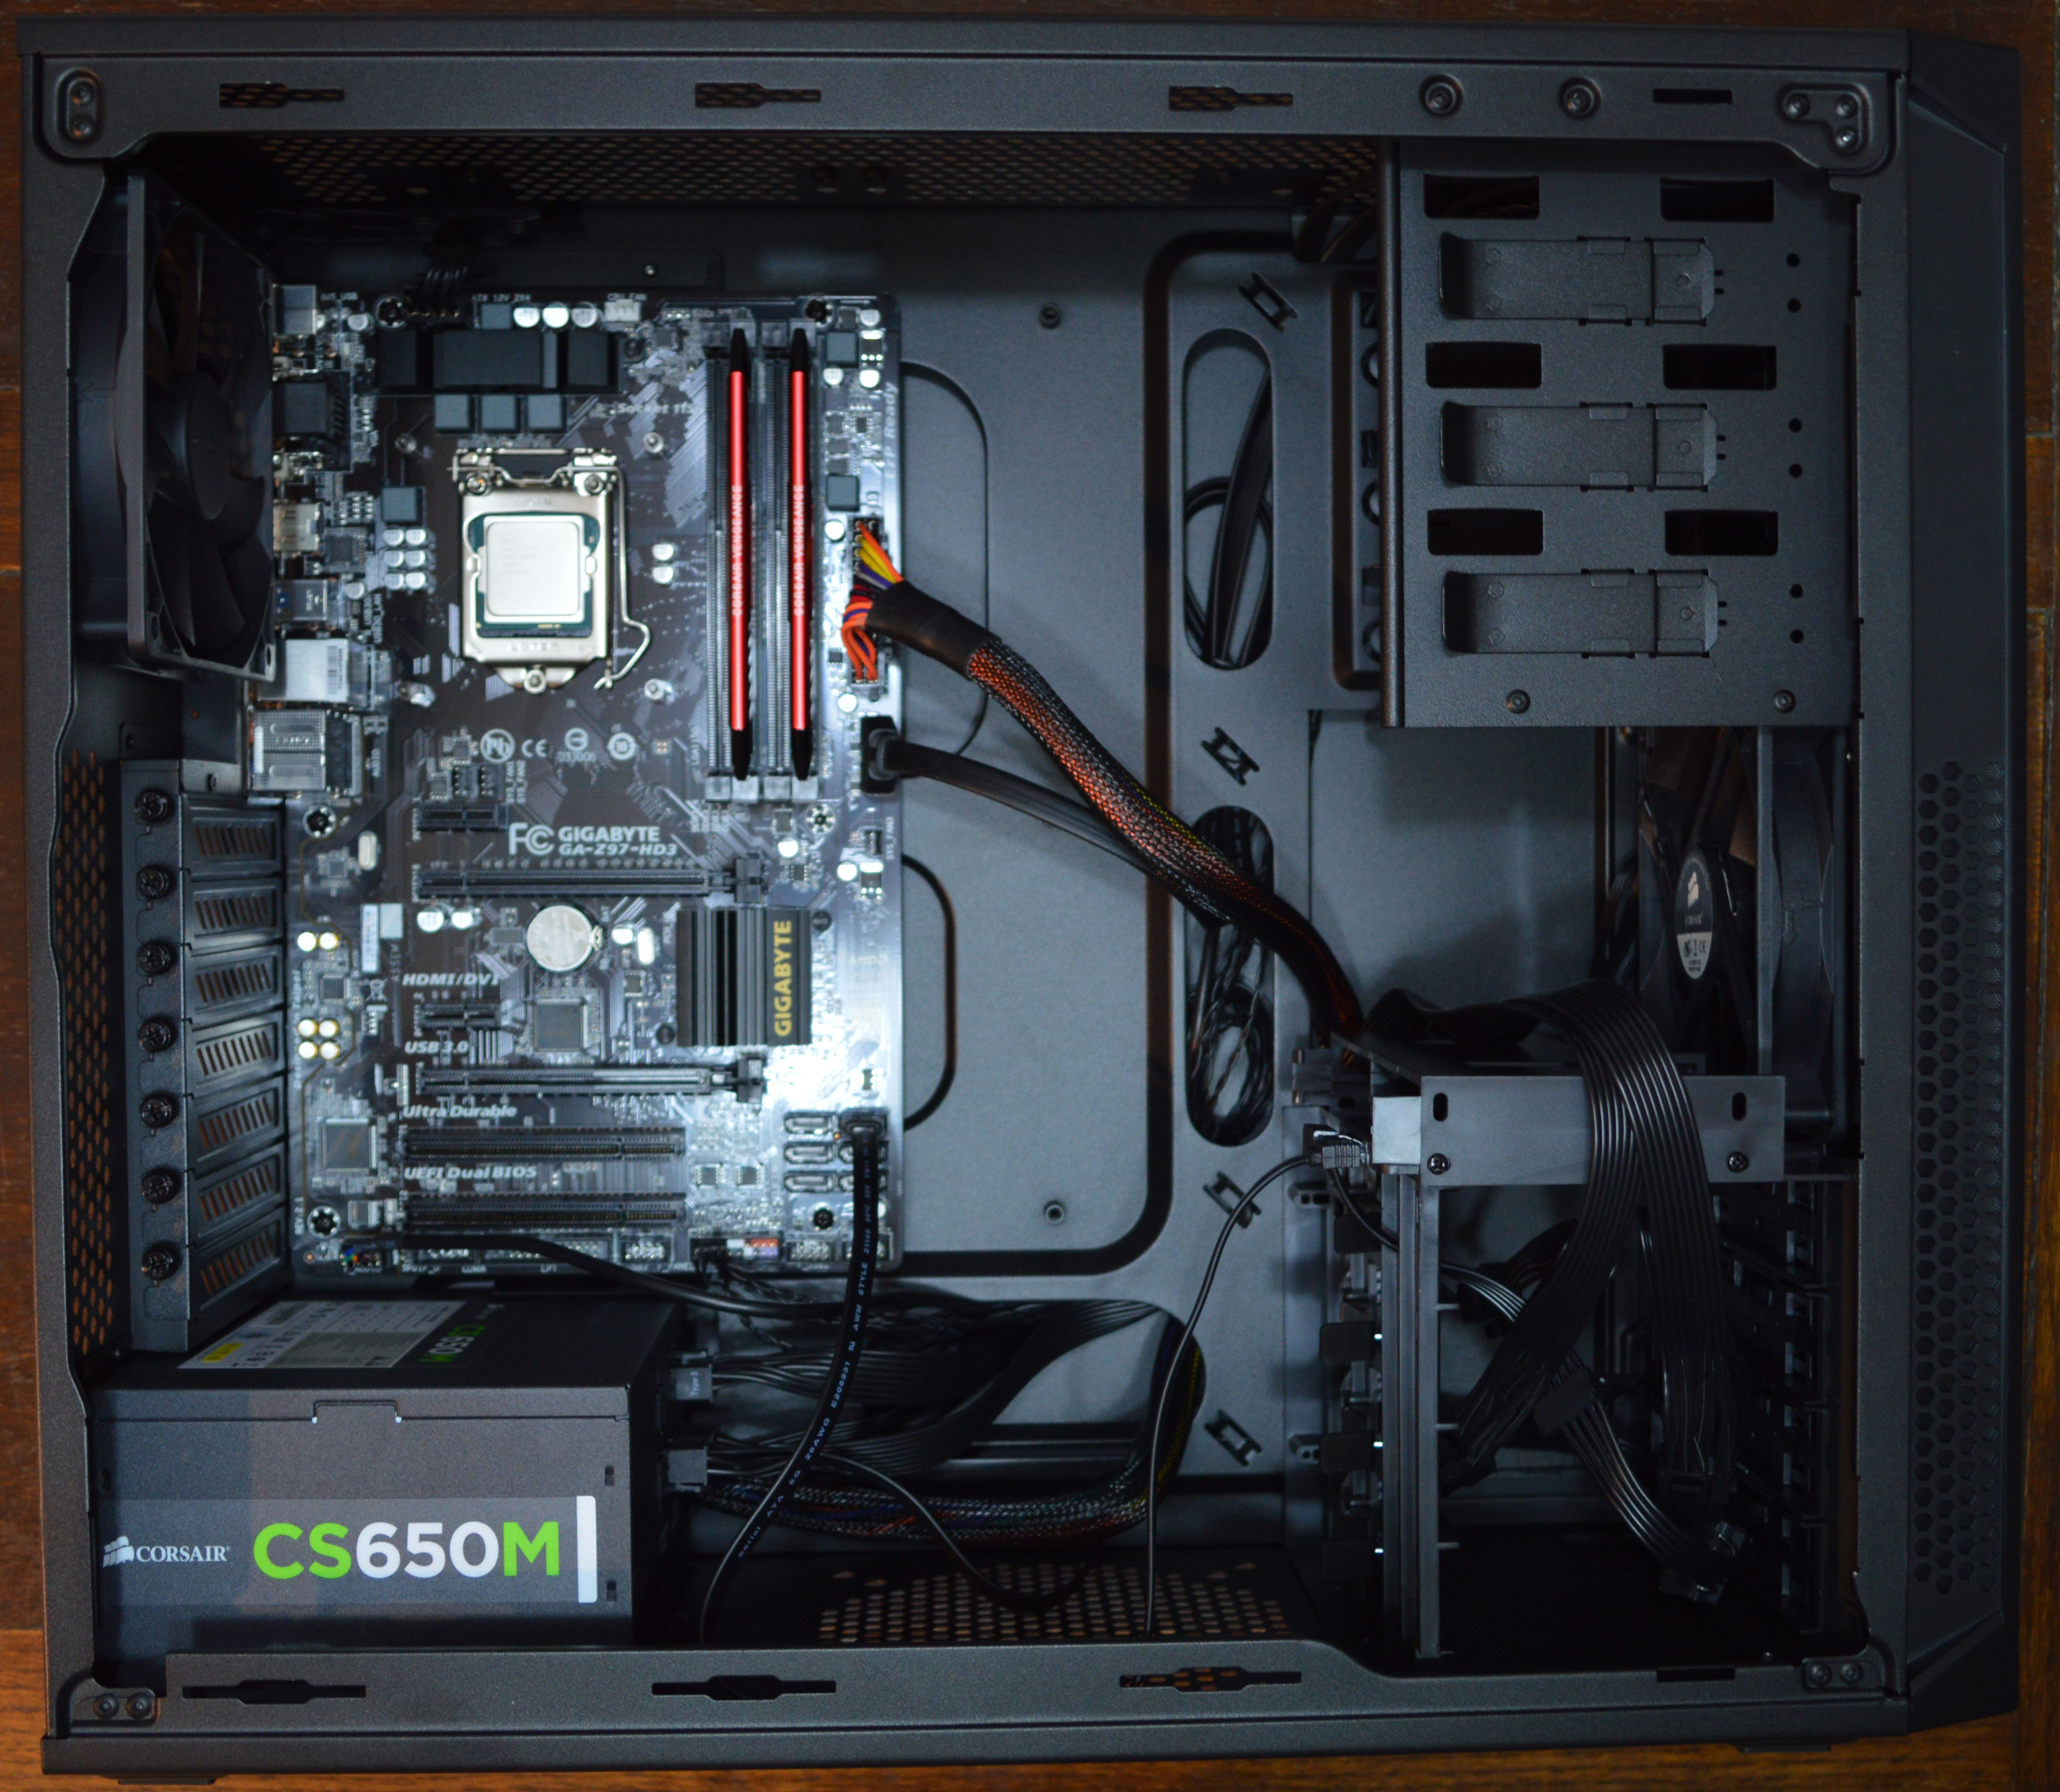
The GA-Z97-HD3 is actually a rather compact board, measuring about 7.5” wide, so it doesn’t end up taking up all that much space in the 200R case. This means the cables have to stretch out a bit more to reach the motherboard, but otherwise it’s not any harder to work with. And since this isn’t a windowed case, I don’t think anyone will mind seeing a bit of cable when it’s open.
I opted to install the motherboard second after installing the PSU first, so that I could already have some of the cable positions worked out. Plugging in various cables after the fact was about as easy as could be, with the front panel cables being easy to route over to the bottom left corner, while the USB 3.0 cable is routed to the right edge of the board, next to the ATX power cable.

Meanwhile with only a single SSD here, cable routing for drives isn’t too bad. The 200R has dedicated 2.5” bays, though they do face towards the motherboard rather than towards the back of the case. So there’s no real way to hide the cables here by routing them behind anything, meaning I had to run the cable in front of the motherboard. However the SATA power cable was easy enough to route through the empty 3.5” bays, allowing me to pull off a slightly cleaner look to the case.
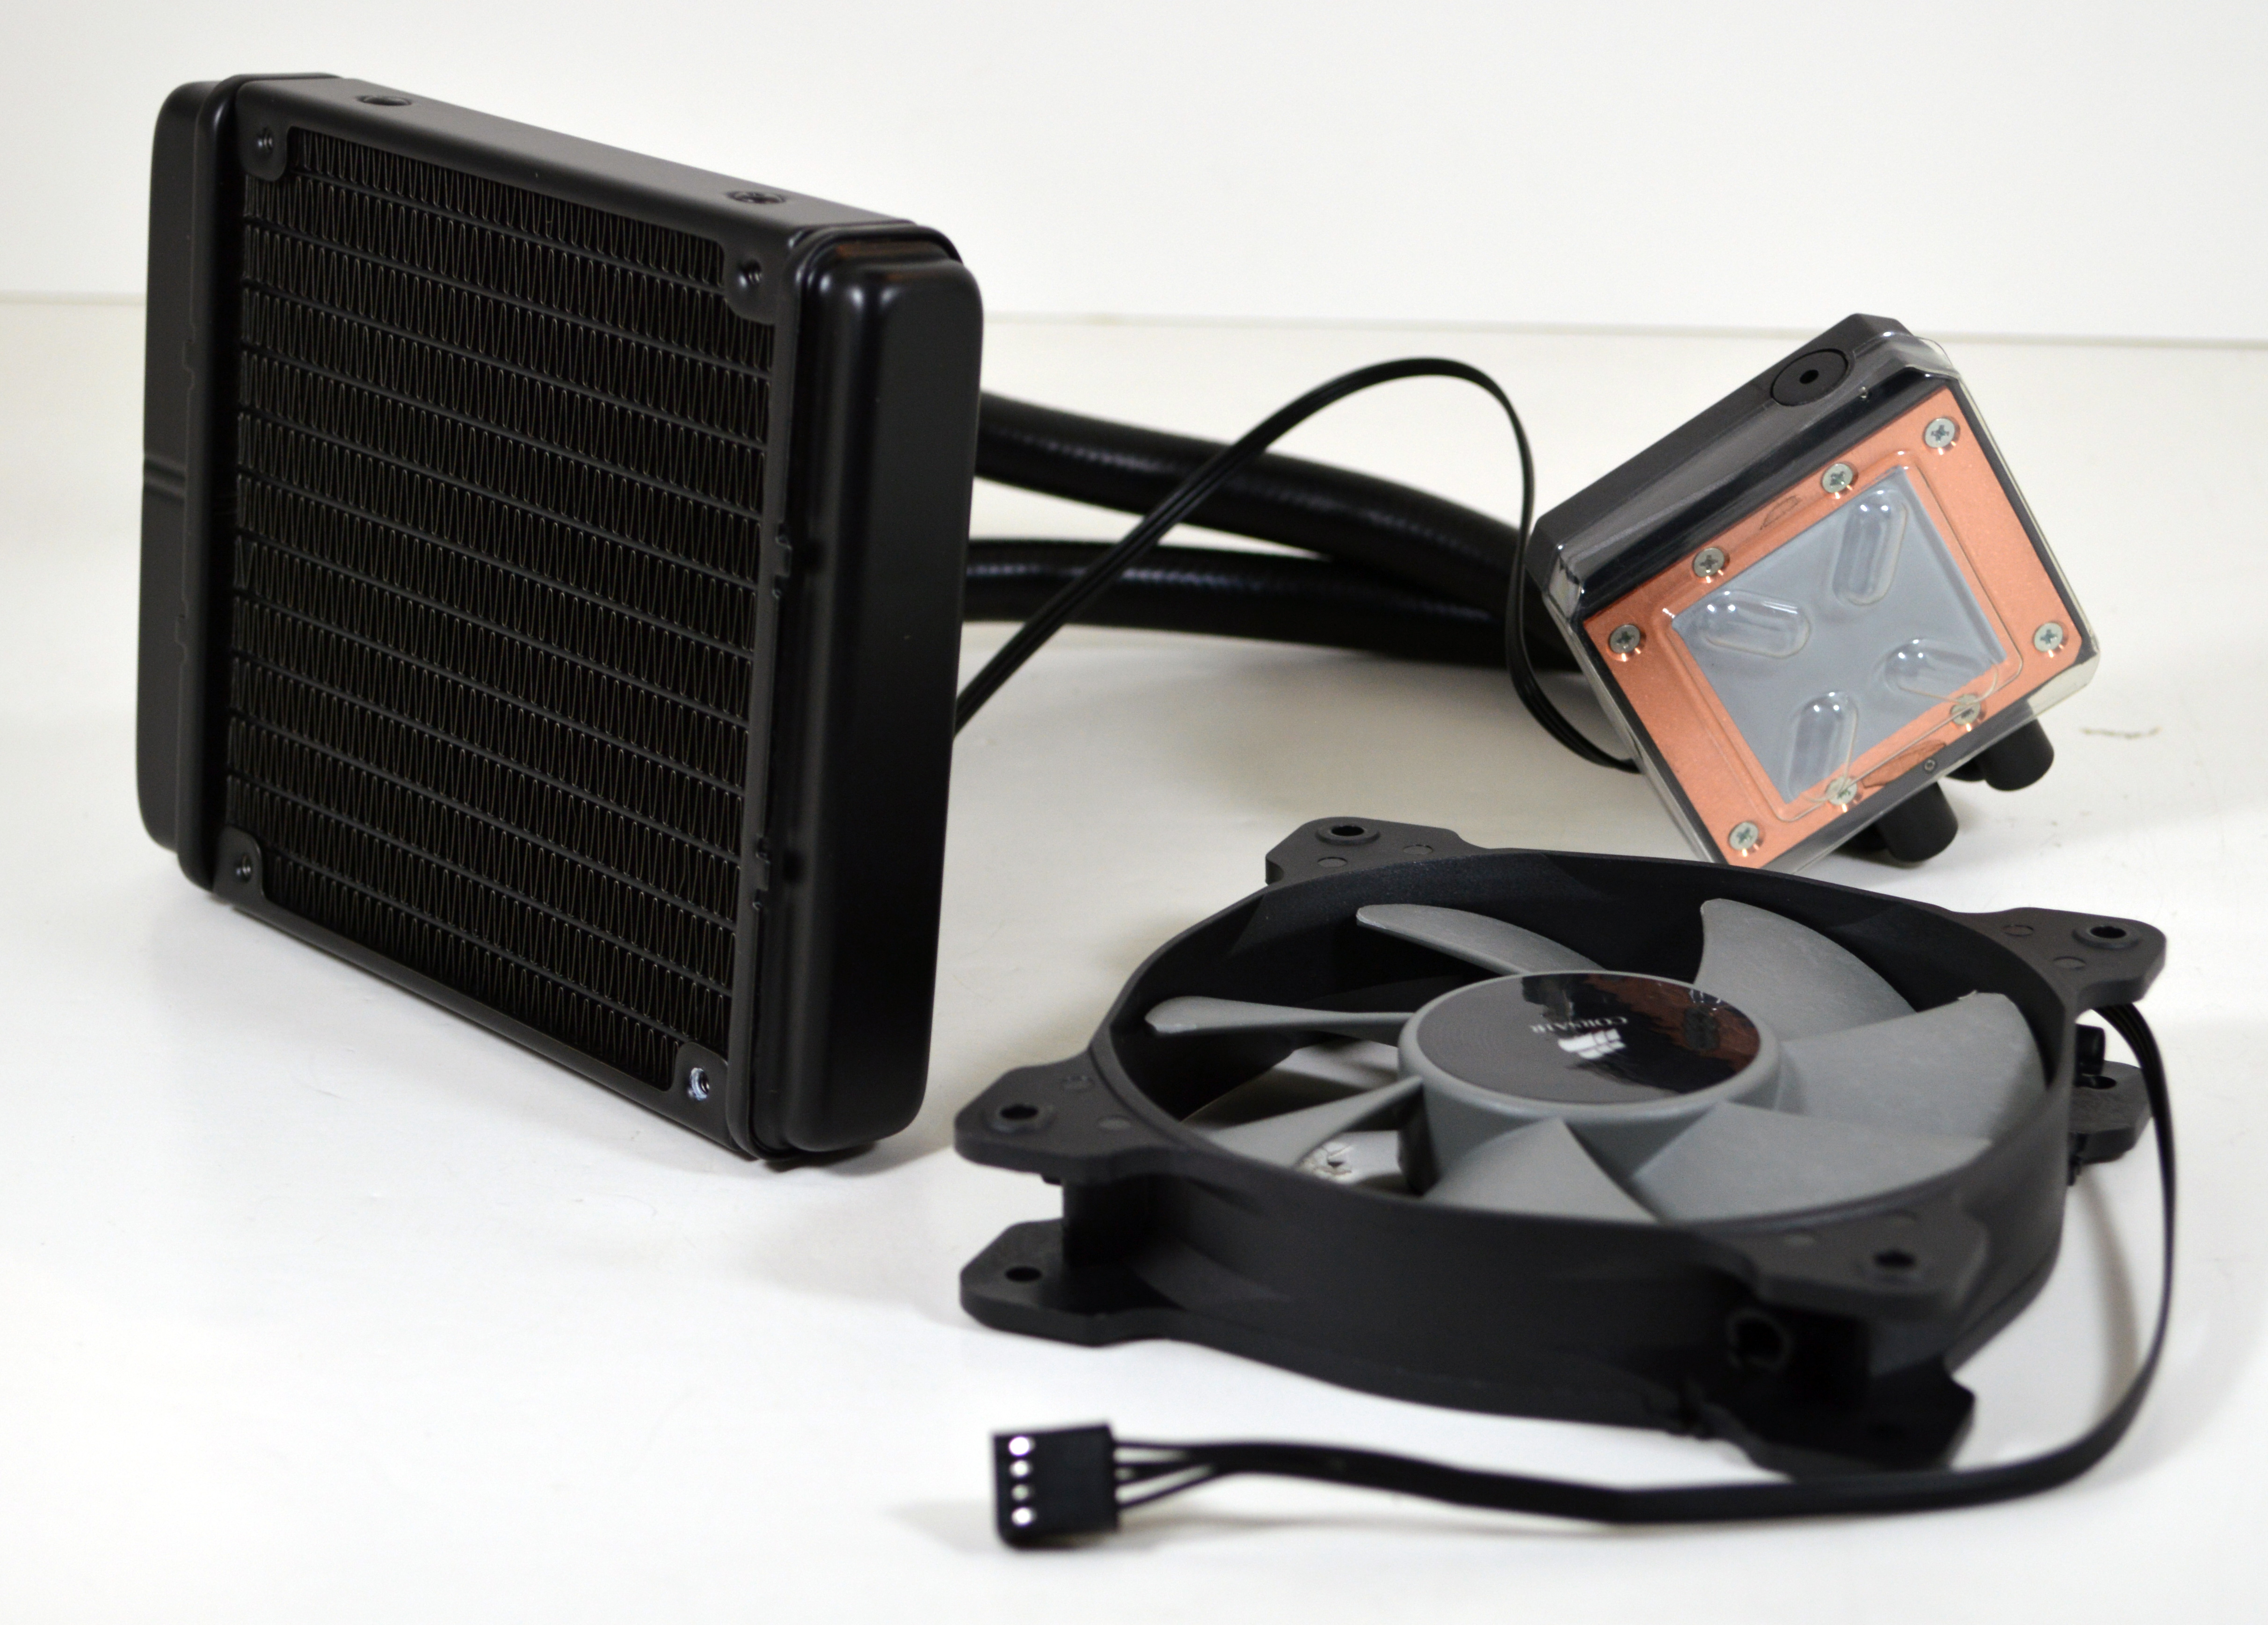
For cooling, Corsair’s build calls for the final Corsair component, the Hydro Series H60, one of Corsair’s closed loop liquid coolers. In Corsair’s now extensive lineup of CLLC’s this is one of the lower-end models, featuring a standard thickness 120mm radiator and a single accompanying fan. The H60 is still rated to move quite a bit of heat though, making it a good match for the 4960K CPU when overclocking.
Since this is one of the lower-end CLLC models, the pump block is a “dumb” block featuring no logic or settings of its own. The pump occupies a 3-pin fan header while the 120mm fan occupies a 4-pin CPU fan header.
When it came to installation, the 200R has a number of open 120mm+ mounting points that could have housed the H60. However since all of the other major components in The Accelerator are self-exhausting – the video card is a blower-type card, and the PSU is isolated as well – there aren’t any major sources of head in this build besides the CPU. Other than that what other heat there is will be what radiates off of the video card, and what little heat is produced by the mobo and SSD.
For that reason I opted to remove the 200R’s included 120mm exhaust fan and install the H60 in its place. The air coming into the H60 is still plenty cool due to a lack of other heat sources, and this keeps the case’s front-to-back airflow intact. More importantly it means I was able to keep the fan noise down, since again we don’t need much in the way of fans on this build with the blower-type video card.
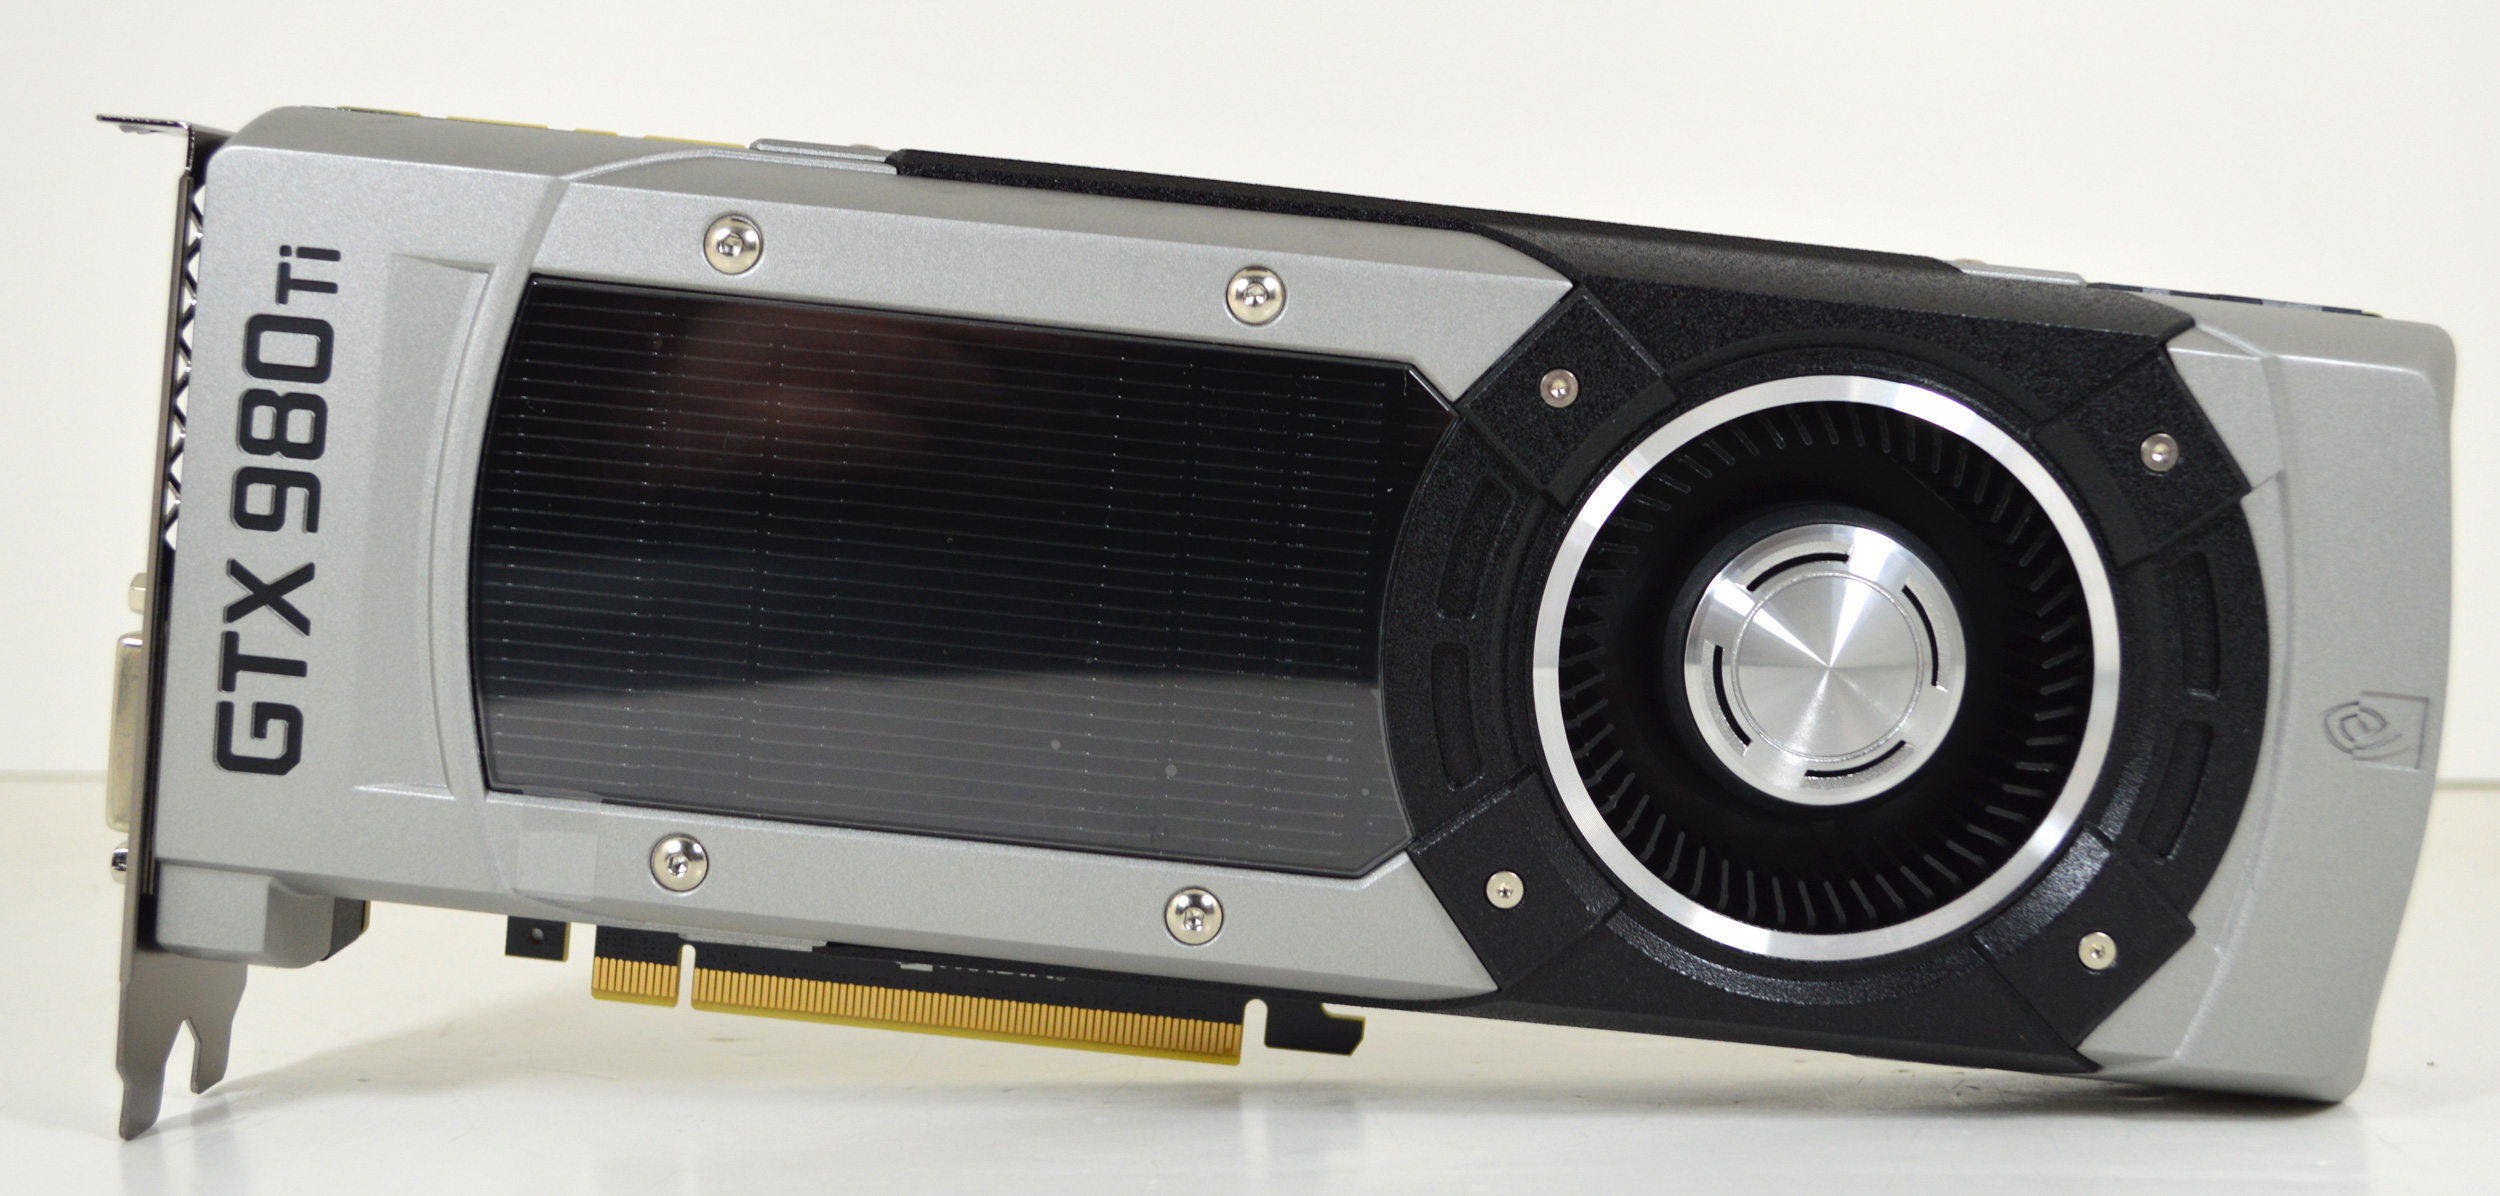
The final piece of the puzzle was installing The Accelerator’s video card, an aptly chosen Zotac-branded GeForce GTX 980 Ti. This is a reference model card featuring NVIDIA’s blower, so I already know from earlier experience that we should be in for a relatively quiet experience here. Meanwhile as far as performance goes, Corsair had to sacrifice in other areas to keep the build cost down, but the end result was that they were able to squeeze in what’s arguably NVIDIA’s flagship video card for this generation, the GTX 980 Ti. The GTX 980 Ti offers great performance and it means The Accelerator should handle 1440p with ease, while even 4K is within its reach for some games.
On a side note, the narrower than average profile of the Gigabyte motherboard means that the installed GTX 980 Ti makes for a humorous sight. At 10.5” the GTX 980Ti overhangs the board by 3”; this is the most expensive component in the build, and it shows.
Overall The Accelerator proved to be a fairly easy build, though it wasn’t without its last minute surprises. Upon booting the system and dropping into the UEFI configuration environment, I found the CPU operating at a toasty 70C. As it turns out Gigabyte has the GA-Z97-HD3 default to running the system fan headers at a lower voltage for noise purposes, which in this case is also where the H60 pump is plugged into. So a quick change to full speed mode on the right header brought the pump up to speed, and brought idle temperatures back down to around 30C.
Meanwhile for whoever wins this PC, I’ll be shipping it with the initial Windows 8 installation complete, and for good reason. Since Corsair skimped in other areas to get such a powerful CPU and GPU combination, the build doesn’t include an optical drive. This means that it’s not possible to install Windows 8.1 as it ships on an optical disk, as the system would need to load the OS off of a USB drive. Going forward Windows 10 will be shipping on USB flash drives for this precise reason, but it goes without saying that The Accelerator is built on the assumption that the builder already has another PC (or two) to help prepare everything it needs.
Much the same can be said of its storage. The 240GB SSD is speedy, but for a gaming system it’s not very big. With more recent games coming in at 50GB+, you won’t be able to hold very many games on the SSD. As a result this build also assumes that the builder will be bringing some additional storage as well, as it needs either another SSD or a HDD to really have enough space to hold a suitable number of games.
And with that, The Accelerator has been built and is ready for the last phase of the Build-A-Rig challenge: benchmarking. Be sure to tune in next time as we put The Accelerator through its paces and see just how much performance Corsair has been able to put together on their $1500 budget.


53 Comments
View All Comments
eek2121 - Thursday, July 30, 2015 - link
I don't understand the component selection for the zotac build. A quick build off from newegg using a the same case, motherboard, same gen graphics card (zotac 970, but a different, cheaper) model, and no water cooling or bling allowed me to significantly up the speed of the overall system. 16 GB of DDR3 1866 RAM, core i7 4790k, Samsung 850 EVO 500 Gb SSD and Windows 10 pro. All for $1431. I wasn't even trying, can probably do even better on Amazon since Amazon tends to be cheaper. You could even go to 32 gb of RAM and not be over budget.atl - Thursday, July 30, 2015 - link
Again - 240mm AIO water cooler on 84TDP non-overclockable CPU, which in RL will most likely not exceed 60 Wattsfokka - Thursday, July 30, 2015 - link
i think it is very likely to exceed 60 watts and even the tdp of 84 watts, since it might use more than that in turbo mode. but as you said, in real life it will only turbo for short periods of time most of the time, so the 240mm cooler is completely over the top of course.arnavvdesai - Thursday, July 30, 2015 - link
Hope to WIN!!Scrote - Thursday, July 30, 2015 - link
So for the Corsair machine, how would one know that the fan headers are running at a lower voltage? Does it show the value as a %? Otherwise, I would have no idea if they're lower than normal or not... if it's just showing a voltage amount, since I don't know the standard amount.fokka - Thursday, July 30, 2015 - link
there might be something like a "silent" or "low" fan mode in bios with the option to override and customize the seperate fan speeds. you'll most likely see a percentage or some other number indicating the speed so it should be relatively straight forward to spot the culprit - if you know what to look for.barleyguy - Thursday, July 30, 2015 - link
Oh, there's a typo on page 2:"there aren’t any major sources of head in this build besides the CPU"'
Well, I assume it's a typo. It does read fine and make perfect sense the way it is. ;-)
MTDEW - Thursday, July 30, 2015 - link
I agree with most other comments here..IMO Corsair nailed it with proper priorities when working with a budget...CPU, Memory, Mobo, PSU and GPU performance are top priority over aesthetics.
Performance per $$ should always take top priority over aesthetics when working within a limited budget.
Add a cheap HDD to the Corsair build and you've got a heck of a lot of PC Gaming performance for your $$$.
Although to be fair, going by the rules Corsair was allowed to come in a little over budget. ;)
wperry - Thursday, July 30, 2015 - link
I'm all in on the Corsair build.....but dude, take 5 minutes to route and tuck the cables - it looks like butt.
Gigaplex - Friday, July 31, 2015 - link
There's only so much routing and tucking that makes sense when the cables don't quite fit nicely in the first place, and the case doesn't have a window to see the diminishing returns.