The ASUS TUF X99 Sabertooth Review
by Ian Cutress on July 22, 2015 10:00 AM EST- Posted in
- Motherboards
- Asus
- TUF
- X99
ASUS TUF X99 Sabertooth BIOS
ASUS’ BIOS implementation has been getting a good reception as of late. The trend for motherboard vendors is towards having both a simple mode and an advanced mode for new and seasoned users respectively, although there is a gap between what level of interactivity each mode should have (and how it is implemented). Ultimately one of the purposes of moving from the standard ‘BIOS’ to a graphical ‘UEFI’ several years ago was to improve interactivity rather than being a simple list of options – that is still to be realized, but we are getting there. For clarity, we use BIOS is an overall term for the F2/Del entry system into the CMOS, although the latest editions also fall under the EFI (extensible firmware interface) definition as well.
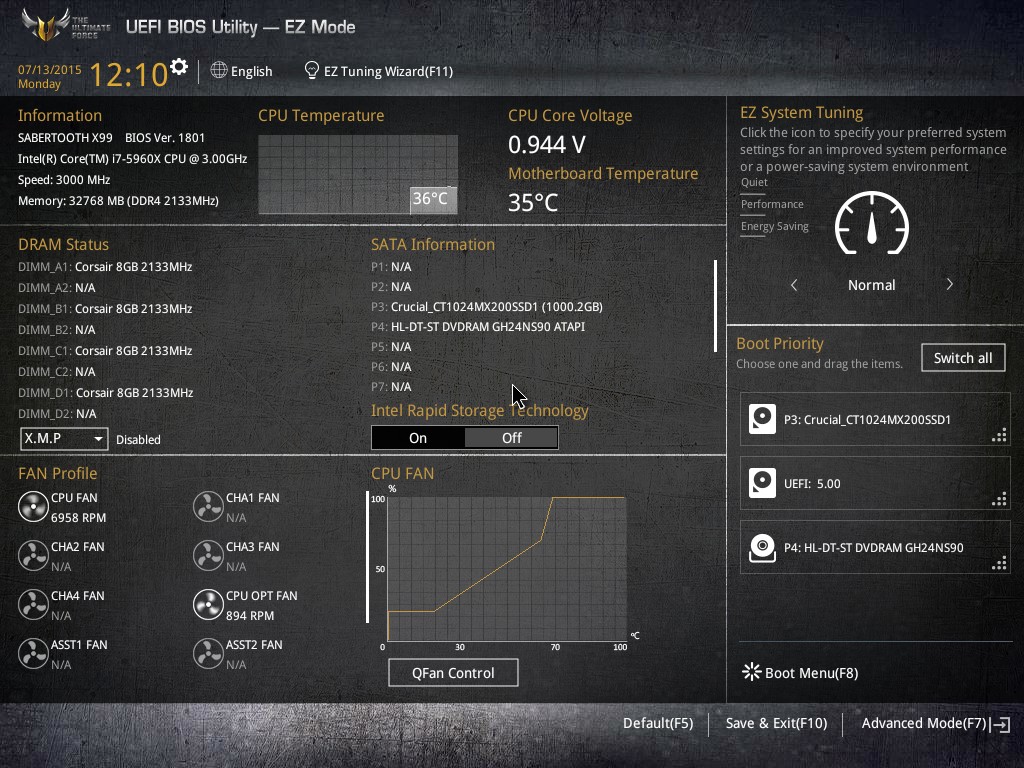
The first screen up on entry is the EZ mode. This features a significant amount of information: the motherboard name, the BIOS version, the CPU installed, the frequency of that CPU, the total amount of DRAM installed, the speed of that DRAM, a graph of CPU temperature (helpful if you forget to plug in the CPU fan), the CPU voltage, the motherboard temperature, a breakdown per-module of the DRAM installed, a button to enable XMP with a couple of clicks, a breakdown per-port of the SATA drives installed, the ability to enable RST with one click, a breakdown per-fan of the fan speeds, a graph showing the fan profile of the CPU fan header, a button to enter fan controls, a quick system tuning option, a configurable boot priority list and at the top a button for an EZ Tuning Wizard. As the guy that fixes hardware at home and for family, this is the information you need on entry to help diagnose issues without looking in the case.
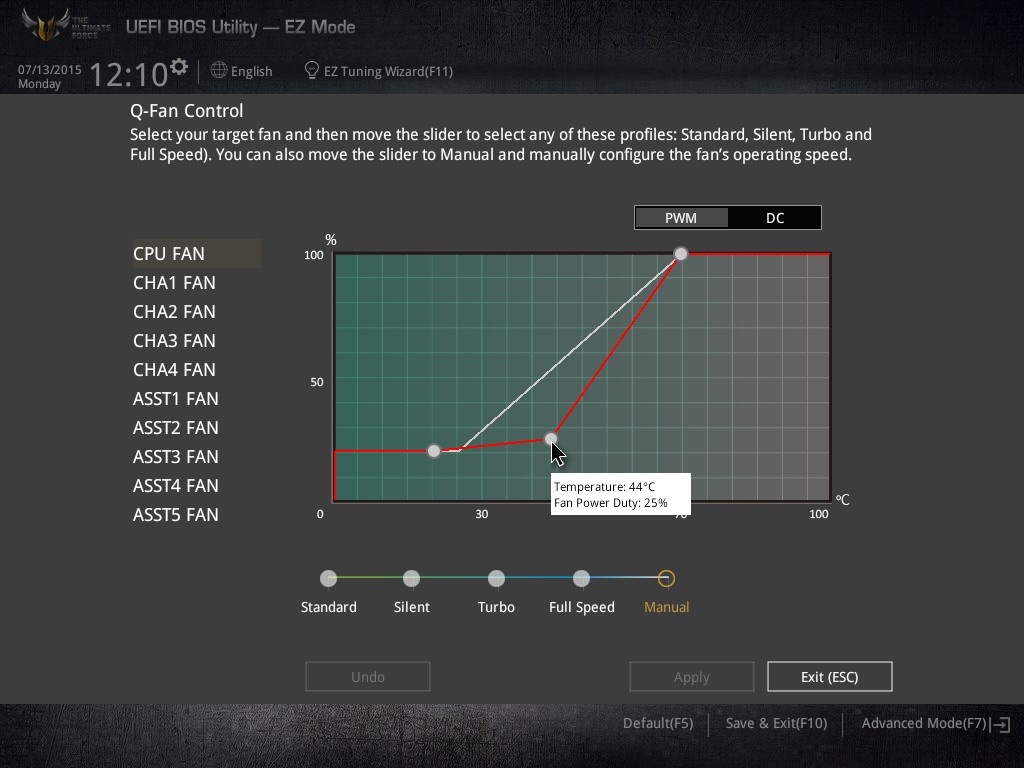
Most of the interactivity from a BIOS comes from the fan controls, and here ASUS offers a two point gradient settings for its fans. Users can either use the presets or do a manual configuration as shown above. Any settings applied in the operating system software override these, although the BIOS settings take into account any situation when the OS software is not present/fails.

The EZ Tuning Wizard at the top of EZ Mode allows new users to configure a quick overclock or RAID array by following the on screen commands. For the overclock, the system asks the type of usage (gaming/everyday use) and the cooling being used:
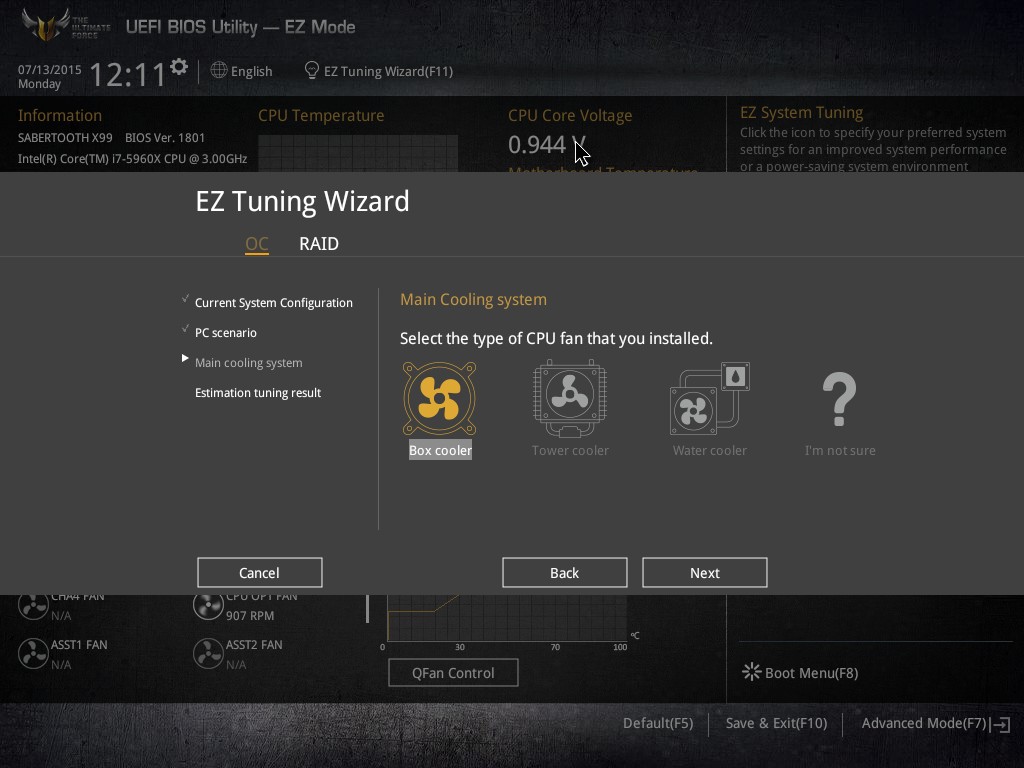
Before giving an overclock estimate based on the hardware installed and a final option to attempt implementation.
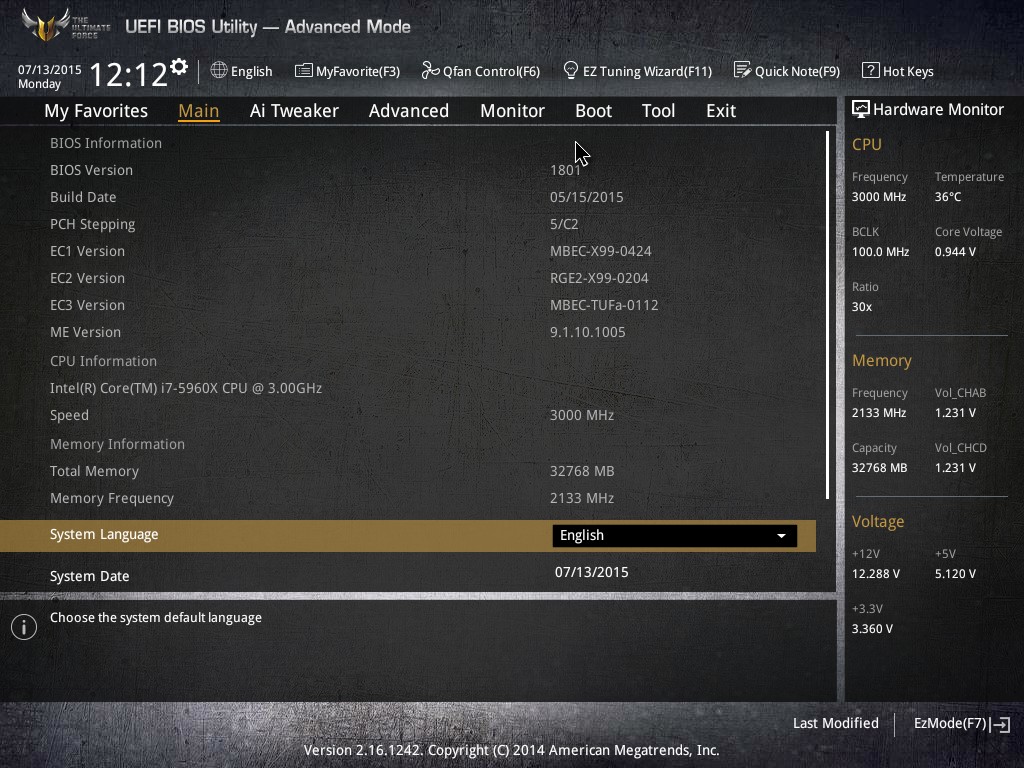
Pressing F7 moves the user into the advanced mode, which from a list perspective is similar to how vintage BIOSes are used. ASUS has updated the list with a few tweaks, such as adding information about the system on the right hand side and a description of the selected option at the bottom. There is also the My Favorites feature to the left of this Main tab which allows users (particularly overclockers) quick access to user-selected settings.

For overclockers the main interface here is AI Tweaker, giving a long list of options from frequencies, DRAM options, voltages and other tweaks. One suggestion I’d like to put to ASUS is the top four options listed here – when I select an option further down, I have to scroll back up to see the difference it will make. These four options are best served on the right hand side with the Hardware Monitor section.
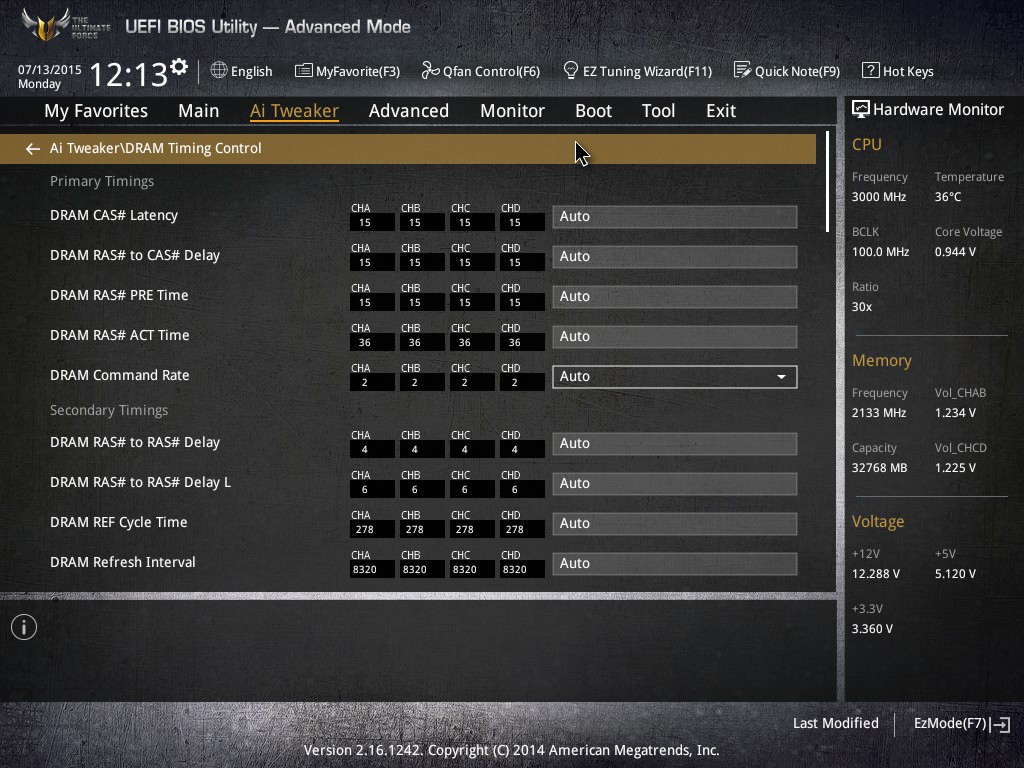
ASUS is usually proud of its DRAM compatibility and overclocking, especially with the OC socket, so there are over five pages of DRAM settings to sift through for enthusiasts. At the bottom of this are a few options worth noting:
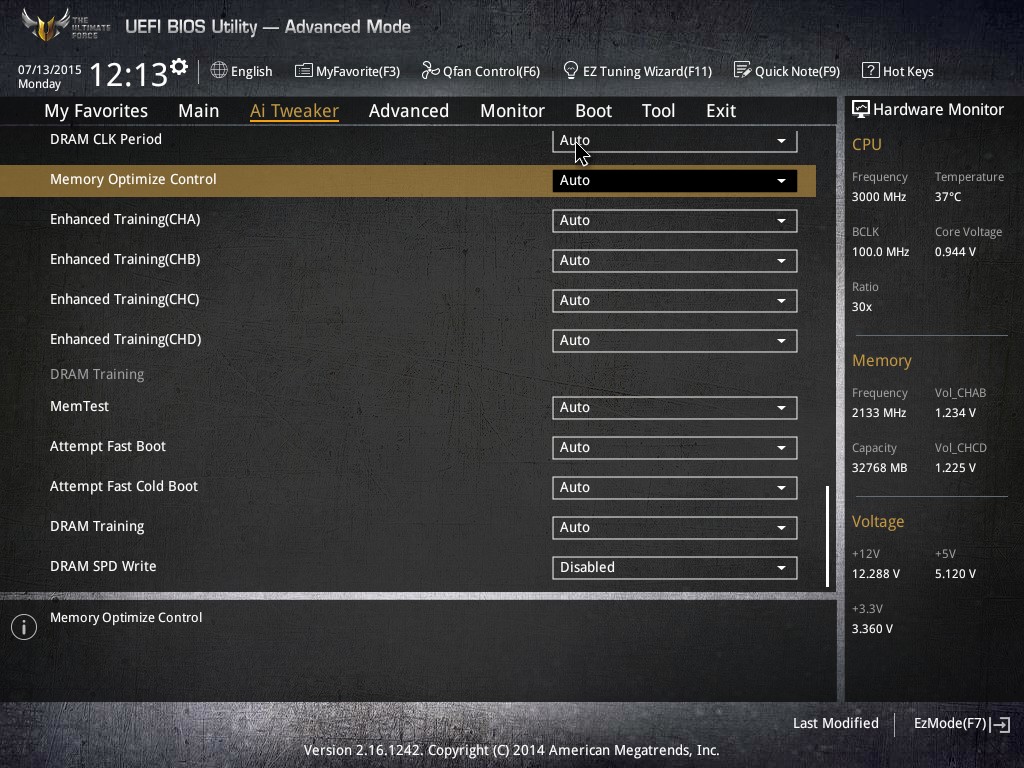
With the X99 platform, DRAM needs to be extensively ‘trained’ to ensure proper operation. This means adjusting internal settings and configuring internal voltage points based on the DRAM age, temperature and other factors. This process takes around 10 seconds on the X99 platform at POST, giving POST times around 20-25 seconds. This can be shortened by the options listed above, by disabling some of the training, though it might result in more failed POSTs or instability over time. For completeness at least, or specific use cases, these options are included nonetheless.
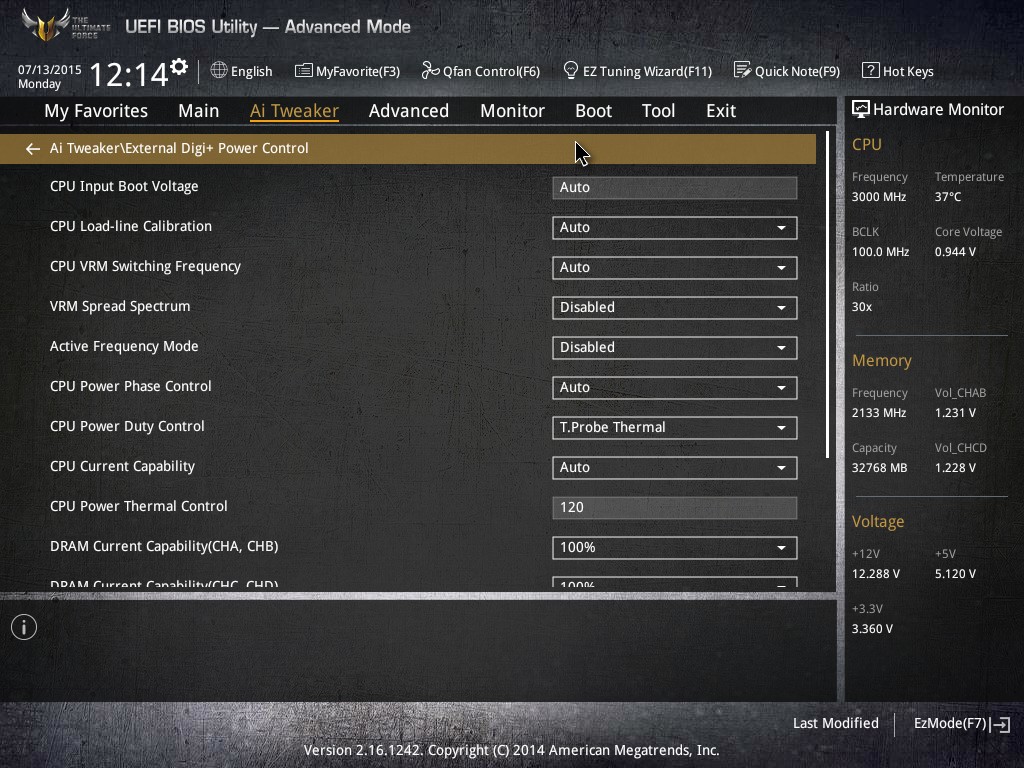
Digital power options are also here, including options to adjust the thermal control of the CPU and power phases.
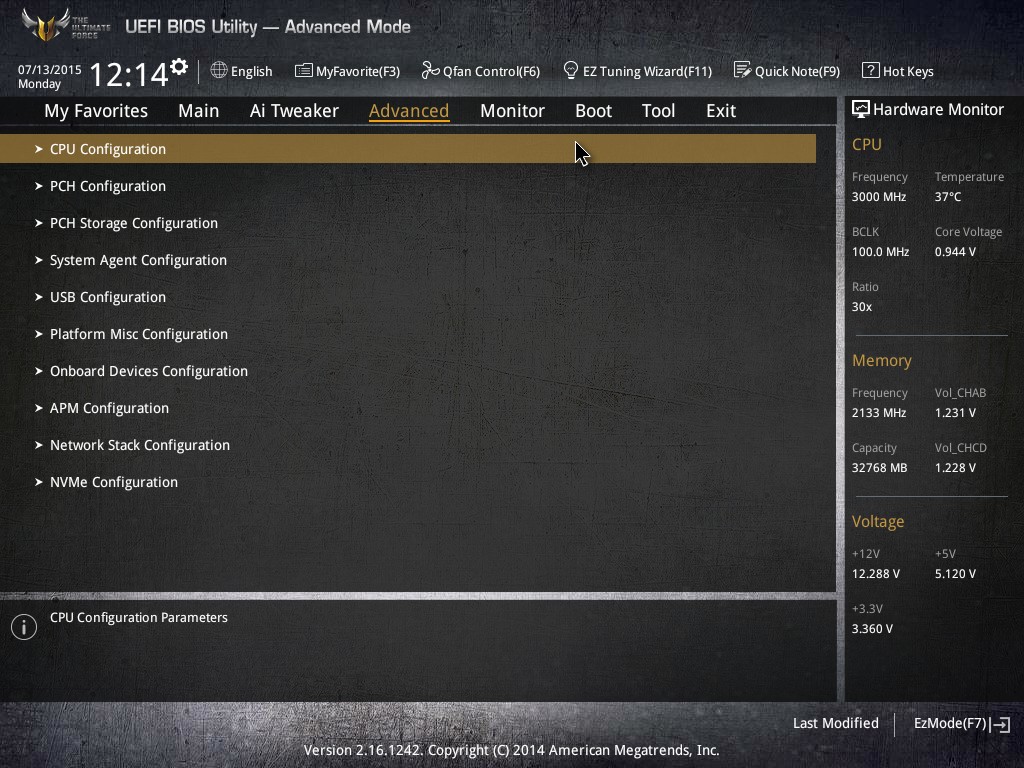
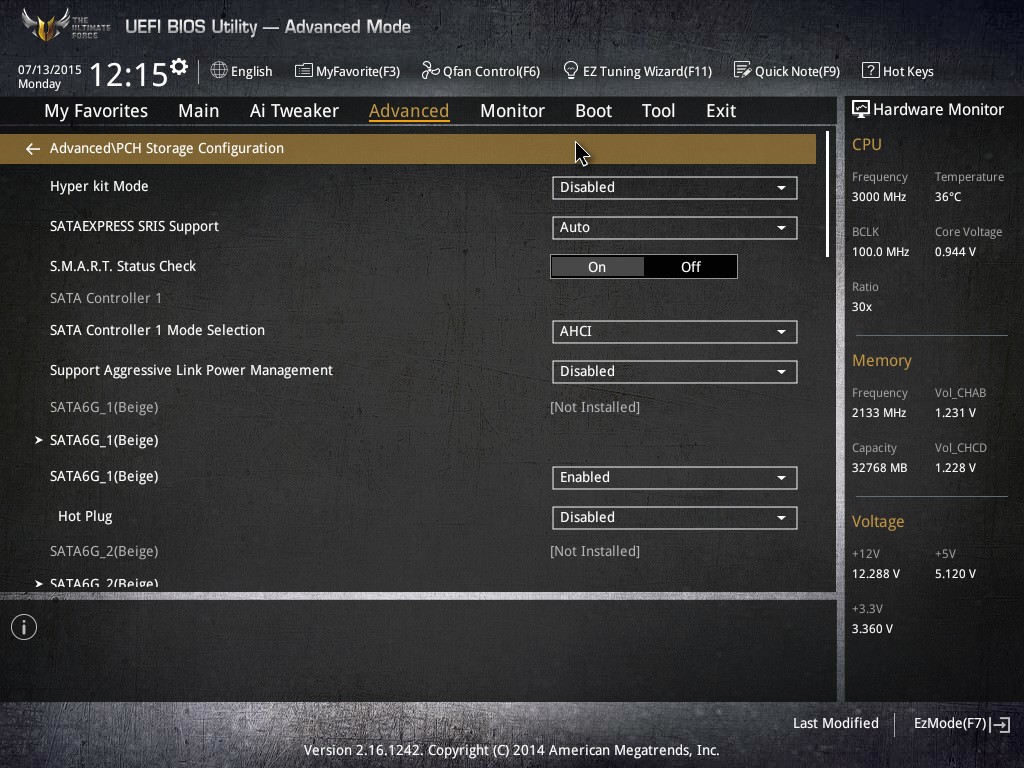
The Advanced options list contains the regular set of options such as core count, HyperThreading, power states, PCIe speed and VT-d (disabled by default). There are a few things to note however – in order to enable the Hyper Kit for the Intel SSD 750, the PCH Storage Configuration menu must be selected:
When enabled, the NVMe Configuration option will list the drive:
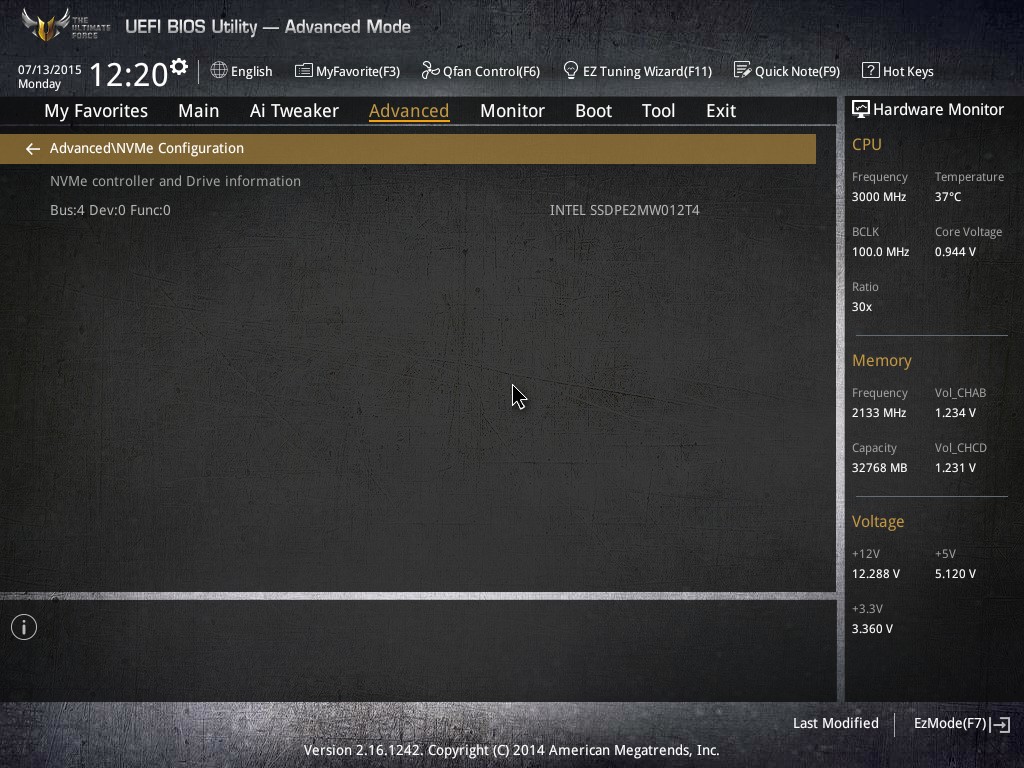
This drive is then bootable from the Boot sub-menu.
The Advanced menu also allows the USB ports to be enabled or disabled individually to deter random input of drives or in the event that one stack of ports is shorted. The USB 3.1 ports can be controlled in the Onboard Devices Configuration menu:
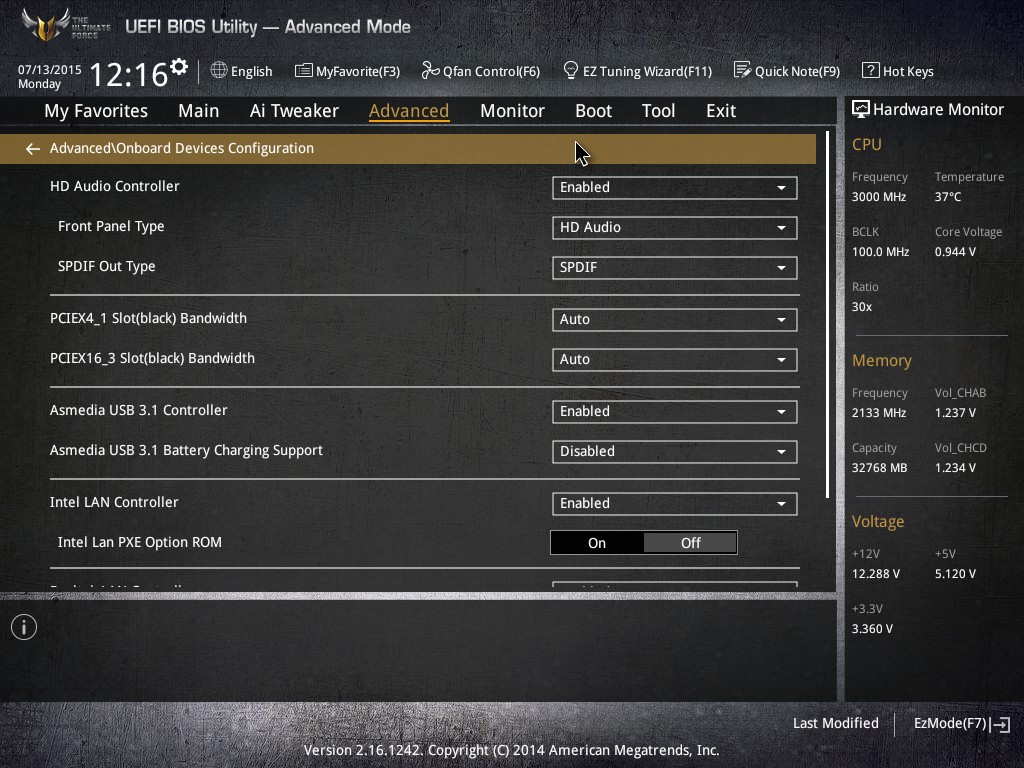
Here the controller is enabled by default, but the fast charging modes are disabled by default.
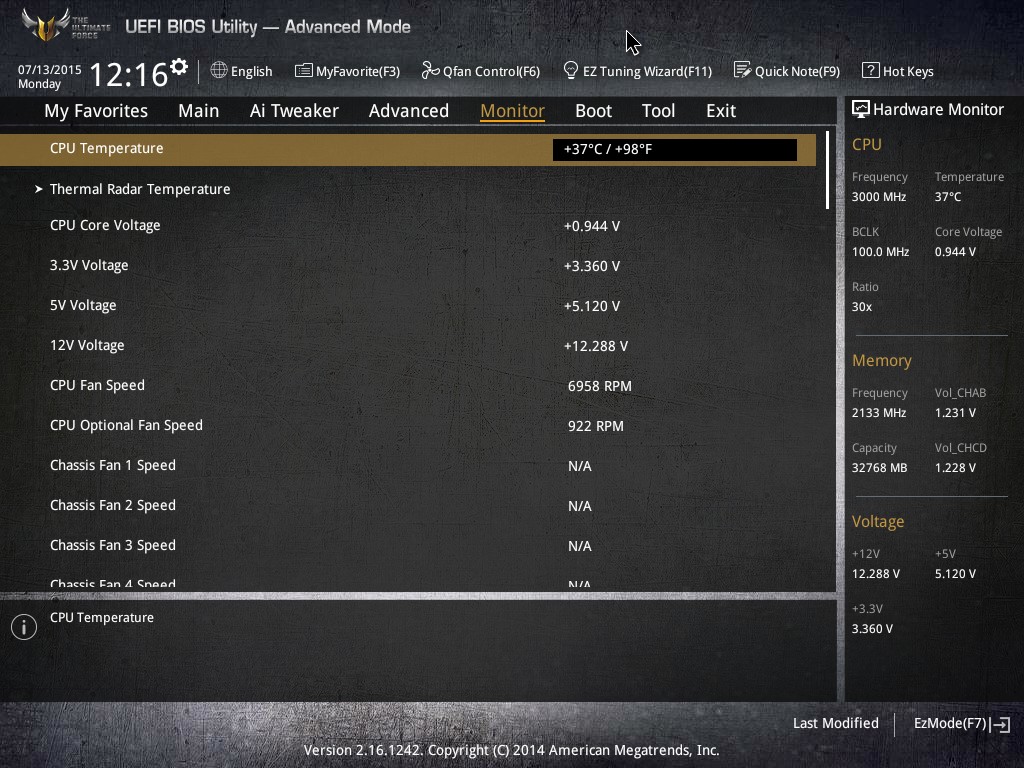
The monitor menu has the regular list of temperature sensors and fan speeds, although having 11 fan headers means a long list of them at the bottom:

It’s worth noting that this Monitor list only has one temperature sensor on it – to get details on the other 10, users have to navigate to the Thermal Radar Temperature menu:
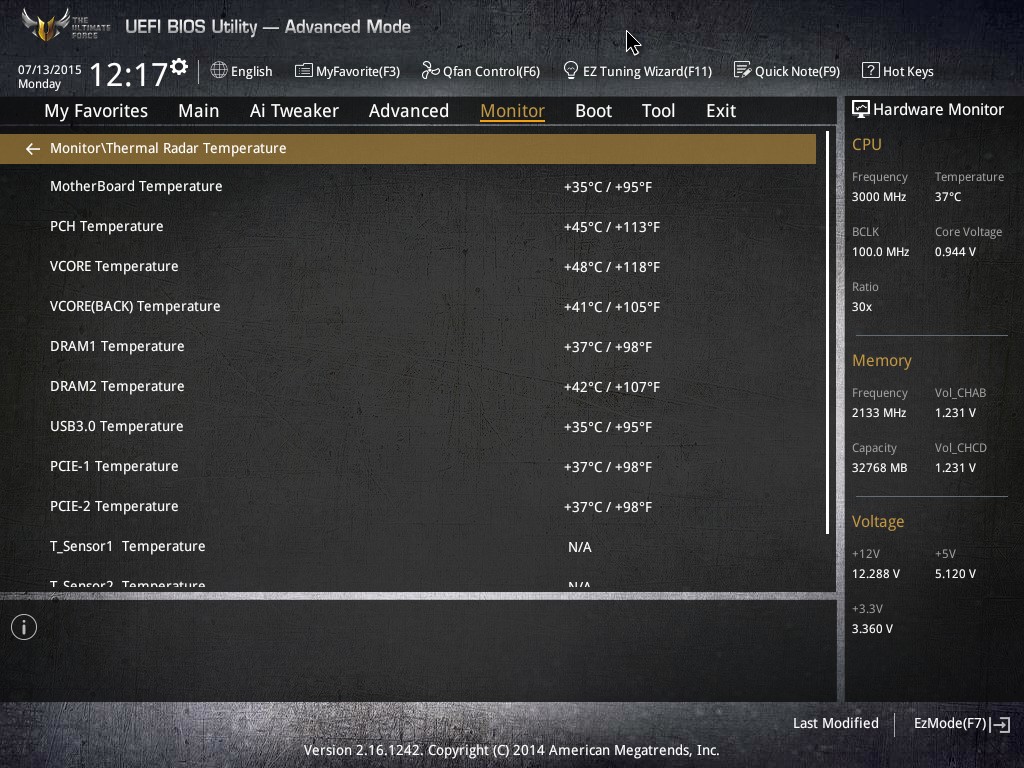
It’s interesting to note here that the information is not all-contained, requiring users to go back and forth depending on their options. Ideally we need a screen here like the EZ Mode, or at least laid out similarly, so all the information can be presented on the screen at once. Sometimes having a bulk list like this is the least interactive way of doing things.

The Boot menu is the standard ASUS layout we’ve seen many times before, and as long as the Hyper Kit option is enabled then the Intel SSD 750 will show up here as a device to boot from. For Xeon Phi and other cards, it is worth noting that the Above 4G Decoding is listed here and disabled by default.

The Tools menu has options for flashing the BIOS as well as saving overclock profiles and DRAM SPD info. I want to point out the GPU Post option though:
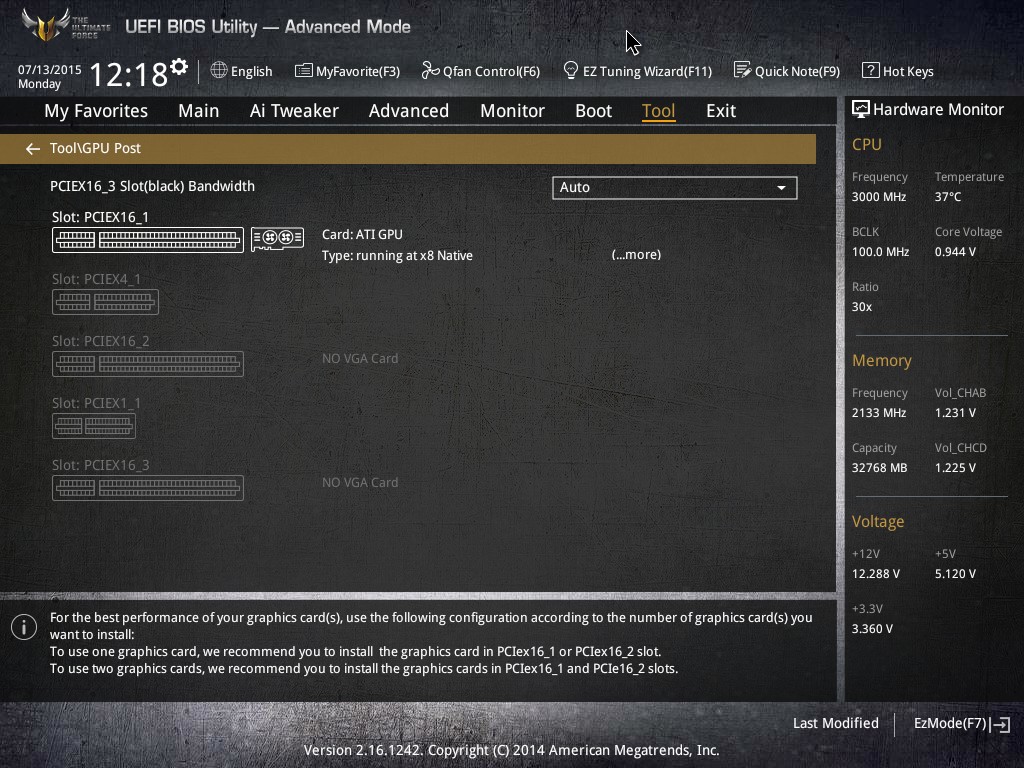
We’ve seen this before on ASUS motherboards, though this is the first time (I think) that I’ve seen the ‘more’ option connected to it. Selecting this gives the GPU information:
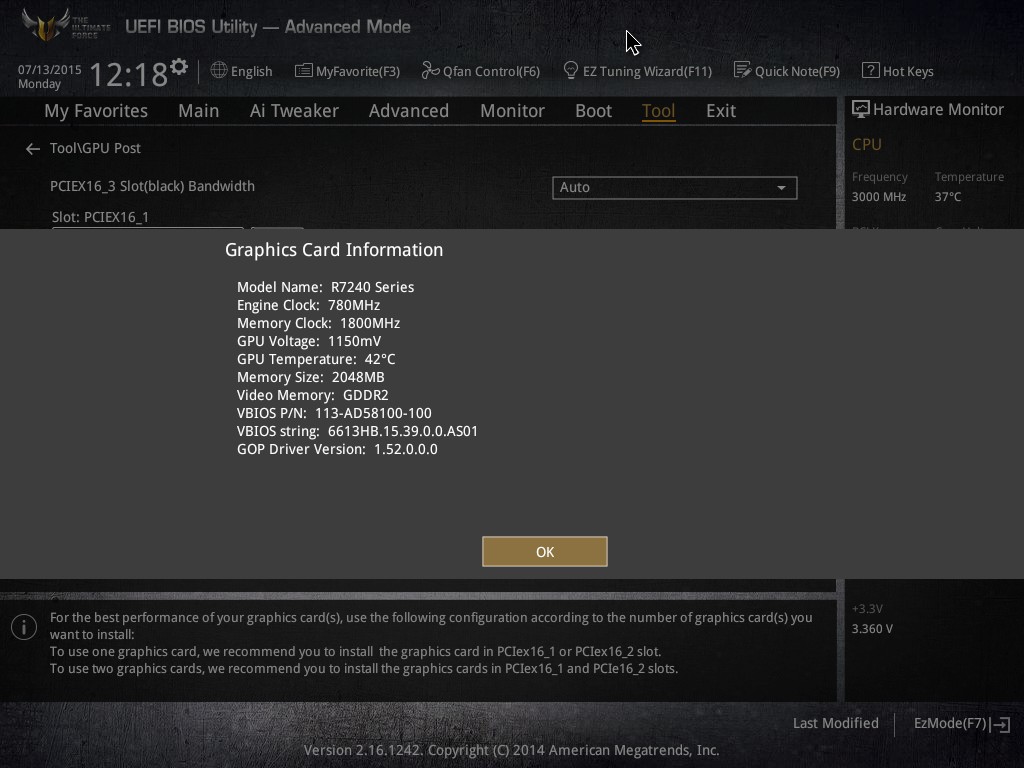
No doubt there is a way to include this in the GPU Post menu without having to select extra options, but as far as I can understand it is a fairly new feature. It didn’t detect the DDR3 on the graphics card correctly though!
As an aside, one of the things missing from the ASUS BIOS which other companies have is a full ‘Board Explorer’ mode which gives a picture of the motherboard and highlights what is installed where. ASUS kind of has this information already in the BIOS though it is split over different menus and options, rather than in one handy place. It might be worth looking at for the future.

The final menu is the Save and Exit menu which also offers up a list of changes made since the system was booted.


57 Comments
View All Comments
OldCOP - Tuesday, September 8, 2015 - link
that would also kill real advances in overclocking theory. Overclocking is not for someone who does not know what he is doing. If you must rely on "built in protection" you don't need to be overclocking.OldCOP - Tuesday, September 8, 2015 - link
It's the guns fault, not the NOOB that pulled the trigger ! Right? People need to take responsibility for what THEY do and stop blaming the manufacturer.Stuka87 - Wednesday, July 22, 2015 - link
He said how to get to the source (but has since now posted it).I find it pretty awesome that you were running X99 boards before they even started development on them.
superflex - Wednesday, July 22, 2015 - link
ASUS sockpuppet in the House!Six X99 boards operating for years?
LMFAO.
Does ASUS pay you in Hot Pockets?
bigboxes - Wednesday, July 22, 2015 - link
It was pretty funny. SIX Asus X99 boards. LOLGothmoth - Friday, July 24, 2015 - link
6 boards working since late 2014 make ~5 years of use.Desired Username #3 - Sunday, January 17, 2016 - link
Literally how? Are you adding up the time that you've owned the boards?Gothmoth - Friday, July 24, 2015 - link
well m*r*n...im a 3d freelancer doing jobs for architects.you ever heard about renderfarms?
distributed renderings? no.. well then get a clue.
so yes i need six x99 boards because i need lots of memory for my 3d scenes.
all boatds are equipped with 64gb of memory... ist how i earn my living.
not that a boy like you, who lives in his parents basement, would know anything about work or having a job.
so keep on wanking....
Ryangadz - Friday, July 24, 2015 - link
Have you looked into a GPU setup to do renderings? I know 3d studio max does it maybe Maya too. Workflow into those programs might not be ideal for your process but it could certainly save you a lot of time and money.I've always run dual CPU setups since 2002 for this reason but a GPU can be several times faster than even a dual Xeon for global illumination and raytracing.
itsallgoode9 - Wednesday, July 29, 2015 - link
GPU renderers generally aren't as fast as you'd think for interior renderings. Many other things, they are blazing fast (products, vehicles etc) but generally not interiors.I do product renderings for a living using Maya with Octane Render (GPU) and they work super fast for that. I was playing around with some interior rendering the other day and holy cow the speed drop from my product renders is substantial.
All my render programs are unbiased though, so if there's a biased gpu program out there, it might work much faster but then you're losing a lot of photo realism using biased.