ASUS TUF Z97 Mark S Motherboard Review: The Arctic Camo Special Edition
by Ian Cutress on November 10, 2014 10:00 AM EST- Posted in
- Motherboards
- Asus
- TUF
- Z97
- Sabertooth
ASUS TUF Z97 Mark S BIOS
As always with our motherboard reviews, the discussion when it comes to the BIOS is one of form and function. When we moved into the graphical BIOS era with UEFI implementations, it opened up a world of aesthetic and interactive capabilities. Some manufacturers were slow on the update in terms of the interactivity either by virtue of actually putting effort into the prospect or due to a lack of ideas at the core of the BIOS team. The BIOS is meant to be the main place to deal with hardware and firmware configurations, although there is now plenty of opportunity to improve the user experience rather than being a wall of text. I am a big fan of improving the user experience.
ASUS’ BIOS development over the last few launches is of an upwards trend. I like to remain on the skeptical side of the analysis, but ASUS is at least receptive to suggestions, improvements and additions. A danger with introducing new concepts and additions is responsiveness within the BIOS, as any screen that updates visually over time needs to be quick to keep the system feeling fast. There is also a persistent issue in general with BIOS design regarding color schemes and fonts, but ASUS has been working on this as well. As a result we get a non-fixed length and variable sized font in the ASUS BIOS which allows for potential optimization of detail and design.
For ASUS’ Z97 and X99 range, the format of the BIOS is essentially identical with entry into an EZ Mode with an Advanced set of options on hand as well. There is an amount of interactivity with the fan controls, and for the Z97 Mark S the BIOS also gets a TUF implementation with a white accent.

As regular readers of our motherboard reviews will notice, I constantly want a BIOS to display a lot of information about the system the minute I enter the BIOS. ASUS gives this information in spades (MSI is not too far behind), with the motherboard name, BIOS version, CPU, CPU frequency, amount of memory and memory speed right off the bat in a small section in the top corner. If all motherboards had even this, it would be amazing.
Also in this first screen, the EZ Mode, we have a graphical representation of the CPU temperature over time (useful if you forget to attach the CPU fan), CPU voltage, motherboard temperature, a per-DIMM status of the memory, a per-SATA port status of storage, instant application of XMP profiles or RST, an up-to-date list of fan speeds for each fan header and a visual representation of the fan profile in play. If that is not enough, we also have an EZ System Tuning option and a Boot Priority menu.
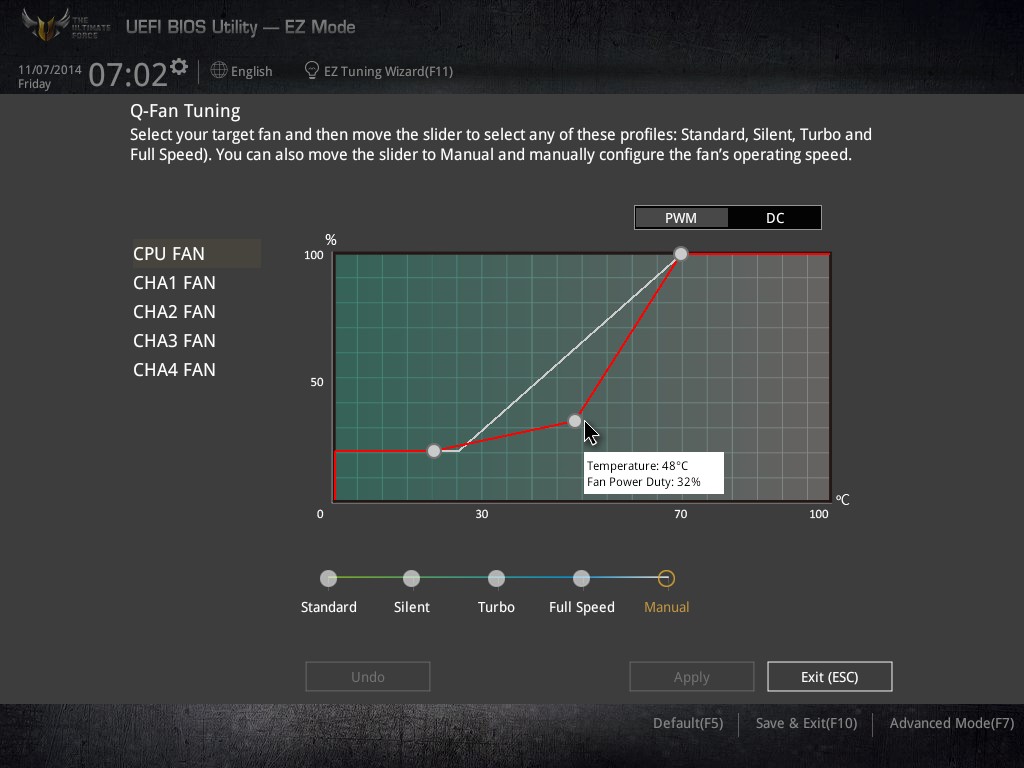
Clicking the Manual Fan Tuning option brings up a screen to allow users to adjust the fan profiles for the CPU and Chassis headers in terms of a three-point gradient. All of these fan headers are DC/PWM capable, and ASUS offers a series of presets along with a manual option. Aside from a request for more gradient points, one thing missing here is a button to apply the same profile to all the fan headers.
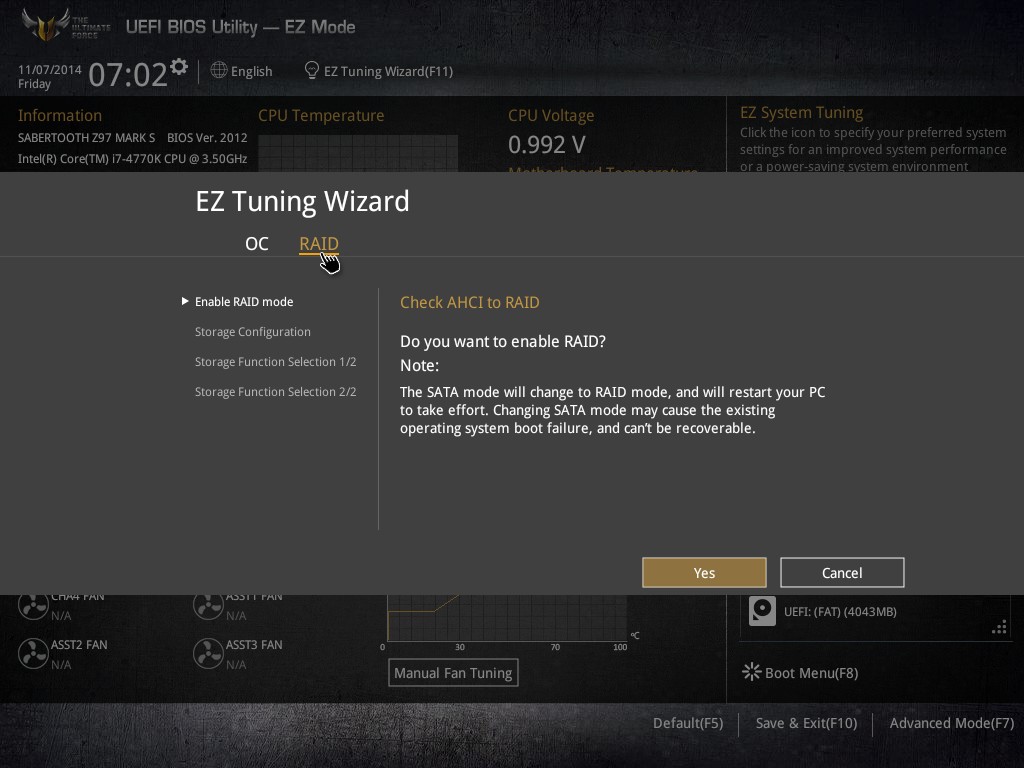
The EZ mode also has an EZ Tuning wizard for RAID or Overclocking. For the RAID Mode, the BIOS will use words to describe the potential RAID options rather than a list of options that might not mean much. The OC menu also offers some point and squirt topology, asking users about their type of use (Gaming or Media) along with their cooling (stock cooler, big air coolers, liquid) in order to determine a potential overclock.


Pressing F7 in EZ Mode moves into the Advanced mode, where we get a more typical ‘Main’ screen to deal with:
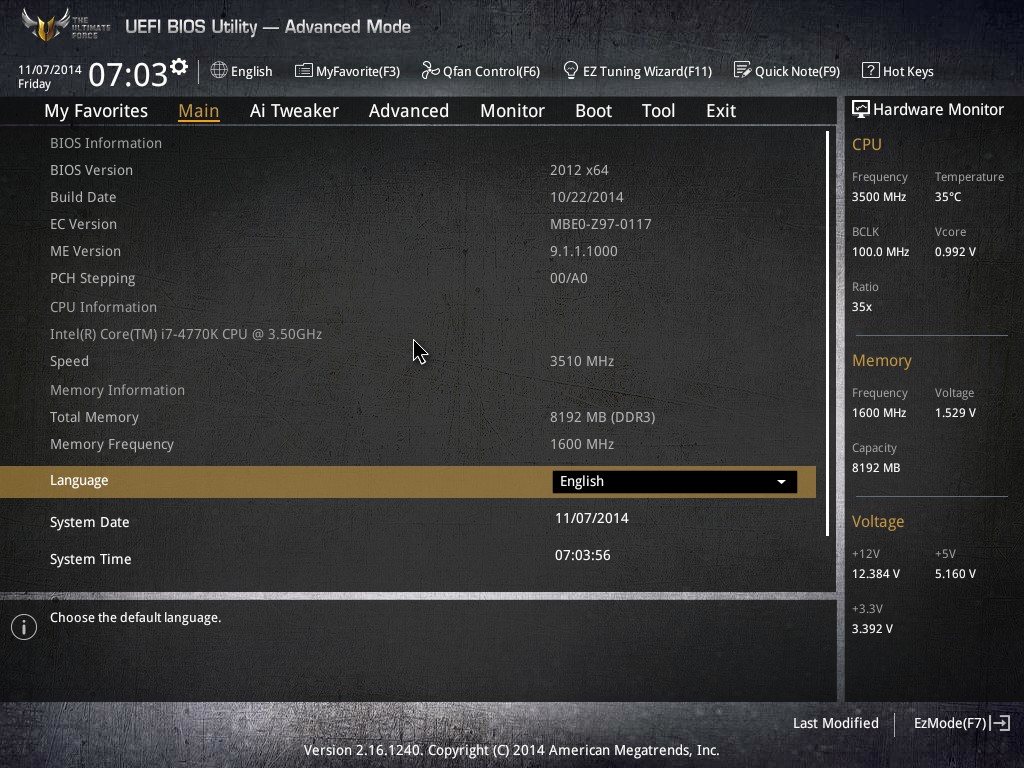
This tab breaks the information down to one bit per line, which some other manufacturers still do as a default.
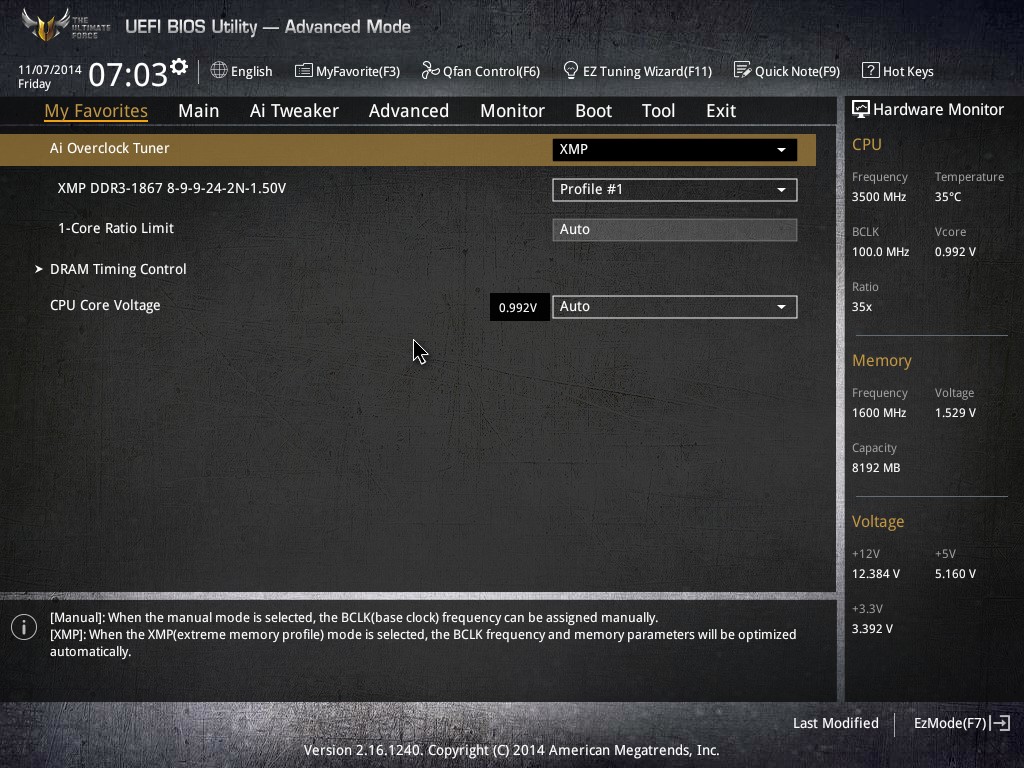
The tab to the left is ‘My Favorites’, which allows users to select the important options they need (for example in overclocking) into one menu rather than scrolling through lists. Above are a few options I use in our basic overclocking test.

The long list of options for advanced overclocking is in the AI Tweaker menu. Here everything is piled in a semi-ordered list (CPU, DRAM, Voltage) with certain sub-menus for DRAM sub-timings and DIGI Power.
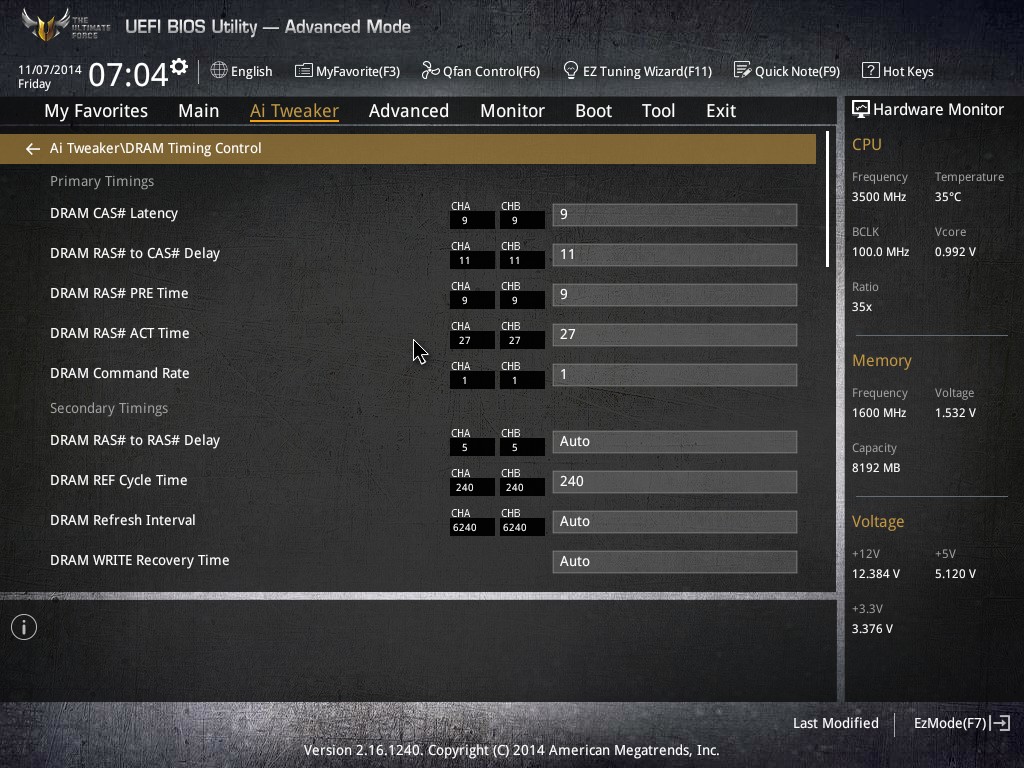
One suggestion I would like to put to ASUS is to make a version of AI Tweaker similar in design to EZ mode. Rather than a bulk list we get several columns of related info and it fits nicely into one screen (or two) so we have everything on screen for reference.
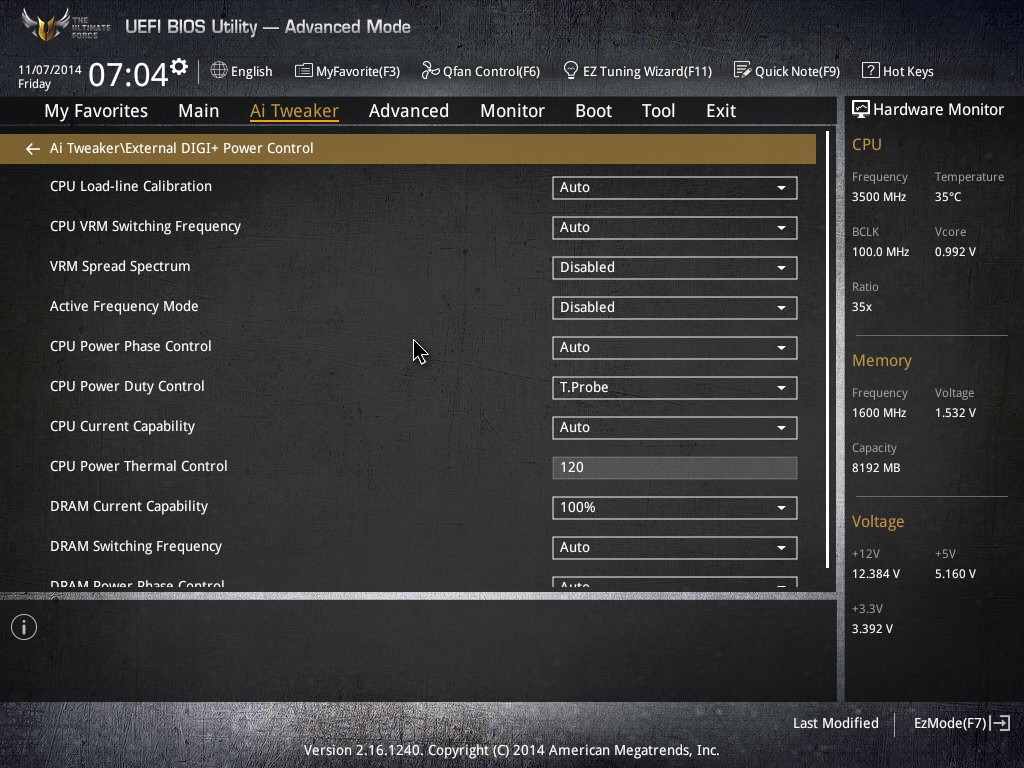
That being said, ASUS does at least optimize the space to the right and bottom of the BIOS, giving information such as current frequencies and voltages, along with a help description down at the bottom. Most of these explanations mention what happens when an option is adjusted, rather than just quoting the range.
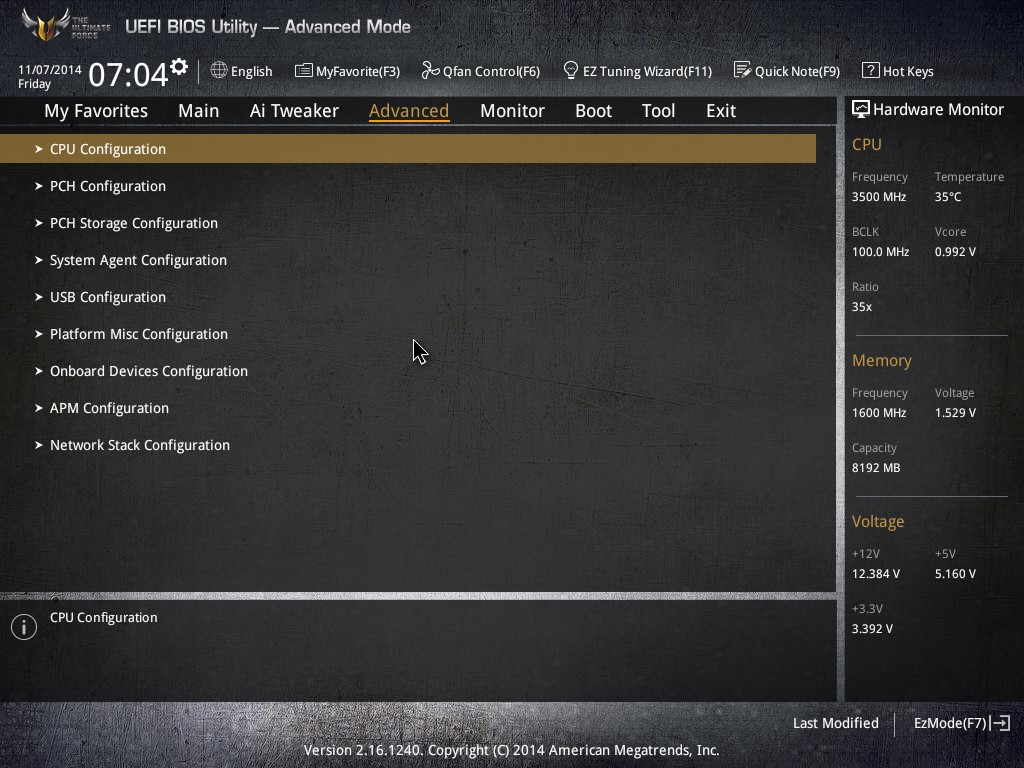
The Advanced tab features a lot of the CPU and PCH options in terms of controller support and settings. This includes integrated graphics, CPU Power configurations (cores, Hyperthreading, SpeedStep), Smart Reponse/Smart Connect, SATA modes and onboard devices:

It is these menus that we go into and disable a large portion in order to get our stripped POST times.
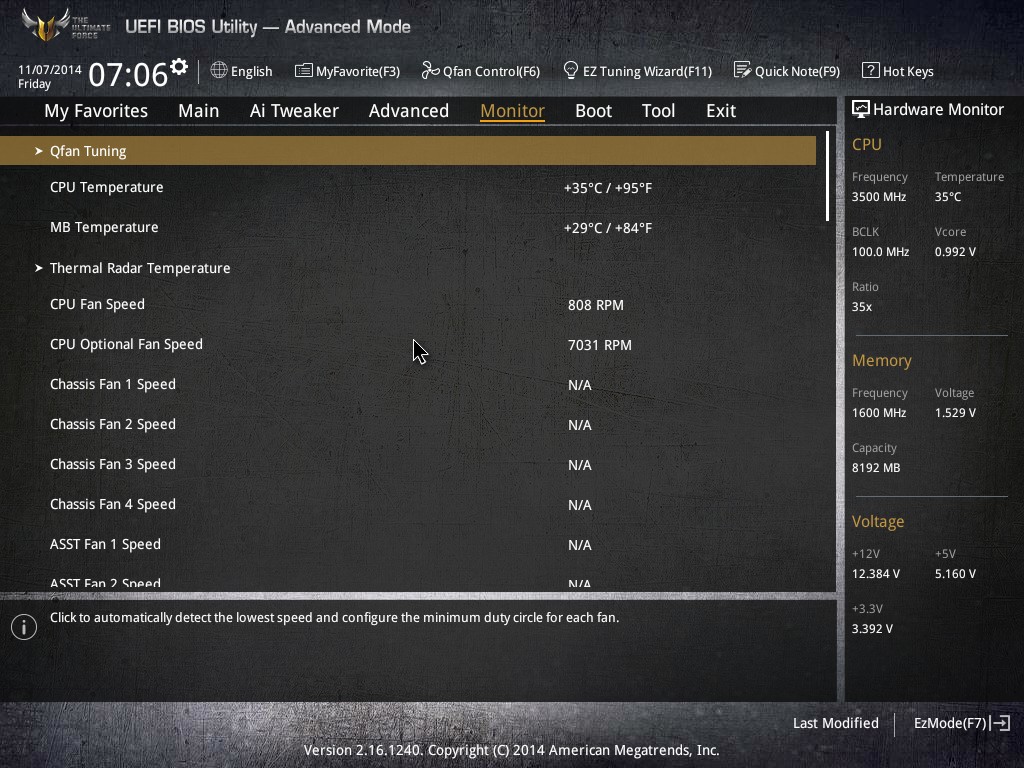
The Monitor tab deals with everything relating to temperatures and fan controls. Here we can adjust the QFan settings, and one feature with TUF boards is the amount of sensors – these values can be seen here.
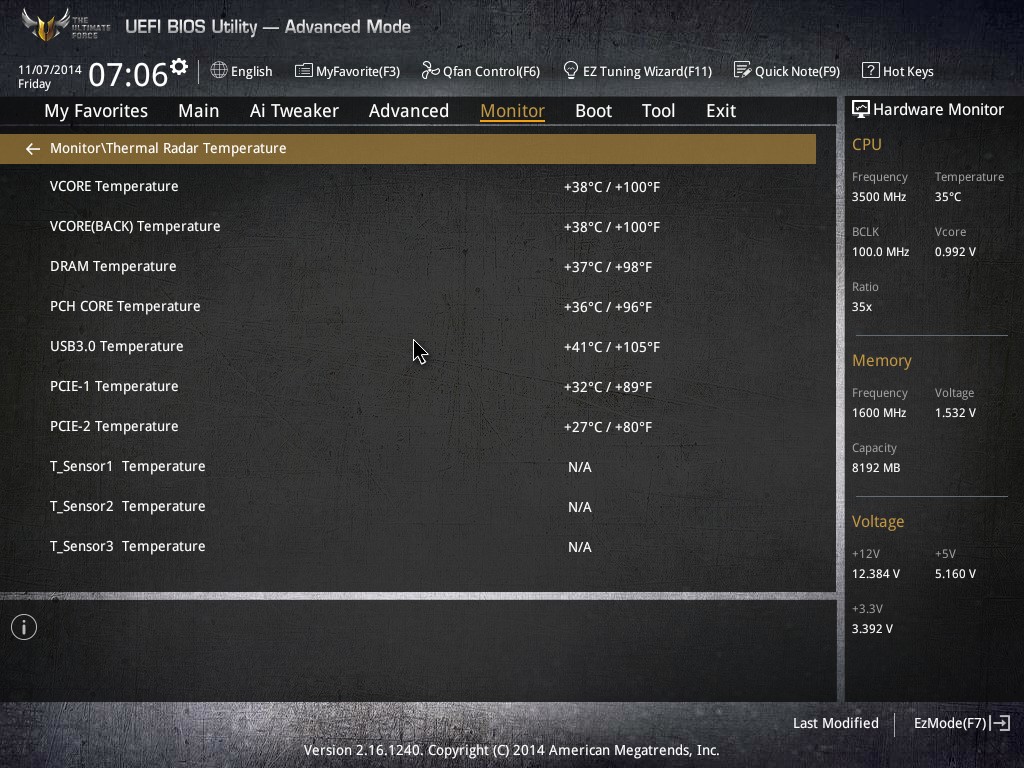
The Z97 Mark S comes with nine temperature sensors on board (7 shown here) and three additional 2-pin headers for users with the thermocouples provided with the motherboard.
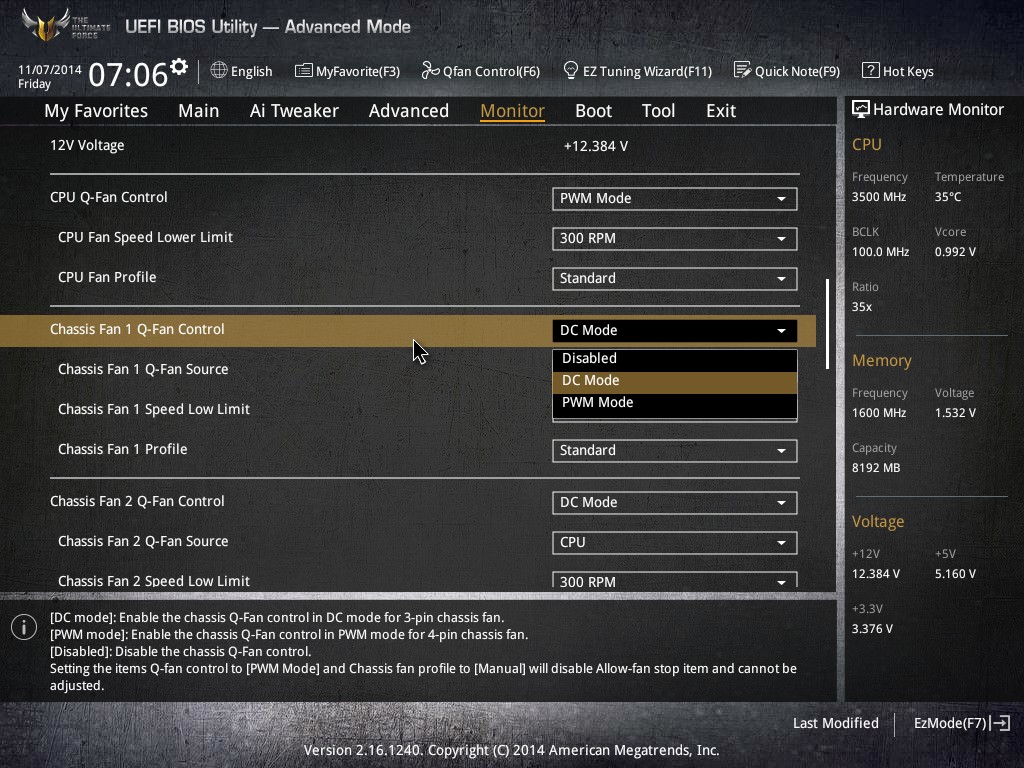
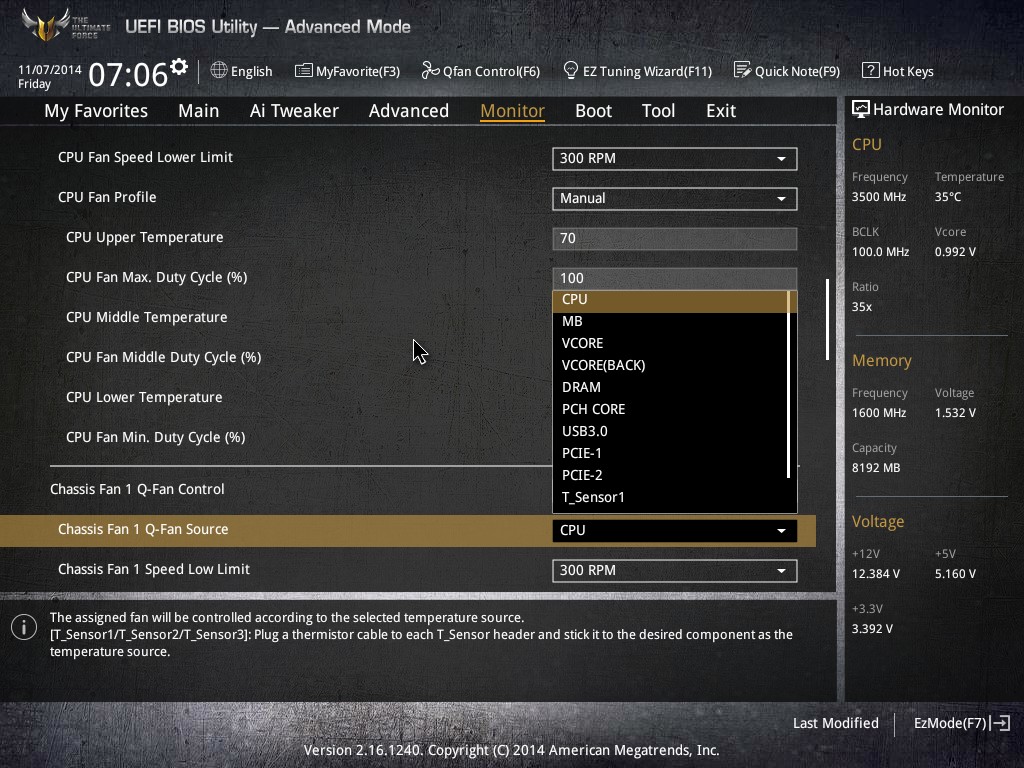
The CPU and chassis fans can be adjust here in terms of DC/PWM mode, or the sensor from which they run:
There are a set of additional fan options as well, including the ASST fan headers, fan overtime (keeps fans spinning after shutdown), ‘Dust de-Fan’ (reverses the two mini-fans on board to remove dust) and frequency of dust de-fan implementations. We have seen something similar on previous TUF boards and some graphics cards.
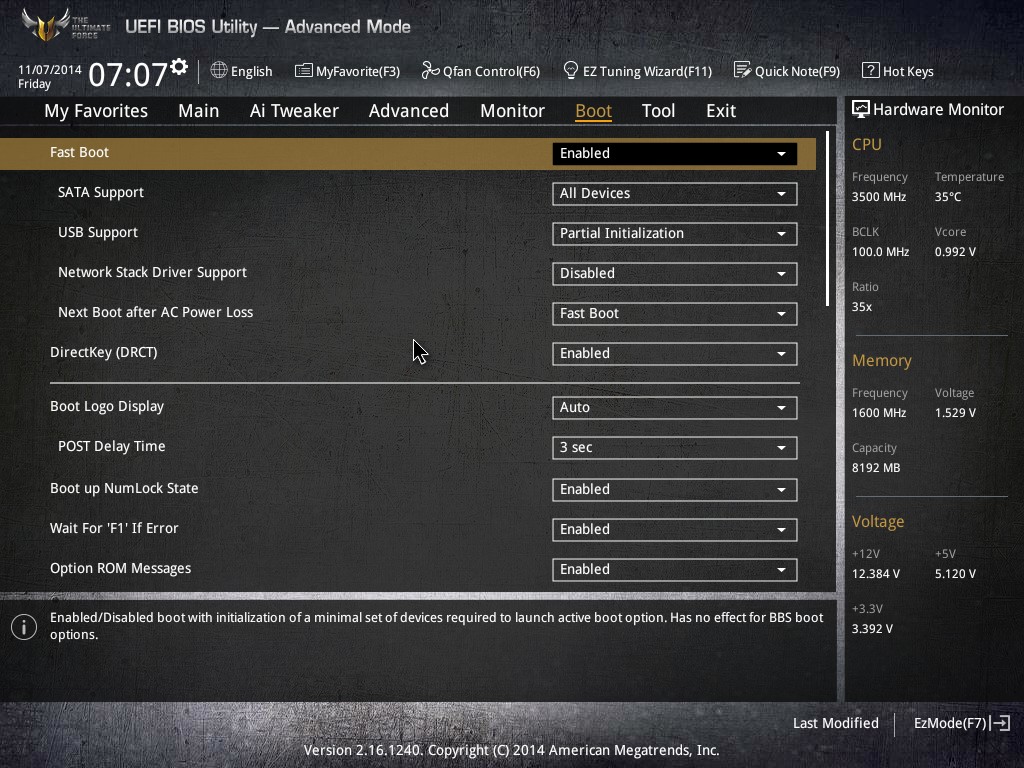
The Boot options in the BIOS are standard fare for previous users of ASUS products, offering various options to speed up POST times, adjusting boot priority or boot override functionality.
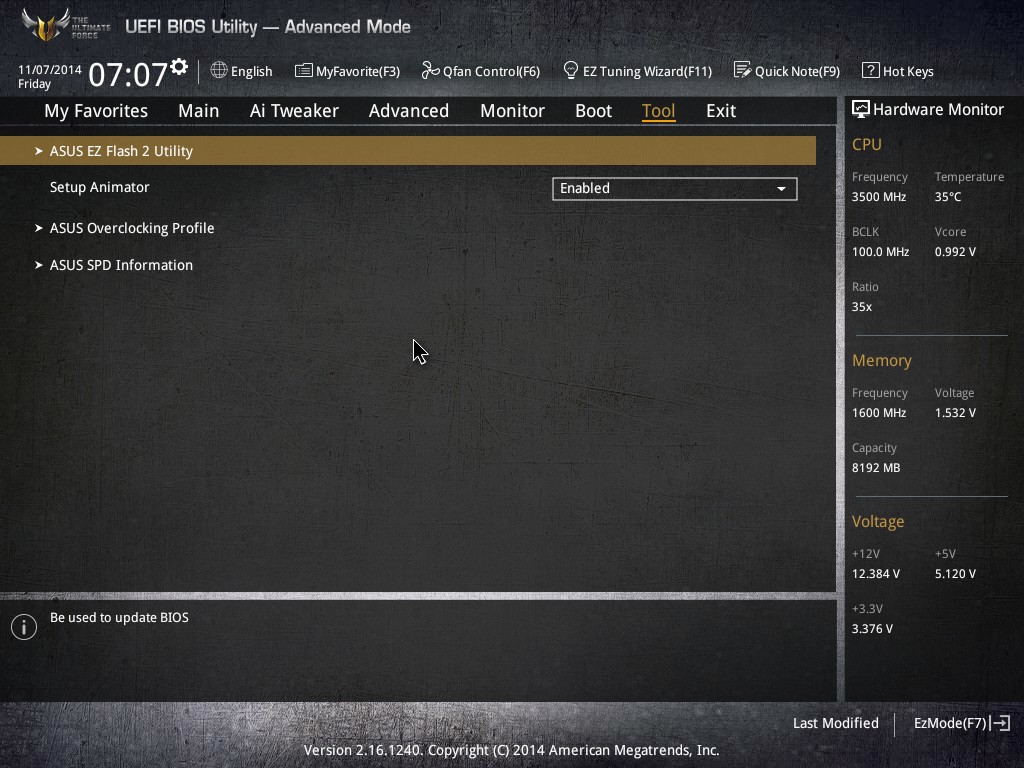
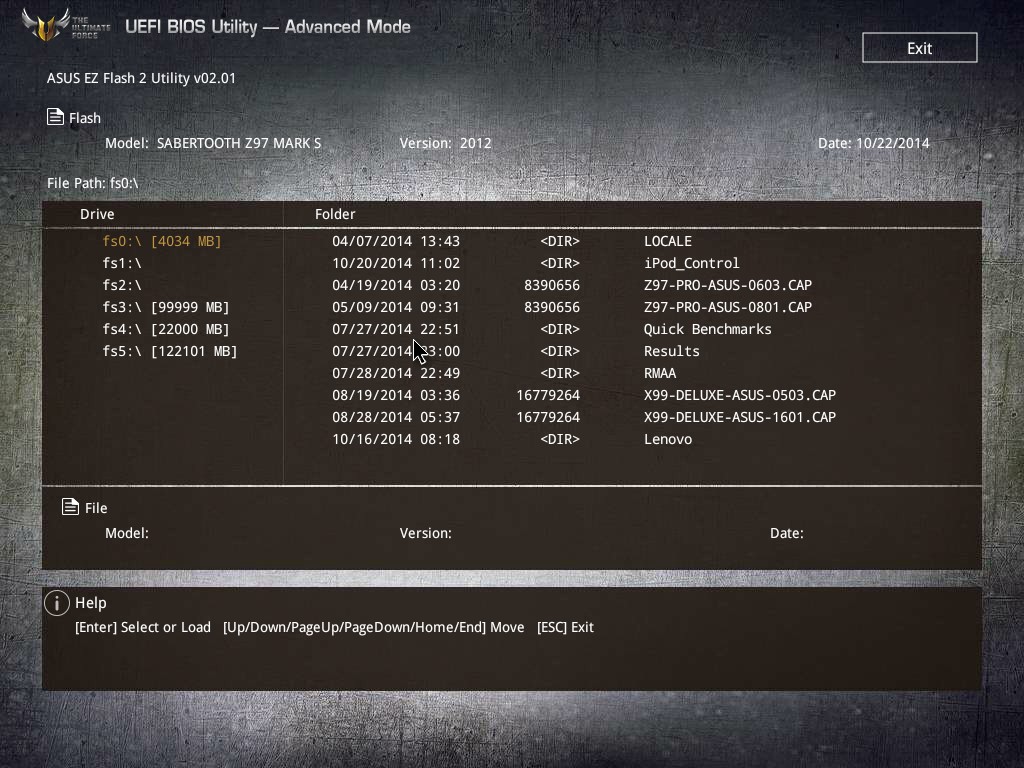
ASUS also includes a few small tools to go along with the rest of the BIOS. EZ Flash 2 is the usual software to allow for BIOS updates:
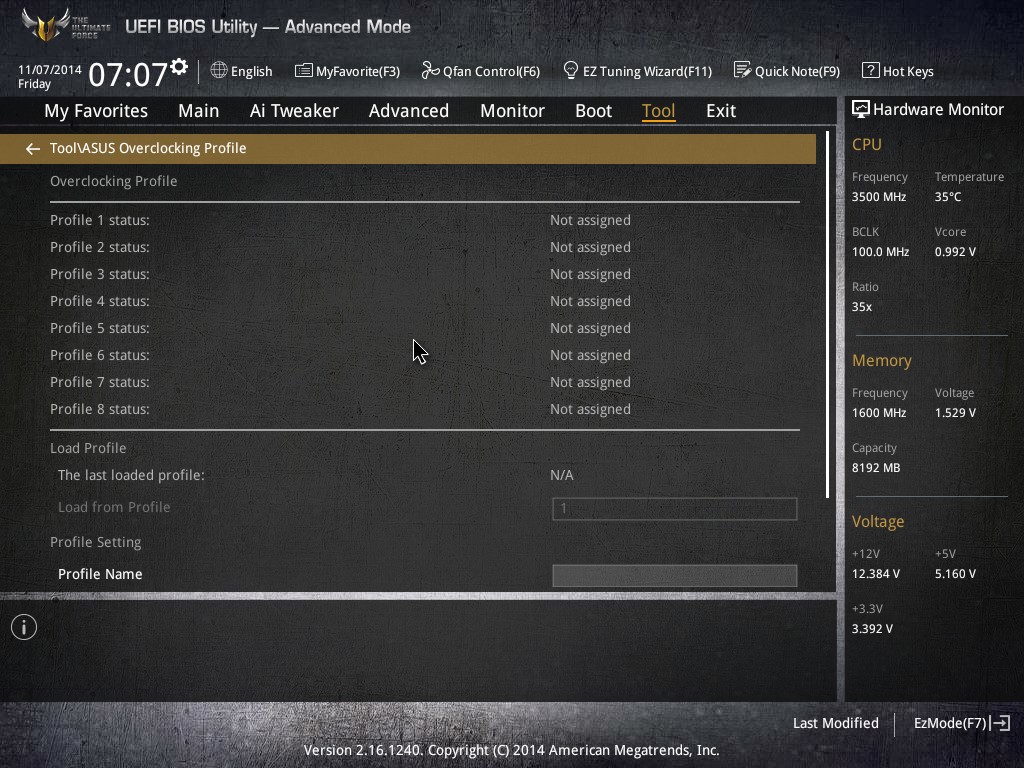
OC Profile does what it says on the tin: users can save their BIOS profile for various option settings:
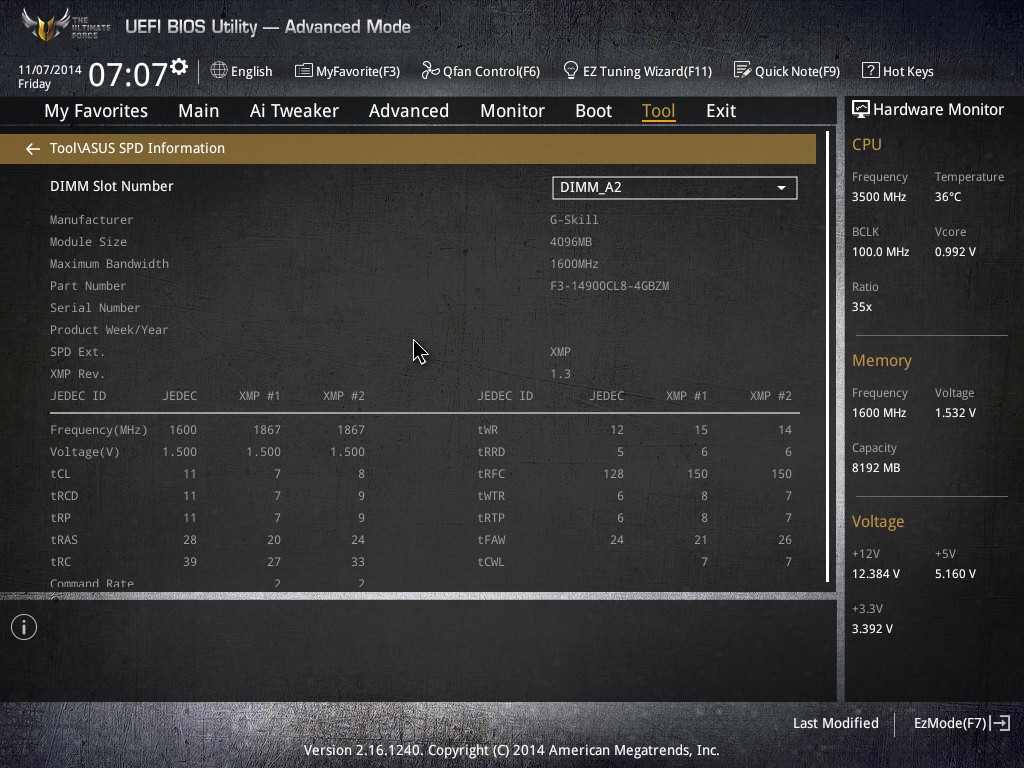
SPD Information gives extreme detail about the memory detected in the system:
The last option in the Tool menu is ‘Setup Animator’, which enables/disables the swiping motion as you move through the BIOS. As someone who likes to navigate through the BIOS at speed, the animation mode can be rather annoying, so at least it can be disabled.
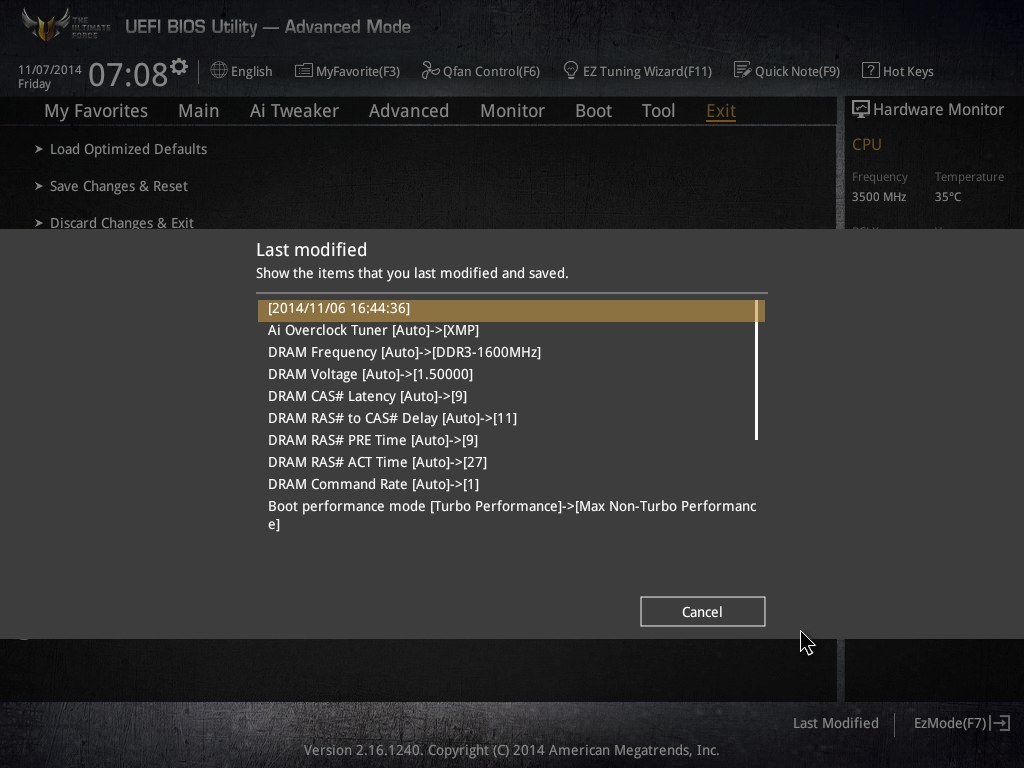
ASUS also has Quick Note which allows a user to write a note in the BIOS to be saved for later, but the Last Modified option allows the user to see what has been changed in the BIOS since POST:
One somewhat major omission from the ASUS BIOS but found in other manufacturers’ motherboards is a ‘Board Explorer’ mode. MSI and ASRock use this mode to show an image of the motherboard and indicate all the hardware currently installed. I find it particularly useful when a memory module is not recognized, or for detecting PCIe bandwidth per device at POST. Technically ASUS has the DRAM info detailed right on the front EZ mode page, although having the same data displayed in a couple of ways is not a bad thing.


45 Comments
View All Comments
Pontius Dilate - Monday, November 10, 2014 - link
I really would have liked to see pictures of the board with the armor removed. The white PCB sounds like it could be interesting by itself.xthetenth - Monday, November 10, 2014 - link
Yeah, I'd be really interested in how it looks with just the white board, especially since it seems the thermal armor is removable. I think that'd look extra cool in a white case.futurepastnow - Monday, November 10, 2014 - link
Cheap, stupid looking plastic and cheap, stupid looking fans, neither of which serve any purpose. Looks like a winner.JaredNihilist - Monday, November 10, 2014 - link
Have the Z77 Sabertooth. Board fans still working fine and don't notice any extra noise from them. Albeit, I don't notice any benefit from them either, heat-wise - I'm sure they've stopped their fair share of dust.I didn't mind paying the extra for appearance though, I liked that it hid the rest of the board. I found the build the same as others, armour didn't impede anything. Once I upgrade though, shall definitely be removing the armour to customise its look - too scared to do it at the moment as my mainstay PC.
mexell - Monday, November 10, 2014 - link
What a colossal waste of money. However, to each his (or her) own, I suppose.nekoken - Monday, November 10, 2014 - link
I'm pretty dubious about the thermal armor, and its efficacy. I have the Sabertooth 55i and Sabertooth 990FX motherboards and have been quite happy with them. They work quite well in a wide temperature range without that plastic wrap.I'm more than dubious about a modern motherboard that has two different on motherboard fans. I don't ever plan on owning another system that needs an active cooling solution for the stuff built into the motherboard (other than SoC systems.)
xthetenth - Monday, November 10, 2014 - link
Is there any word on whether they'll release one without the thermal armor?Miqunator - Tuesday, November 11, 2014 - link
There is the Z97 mark 2 board that doesn't have the armor, haven't bothered to compare the other features so not sure if you lose something else too.xthetenth - Tuesday, November 11, 2014 - link
I'm hoping they'll do something like the mark 2 with the S coloring, because a white PCB looks super cool and they're promising it'll actually stay white. IIRC the 2 only misses out on an ethernet port and a significant fraction of the cost.CrazyElf - Monday, November 10, 2014 - link
The back might be worth something. It it will serve as a function similar to those GPU backplates, preventing warping from heavy CPU coolers and perhaps triple slot GPUs as well. Gimmicky, but potentially useful in that regard.As far as the front side, it's mostly pointless and maybe harmful (ex: the components may be cooler with the cover off). Dust I suppose, but if you have a DataVac, then this is pointless too. The only protection it might offer is if your screwdriver slips. It also will make removing GPUs a bit of a pain.
The rest of the board I think is underwhelming for the price. At $300, I expect very high end VRMs and a PLX chip.