The Intel Haswell-E X99 Motherboard Roundup with ASUS, GIGABYTE, ASRock and MSI
by Ian Cutress on September 25, 2014 11:30 AM ESTGIGABYTE X99-UD7 WiFi BIOS
In the past couple of generations, GIGABYTE’s BIOS setup has been in a difficult place. Everyone is now part of the graphical BIOS era, but migrating from a series of regular menus to something more interactive is a hard part. At some point in the journey, aesthetics and visuals have to be addressed. When the visuals are focused on first, then the system is negatively impacted by not bringing anything new to the table. When interactivity is focused on at the expense of any element of aesthetic improvement, this means that the user experience is terrible. Every motherboard manufacturer is churning through this slurry of what a graphical, interactive BIOS is meant to be like, and GIGABYTE’s journey has been tougher than most.
Initially it started with ‘3D BIOS’, which was a visual representation of the motherboard that was not executed with users in mind. Within the past 18 months GIGABYTE ditched the 3D BIOS in favor of a HD mode. This had its own initial issues – the text was not calibrated to work within the confines of the various boxes to which it was assigned, and the orange/black/grey color scheme was not easy on the eyes, especially for anyone with slight colorblindness. HD Mode itself is a full 1080p high definition implementation, allowing more information on the screen at once, although the menu system was almost a carbon copy of what was found in the classic mode. Interactivity is still minimal, with almost everything being in a text menu or a drop down.
For X99, several things have changed for the BIOS. The classic mode gets a facelift and moves to a cleaner but blockier interface with a good contrast between text and background. In the HD mode, the text now all fits in the boxes and there is some improvement to adjust the visual differentiation between background and text, but more could still be done. Interactivity is still quite minimal, with classic and HD mode featuring many of the same options slightly rearranged.
The first entry screen is the Startup Guide which is the main recipient of text adjustment, but we also get a few more options to fill up this 3x3 grid. It might make sense that in the future GIGABYTE implements a 5x5 grid with various quick access to options (!).
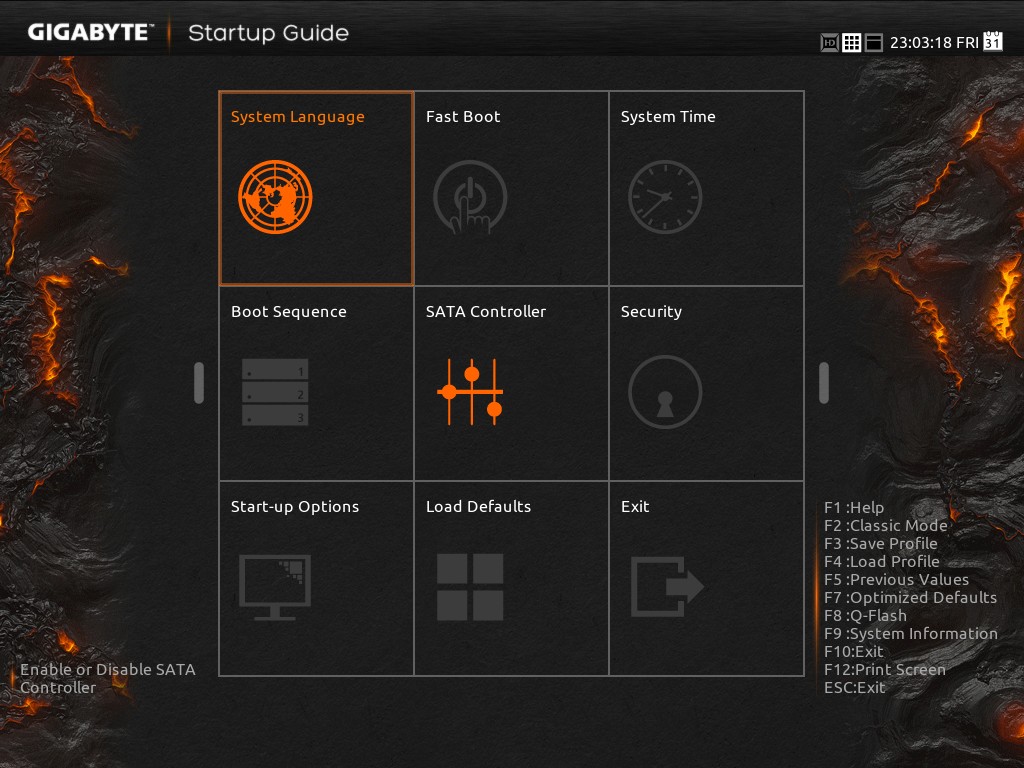
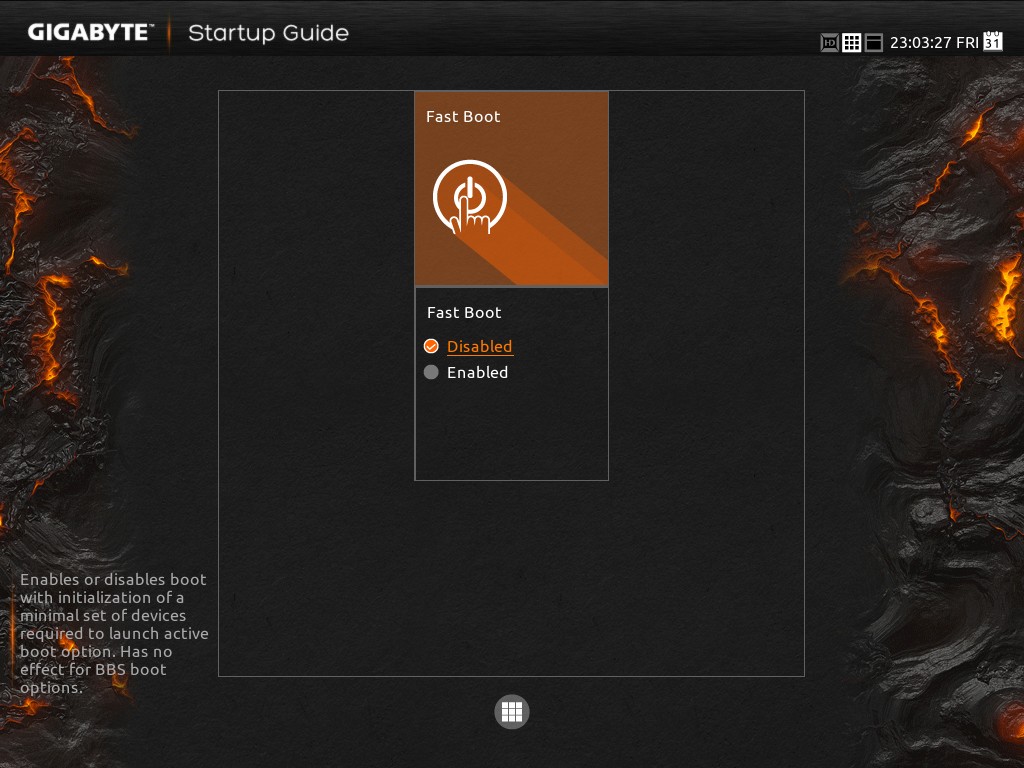
Most of these are self-explanatory. Fast boot gives options related to Windows 8 such that devices are not initialized until later in the OS boot process, speeding up overall POST time:
The SATA controller option text now all fits nicely into each of its boxes, although due to the dual AHCI controller nature of the chipset and only six SATA ports having access to RAID, it does not help the user much if the drives are plugged in the wrong ports:
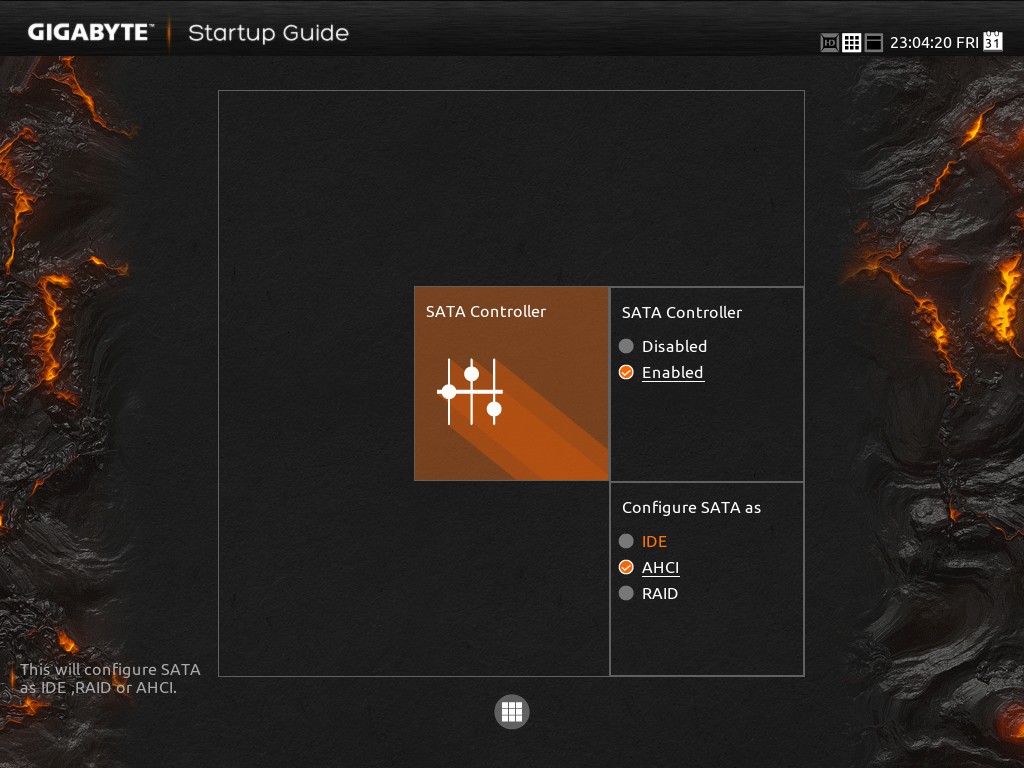
Ideally we would see an explanation giving SATA versus sSATA ports on the motherboard used, and what drives are installed where.
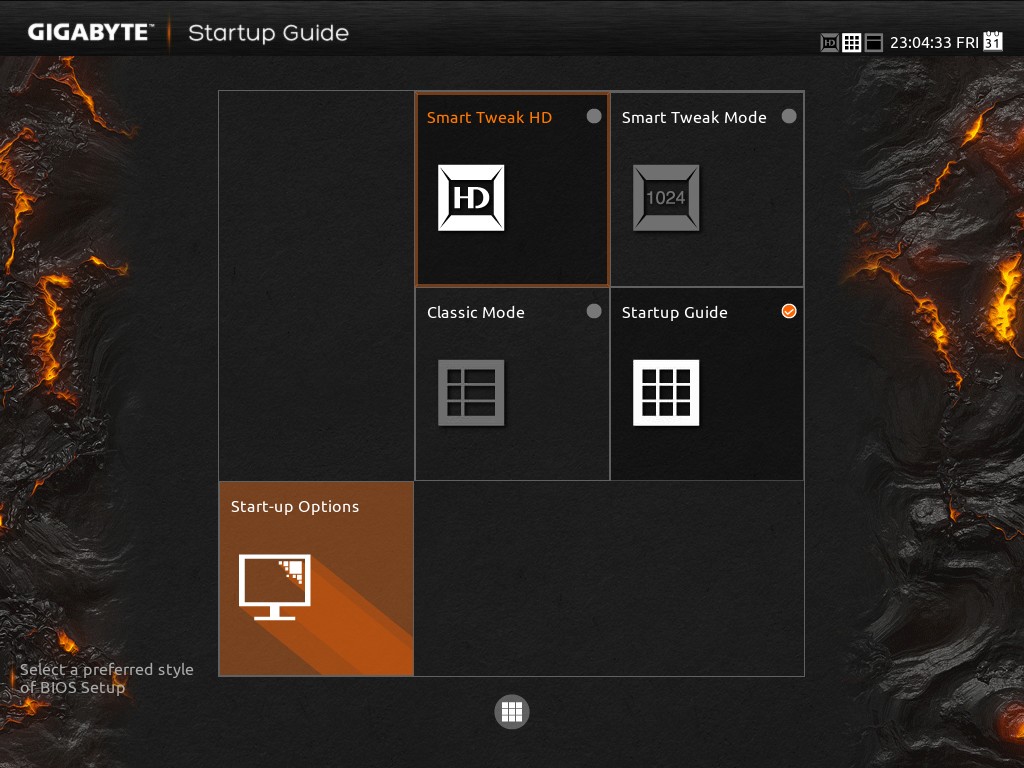
The Startup Options allows the user to boot into any of the four modes available. The HD mode does offer a smaller sized version with less information if the monitor is not capable of 1920x1080.
Despite a nice start guide for users, it would help if the initial screen detailed the system, perhaps in the top left. We want to see the name of the motherboard, the BIOS used, the CPU installed, the DRAM installed and frequencies where possible. That way any user trying to debug the system without having access to the insides will be able to see immediately what is at hand.
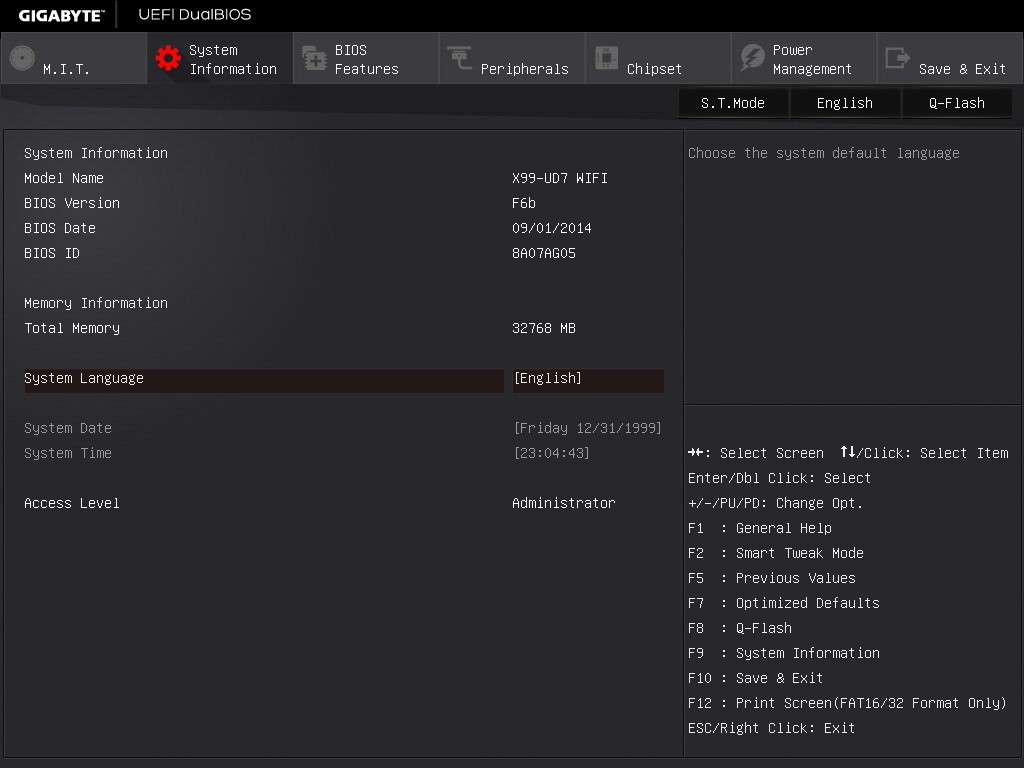
The standard classic mode gets an update from the blue interface to a sleeker grey and white menu system. The layout is pretty much the same as before, along with the information provided. For example, the entry point offers the model name of the motherboard and the BIOS version, but no mention of the CPU installed.
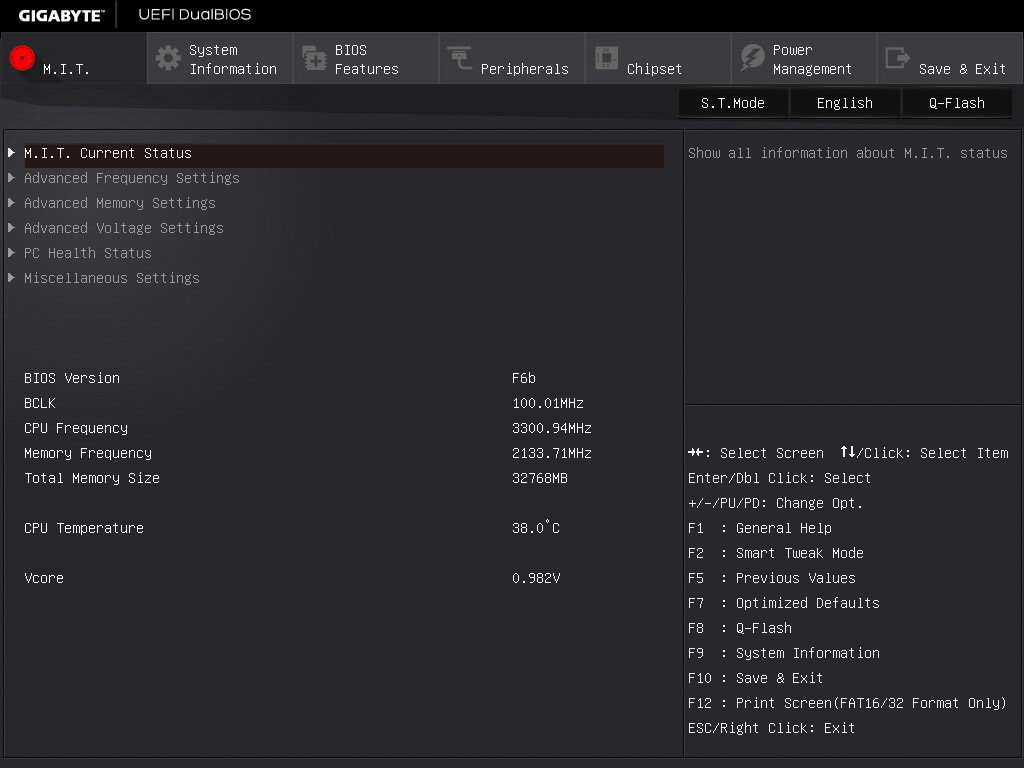
Even moving to the Motherboard Intelligent Tweaker menu (MIT) does not display this information, although we do get the VCore, CPU temperature and various frequencies on hand.
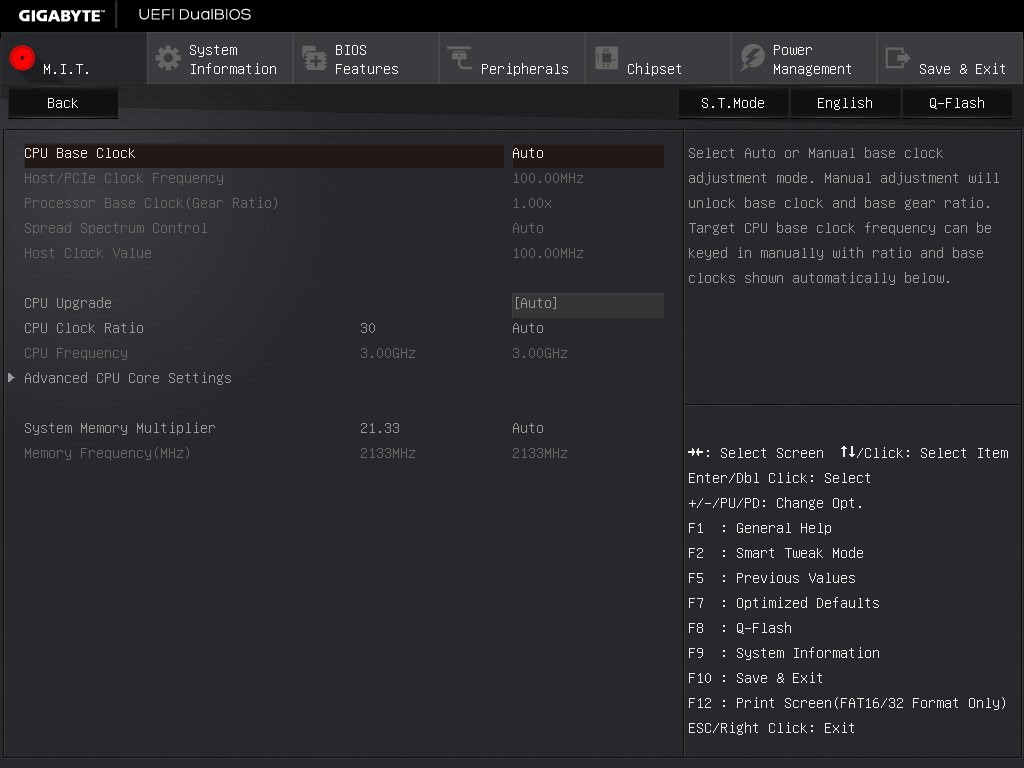
The overclocking options in the GIGABYTE BIOS are only for manual overclocking, and split into several sub-menus coming from the MIT tab. The Frequency menu allows the user to adjust the CPU and DRAM:
In order to adjust the per-core ratios or the Uncore and C-states, the CPU Core Settings menu is provided:

Note that there are no voltage options in either of these menus. GIGABYTE’s reasoning is that the voltage options are solely for the voltage menu, but I differ. Motherboard manufacturers can place the same option in multiple menus, but often choose not to for reasons of layout or space or to avoid confusion. I do not see that as an issue – if anything, I believe it would enhance the experience especially for an enthusiast wanting to adjust these settings. So while the voltage settings are not duplicated, the DRAM frequency strap is – we see it here in the Advanced Frequency menu and also in the Advanced Memory menu:

It makes no sense to duplicate this option and not others.
In order to adjust sub-timings for the memory, as with previous GIGABYTE motherboards, the memory timing mode must be changed to ‘Manual’ to set a rule for all modules or ‘Advanced Manual’ to set per-module timings.
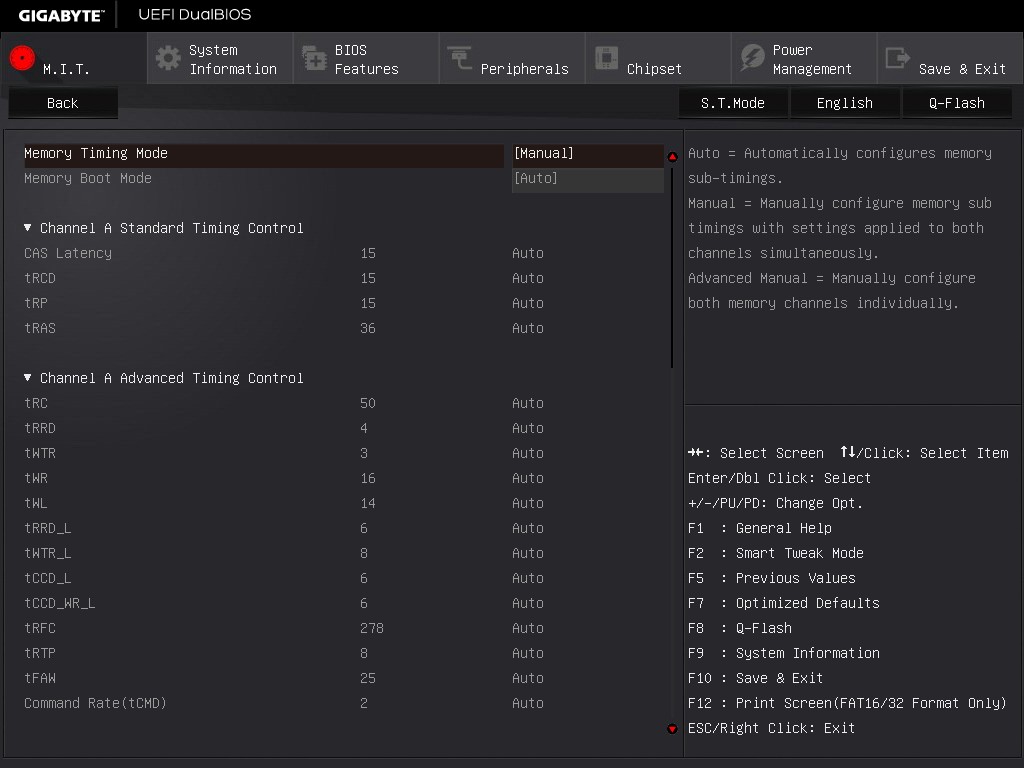
GIGABYTE has adjusted how the BIOS communicates what each option means to the user in the top right of the screen. I remember one of my contacts at GIGABYTE was writing the initial drafts for these info texts earlier in the year, and remarking that it was no small feat especially after several iterations and then sending it to the translators for other languages and making sure no subtleties were lost.
The Advanced Voltage Setting menu is split into several sub-options.

The Power Settings menu is for voltage protection options, current protection and switch rate adjustment. The most important option though is the Load Line Calibration for the FIVR:
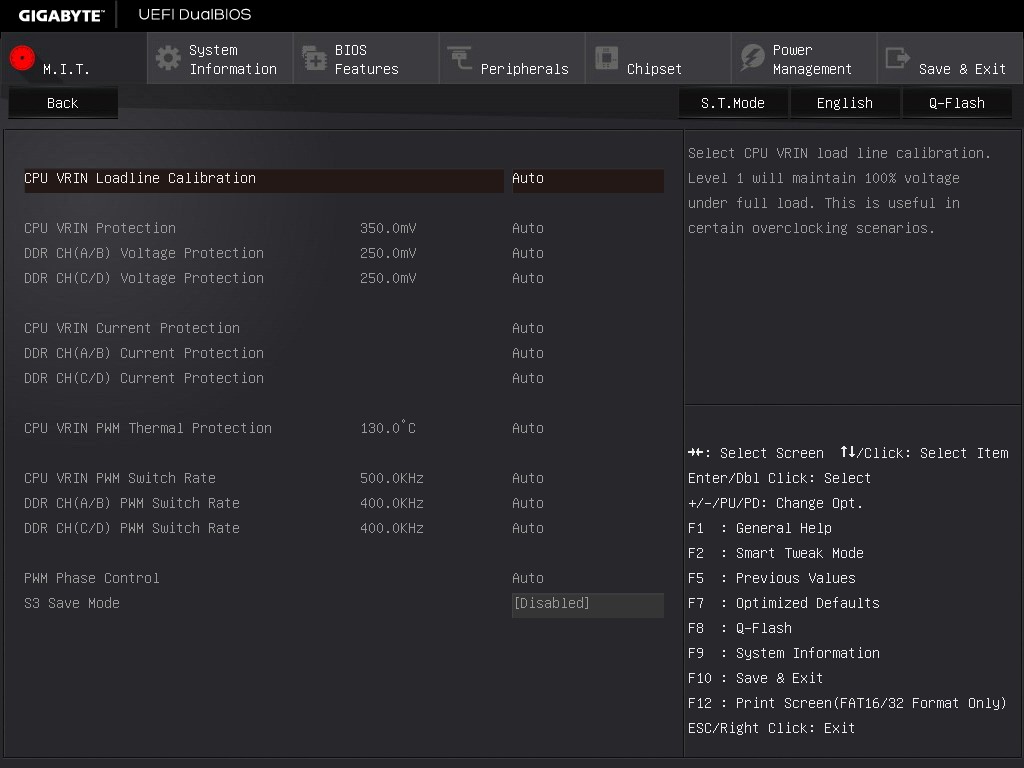
As mentioned in the help text, the top setting will maintain 100% voltage at load to combat the regular voltage drop across the processor as the workload varies.
The Core Voltage menu is where the meat of the CPU voltage options are:
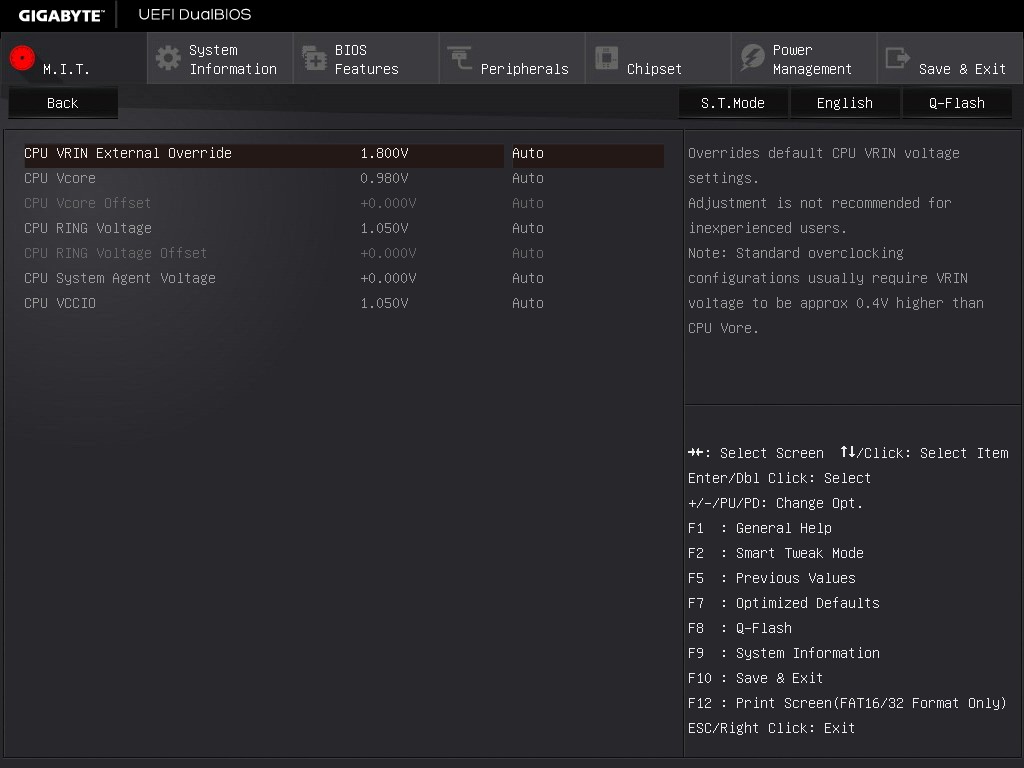
Adjustments to the VRIN (FIVR), VCore and Cache voltages are here, with only absolute values allowed. Other manufacturers offer both offset and absolute choices for these values although I find offset values more applicable for automatic overclocking options.
The fan controls in the classic mode are in the PC Health option from the MIT tab.
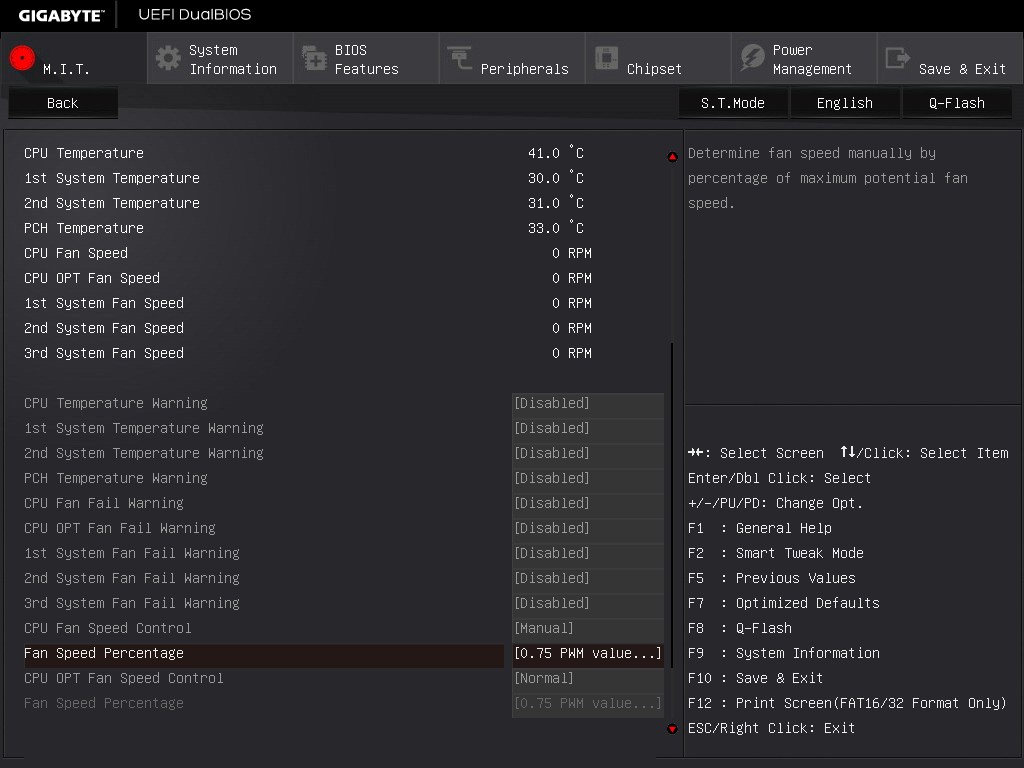
While the system has four temperature sensors and five fan headers, the level of fan speed options in the BIOS is very basic.
For anyone not used to a value describing how one variable adjusts with another, the options here might make no sense. The power applied to a fan is a ‘PWM’ number from zero to 255. GIGABYTE’s options allow you to adjust that value based on the temperature, in terms of ‘PWM per ºC’. So a CPU temperature of 50ºC at 2 PWM per ºC will give a value of 100, which means that 100/255 = 39.2% of the full power of the fan is used. To confuse the matter even more, a fan does not respond linearly to power increases, and GIGABYTE does not mention of this value has a base number.
Other manufacturers have the fan controls in the BIOS at a state where they are a lot easier to follow, and GIGABYTE has fallen behind in adapting their controls to a more interactive interface that is easier to understand.
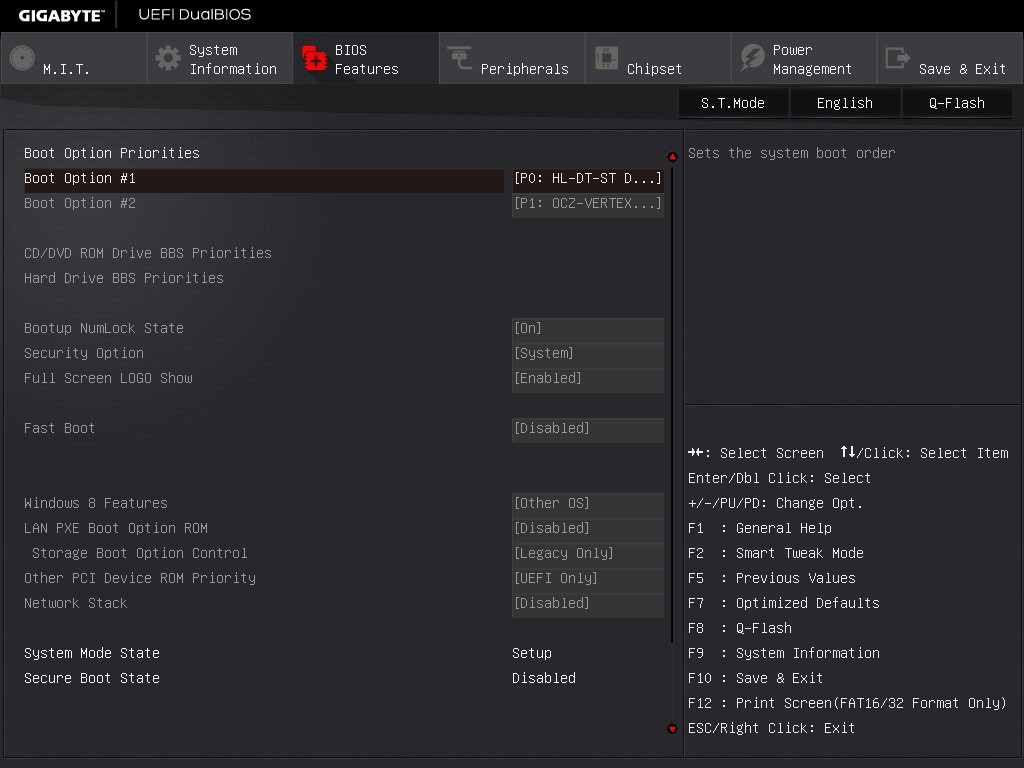
The BIOS Features tab relates to the boot order and fast boot options:
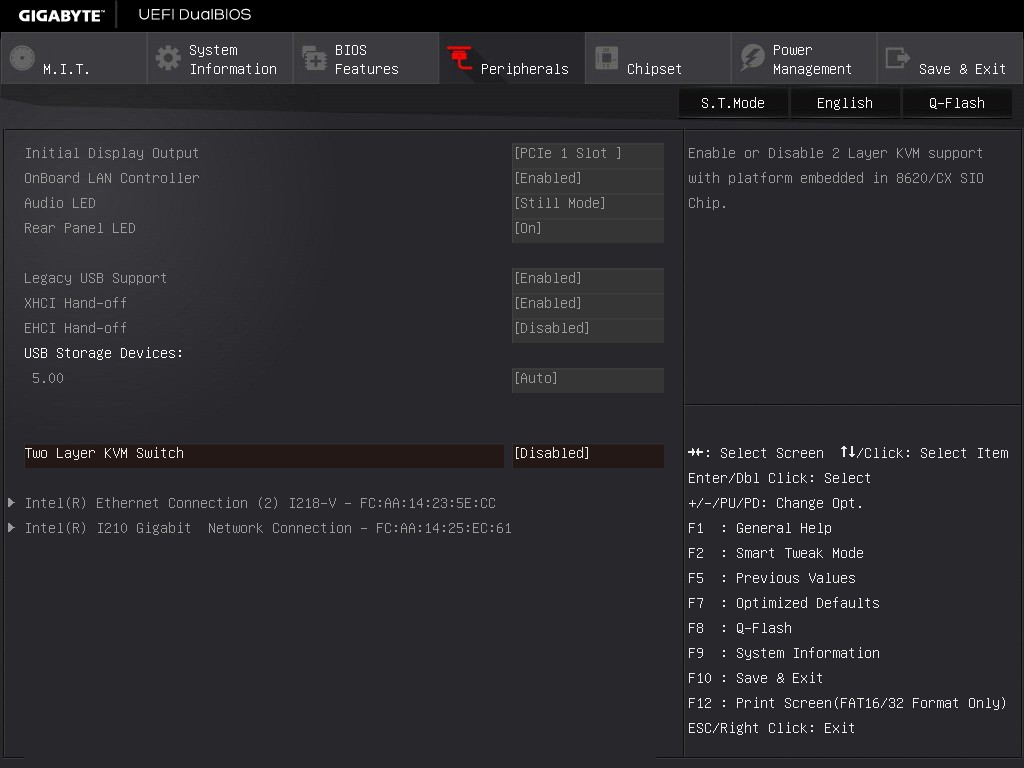
The Peripherals tab involves LED options, enabling onboard controllers and an interesting option relating to KVM switches:
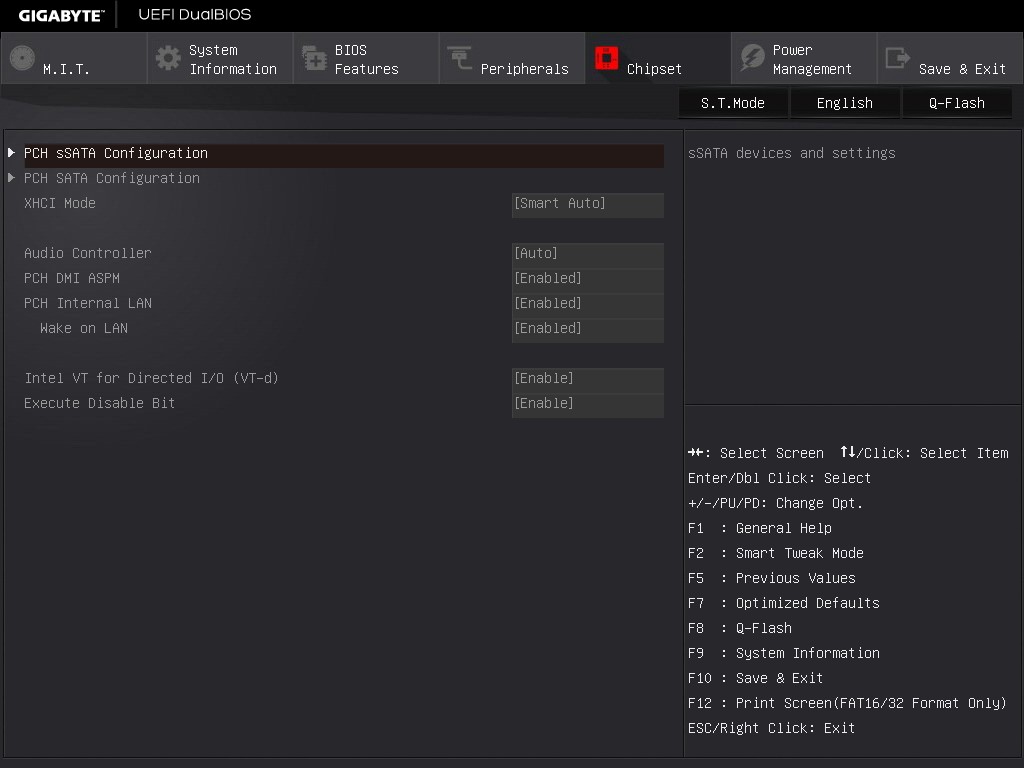
The Chipset tab is for SATA adjustments, with GIGABYTE offering different menus for the sSATA (non-RAID) and SATA (RAID) AHCI controllers:
The rest of the classic BIOS allows for power management and BIOS flashing, with the Save and Exit menu giving boot override possibilities.
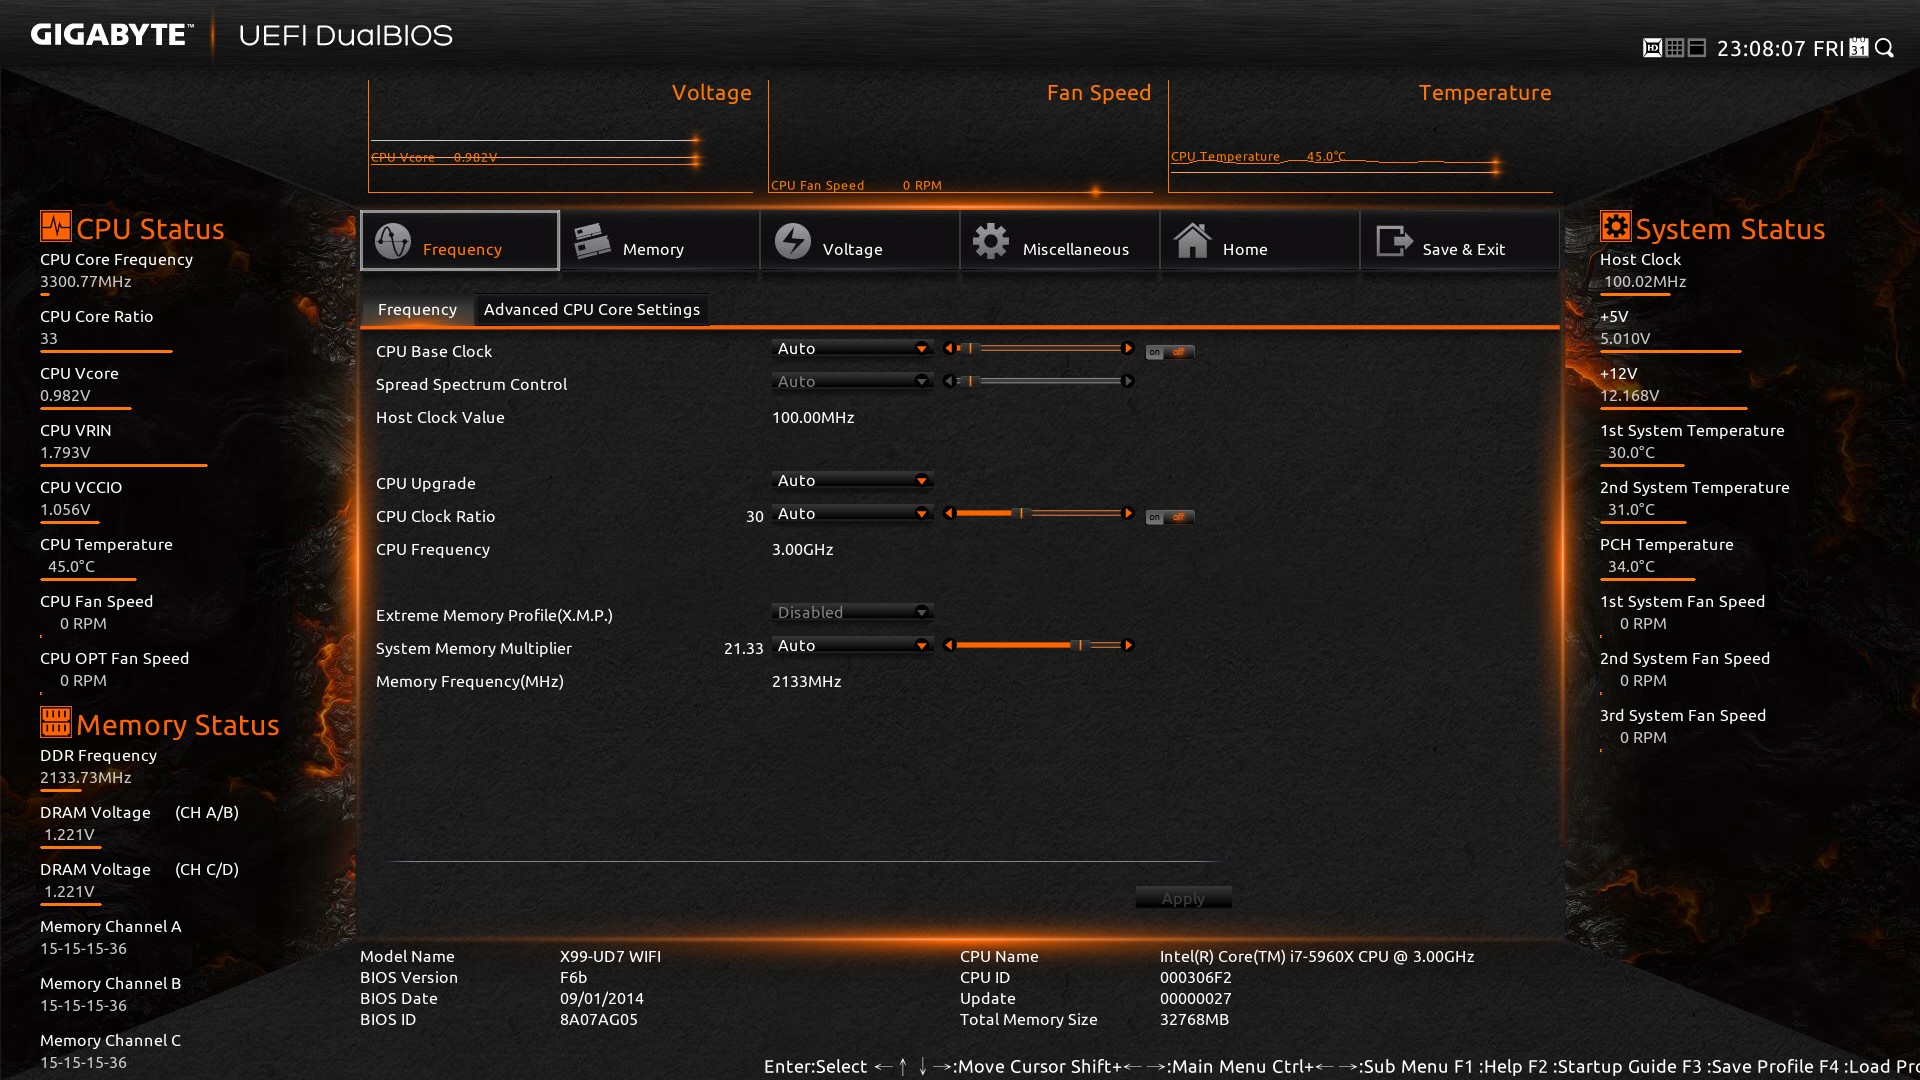
The full HD mode uses a similar sort of option arrangement in the middle of the screen with as much information as you can pack into the surrounding edges. Most BIOSes need something like this around the edge to tell the user about the system, although I might suggest that having bars underneath values such as ‘CPU VRIN’ are ultimately not necessary and could be cleaned up. The ideal BIOS is one that displays everything succinctly without wasted space but still visually effective. For example, perhaps graphing the voltage change over time in the BIOS is not particularly helpful.


GIGABYTE X99-UD7 WiFi Software
Similarly to the BIOS, the software has been upgraded over the past 18 months. Easy Tune 6 is out, and the new interface is a sleek color-on-black design. This allows GIGABYTE to alter the color palette depending on what motherboard is being used – blue for Ultra Durable, orange for SOC and yellow/green for gaming. So despite the accents on our UD7 being yellow/orange, the software has a blue-on-black style, but this can be adjusted in the preferences.
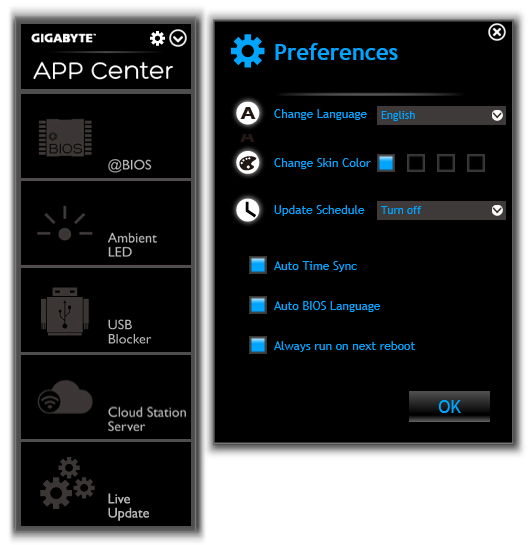
The base menu system is called APP Center which shows the various ‘apps’ in a scrollable window. The Live Update element on the bar is fixed, while the rest are sorted in alphabetical order. I hope that in future updates we are able to fix a preferred option at the top as well, given that I primarily use EasyTune for overclocking or System Information Viewer for fan controls.
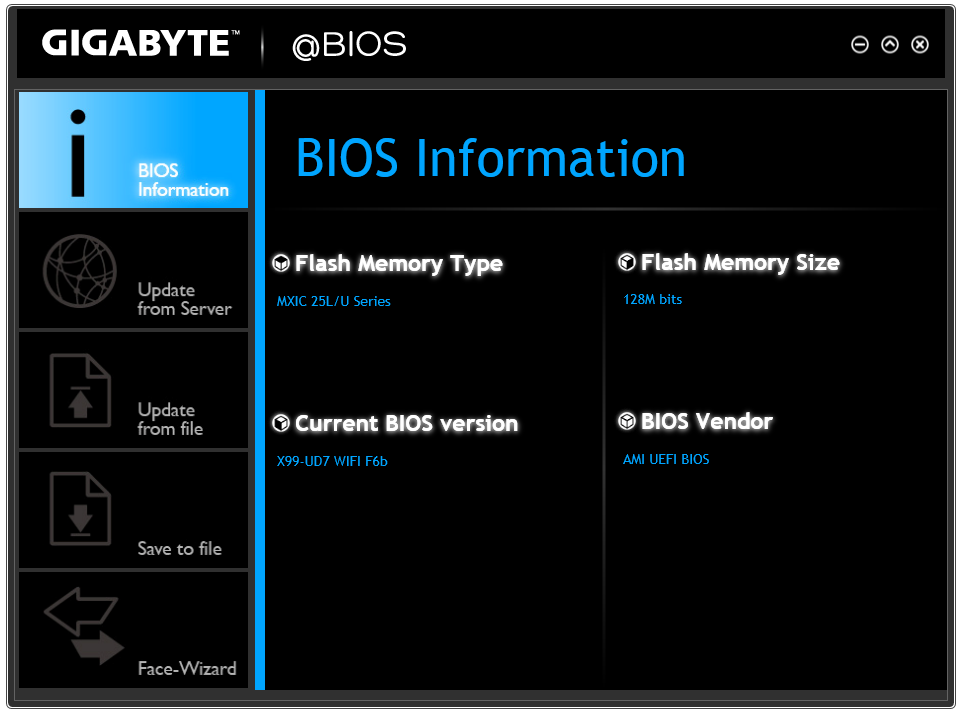
@BIOS is the interface for updating the BIOS through the operating system. This front screen shows the details of the motherboard (note the 128 Mb BIOS chip), and the tabs on the side allow the BIOS to be updated by directly downloading the BIOS from the server or via a file. The bottom selection, Face-Wizard, allows a user to adjust the POST image on startup.
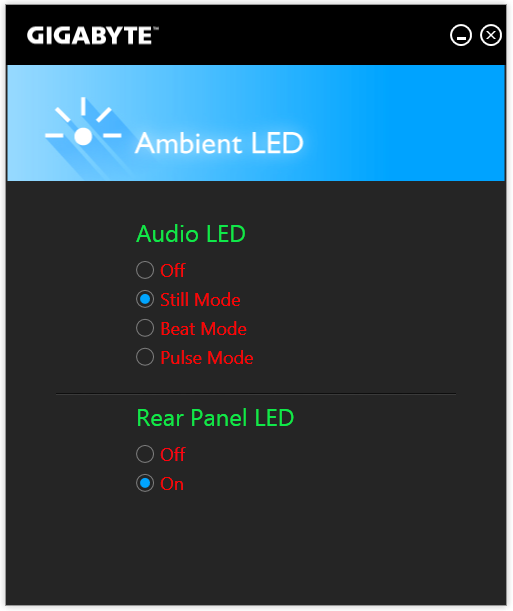
Ambient LED adjusts the lighting for the rear panel and the heatsink on the motherboard at the same time. In still mode both lights are on constantly, with pulse having the lights phase in and out. Beat mode keeps track of audio coming through the speaker ports on the rear panel and adjusts its intensity based on the music playing. I tried with various artists and the lights to adjust depending on slow and fast music, although during fast music it comes across as very flashy.
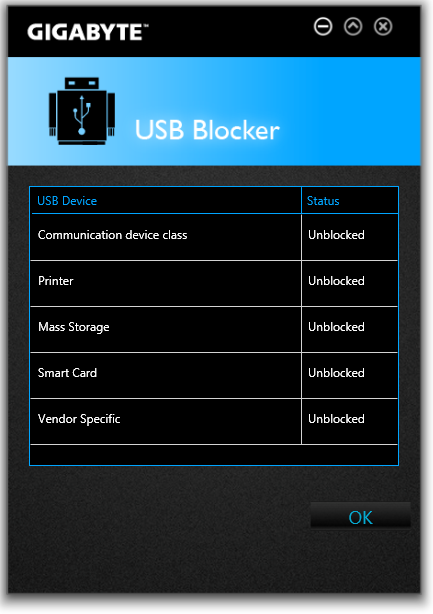
USB Blocker allows the administrator to block different types of devices used in the USB ports. GIGABYTE’s main use for this is in an office environment to stop employees using mass storage, or for public machines such as in libraries.
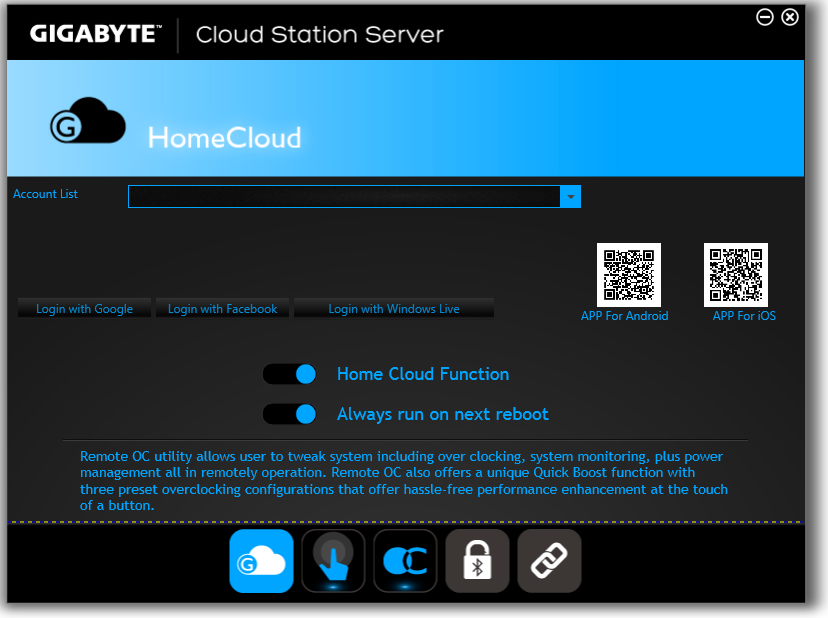
The Cloud Station Server is a relatively new part of GIGABYTE’s software package, allowing for overclocking, remote control, hotspot functionality and adjusting use based on proximity to a Bluetooth device (such that the system hibernates if >10m from a paired Bluetooth phone).

EasyTune is the big one for overclocking, and GIGABYTE offers several tools to help with automatic overclocks. We tested each of these and with a sufficient CPU 4.1 GHz should be a walk in the park. The Auto Tuning aspect also hit 4.1 GHz on our sample.
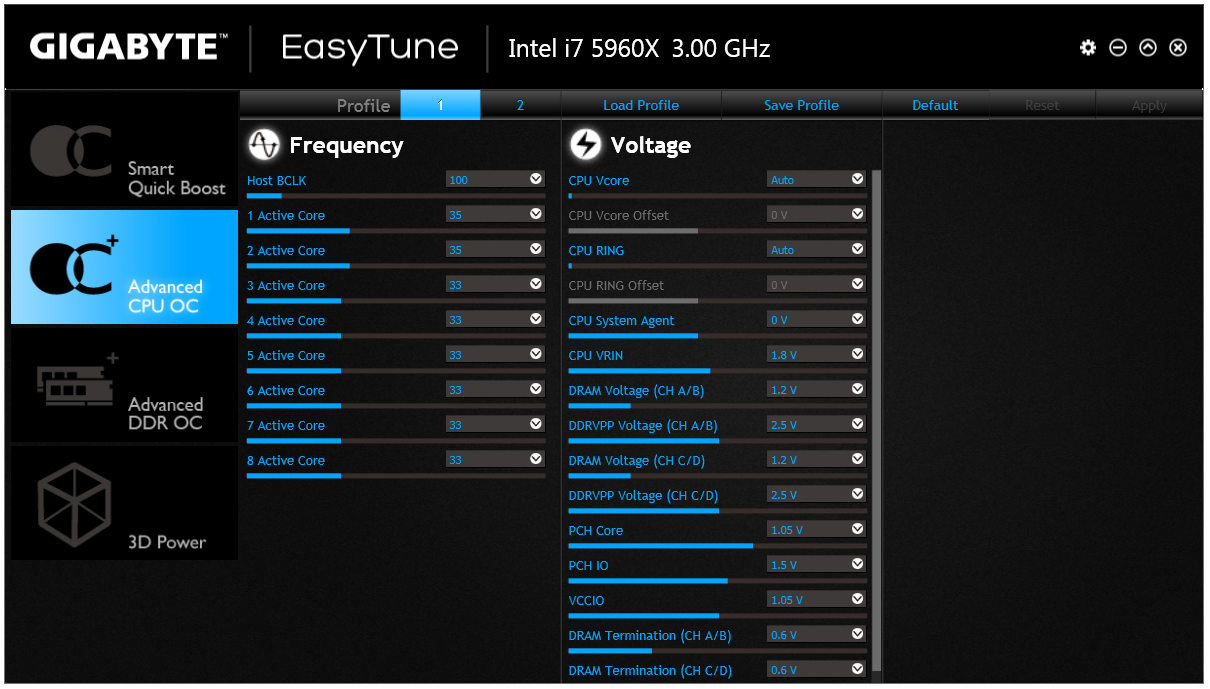
Manual overclocking can also be performed, and here GIGABYTE allows voltages by offset rather than the absolutes given in the BIOS.
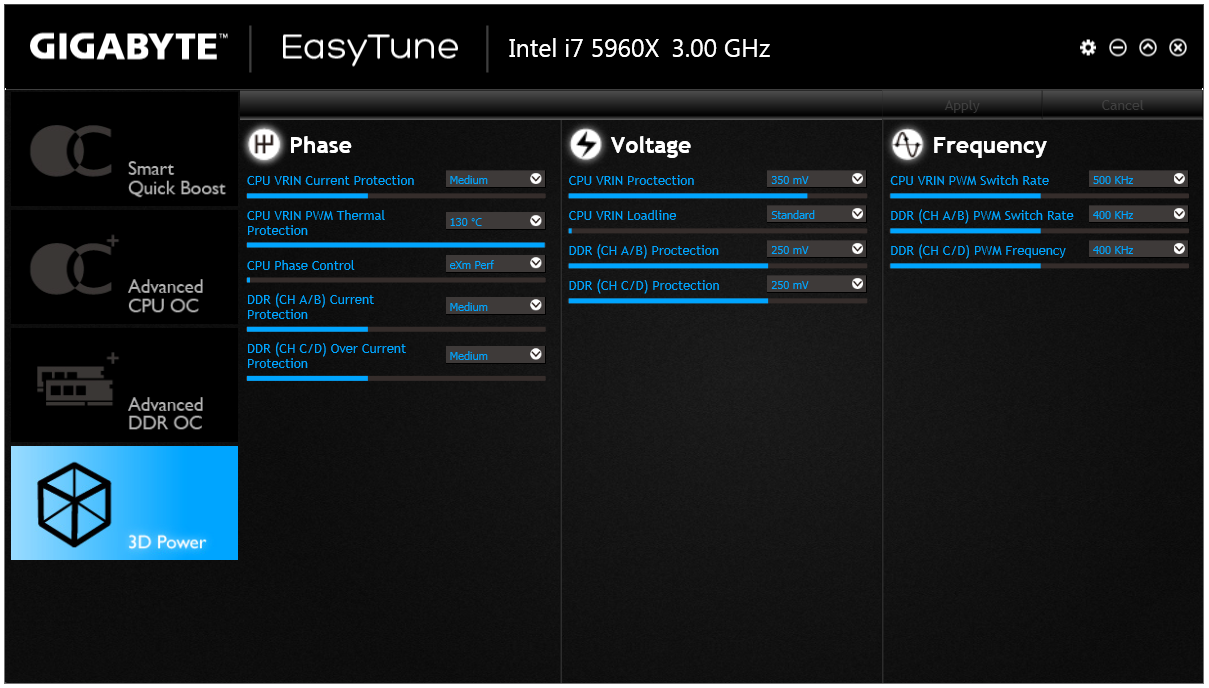
Users can also adjust the phase control and load line calibration in the 3D Power tab.
For users wanting to create RAID arrays using the chipset based solution, EZ Setup provides the tabs:
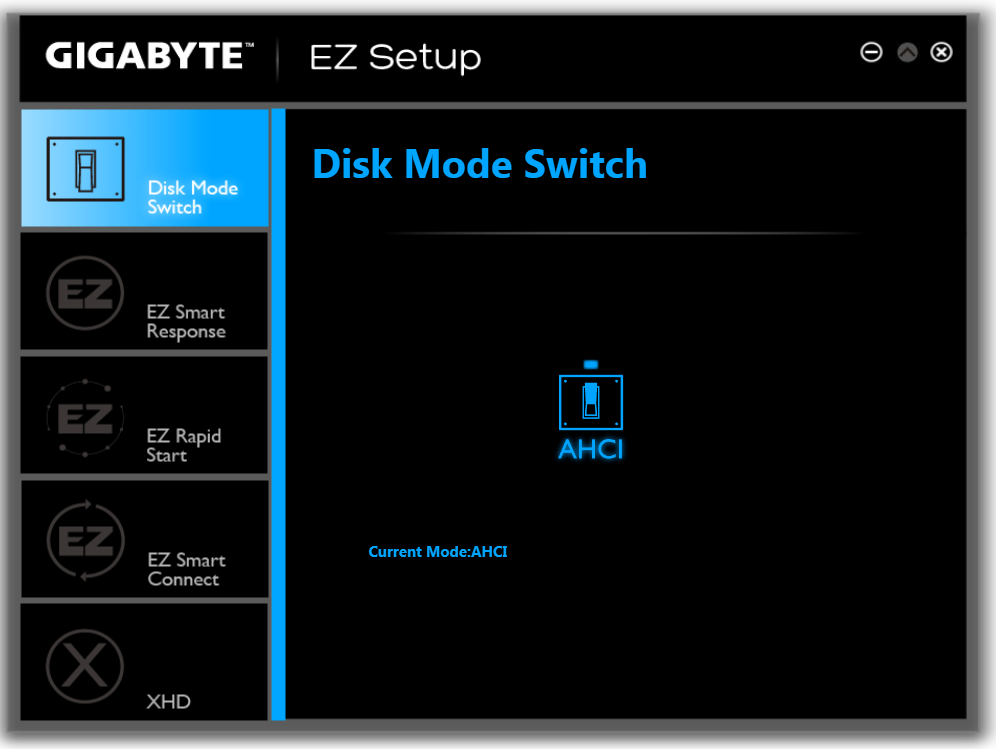
Ideally I would have liked this software to detect all the devices I have connected and list them, in case they were plugged into the wrong SATA ports for RAID as shown above. This software will also allow users to use an SSD as a cache for a large disk drive.

The Fast Boot application does what it says on the tin, with an extra option to allow users to restart and enter the BIOS directly.

One of the newer tools in GIGABYTE’s arsenal is Game Controller, which allows both macro generation and introduces a ‘Sniper Mode’ for improved mouse accuracy. We have played with the macro generator before, and nothing much has changed – it needs some form of tutorial as well as the ability to adjust and move individual elements of the macro. Currently, if you make a mistake in making the macro, there is no way of adjusting a single element.
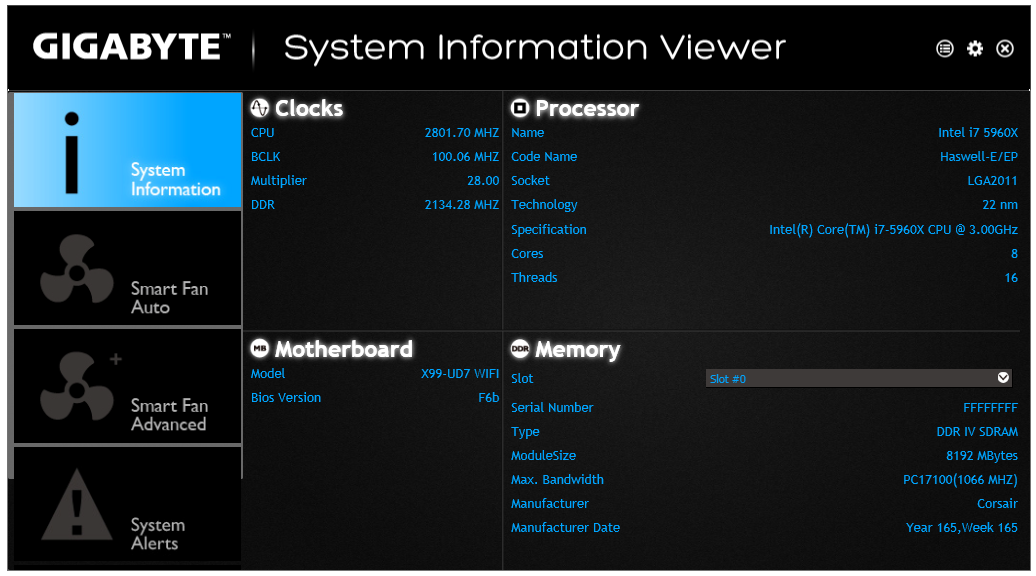
The System Information Viewer shows what the system has in it in terms of the processor, motherboard and memory, although the main use of this app is for the fan controls.
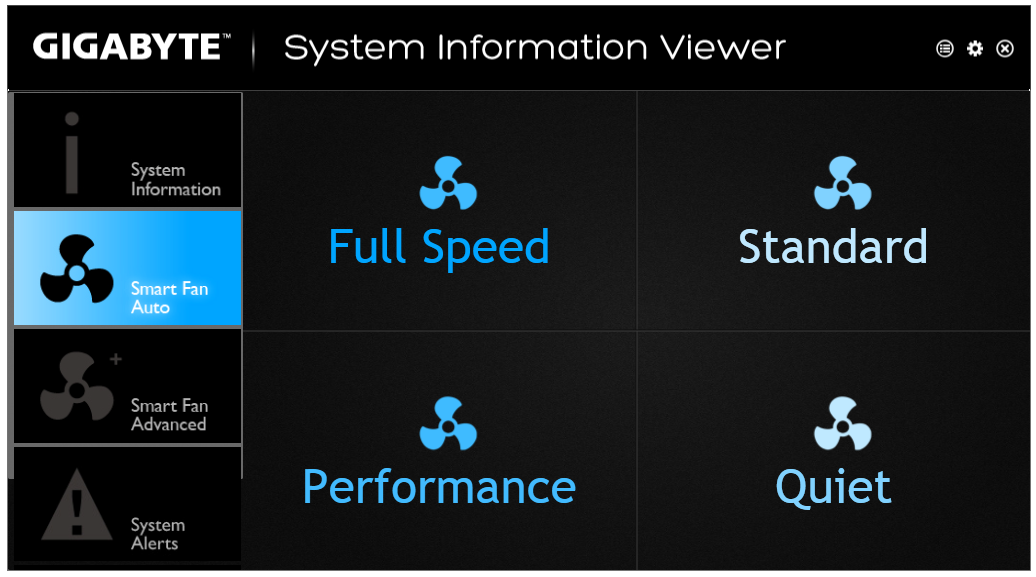
The software comes with four general fan settings which are applied to all the fans when selected.
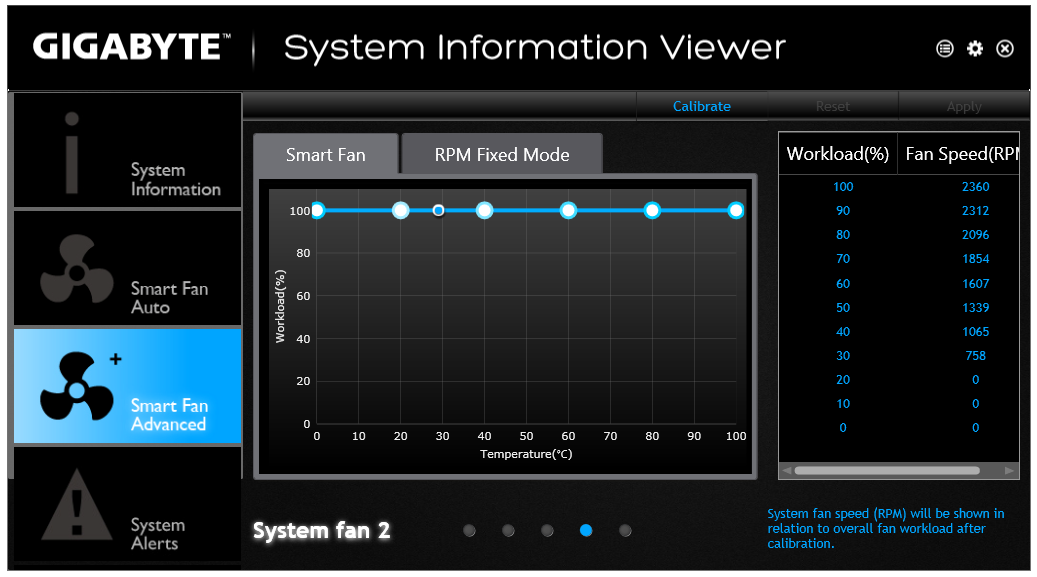
The advanced tab offers a calibration button that tests each fan in the system then the user can use that data to adjust the multi-point graph. That being said, I’m unsure why the software does not to the mathematics for the user such that we get a graph of fan speed against temperature – it would be really easy to do. GIGABYTE should also consider adding hysteresis to the fan configuration, as this allows the fan to remain at high mode when cooling down in order to speed up the process.
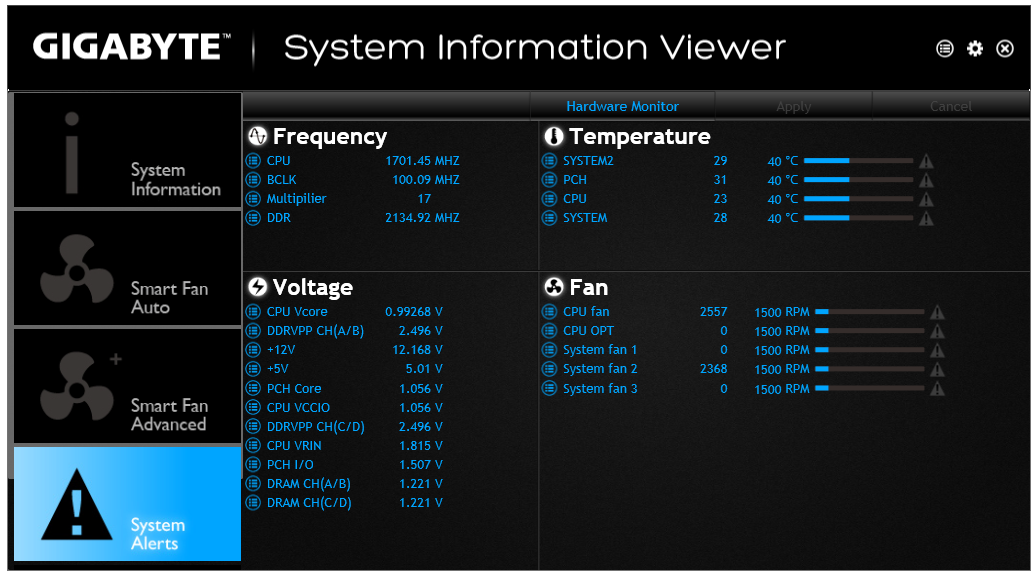
A user can also adjust the system to provide alerts when the temperatures or fans reach a maximum value. Other manufacturers provide similar alert systems, although typically users can select a high and a low value to produce a warning. The Hardware Monitor button here unfortunately did not work in our test system.
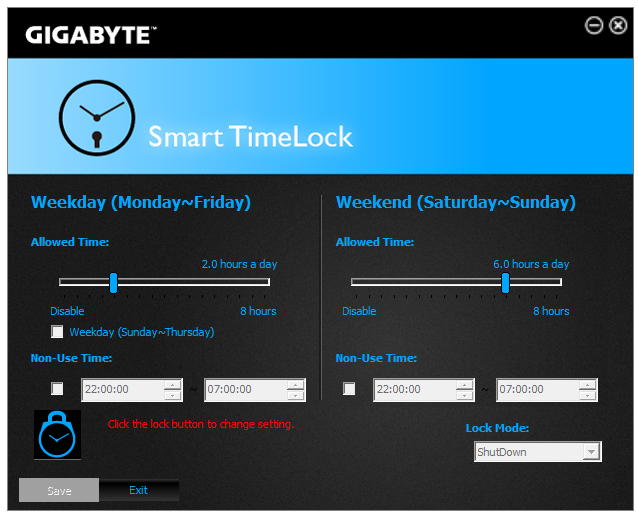
The Smart Time Lock feature is a super upgraded version of ASRock’s Online Management Guard but completely shuts down the system when the specified time limit is reached, or the system is in non-use time. This has applications for parents who want to limit the time their children use the computer for non-school activities.
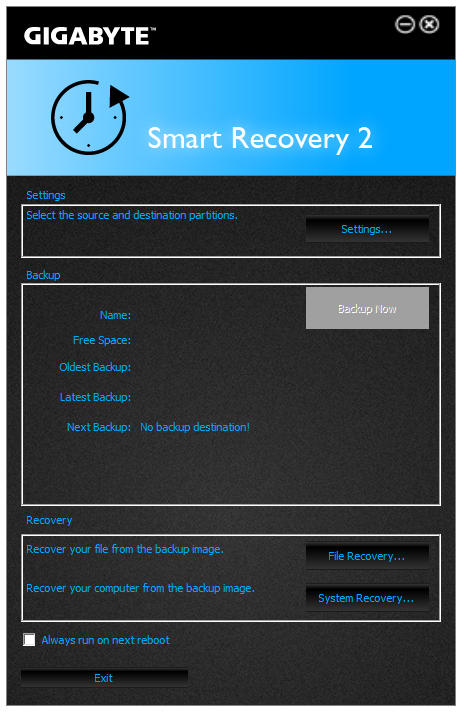
Smart Recovery will take an image of a drive for safe keeping and allow a user to restore he image should the system be compromised. Perhaps not ideal is that the user must install this software in order to restore the image – it would make sense if part of the software was baked into the image so it could self-extract and apply to the system it is run on.
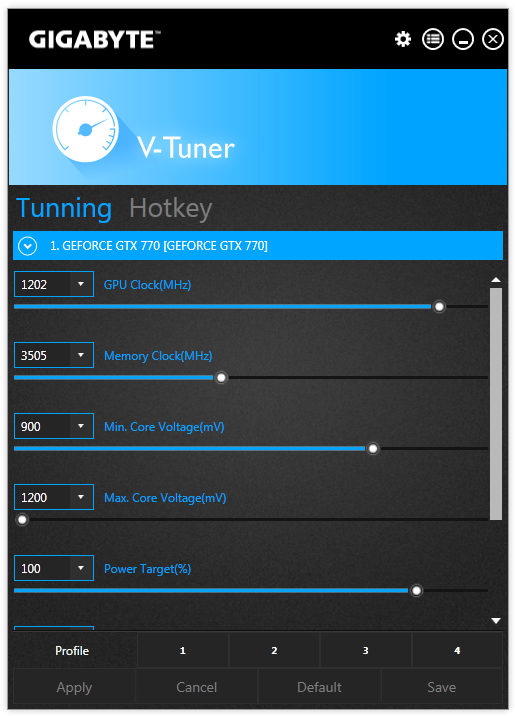
One feature we have not seen before is V-Tuner, which allows for GPU overclocking when applicable graphics cards are used. Here we had a non-GIGABYTE GTX 770 in play and it saw all the information as needed.
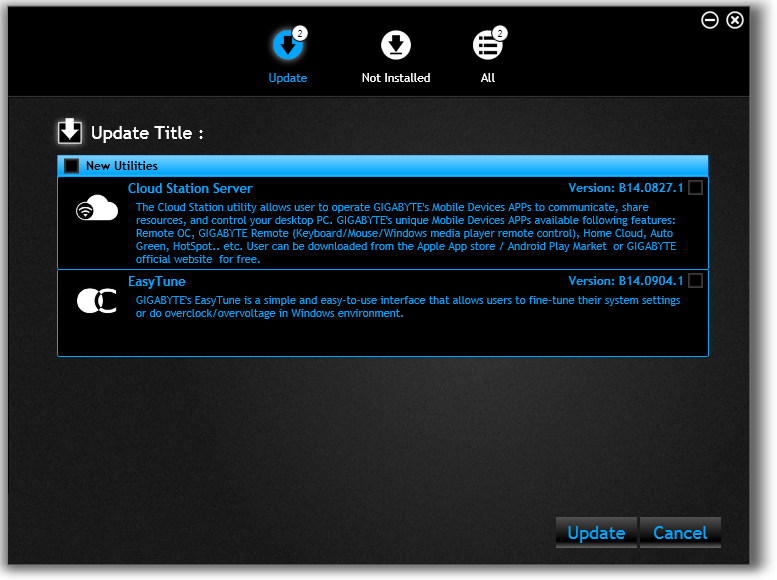
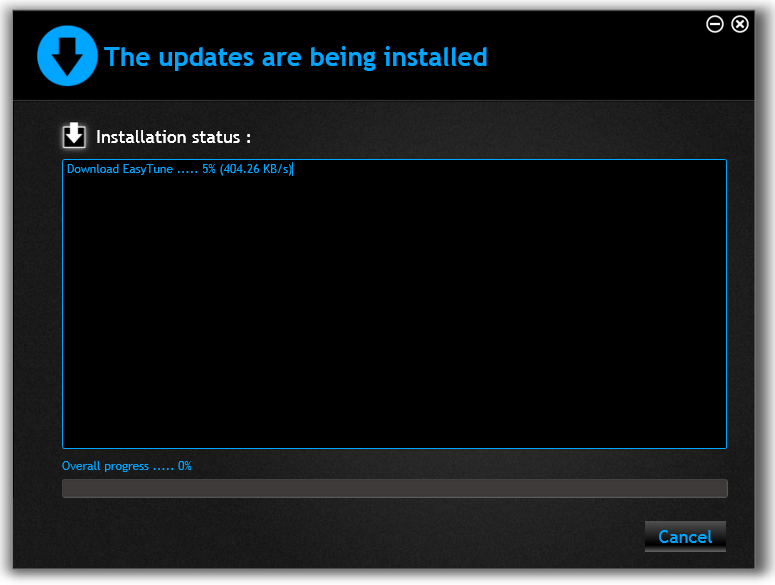
The last app for GIGABYTE is its update software. Compared to previous iterations we have tested, this successfully finds software that needs updating and performs the process of uninstalling and reinstalling as required. One issue that needs to be addressed here though is the size of each update needs to be made available to the user before it is selected to download. Otherwise those on slow or limited connections might be stranded with a 600MB update of audio drivers they might decide to postpone for another time.


62 Comments
View All Comments
biostud - Thursday, September 25, 2014 - link
ASUS also has the X99-A at launch, at least here in Europe.isa - Thursday, September 25, 2014 - link
Ian, thanks for a great job overall on this article. I especially appreciated your clarity on how the PCIe and M.2 configs work.SanX - Thursday, September 25, 2014 - link
+1SanX - Friday, September 26, 2014 - link
Ian is on Liquid Nitrogen.The Monster-review :-)
icrf - Thursday, September 25, 2014 - link
Sounds like the Asus X99-A is the one for me. It keeps all the good stuff about the X99-Deluxe and saves $125. I don't need so many SATA or USB ports, I don't need wifi or dual GbE. I get the pile of fan headers and great sound, BIOS, and overclocking. Now I just need to know where the sweet spot is for memory count, speed, and timings. I suspect that's next on Ian's list.Eyeshield21 - Thursday, September 25, 2014 - link
Great roundup review. ASUS is falling lately. Did you guys heard about the burnt motherboard that their X99 had? I wonder how many people have this issue.The Von Matrices - Friday, September 26, 2014 - link
So somehow you have determined it is a great roundup without even reading the first page?The_Assimilator - Friday, September 26, 2014 - link
This is a really poor anti-ASUS shill comment.xunknownx - Thursday, September 25, 2014 - link
i have the MSI x99s sli plus and its great. its beautiful and feels premium. http://imgur.com/Q7u6qjDnot sure why the article say its not for overclockers. i overclocked my i7 5820k to 4.6ghz easily and its running stable. i don't need so many extra ports or wifi. at $230, its a great value for such an awesome board.
jay401 - Thursday, September 25, 2014 - link
Because then you won't spend twice the price for a more expensive board.