ASUS Rampage IV Black Edition Review
by Ian Cutress on January 5, 2014 10:00 AM EST- Posted in
- Motherboards
- Intel
- Asus
- X79
When Ivy Bridge-E arrived, there was discontent at the lack of a new chipset. Users who wanted to migrate to the high performance end of the spectrum received a relatively small bump in performance over Sandy Bridge-E and Haswell on the mainstream was offering better IPC. To compound all this, the X79 chipset looks dated, with no native USB 3.0 and only two SATA 6 Gbps. ASUS have tried to address this balance somewhat by releasing an upgrade to the bestselling X79 motherboard: the Rampage IV Black Edition is an evolution of the Rampage IV Extreme, incorporating as many aspects of the Maximus Z87 series as possible into an antiquated chipset.
ASUS Rampage IV Black Edition Overview
Back when we reviewed the ASUS ROG X79 range in August 2012, the ROG range itself received our best award at the time and the Rampage IV Extreme achieved our second highest award on our scale. Since then ASUS were put hard to work at the Maximus VI range, which expanded the ROG platform from three to five motherboards and placed extra features in the hands of the user (updated BIOS, Sonic Radar, AI Suite III, the OC Panel, and SupremeFX). Once those were complete, the teams were set to task on the motherboard we have in today – the Rampage IV Black Edition.
The biggest difference in the RIVBE (Rampage IV Black Edition) against the RIVE (Rampage IV Extreme), aside from the color scheme, would be the lack of features present on the motherboard directly. The OC Key is gone, VGA Hotwire is gone, the Slow Mode switch is gone, the LN2 mode switch is gone, Sub-Zero Sense is gone, and the motherboard is physically smaller in width. These features have not disappeared, but migrated – into the ROG OC Panel.
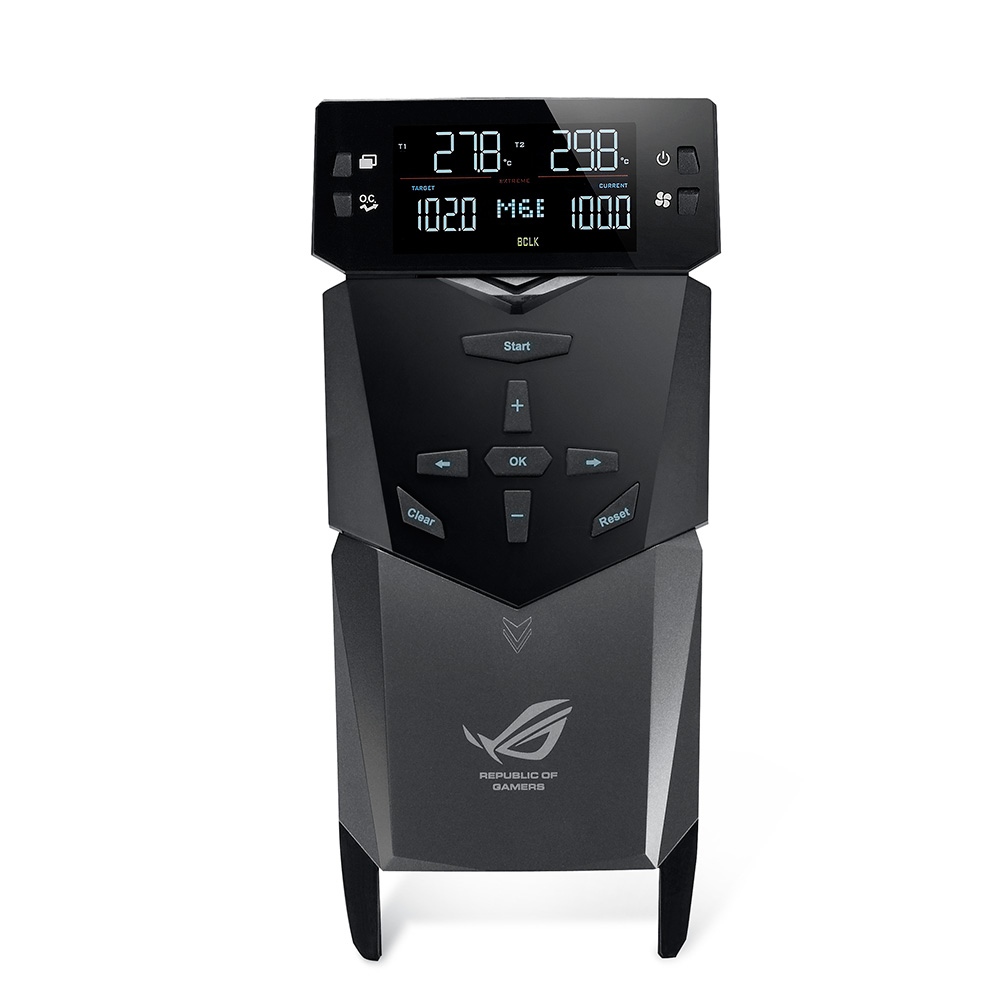
The ROG OC Panel comes with the RIVBE (and Maximus VI Extreme), but uses a proprietary connector onboard to talk to the system. All the models in the Maximus VI range have this system, although only the high end model comes with the OC Panel. The OC Panel itself represents almost a tick-tock of the ROG range, given that the Rampage II Extreme had an additional upgrade in the OC Station which then those features migrated back onto the motherboard. The OC Panel this time around looks like a permanent (and future compatible) addition to the range, and allows users to adjust voltages, BCLK and multipliers on the fly, as well as all the features listed above that were on the RIVE motherboard, and extra fan headers as required. For users that do not want to overclock, ASUS have engineered the panel to fold away into a 3.5” bay in a case and double up as a temperature and fan monitor for the system, which can be used to apply a basic overclock at the touch of a button.

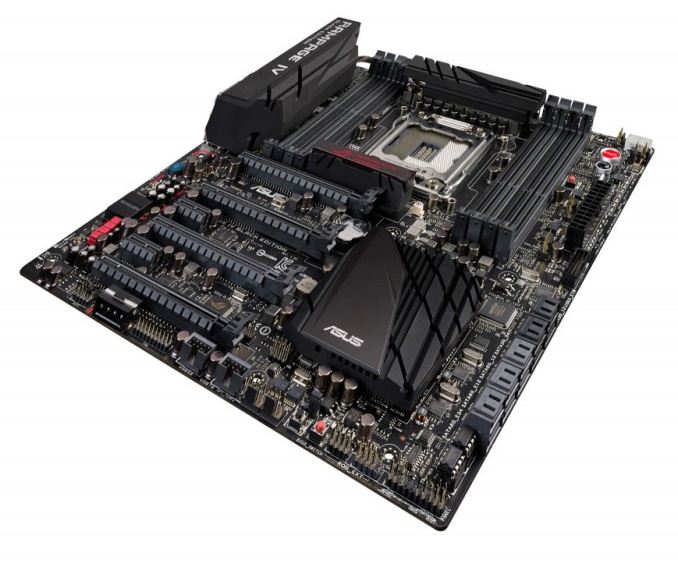
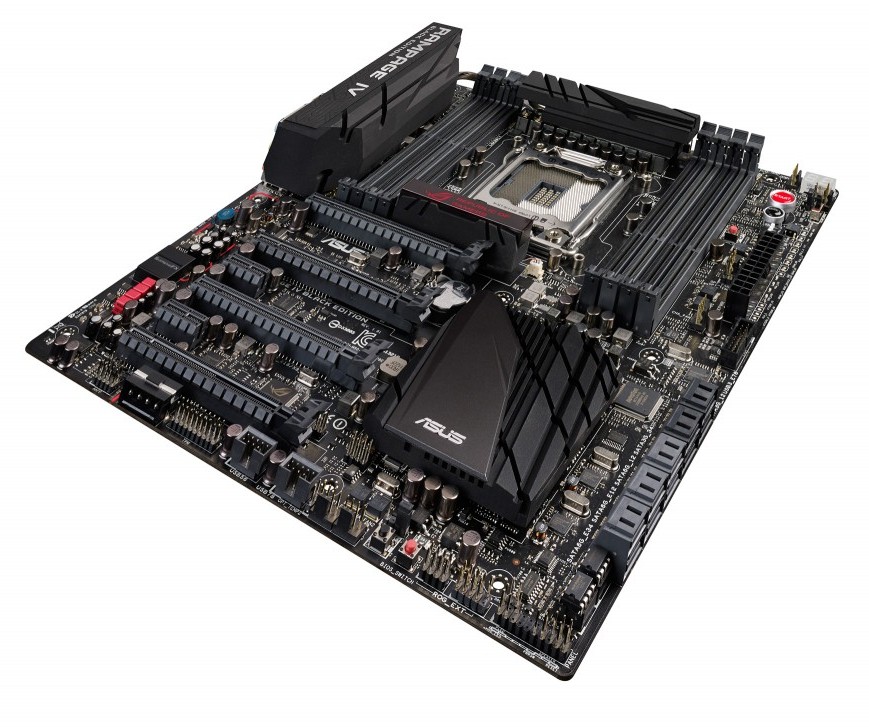
The motherboard itself is, as the name suggests, styled in black. With this being one of our few X79 refresh reviews, we have to return to the time of eight memory slots, limited space for power delivery and heatsinks, as well as extra controllers for SATA 6 Gbps and USB 3.0. The RIVBE comes with 10 SATA ports total, along with onboard power/reset buttons, features like MemOK, DirectKey, USB BIOS Flashback, ROG Connect, and a total of eight four-pin fan headers for any prosumer setup. The PCIe lane layout from Ivy Bridge-E CPUs allows for an x16/x1x/x8/x8 PCIe 3.0 setup, and ASUS uses two PCIe 2.0 lanes from the chipset for open-ended x1 slots. I prefer these open ended x1 slots compared to the traditional open slots, purely due to the fact that you are no longer limited to x1 cards for them. On the audio codec side, ASUS use their SupremeFX technology from the Maximus VI range, which implements an enhanced codec (in this case, the Cirrus Logic CS4398) with additional filters, EMI shields, support for 600 ohm headphones and PCB separation of digital and analog signals. The RIVBE is also bundled with a dual band 802.11ac 2T2R WiFi module on the rear IO.
The software side of ROG is similarly styled differently to the channel range, and the RIVBE follows the trend of ASUS Z87-style BIOS, as well as features like My Favorites and SSD Secure Erase used on Z87 ROG. In the OS we also get the updated AI Suite III, featuring the DIP4 auto overclock setting as well as ROG RAMDisk and GameFirst II. Fan Xpert II, TPU and EPU all make appearances, as well as ROG themes and backgrounds.
From the benchmark perspective, dual GPU boot times under 15 seconds gives the RIVBE an advantage over the RIVE due to the movement of features off the motherboard and onto the OC Panel. We saw some single thread performance issues in one of our benchmarks – despite implementing MultiCore Turbo to 40x on all cores, our 3DPM benchmark saw 36x performance. As our only comparison point for most of the benchmarks is the EVGA X79 Dark, which had issues of its own implementing any form of Intel Turbo Boost + XMP let alone MultiCore Turbo, ASUS definitely provides a stock benchmark result above the EVGA.
The issue, as always, will come down to price. At $450, the RIVE was one of the most expensive X79 motherboards available (X79 Extreme11 was more), and the RIVBE builds on this with a $500 price tag. Despite the RIVE price, it was one of the best-selling X79 motherboards, and the RIVBE has the potential, despite the extra $50, giving the user all the Maximus VI ROG range enhancements. The problem ASUS has, as mentioned before, is that Ivy Bridge-E is not as exciting as Sandy Bridge-E was, especially from a chipset perspective.
Visual Inspection
Motherboards bigger than ATX are always worth a double take if you ever see one. The extra dimensions on the motherboard have to be there for a reason – extra controllers, buttons, and so on. On the Rampage IV Extreme this was populated with VGA Hotwire and Sub-Zero Sense as listed above – the logic for these components still has to be initiated on the motherboard, and as we can see below the extra space is still very busy.

Starting with the heatsink arrangement, the power delivery has a relatively small heatsink (compared to some Z87 arrangements at least) directly above them which is connected via heatpipe to another heatsink around the rear IO, connecting to the RIVBE rear IO to hide the silver connectors usually associated with this region of the motherboard. In other motherboard designs this motherboard is also connected to the chipset heatsink and any small heatsink between the socket and the PCIe slots, but not on the RIVBE. The socket area features ASUS’ modified X79 socket plate – you will notice that the metal extension to the socket holes in other X79 products is not here – one would imagine this is due to the styling, but also the back plate changes such that 775 coolers with 2011 socket extensions can be used easier (such as the X-Socket arrangement with the RIVE).
The DRAM sockets are single sided in terms of latches, making it easier to remove memory with large graphics cards installed. It is worth reminding system builders to ensure the memory is fully pushed in with these single side latch arrangements. In the socket area for fan headers, there are six headers within easy reach – the CPU 4-pin above the power delivery, a CPU_OPT 4-pin (for closed-loop liquid coolers) header to the left of the two-digit debug on the top right, another 4-pin just below the two-digit debug, a pair of 4-pin headers next to the 24-pin ATX power connector and the sixth to the bottom left of the DRAM slots near the rear IO. The final two fan headers on the motherboard are on the bottom of the board, both 4-pin.
Along the top on the right hand side there is the aforementioned two-digit debug, paired with start and reset buttons. For users that do not wish to use the OC Panel, there is an LN2 mode jumper and slow mode switch in the top right corner as well. ASUS have equipped this side of the motherboard with voltage read points for extreme overclockers (rather than relying on software readouts that may be inaccurate), along with PCIe disable switches and a MemOK! Button that resets the memory settings in the BIOS. Moving further down is the 24-pin ATX power connector and a USB 3.0 header provided by an ASMedia controller.
The SATA ports are next, with the four SATA 3 Gbps from the chipset in a darker color, followed by the two SATA 6 Gbps from the chipset and another four SATA 6 Gbps ports powered by ASMedia. Beneath the SATA ports are two removable BIOS chips, the rear IO, next to the ROG_EXT header. This is the header for the OC Panel, which combines both USB power and data paths for the system. In terms of engineering, any device that carries optional data off the main board is interesting, either wired or wireless.
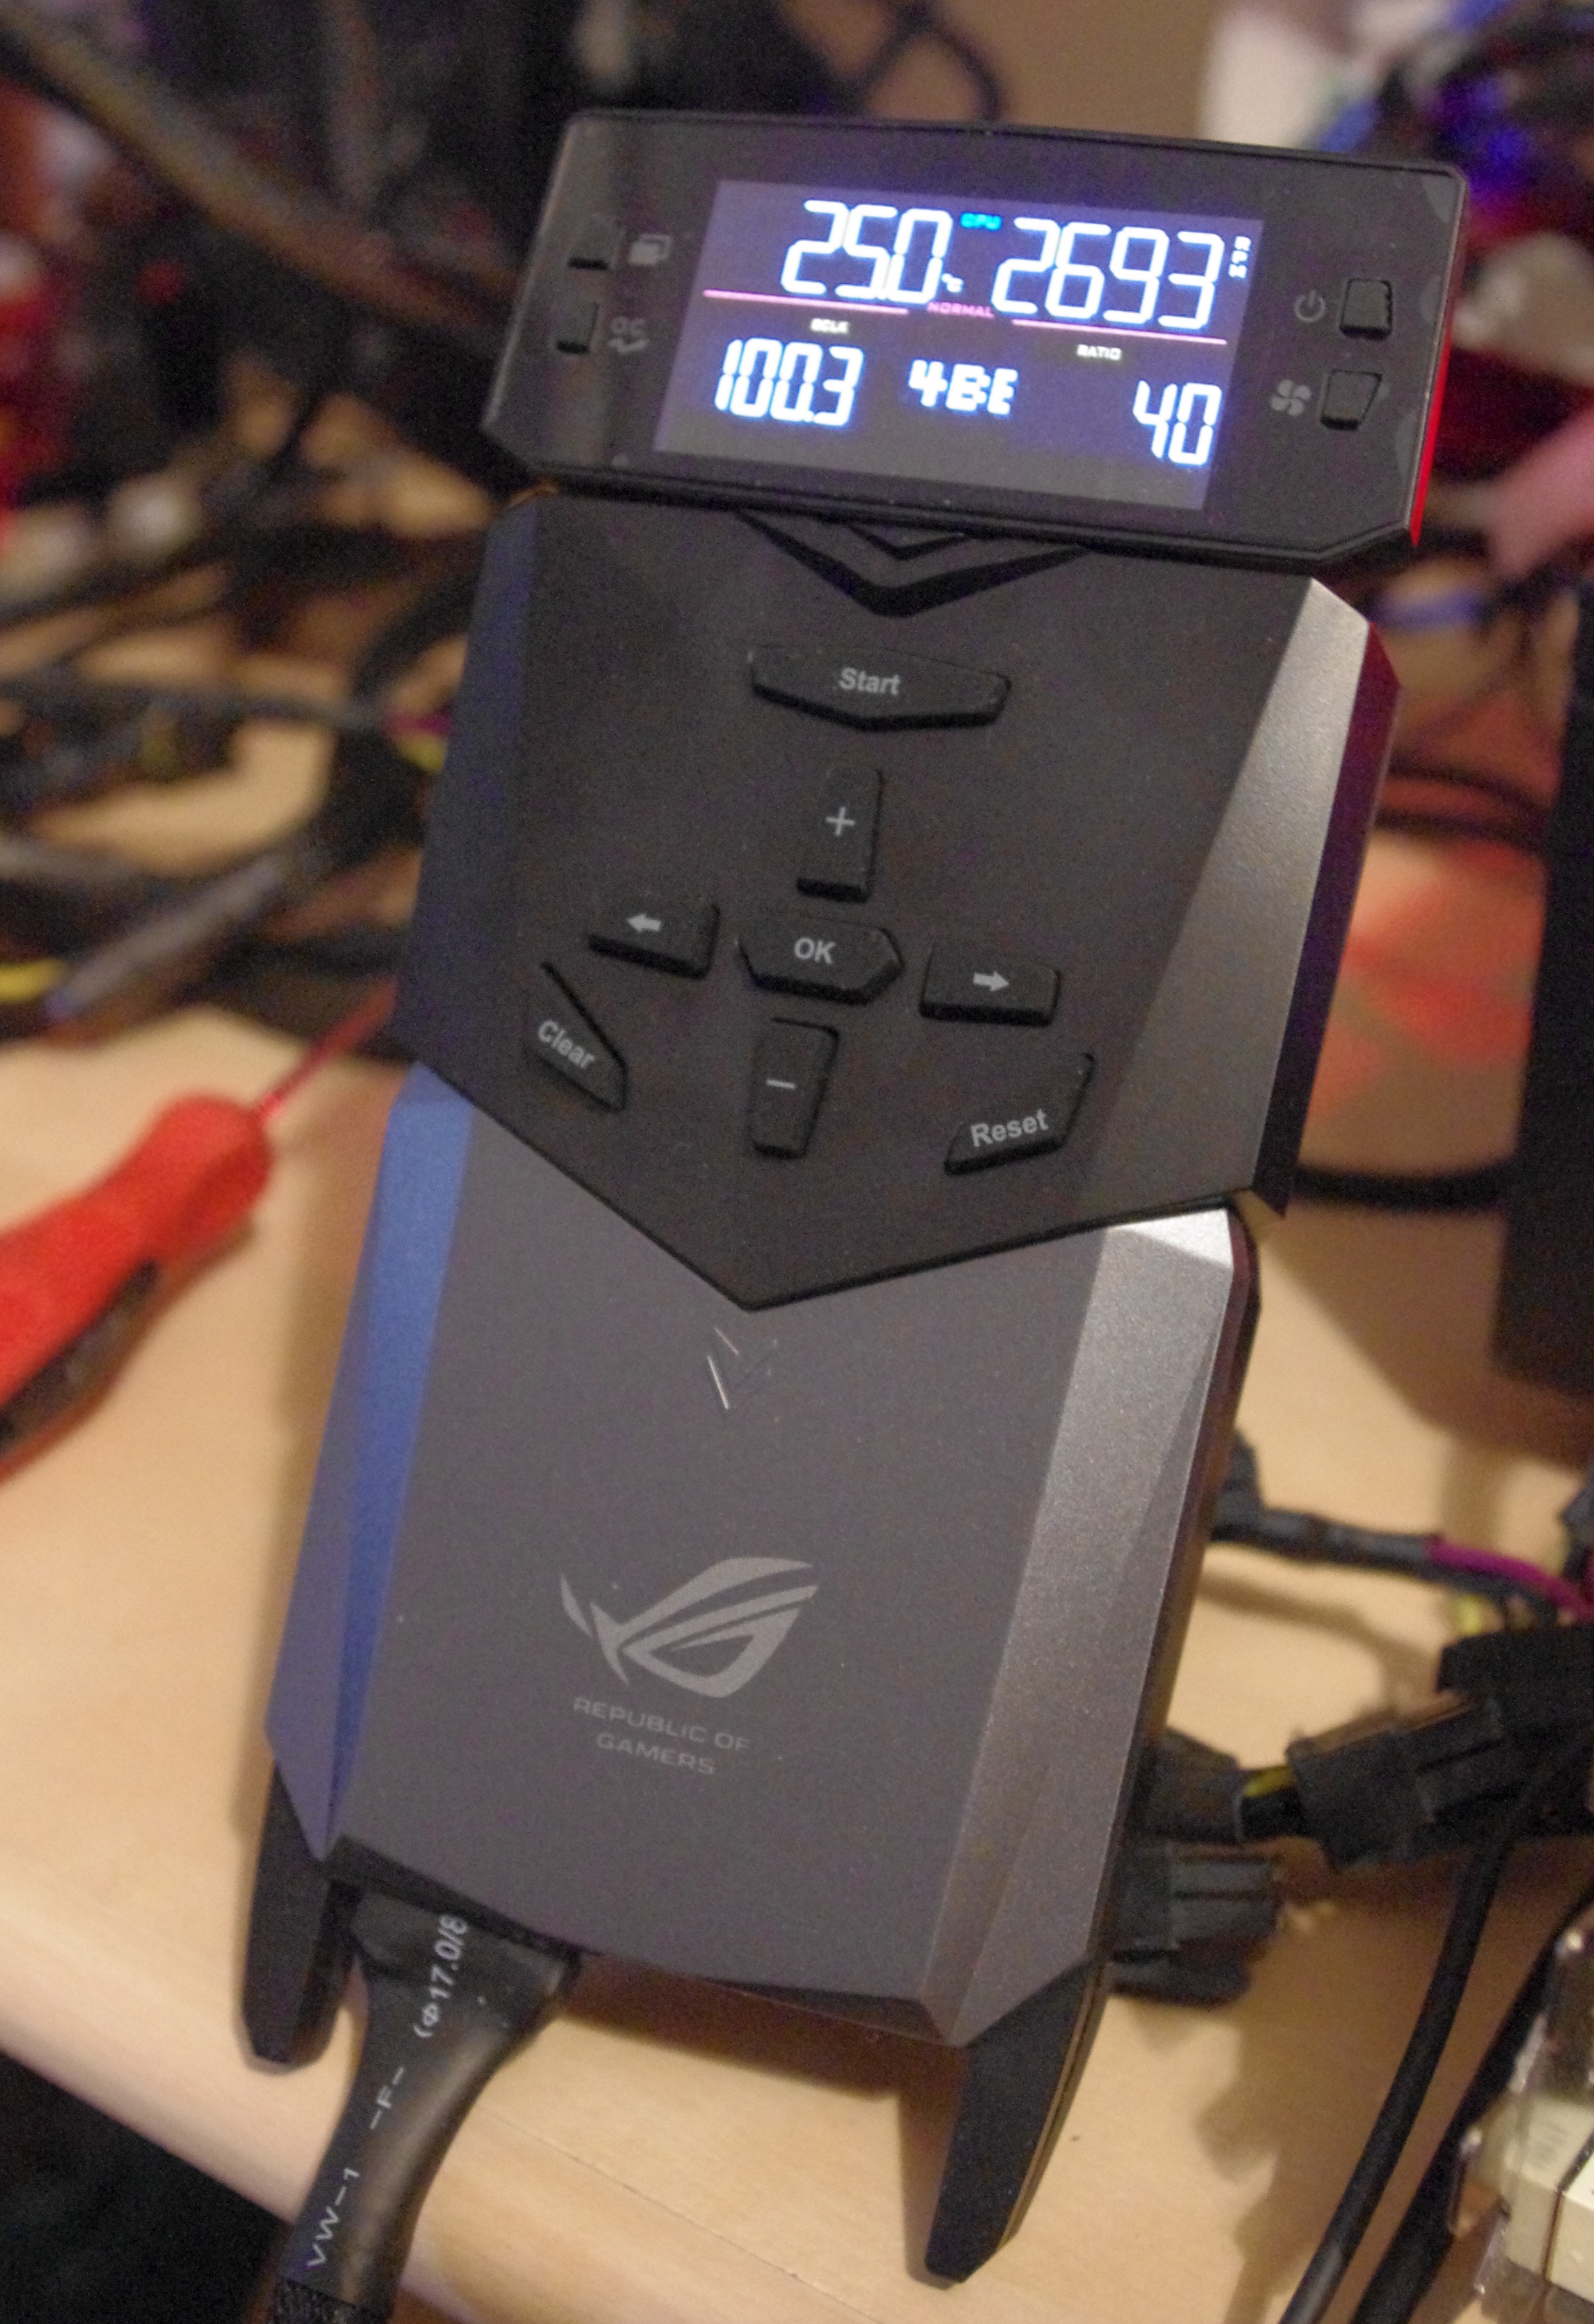
The top of the OC Panel on its first setting shows the CPU temperature, CPU fan speed, the BCLK of the CPU and the CPU multiplier. During POST the OC Panel will also show the BIOS codes as the system initializes, to match the two-digit debug. By pressing the OC Button, the system will initiate one of two basic OC modes, and selecting the button on the top left will allow for finer tuning of OC options.

In this image we have the CPU Ratio selected, with the value currently enabled on the right and the one selected using the arrows and +/- buttons on the left. When the OK button is pressed, the image above would implement a 41x CPU Ratio on the CPU. The two lines of dashes are for the sub-zero sense ports on the side of the OC panel.

On the bottom of the OC Panel underneath the cover are further options – four CPU fan headers (requires the SATA power connected at the bottom), a Slow Mode switch (changes the system multiplier to 12x for screenshots), a Pause switch (freezes the system mid-workflow), and two VGA hotwire connectors with voltage read points for applicable graphics cards.
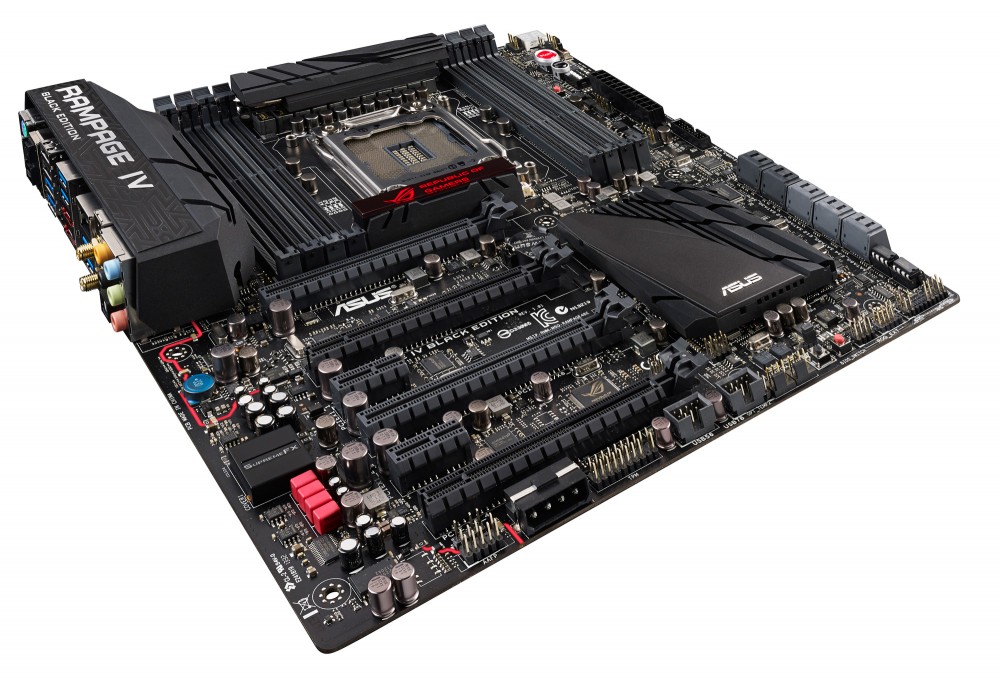
Back to the motherboard itself, and along the bottom of the board are the regular array of headers and connectors – from left to right, the front panel audio header, a four-pin molex power connector for VGA, a Trusted Platform Module header, two USB 2.0 headers, two 4-pin fan headers, DirectKey and BIOS_Switch buttons and then the front panel header arrangement.
The PCIe slots are arranged for full four-way GPU setups, for x16, x16/-/x16/-, x16/x8/x16/- and x16/x8/x8/x8 arrangements. There are two open ended PCIe 2.0 x1 slots from the chipset, suitable for sound/WiFi/PhysX cards as required.

The sound system on the RIVBE is designed to mirror that on several Z87 ROG models. We analyzed the Maximus VI Impact SupremeFX implementation, which used a daughter board due to space restrictions. The full-fat ATX uses the similar method of an enhanced audio codec (Cirrus Logic CS4398 here) within an EMI shield, high quality filter caps in both directions (front panel and rear IO), a 600 ohm headphone amplifier, and PCB separation of the digital and analog signals.
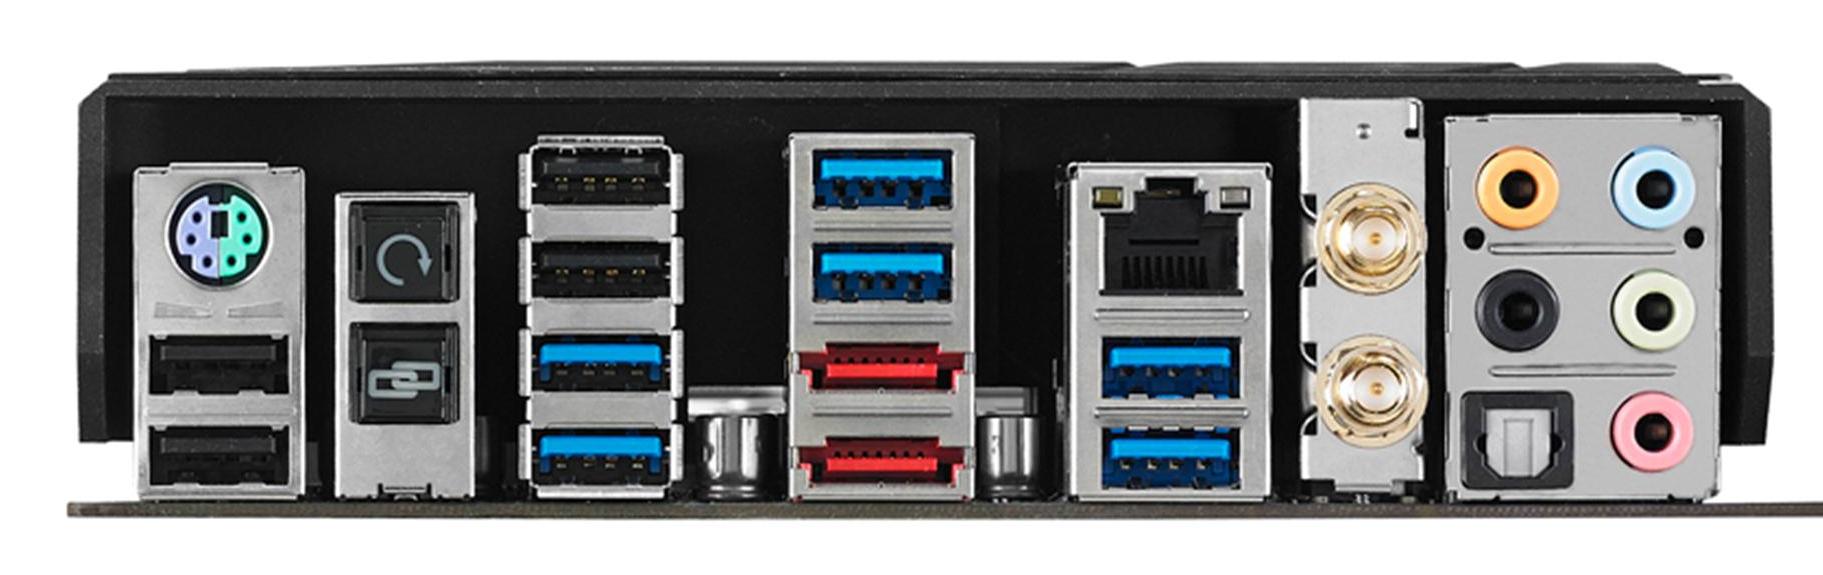
The rear panel is covered by the RIVBE cover to ensure the silver color does not show through when the board is in a case. From left to right we have a combination PS/2 port, four USB 2.0 ports, an ROG Connect Button, a USB BIOS Flashback button, six USB 3.0 ports (from ASMedia controllers/hubs), two eSATA ports (again, ASMedia), an Intel Gigabit Ethernet port, the 802.11ac dual band 2T2R module with BT4.0 and audio jacks.


Board Features
| ASUS Rampage IV Black Edition | |
| Price | Link |
| Size | E-ATX (12" x 10.7") |
| CPU Interface | LGA-2011 |
| Chipset | Intel X79 |
| Memory Slots |
Eight DDR3 DIMM slots supporting up to 64 GB Up to Quad Channel, 1333-2800+ MHz |
| Video Outputs | None |
| Onboard LAN |
Intel 82579 2T2R Dual Band 802.11ac WiFi |
| Onboard Audio |
SupremeFX (Cirrus Logic CS4398) - TI 6120A2 headphone amplifier - ELNA capacitors - WIMA film capacitors - Differential Circuit design |
| Expansion Slots |
4 x PCIe 3.0 x16 (x16, x16/x16, x16/x8/x16. x16/x8/x8/x8) 2 x PCIe 2.0 x1 |
| Onboard SATA/RAID |
2 x SATA 6 Gbps (X79), RAID 0, 1, 5, 10 4 x SATA 3 Gbps (X79), RAID 0, 1, 5, 10 4 x SATA 6 Gbps (ASMedia ASM1061) 2 x eSATA 6 Gbps (ASMeida ASM1061) |
| USB 3.0 |
8 x USB 3.0 (ASMedia ASM1042) [1 header, 6 back panel] 10 x USB 2.0 (PCH) [4 back panel, 3 headers] |
| Onboard |
6 x SATA 6 Gbps 4 x SATA 3 Gbps 1 x USB 3.0 Header 3 x USB 2.0 Headers 8 x Fan Headers DirectKey Button MemOK! Button Slow Mode Switch LN2 Mode Header Voltage Measuring Points Thermal Sensor Connectors Power/Reset Buttons Two Digit Debug BIOS Switch Button ROG OC Panel Header |
| Power Connectors |
1 x 24-pin ATX Power Connector 2 x 8-pin CPU Power Connectors 1 x 4-pin CPU Power Connector 1 x 4-pin Molex PCIe Power Connector |
| Fan Headers |
2 x CPU (4-pin) 3 x CHA (4-pin) 3 x OPT (4-pin) |
| IO Panel |
4 x USB 2.0 6 x USB 3.0 (ASMedia ASM1042) 2 x eSATA 6 Gbps (ASMedia) 1 x PS/2 Combination Port 1 x Intel NIC 1 x USB BIOS Flashback Button 1 x ROG Connect 1 x ASUS WiFi Go! (802.11ac) module Audio Jacks |
| Warranty Period | 3 Years, APS in North America |
| Product Page | Link |
With the Black Edition aiming to be the best X79 motherboard available, the specification sheet shows that ASUS aimed to go all out with USB 3.0, dual band 802.11ac WiFi and the OC Panel. One minor objection I might add is the 4-pin molex VGA power connector at the bottom of the motherboard (I prefer 6-pin PCIe or SATA power), and ultimately if the Black Edition wanted to be future proof, we might have seen some Thunderbolt connectivity as well.


21 Comments
View All Comments
JlHADJOE - Sunday, January 5, 2014 - link
Wait, so the Auto-OC actually beat your manual OC results? Impressive!The table says Auto-OC managed to get 47/47/46/46/45/45 stable where your manual OC maxed out at 45, and it also got 45x100 stable at less volts and lower temps than manual.
Razorbak86 - Sunday, January 5, 2014 - link
The PovRay score for the 45x100 manual OC was higher, the voltage was lower, and the OCCT temp was lower. I'd say the 4.5GHz manual OC beat the Auto-OC hands down.JlHADJOE - Monday, January 6, 2014 - link
Auto OC: 45x100, 1.400V BIOS, 1.408V load, 77CManual OC: 45x100, 1.425V BIOS, 1.440V load, 80C
Slightly higher Povray is probably just variance, or down to something other than the CPU (perhaps XMP timings). I'd say the Auto-OC was better.
IanCutress - Sunday, January 5, 2014 - link
For the manual OC I only adjust the voltage, CPU multiplier and the CPU load line calibration, which is pretty much what most users will do when manually overclocking unless told otherwise (or there's another setting you must adjust). It's clear the Auto-OC does a bit more under the hood (VCCSA/VSSIO voltages most likely) - at the expense of a higher voltage (to catch more processors). In my test, I also only focus on all cores the same speed, and the stress test attacks all cores, rather than single cores that might be higher turboed. There is scope to go playing around with all the settings, which is what the ROG forums are there to do for users who have only one motherboard every couple of years to organise :)jasonelmore - Sunday, January 5, 2014 - link
I've found that disabling the C States of power saving features such as speed step has drastically improved my max overclock on the Rampage IV Extereme BESamus - Sunday, January 5, 2014 - link
$500!? yeooow.Gen-An - Sunday, January 5, 2014 - link
Ian,Have you seen any noticeable difference in memory OC using the Black Edition vs the original RIVE with the same CPU and RAM? People on various forums are saying the BE is more optimized for IB-E and memory OC, but I haven't been able to find anything definitive to support that statement.
jigglywiggly - Sunday, January 5, 2014 - link
why's the first picture skewed lol?great review as always ;D
IanCutress - Sunday, January 5, 2014 - link
I haven't stressed the RIVE with Ivy-E and high (2800+) memory yet, although this motherboard was designed with Ivy Bridge-E as the focus after ASUS finished the Maximus VI range. So if there are optimisations for Ivy-E above the RIVE that are more than just BIOS, the RIVBE should have them. So while I don't have any data, I expect that would be the case. Now whether faster memory is actually useful for a given workload is a different matter...Gen-An - Wednesday, January 8, 2014 - link
Just interested for the OC fun factor, 24/7 I run DDR3-2400 C9.