ASRock Z87E-ITX Review: Motherboard Juxtaposition
by Ian Cutress on November 6, 2013 10:00 AM EST- Posted in
- Motherboards
- ASRock
- Mini ITX
- Haswell
- Z87
ASRock Z87E-ITX In The Box
It would be easy to predict that a $150 mini-ITX motherboard has the bare essentials included in the box – at a guess we would expect a couple of SATA cables as a minimum. The Z87E-ITX goes a little further, giving:
Driver DVD
Rear IO Shield
Manuals
Four SATA Cables
WiFi Antenna
DVI to D-Sub Adapter
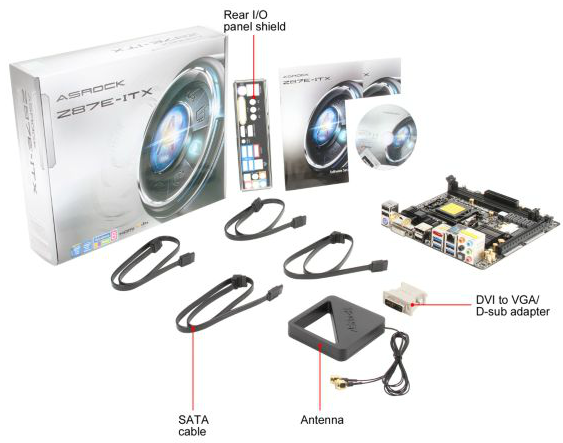
Some motherboards use a built in antenna, but ASRock offers their own version here, designed to hang from a high spot above the system. Aside from the two extra SATA cables, it is a little surprising to see a DVI to D-Sub adapter included, but welcome nonetheless.
ASRock Z87E-ITX Overclocking
Experience with ASRock Z87E-ITX
ASRock have developed their overclocking methodology over the generations, now offering a good number of 24/7 automatic overclock options both in the BIOS and in the OS. These auto options are aggressive with voltage in order to encapsulate as many CPUs as possible, but even with an H80i on the path to winter, some of the options near my CPUs limit were hitting temperature boundaries.
Nevertheless I was impressed that ASRock’s settings all worked on my CPU, albeit a little overloading at 4.8 GHz and 1.42 volts. During the manual overclock testing I did not notice ASRock requiring less voltage than other Z87 motherboards tested, however it did eclipse 4.7 GHz with temperatures remaining under 90C and 4.8 GHz failing only due to high temperatures. Whether this was due to ambient temperatures being slightly lower than in previous testing or not, it is still a good display of overclockability from a small form factor product on server level power delivery chokes.
Methodology:
Our standard overclocking methodology is as follows. We select the automatic overclock options and test for stability with PovRay and OCCT to simulate high-end workloads. These stability tests aim to catch any immediate causes for memory or CPU errors.
For manual overclocks, based on the information gathered from previous testing, starts off at a nominal voltage and CPU multiplier, and the multiplier is increased until the stability tests are failed. The CPU voltage is increased gradually until the stability tests are passed, and the process repeated until the motherboard reduces the multiplier automatically (due to safety protocol) or the CPU temperature reaches a stupidly high level (100ºC+). Our test bed is not in a case, which should push overclocks higher with fresher (cooler) air.
Automatic Overclock:
Options for automatic overclocks are available in both the OS and in the BIOS. For OS overclocks, we have the front page of A-Tuning:
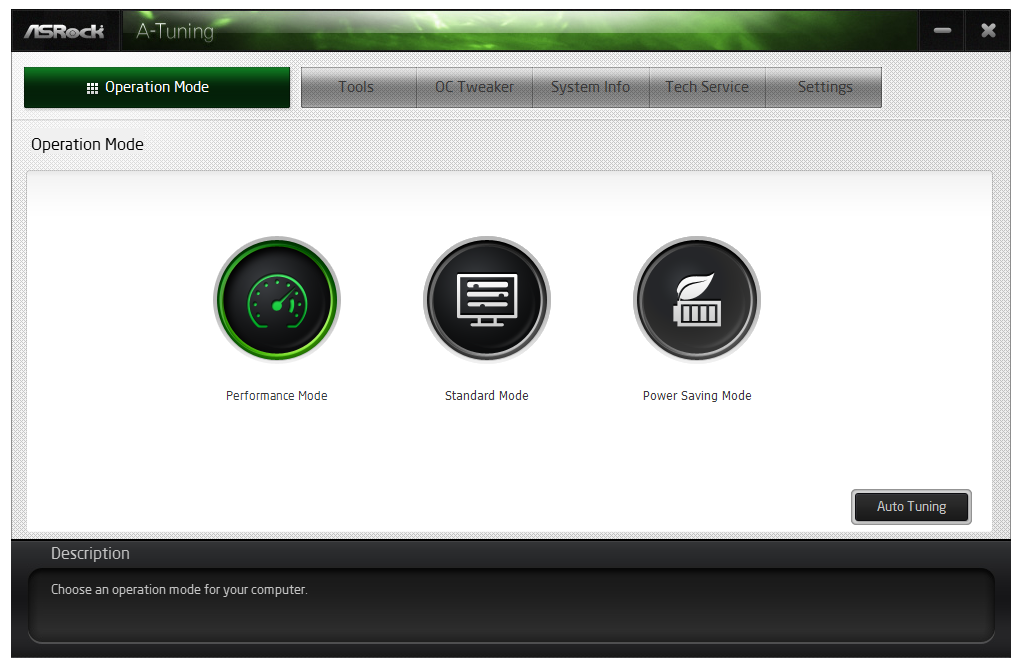
In Standard Mode, the system operates as per the normal settings. We observed a load voltage of 1.021 volts, a PovRay score of 1531.55 and a peak temperature of 55ºC.
In Power Saving Mode, the system reduces down to 800 MHz for almost all operation. Under sustained load (any number of cores), the system will raise the CPU speed slowly. After eight seconds the system will be at full speed, offering full stock performance. Due to this ramp up procedure, the PovRay score was lower at 1438.95, but load voltage was the same at 1.021 volts. Peak temperature under load was 56ºC.
In Performance Mode, the system stays at the full-load turbo bin as set in the BIOS, rarely coming down to idle unless the system is absolutely idle. In our system this meant a 3.7 GHz speed, giving a PovRay score of 1517.43 and load voltages of 1.021 volts. Peak temperatures were at 56ºC.
This screen also offers Auto Tuning, which set the i7-4770K CPU at 3.0 GHz and stress tests the system, upping the multiplier over time to 4.3 GHz. At 4.3 GHz the system stops as if complete. At this setting the CPU voltage is set to 1.200 volts, giving a load CPU voltage of 1.202. Unfortunately the system was only at 4.3 GHz for single thread loads, moving down to 3.5 GHz for multithread, giving an ultimate PovRay score of 1472.88. Peak temperatures were 67ºC due to the higher voltage.
Overclocking via the BIOS is comparatively easy, with the ‘Optimized CPU OC Setting’ giving options from 4.0 GHz to 4.8 GHz in 200 MHz jumps. The latter two options are in red, suggesting a better than average cooling system.
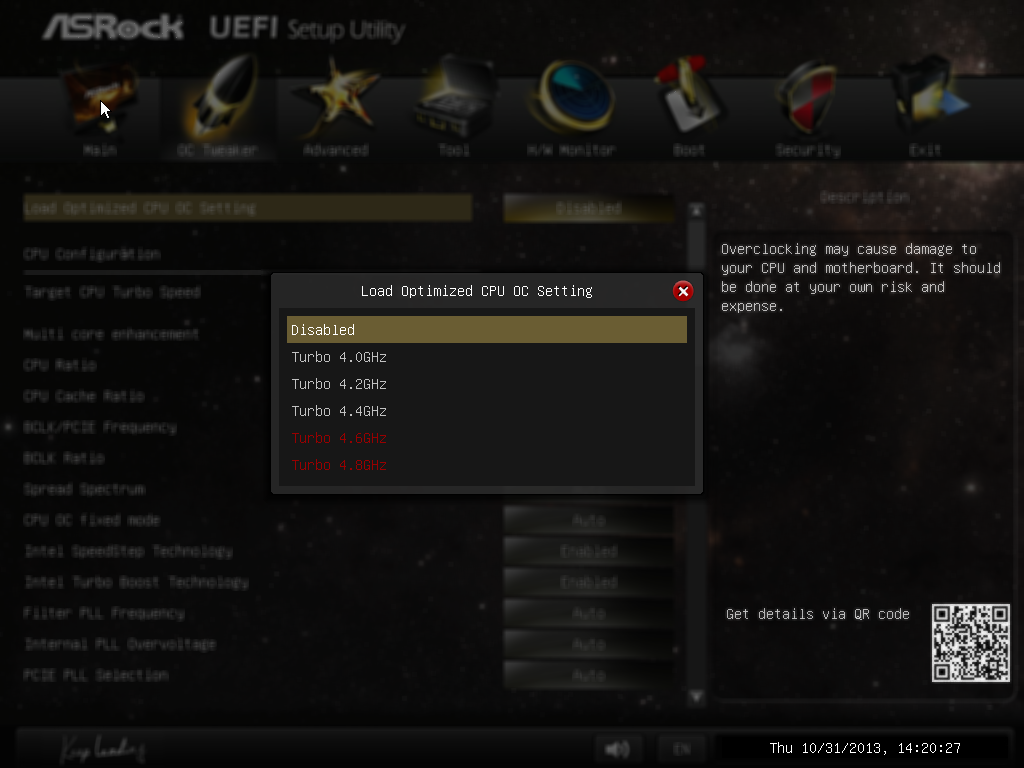
- At 4.0 GHz, the system applies an adaptive 1.000 volts on the CPU, giving 1.064 volts under load and a PovRay score of 1641.82. Peak temperatures under load were 59ºC.
- At 4.2 GHz, the system applies an override 1.200 volts on the CPU, giving 1.202 volts under load and a PovRay score of 1740.26. Peak temperatures under load were 71ºC.
- At 4.4 GHz, the system applies an override 1.300 volts on the CPU, giving 1.297 volts under load and a PovRay score of 1825.93. Peak temperatures under load were 84ºC.
- At 4.6 GHz, the system applies an override 1.320 volts on the CPU as well as a Load Line Calibration level one and 1.9 volts on the FIVR, giving 1.321 volts under load and a PovRay score of 1897.05. Peak temperatures under load were 88ºC.
- At 4.8 GHz, the system applies an override 1.420 volts on the CPU as well as a Load Line Calibration level one and 1.9 volts on the FIVR, giving 1.421 volts under load and a PovRay score of 1961.48. Unfortunately temperatures during PovRay reached 99ºC, and our OCCT load test failed due to temperatures.
Manual Overclock:
For our manual overclock testing it was easy enough to follow the same principles of the CPU OC settings and extrapolate to find the lowest voltage needed for each CPU speed. We adjusted the multiplier from 40x upwards, starting at 1.000 volts with 1.9 volts on the FIVR and a Load Line Calibration of level one.

The fact that the motherboard hit 4.7 GHz on my CPU (and kept OCCT under 90ºC) that commonly falls foul at 4.7 GHz is a pleasant surprise. With any luck I will get my new water chiller loop system to help push systems beyond ambient limitations.


43 Comments
View All Comments
tsheetz - Thursday, December 26, 2013 - link
Has anyone been able to get audio to work through HDMI on this board?Ichinisan - Sunday, February 16, 2014 - link
The first page incorrectly says "DVI-D" in at least 2 places. It's actually DVI-I. VGA is supported using the included DVI-to-VGA adapter.lemmo - Thursday, September 11, 2014 - link
The mSATA is tucked away on the underside of the board. Has anyone heard of issues with the mSATA overheating?