Philips Hue: Automated Home Lighting Gets Colorful
by Ashu Joshi on March 1, 2013 12:50 AM EST- Posted in
- Gadgets
- Home Automation
- Philips
- Hue
- Lighting
Philips Hue Setup
The setup process is very easy and at no point do you need a PC or a Mac computer—everything can be done using a Smartphone or a Tablet. The first step for any automation controller that can be controlled over the Home Network or Internet is to get it on the Network, naturally. Philips makes this easy by sticking with Ethernet for the Hue Bridge.
As far as the setup procedure, the first step is to screw in the Connected Bulbs and turn them on. All the bulbs turn on just like normal light bulbs, with a default white light. Once all the bulbs are screwed in and powered on, plug the Hue Bridge into an Ethernet port connected to your home router/gateway and apply power.
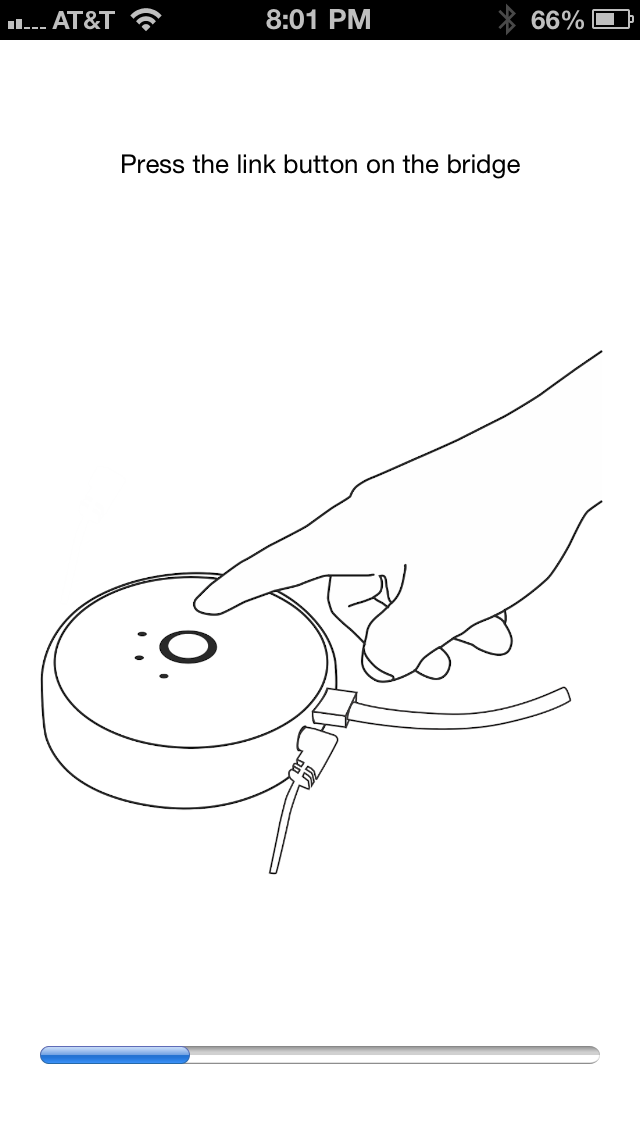
The Hue Bridge boots in less than 20 seconds (you can see the boot process in this short video). The next step is to install the app from the Apple App Store on your iOS device (or the Google Play Store for Android).At this point, make sure that your smartphone WiFi is on and connected to your home network. Fire up the app and it will instruct you to press the “link” button on the controller. When you press the button the app discovers the Hue Bridge and you should be ready to go. In my case, it automatically discovered all the three bulbs and they showed up in the app.
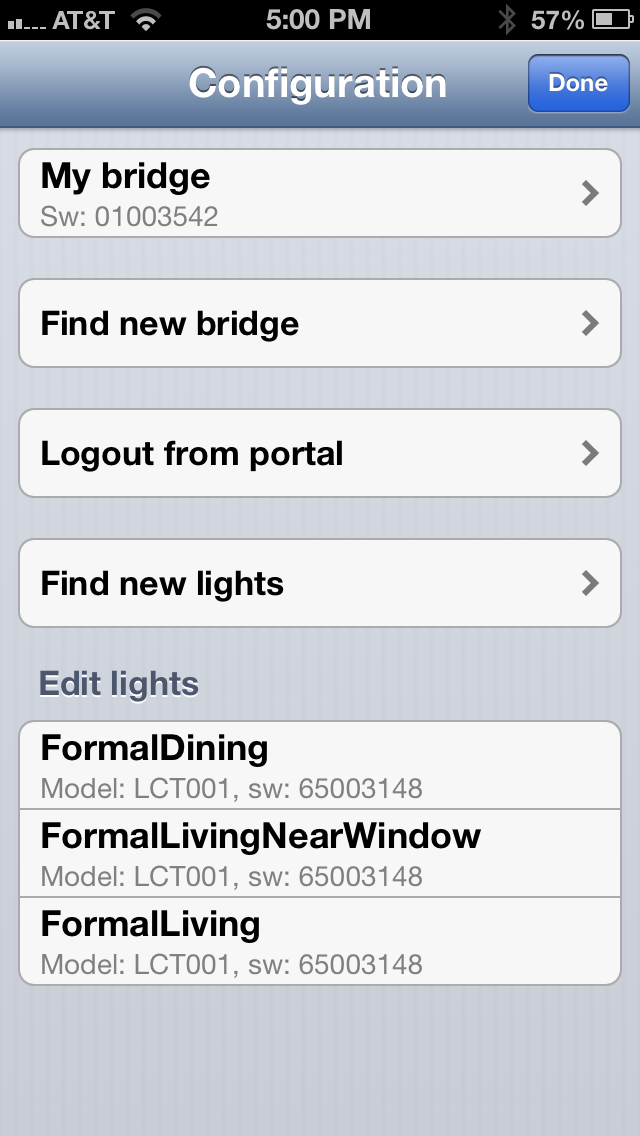
From the App settings section it’s possible to rename each bulb to give it a meaningful location. To help with this process, when you select one of the bulbs in the app the corresponding physical bulb starts blinking to show you which light you’re adjusting. This is a handy feature for the initial setup, and it could be even more important if you happen to have a lot of Connected Bulbs.
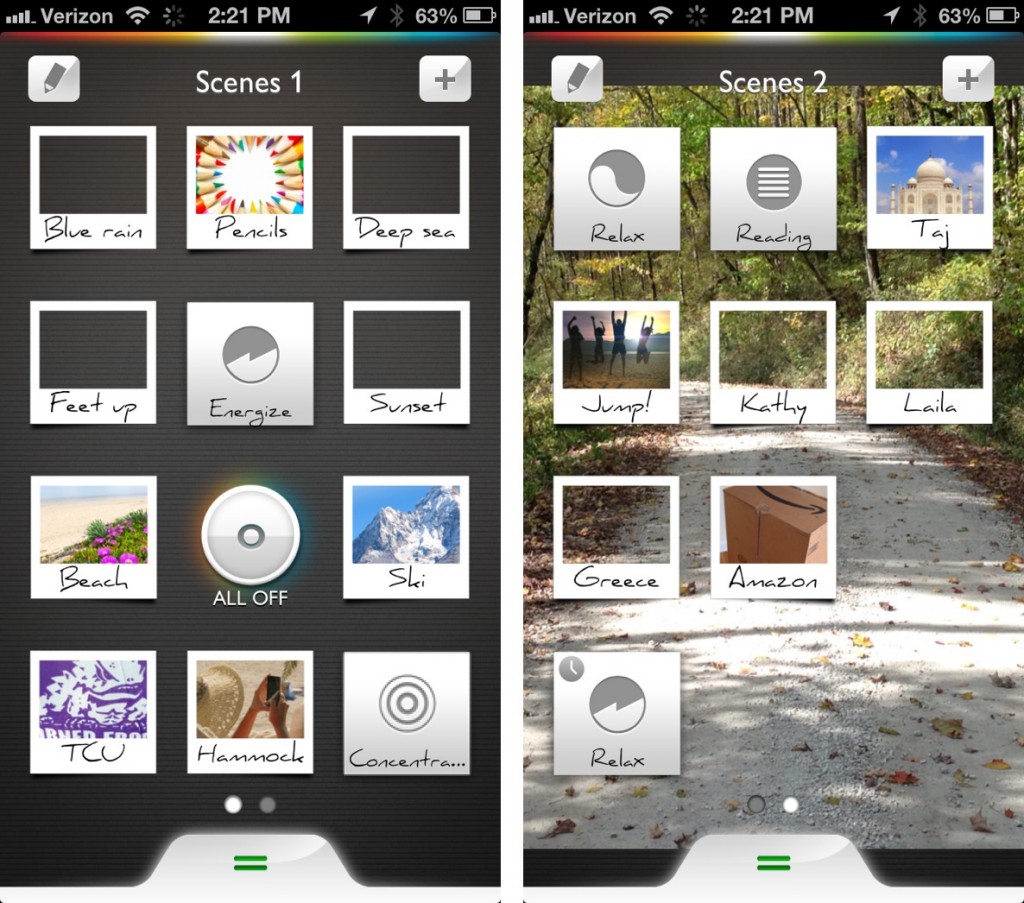
The app comes with multiple scenes that set the lighting ambience to predefined levels. You can also snap a photo and let the app decide on the appropriate color(s), and you can save all of these settings to new “scenes” (e.g. you might have one setting for a regular dinner with a different settings for a “romantic dinner”). There is also an option in the app to add more Bridges or bulbs, but I have not been able to try that yet. It seems pretty straightforward: adding a new bulb takes you to a page on the Smartphone that instructs you to screw in the new light, turn power on, and start the search.
It’s also possible to control Hue from more than one device (e.g. a tablet, a phone, and maybe the phone of a significant other). The process is as before: download the app, make sure you are on the home network (WiFi), fire it up, and when the app prompts press the “link” button on the Hue Controller and it is paired to the network. (This works very similar to the Sonos app as well.) If you have edited the names of the bulbs (for example I called one of them “FormalDiningLamp”), the other devices will pick up the names as they’re all stored in the Hue Bridge (so thankfully you only have to input the names once).
Controlling the Bridge locally is pretty simple, but if you want to be able to manage the lighting when you’re not at home (e.g. you’re not connected to your home network), you’ll need to create an account on MeetHue.com. Select the “Login to portal” option within the app and it will open up a browser with the account creation page. The page is clearly designed for phones and tablets and after a few guided steps you should be all set. Once you confirm whether you’re using a smartphone or a tablet you can then control the lights from anywhere with Internet access (provided of course that your home network stays up).


94 Comments
View All Comments
Franks8519 - Saturday, March 16, 2013 - link
A practical question. Has anyone used these in a 6" ceiling can? It looks like they might be too small to be effective. I love the concept, but do they get lost in a 6" can?BravoRomeo - Sunday, April 7, 2013 - link
You could use the Hue bulbs in a 6" can, but they would have about the same soft/diffuse lighting effect as installing a bare 50W frosted incandescent or a 12W CFL spiral. Adding a parabolic reflector trim would help direct light downward, as without such, much light is wasted into the can and would be disappointing.A better solution, if you don't need the color changing, is the Cree CR6 LED retrofits, which are available at Home Depot for $25 to $35 (as well is a smaller 4" retrofit). Excellent color rendering with Cree's "TrueWhile" led array, dim ability, and they look great since you get a new trim as well. Cleverly, the included white trim is part of the heat sink for the LEDs. I installed two in my bathroom and am very pleased. It would be nice if Philips brings the Hue technology to a similar format.
Philips have said they are working on other bulb formats for Hue, including the venerable BR30 commonly used in 6" recessed can lights. If they can get them as bright as the Cree solution, I might be interested. I'd also like to see some emphasis on more directional lighting, which in both track and recessed applications adds much visual drama to interior lighting design. I love those Halo recessed fixtures with the hidden aimable MR16 bulb... $200 per fixture, but great for illuminating artwork without drawing attention to themselves.
Sascha Schweitzer - Wednesday, April 10, 2013 - link
With the Hue Alarm Clock app you can now set wake-up timers on Android. Really missed that feature in the Philips app...calvin@123 - Thursday, March 30, 2017 - link
Smart Electronics and Smart RGBW LED Controller with dimmer brings colorful led and wide range implementations give you the power to control LEDs with Bluetooth and Micro Controller firmware software buildCheckout our link : http://www.pupaclic.com/iot/smart-rgbw-led-control...