Gigabyte X79S-UP5 WiFi Review: Ultra Durable 5 Meets the C606 Chipset
by Ian Cutress on September 6, 2012 6:36 PM EST- Posted in
- Motherboards
- Gigabyte
- X79
- C606
Gigabyte X79S-UP5 WiFi BIOS
Despite the fact that Gigabyte were late to the graphical BIOS party back in the P67 era, today we have a fully functioning BIOS on our hands to play with. Over time, it has increased in speed, usability and presentation. The overriding message, as with any graphical BIOS, is to expose the nature of the configurable settings in an aesthetically pleasing way. If you can get around the fact that Gigabyte calls a 2D image the '3D BIOS' technology, then usually the Gigabyte BIOS is an easy one to navigate and use.
Since the inception, Gigabyte seems to have gone through three phases of BIOS. The first was slow and clunky, with transitions taking time. The second saw the system speeded up, but in order to type numbers in NumLock had to be pressed which caused a 10-second delay. Later BIOSes removed this time penalty, and this is what we see on the Z77 platform. However there still seems to be an issue with the C606 chipset and that NumLock feature, as it is still a problem on the F3a BIOS for the X79S-UP5 WiFi. Also of note is our Deferred Procedure Call latency testing, which determines how well requests for CPU time are dealt (critical for audio processing) - sometimes the software in the OS can have a negative impact, such as EasyTune 6, due to their system monitoring feature. Gigabyte have solved the issue on Z77 with a BIOS update, however it still lingers here in C606.
Regarding MultiCore Enhancement, the X79S-UP5 does include MCE as part of the setup when XMP is enabled. I can confirm this for regular socket 2011 Core processors, however I can also confirm that it does not affect Xeons. As a result, we do get better multithreaded performance at stock settings for Sandy Bridge-E Core processors. It should also be noted that as of the F3a BIOS, two of the CPU settings seem not to work - Load Line Calibration settings for the CPU, no matter what option is selected, does not kick in properly. We see this when we overclock - when 1.425 volts is selected in the BIOS and LLC set to Extreme, we would expect in the OS to see near 1.425 volts in our monitoring software. However, on the X79S-UP5 WiFi, we get 1.380 volts, suggesting that default LLC is still applied. The same goes with PLL Overvoltage, a feature used to get above 4.6 GHz on a Sandy Bridge processor - despite enabling this in the BIOS, it does not have an affect and we are limited in overclocking.
Chances are all these issues will be fixed in due course with a BIOS update. Stay tuned to the Gigabyte webpage for the latest version.
The main screen as a user enters the BIOS is the '3D BIOS', showing a motherboard image similar to that used in the product.
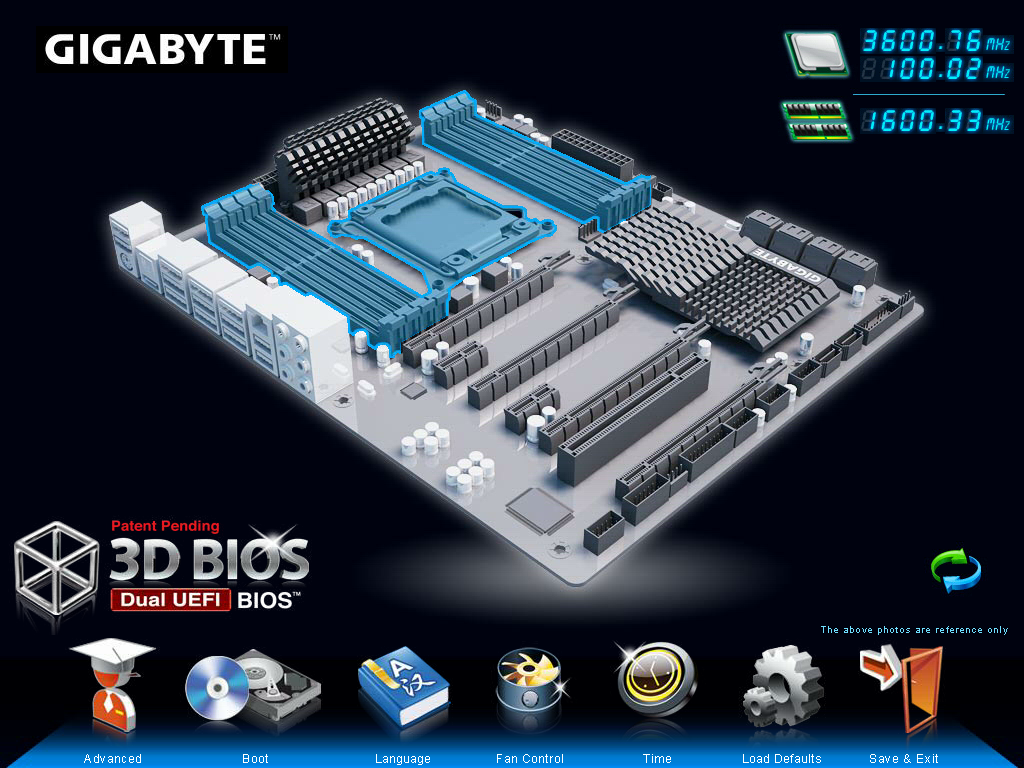
As an initial screen, I am a little disappointed, as it contains almost zero information. The image of the motherboard may or may not be the motherboard that is actually being used (we saw similar scenarios on other Gigabyte motherboards), and we get no details about what is actually installed - motherboard name/model, CPU used, memory amount, temperatures, voltages, fan speeds et al. As a system builder or debugger, this information is vital so I do not have to go rummaging inside a possibly dusty case.
This main screen separates the BIOS up into different areas that the user can click or highlight, and as I have specified in previous reviews, it would be great if these areas that change color also provide a popup that tell the user what it is they are selecting. Each of the areas (CPU + Memory, PCIe, IO Panel, SATA, Chipset) brings up a menu similar to that found in the 'Advanced' section of the BIOS. Along the bottom are options to enter the advanced mode, change language, or the fan controls:
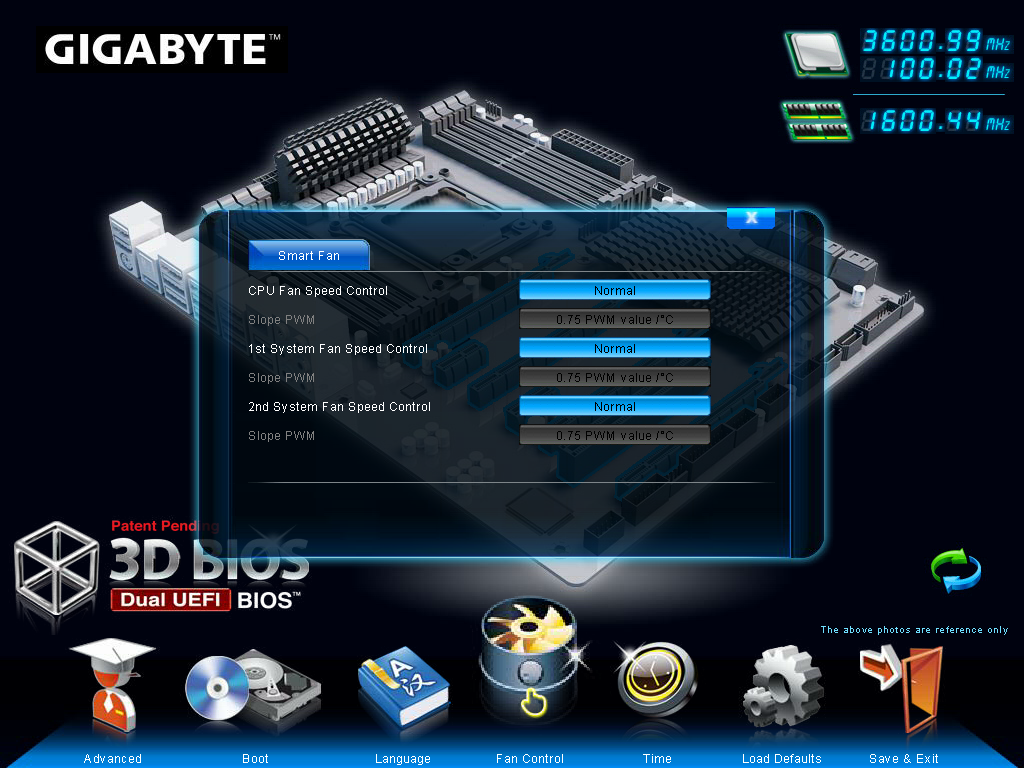
Once again we see an odd-ish system for users to control their fans - by the magical 'PWM Value / ºC' units. Clearly, we can work out that the higher the number, the quicker the fan ramps up in speed, but there are infinitely better ways to handle this. At the low level, we have ASRock who utilize 'Levels' of how quickly the fans ramp up, taking out the units altogether, but let us look at this objectively.
The BIOS has access to CPU speeds, CPU temperatures, and the PWM value of the fan. Given the fan controller used on board, we may also have access to the RPM value of that fan. It does not take a software genius to code a system that means that the user can utilize a percentage of the peak PWM value for various temperatures, and the software to control the gradients in between a multipoint user-defined system. If there is access to RPM values, then the system could initiate a test to see what PWM values correlate to what RPM, and how much this is of the max RPM (as the relationship between RPM and power applied is not always linear). Then give the user a graphical interface in order to control this, apply a multipoint gradient and possible hysteresis with spinning down the fans as well as spinning them up. I struggle to see the complexity of such a system (maybe there is more to it than meets the eye) given the controls at hand - the nearest solution we have to this is ASUS' technology, which works rather well.
Rant on fan speeds aside, the main set of screens I am usually interested in within the BIOS start in the advanced menu:
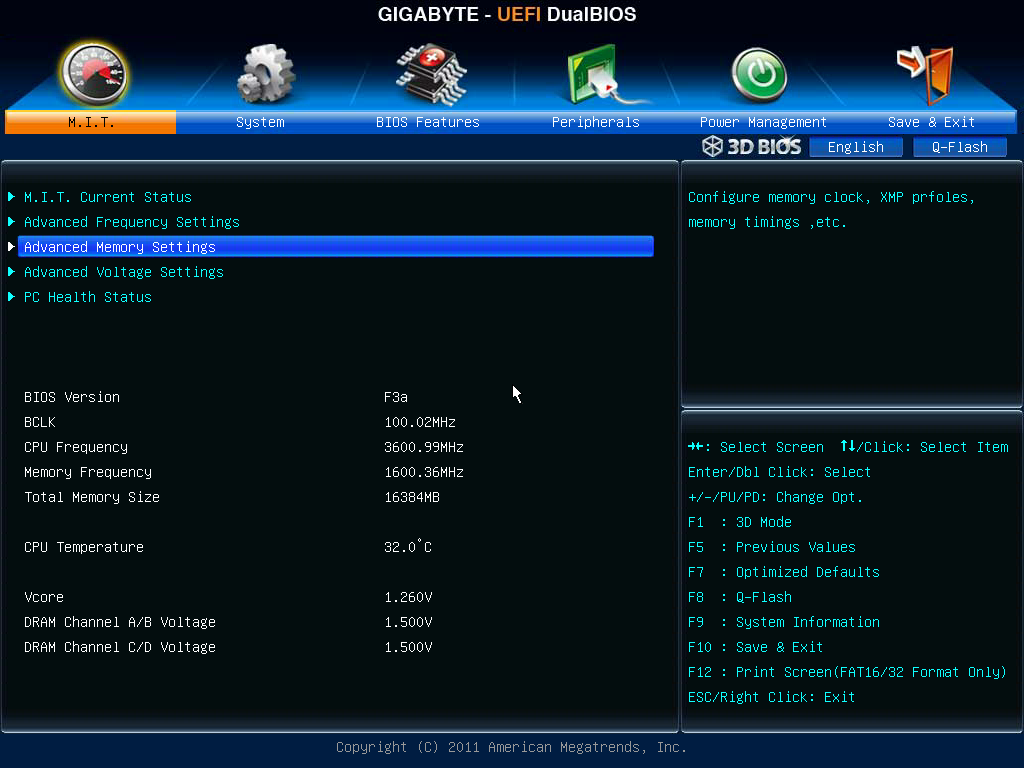
The first screen is our overclocking option menu, designated 'M.I.T.'. From here, we get more of the information out of the BIOS, such as the BIOS version, CPU speed, memory speed, CPU temperature and voltages. The five menu options provide us with a more detailed look at the settings of the board, such as frequencies, memory settings, voltages, power delivery and PC 'health' (fan speeds and temperatures).
For overclocking, the options are a little around the place, requiring multiple clicks or button presses to get to everything important. We can change the CPU speed via the frequency menu, but CPU voltages are found in a sub-menu of the voltage settings. For Load Line Calibration, this is found under a different sub-menu of the voltage settings. Memory multiplier can be adjusted in either the frequency settings or memory settings, but sub-timings are dealt with in a sub-menu of the memory settings - memory voltages are changed through a different sub-menu of the voltage settings. If that wasn't enough, turbo modes, PLL overvoltages and Cx state options are in a sub-menu of frequency settings. There are better ways of laying the information out - it feels like a BIOS designed by an engineer, rather than an enthusiast user.
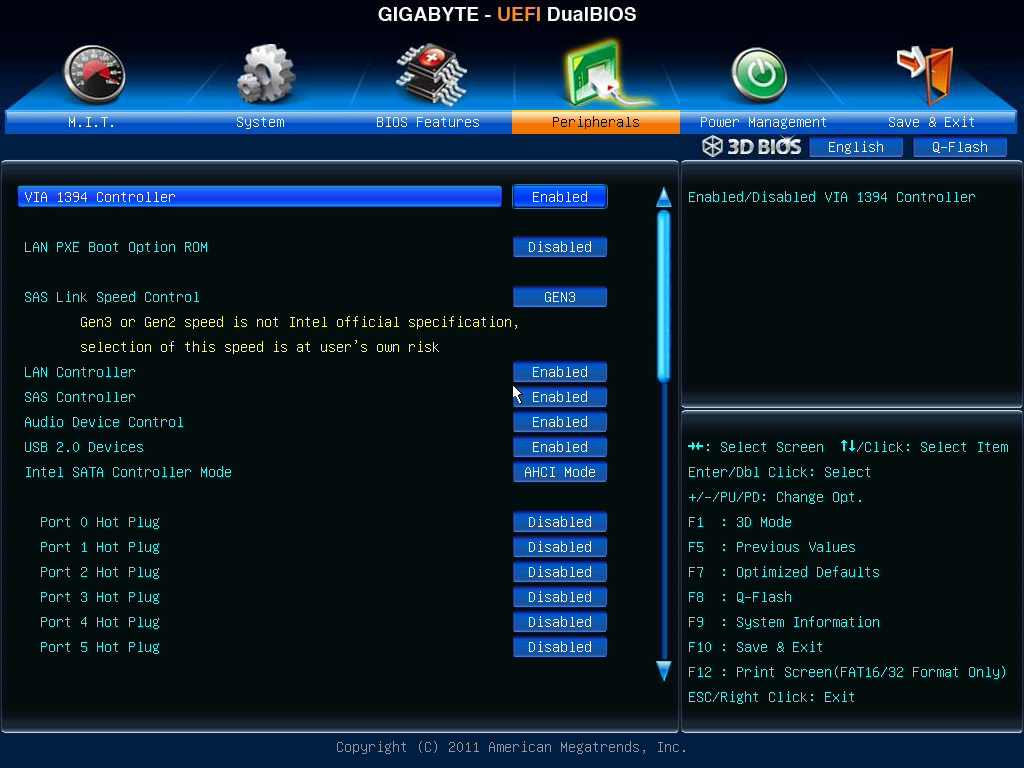
Other BIOS options of note are in the peripherals section. Because of using the C606 chipset, we have those SAS enabled ports that also support SATA drives. As mentioned in the visual inspection, these are specified to be routed to the chipset via a PCIe 1.0 link to ensure data integrity. If a user would like more speed (i.e. greater than 1.0 GBps), then the option to change the SAS Link Speed Control is now available from the F3a BIOS onwards.


16 Comments
View All Comments
James5mith - Friday, September 7, 2012 - link
For what it's worth, I would personally be interested to see what 8x SAS SSD's would do vs. the 8x SATA SSD's.SAS is full duplex vs. SATA's half-duplex. As well, native SAS doesn't suffer the overhead of the tunneling protocol that allows SATA drives to run under a SAS controller.
soloburrito - Friday, September 7, 2012 - link
why no mention of the ASUS x79 WS? It seems relevant to include in any comparison with this board.loimlo - Sunday, September 9, 2012 - link
Hi IanAt first, thanks for your hard work. It's a pleasure to read your article.
Given the popularity of samrtphones/tablets, I think it is the right time to add USB charging into MB review. As almost every MB vendors have one or two USB Charging functions like USB charging during computer S5 sleep, over-current USB Charging for iPAD, it does make sense to test and include this function review.
My suggestions are as follow:
1. Normal USB Charging: 500mA for every samrtphones/tablets like iPhone, iPAD, Android devices. Very long charging time usually.
2. USB charging during S5 for iPhone, iPAD, Android devices
3. Vendor proprietary software to control over-current USB charging like 1.5A/2A for iPhone, iPAD, Android devices to shorten charging time.
Given the 2012 Amazon Kindle tables ship without a charger, USB charging will be getting more and more popular among enthusiasts
drmrking - Monday, September 10, 2012 - link
>>As stated with the ASRock X79 Extreme11 though, eight-way RAID-0 is an obscure usage scenario.No I totally disagree - 8 x 500gb SSD is going to be a pretty common usage for photographers - we need storage volume and speed. SSDs are very reliable (no moving parts) so its pretty productive to use Raid 0 as long as you back up changes regularly.
Of course I can't get the full read potential (4gb/sec) out of that setup but the write performance is pretty well matched.
Mike
IanCutress - Wednesday, September 12, 2012 - link
Hi Mike,Thanks for letting us know that at least someone considers 8-way RAID-0. We all have our own narrow view of what constitutes normal usage, and it's always good to hear that one segment uses a particular feature to the maximum.
Ian
ray1214 - Thursday, September 20, 2012 - link
instantaneously. Its searches across popular sources such as YouTube, Soundcloud and also across some not-so-well known places such as ex.fm, Jamendo, BandSoup and Official.fm. In addition, you can also listen to livestreams from online radio stations as well.http://www.e-monkureru.com/ It goes without saying that it searches your iTunes library too.