Gigabyte GA-X79-UD3 Review
by Ian Cutress on December 26, 2011 4:37 PM EST- Posted in
- Motherboards
- Gigabyte
- X79
- Sandy Bridge E
BIOS
Up until this point, Gigabyte had not released a graphical BIOS for any recent consumer level chipset, if at all. One of the major criticisms of most reviews at the launch of P67 and Sandy Bridge was that while some manufacturers had embraced the zeitgeist of the graphical interface, Gigabyte hadn't, citing that using the old style suited a lot of their customers, and they were able to retain stability of a mature design. So when Anand got a sneak preview from Gigabyte [1,2] , we knew things would change significantly for X79.
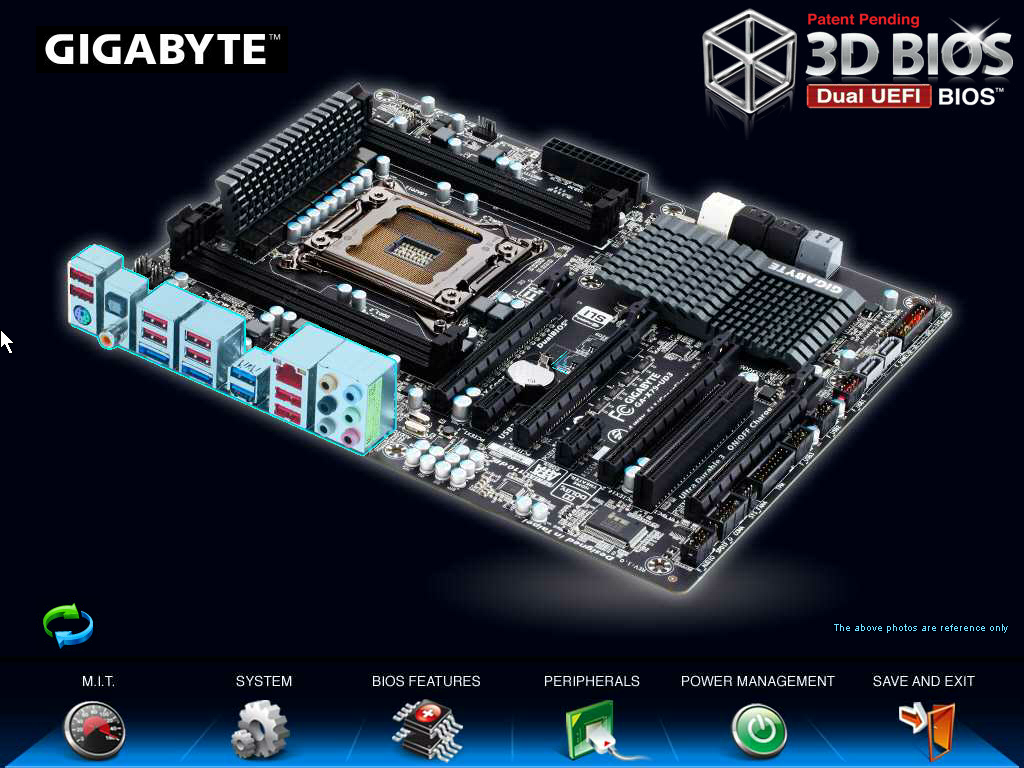
Gigabyte call their graphical implementation a '3D BIOS', which to all intents and purposes, isn't 3D at all. The front screen shows the board at an oblique angle (to 'look' 3D), whereby different areas of the board are clickable to see a quick list of certain options.
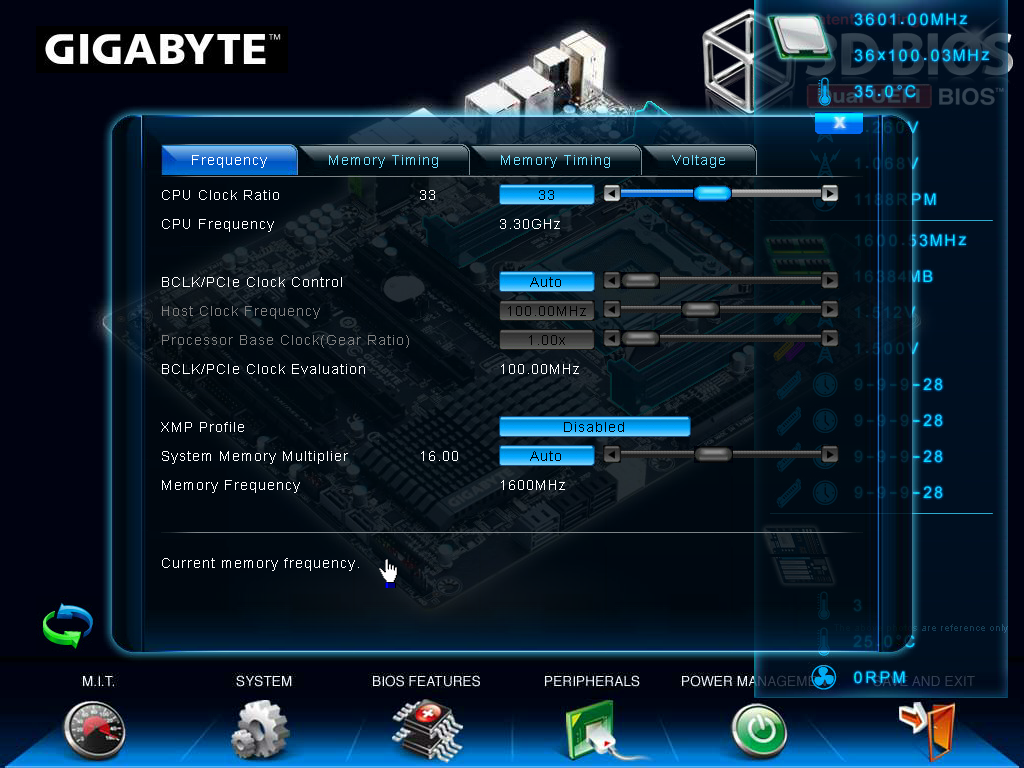
So for example, if the mouse was moved over the CPU socket, the socket and VRM would turn blue, a little description comes up, and when this is clicked, a screen showing the most obvious BIOS values which can be adjusted. Note, to the right of this is a small list of CPU speed, temperature, voltage, and memory info. In a perfect world, I'd like to see that menu before clicking the board itself. The '3D' board and the menus are all navigable with the keyboard as well, although in 3D mode, the F10 button to save and exit does not do anything, and you will have to navigate to 'Save and Exit' to exit.
By clicking any of the other buttons at the bottom of the screen, we are taken to a more recognizable menu system for a BIOS, with menus and simple selection options.
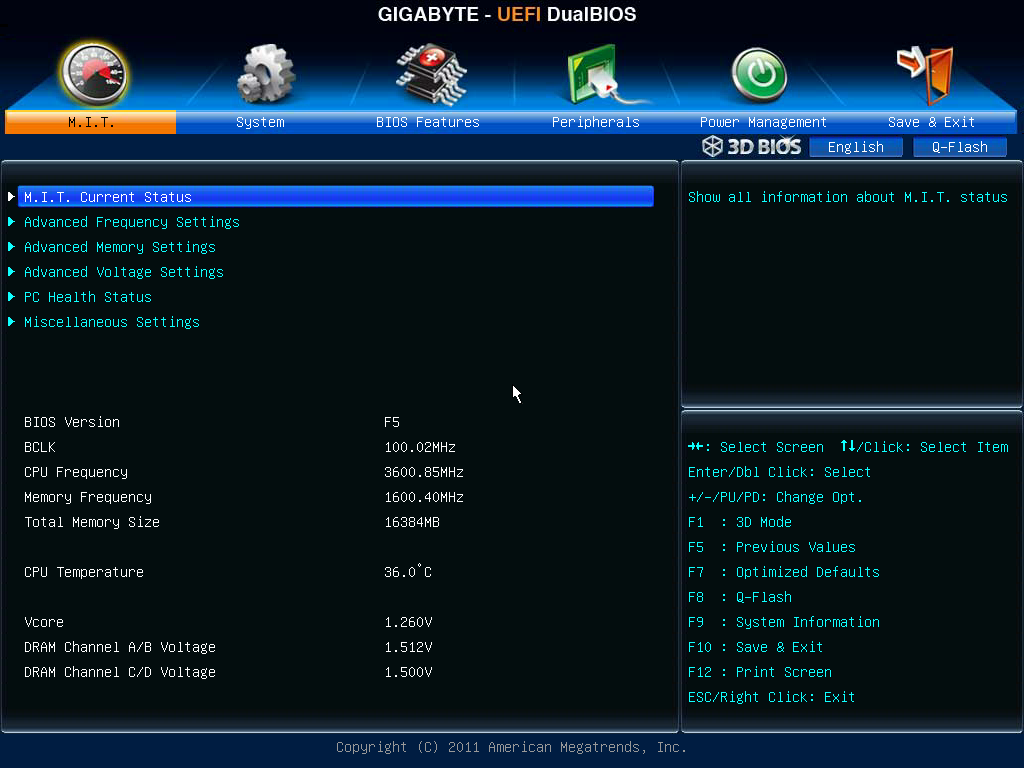
The main screen is listed as M.I.T., and offers sub menus for the variety of clocking options - frequency, memory, voltage and general health. For the large majority of consumers, the only options worth modifying are the CPU multiplier and the memory divider/XMP profiles. For enthusiasts, there is a wide range of power/PWM controls, current protection modifiers, voltages and sub timings available. I found a couple of things rather frustrating - I really needed one set of options for simple overclocking to be a single menu - CPU Multiplier, Gear Ratio, BCLK, CPU + VTT Voltage, Memory strap, Memory timings, and Memory voltage. I often found myself going in and out of menus to set these - having them all in one menu would be easier to digest.
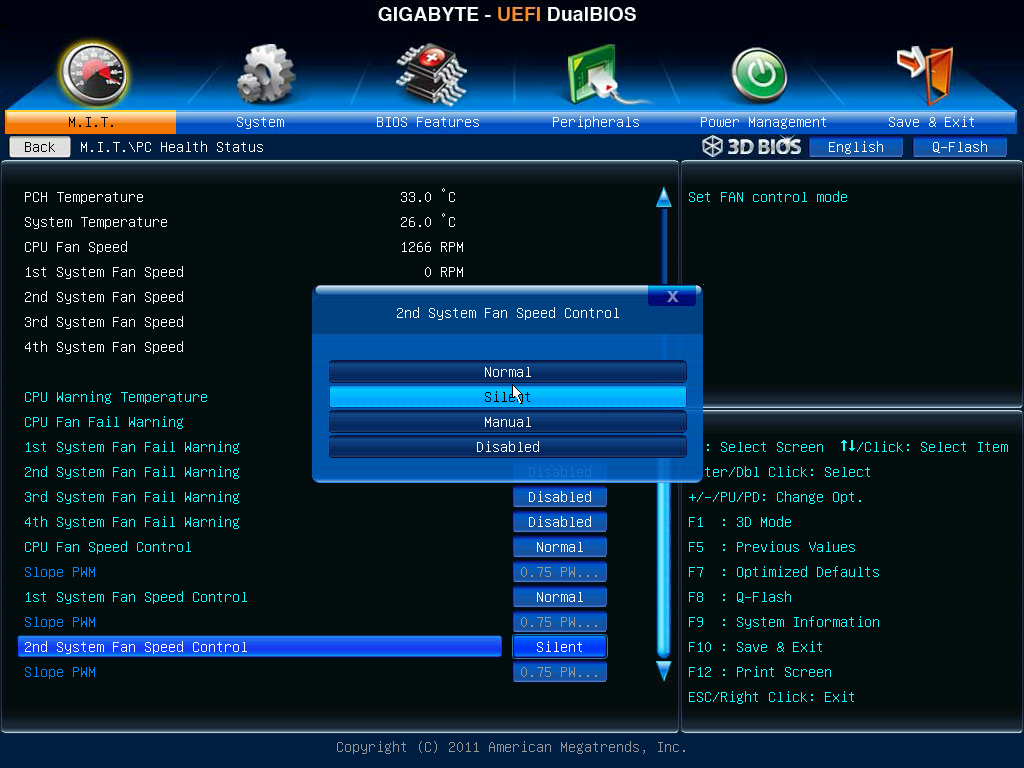
Fan controls are set in the PC Health Status menu. On the whole, these are ultimately confusing. Only the CPU fan header and the two four-pin fan headers are given adjustment options - either Normal, Silent, Manual or Disabled. In manual mode, the fan speed ramp is adjustable in terms of PWM value / ºC, which in the real world to most people means nothing. The fact that other manufacturers can provide a full range of ramping and selections could either lay at Gigabyte's lack of integration with the fan controllers, or simply they use slightly cheaper ones than some of their competitors. There's scope for improvement here, as a lot of users would prefer a finely grained control over their fans.
By default, users will notice several things: the boot-up Num Lock option is set to disabled, which I found rather odd given that the tendency is to have it enabled. Also, as with other X79 products, we are set to AHCI by default as well, so that users can take advantage of AHCI features. All the boot options are found in the BIOS Features menu, with boot override found in the Save & Exit menu.


Overclocking
For the X79-UD3, overclocking was a little hit and miss. I had trouble with the OC profiles as per the OS software (sometimes it would work), but the CPU overclocking from the BIOS was very easy. The memory overclocking was a one hit wonder however, as for some reason there is a variety of issues. Let us go through them one by one.
For automatic overclocking, we have no options in the BIOS, but in the OS the EasyTune6 software (or via the Smart6 software), there are turbo modes available - either 4.1 GHz, 4.3 GHz or 4.5 GHz (one part of the software says 4.5 GHz, another says 4.68 GHz, but it means 4.5 GHz). By clicking on one, the BIOS is adjusted and the system asks for a reboot to apply the new overclock. Initially, this didn't work for me at all - the software would just crash, or it would reboot with no change. Then, at some random point, it did start to work. By selecting the turbo mode, the speed was correctly selected and it applied the XMP profile of the memory being used. On the 4.5 GHz setting, the board set the peak load voltage to be 1.392 V, and the CPU reached 75ºC during 3DPM. This is a lot better than other vendors' implementations, where they put another 0.1 V into the CPU for equivalent clocks!
In terms of manual overclocks, I purely sat there raising the multiplier. Up to 46x was stable, with the automatic voltage giving 1.392 V. At 47x, the system would BSOD on loading Windows. By going into the BIOS and fixing the voltage at 1.4 V, the board successfully booted and ran, but failed a Blender test. At the 46x setting, a maximum temperature of 78ºC was seen during a Blender test.
For the memory, initially the board was easily able to go into XMP on my new high end G.Skill kit, rated DDR3-2400 9-11-11-31 2T at 1.65 V. The next memory strap was for DDR3-2666, which would not run at 1.65 V even with looser timings (11-14-13). The ability to put it on XMP worked initially over successive reboots, then after a BIOS reset it would not work at all. I tried various combinations, to no avail. Then after a series of resets, it worked again when I applied the automatic overclock setting.
Combined, I believe that if a user can get the 4.5 GHz auto overclock setting to work, which automatically applies the XMP, then we are on to a winner.


39 Comments
View All Comments
sor - Wednesday, December 28, 2011 - link
I've had three different motherboards with realtek 8111 nics on them, all of them regularly had issues where the link would go to 100mbit or drop out altogether, which required disabling the device and then reenabling it/reinstalling the driver... almost daily. Granted, this was with Linux and the driver might not be up to par (though I used the one from Realtek's website after having issues, with no improvement), but since it's what I use at home and at work I much prefer the reliability of the Intel NIC and drivers.ET6 - Saturday, December 31, 2011 - link
You do need to have more than one Ethernet NIC on the physical computer if you are going to install Virtual Machines. For example, you could install Windows Server 2008 R2 with Hyper-V first. You could then install several VMs; one running Windows 7 with Media Center for media transcoding and content display; one running Windows Home Server 2011 as a media server etc; and maybe a third running Windows SQL Server 2008 or Visual Studio Team Foundation Server 2010.You need a dedicated NIC for all network communications with the management operating system incuding remote access to the Hyper-V role. The management operating system runs the Hyper-V role. This NIC should be different than any mapped to VMs.
Need at least one other Ethernet NIC to provide Virtual Machine access to an external virtual network.
Now you might have reason for 32 or 64 Gig of RAM.
zanon - Monday, December 26, 2011 - link
I had thought that at this point most manufacturers would finally be moving to EFI, and that that was an important part of enabling some of these more modern GUI configs. However, you don't mention EFI at all, so does that mean these are still using legacy BIOS, just further hacked on? Or are you using "BIOS" in some generic sense? If it's the former then that's both too bad and somewhat interesting, wonder what the hold up is. If it's the latter it's confusing, please stop immediately and don't do it again.tpi2009 - Monday, December 26, 2011 - link
If you read the screenshots in the second page of this review you'll find your answer.zanon - Tuesday, December 27, 2011 - link
The screenshots say alternatively "3D BIOS", "Dual UEFI BIOS", "BIOS Features" and "UEFI DualBIOS" with the article itself never referring to EFI at all. Awesome clarity and consistency there! Does "Dual" mean that it has both EFI and BIOS? Are the selectable, or is there some sort of automatic switching, or what? Or is it just stupid confusing naming?Death666Angel - Tuesday, December 27, 2011 - link
BIOS is used as a synonym for UEFI afaict. "Dual" refers to Gigabytes use of 2 BIOS chips, meaning you cannot brick it with a BIOS flash gone wrong (though I haven't seen one of those in years).AstroGuardian - Monday, December 26, 2011 - link
I can't notice any performance difference from the graphs. How can you notice and how can you make such a poor verdict?RamarC - Monday, December 26, 2011 - link
it wasn't a low rating... just a bit middle of the road because of the XMP issues and the price."In terms of performance, we are not seeing anything stellar with the GA-X79-UD3." so it doesn't hit the best-of-the-high-end marks but it's still a good mobo.
"If it were my money on the line, it would be a hard choice between the UD3 and the ASRock X79 Extreme4." that sounds like a mid-range endorsement to me.
So overall it seems to be a solid 'B'... you just need to see if 'pretty good' is worth your money.
PS to AT: thanks for the recent hardware reviews -- since I was getting very tired of smartphone writeups since a) I (like a lot of folks) am tied to a carrier and thus limited to their offerings, and b) I read AT for PC tech (not phone tech, and I can upgrade PC tech at my choosing.)
gevorg - Monday, December 26, 2011 - link
Does Gigabyte continues to ignore the fact that their BIOS lacks basic case fan controls? Unacceptable for a $100+ mobo, let alone $250.Rick83 - Monday, December 26, 2011 - link
If it where only the BIOS - It's in fact the hardware chip that's only got two PWM-able outputs...