TheaterBlog: Hush Little Baby, Soundproofing the Room Part I
by Anand Lal Shimpi on January 5, 2008 12:00 AM EST- Posted in
- Anand
At this stage, progress in the theater was moving along quite nicely. As with most construction you get to enjoy these stages where it seems like the whole process will be done in 2 weeks, followed by periods where it feels like absolutely nothing gets done. If you want background, be sure to check out my first post.
Sound travels through the air as waves, when those waves collide with an object they cause it to vibrate. That's fine when the object is your eardrum, that's not so great when the object is a stud in one of the walls of your theater.
Bryan Pape, the sound guru, made it very clear: we wanted to keep noise in the theater from getting out, and noise outside the theater from getting in. In order to do that, we needed to isolate the theater from the rest of the house.
Normally, when you build a house you build a large wooden frame on top of a foundation, then frame out individual rooms within the house; in other words, everything is connected. The rooms are finished by nailing sheets of drywall to the frame. The problem in a theater is that when sound waves hit the drywall, they will vibrate the drywall, which will then vibrate the studs that it is nailed to and transmit sound out of the theater that way.
Luckily, there are ways to acoustically isolate a room and prevent the walls/studs from carrying sound around the house.
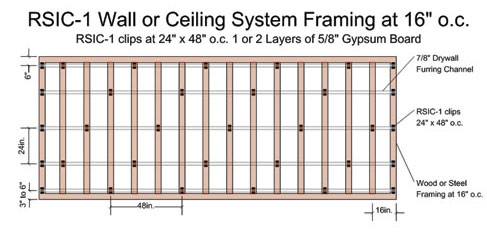
Since the theater was already framed I couldn't do some of the easier approaches to sound isolation, so Bryan instructed me to go the RSIC-1/channel approach.

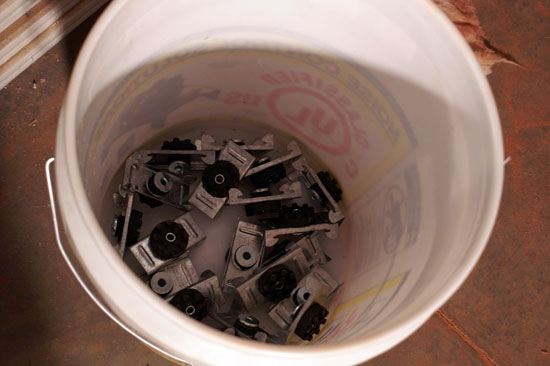
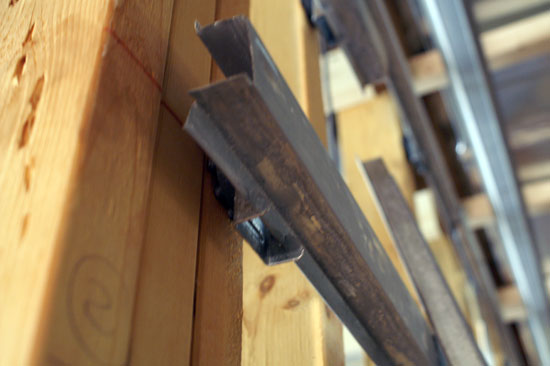
An overpriced piece of metal with some rubber on it - Click to Enlarge
A RSIC (Resilient Sound Isolation Clip) is a metal clip with a rubber back on it. You screw these clips to the studs in a room and run metal channels through the studs. Then, you hang the drywall off the metal channels instead of the wooden studs in the room. The benefit is that when the drywall vibrates, it sends the vibration through the RSIC clip which has a thick rubber mount where it attaches to the stud behind it. The rubber mount dampens much of the vibration and prevents it from being transmitted to the wood behind it.

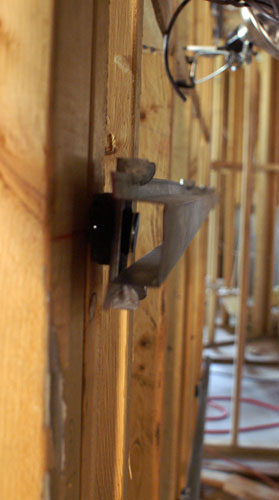
This is RSIC's photogenic side - Click to Enlarge
I couldn't get the RSIC clips locally, but the metal channels were easy to order. I had a channel every 24" down the walls, and a clip every 24", staggered:
Installation picture, courtesty of Acoustical Surfaces, Inc.
Bryan sent me instructions on how to mount the clips and channels, just screw the clips into the studs and shove the metal channels in them.

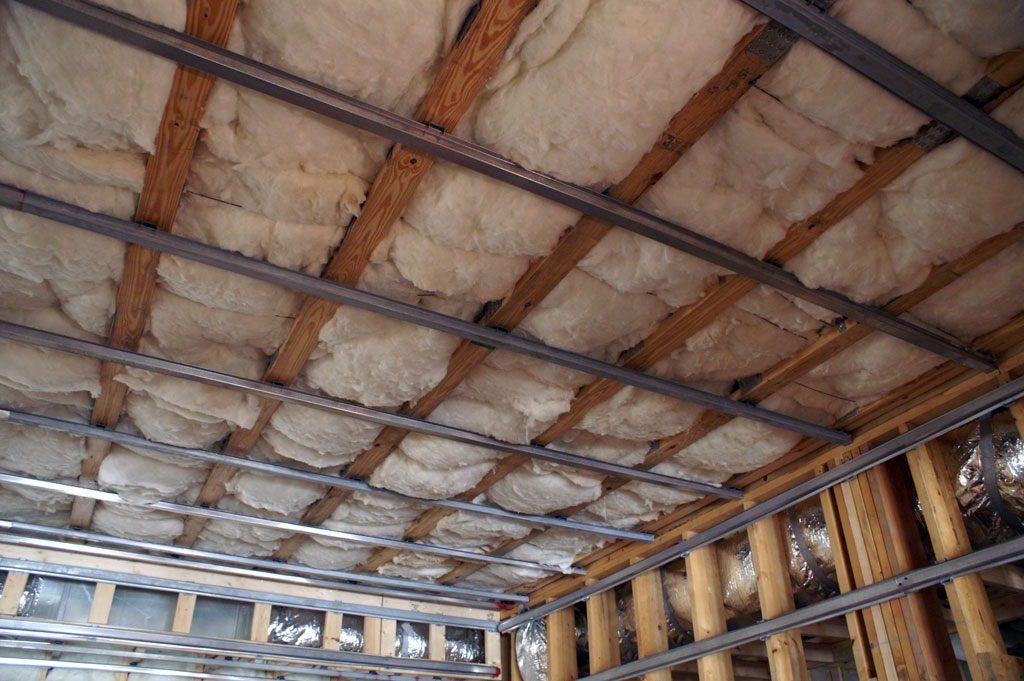
Yes they even go on the ceiling
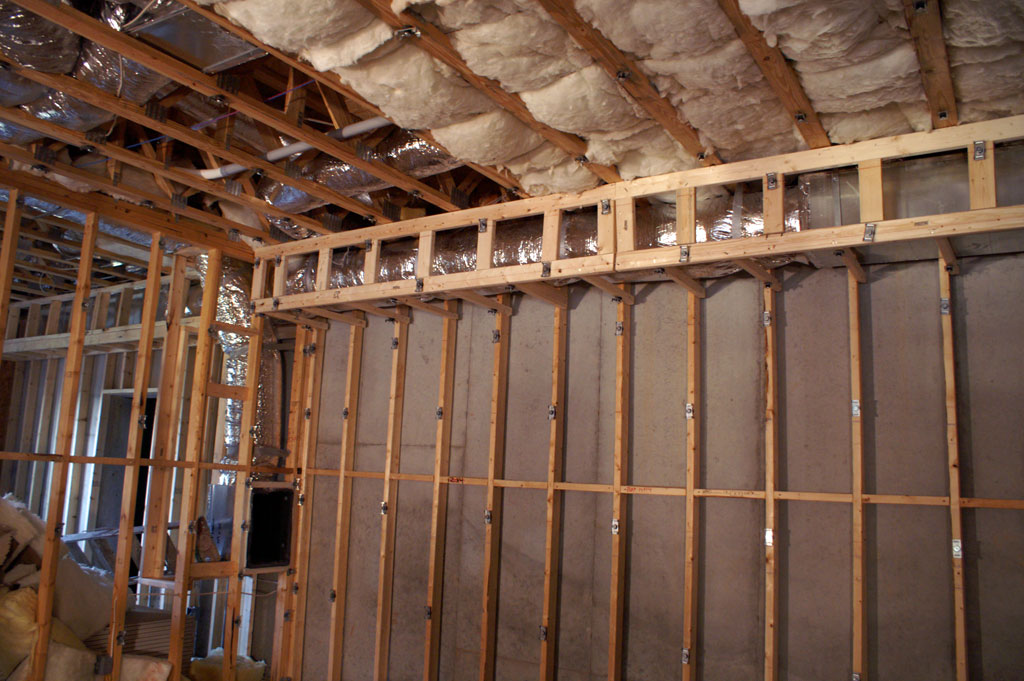
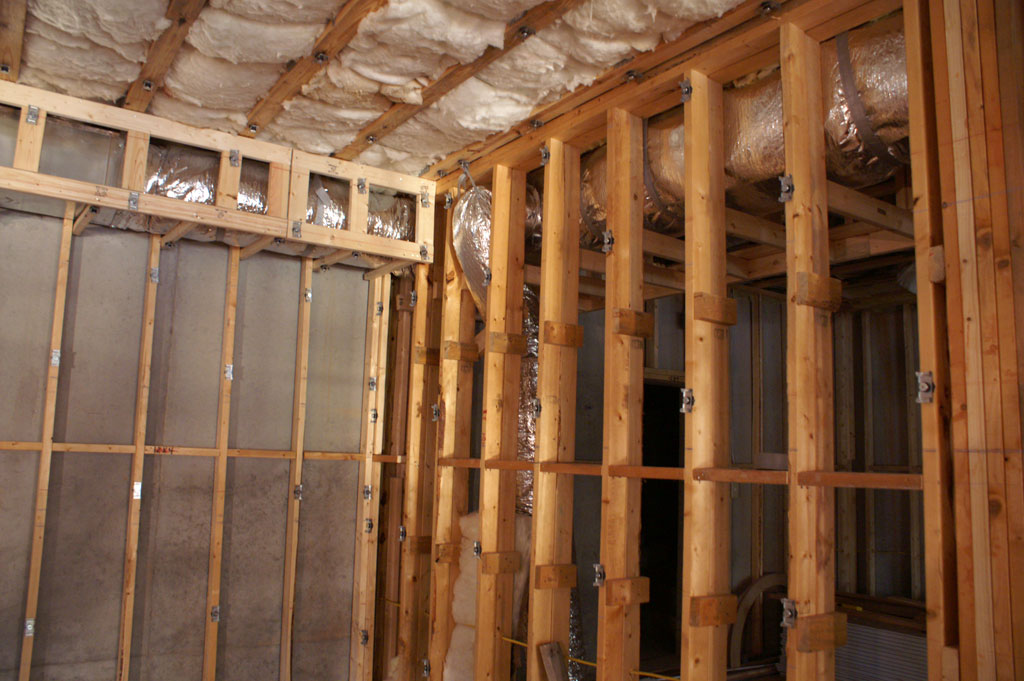
One side of the room already had a big duct going through it to carry HVAC to parts of the house. The problem with HVAC ducts is that they also carry sound really well, and I don't think a theater that broadcasts throughout every room in the house is a good feature for resale. I decided to treat the HVAC duct as external to the room, meaning that I'd run RSIC channels around its frame and drywall it as if it were a part of the adjacent hallway.
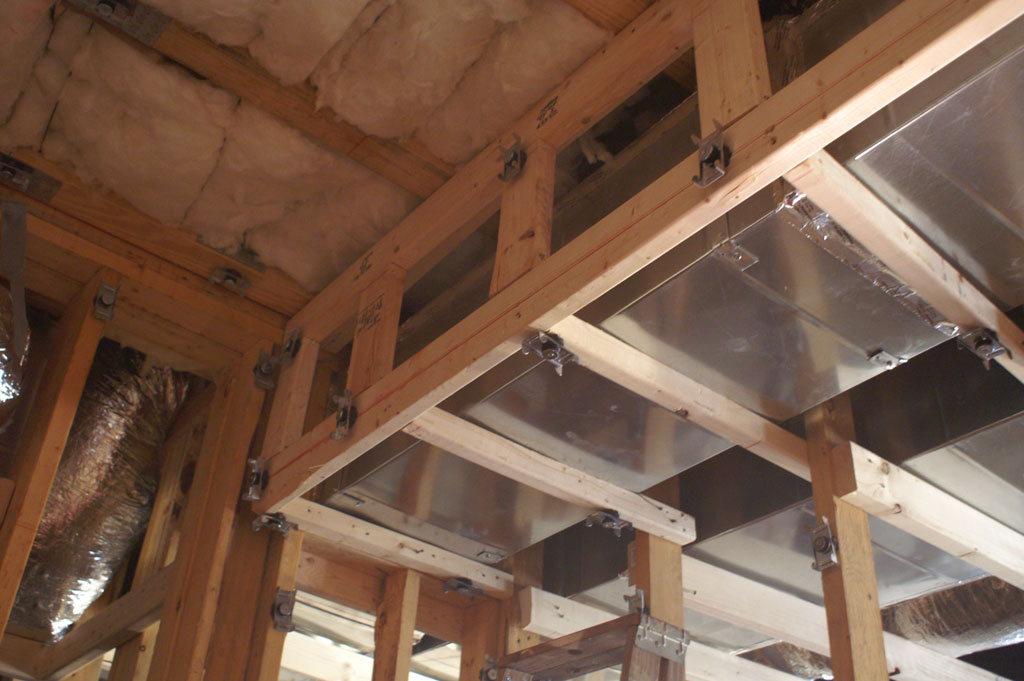
Apparently symmetry is a big deal in building a theater so I had to build a similar frame on the other side of the room and treat it as external to the theater. This ended up working out fine since I needed to run another duct through there anyways to get HVAC to the rooms in the basement.
At this point I had decided on the right wall as the screen wall, so that would be where the air ducts entered the room. For now they were just hung up on the front wall, eventually I'll need to box them in to keep the soundproofing of the room intact. There will be two air vents, one on each side of the screen coming out of the false wall, here's one:
Bryan suggested that we go with flexduct for the air vents, and he also recommended that from the time the duct enters the room to the time that it actually reaches the vent, the duct should have 2 or 3 90 degree bends in it, to cut down on sound transmission. We'll deal with that later once the false wall is built.
The return is placed along the back wall, behind the rear row of seats:

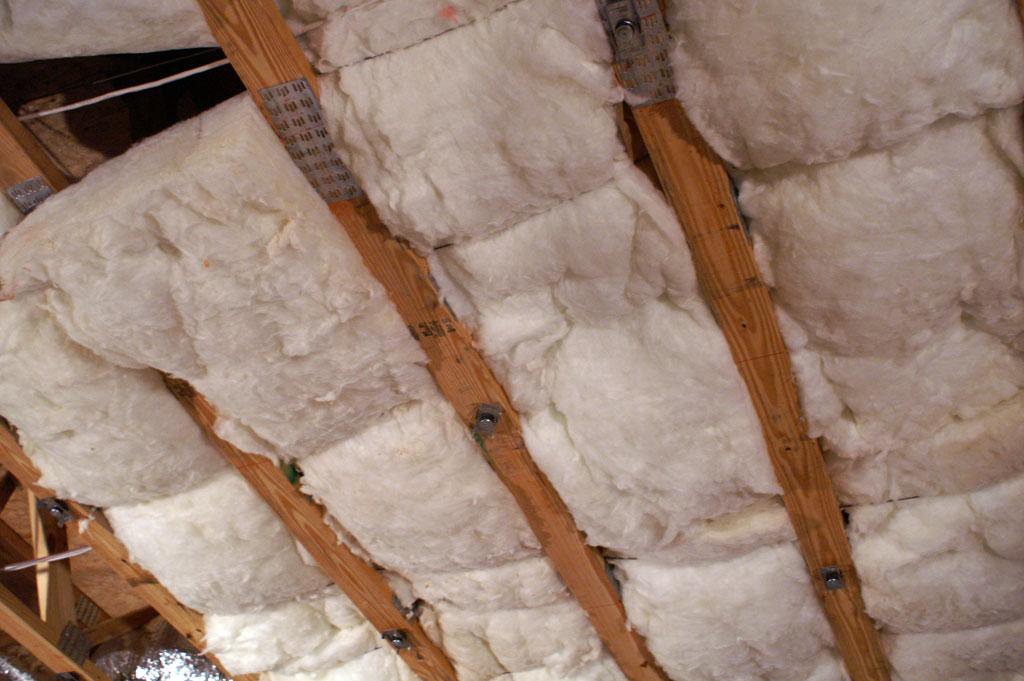
The next step was to stuff insulation all throughout the walls; air transmits sound much better than dense material, and filling the walls with lead isn't really an option, so standard R19 insulation works to cut down on sound transmission out of the theater. At this point I was blindly following Bryan's suggestions, but he came well recommended and everything he was saying made sense so I went along with it (you guys should see how easy you have it, most people don't give you pretty graphs and pages of analysis when making a recommendation ;)...).
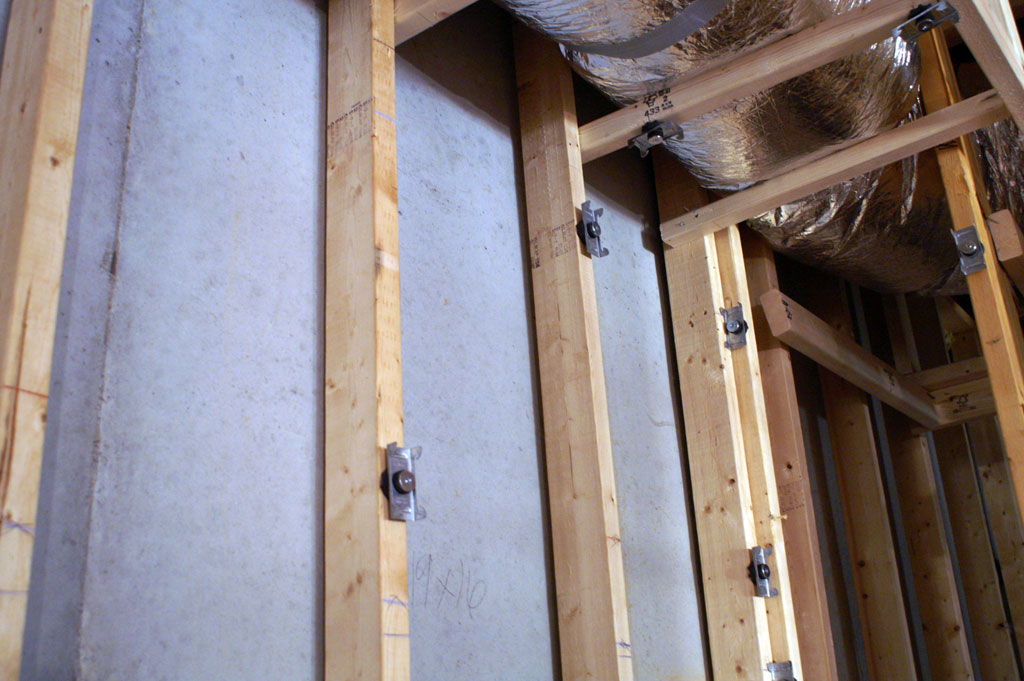
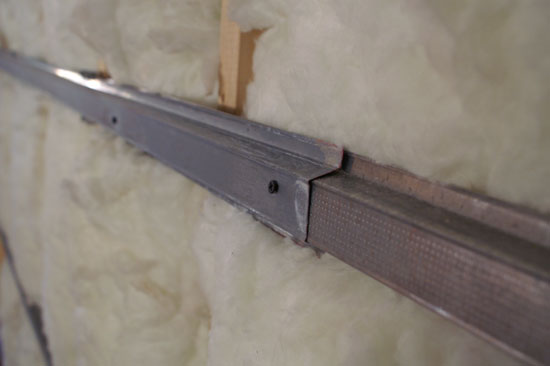
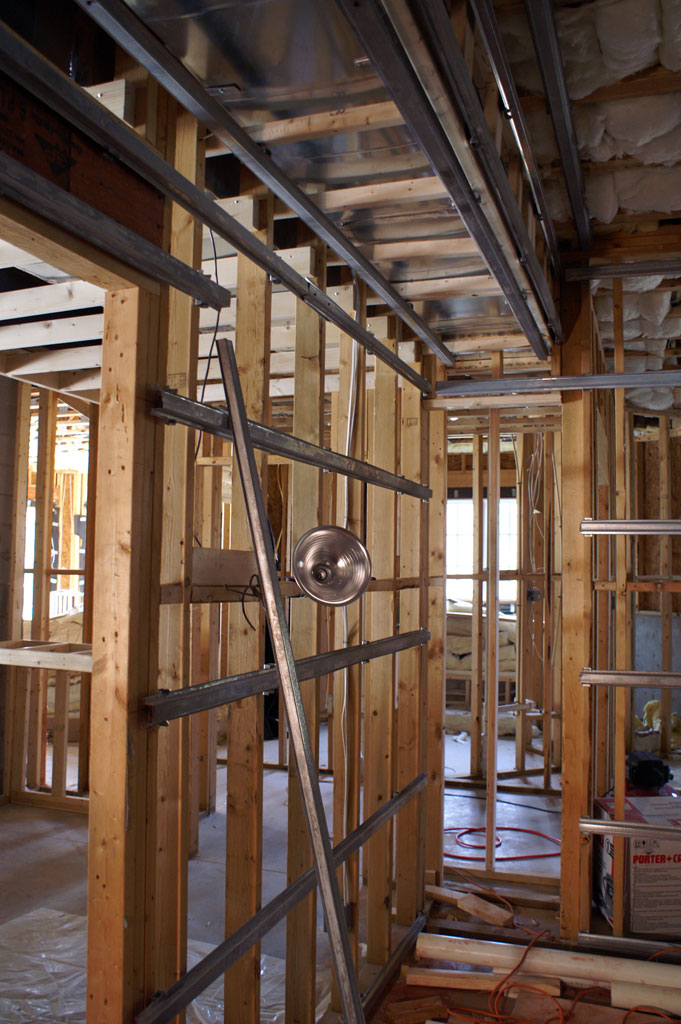
With the clips installed everywhere, it's time to get the hat channels in. Remember, these channels will be what we mount everything to. From this point on, no screw or nail will touch a single wooden stud in the room.
Channel, installed
The channels just clip into the RSICs mounted on the studs, it's not like installing a videocard though, there's a lot more force required.
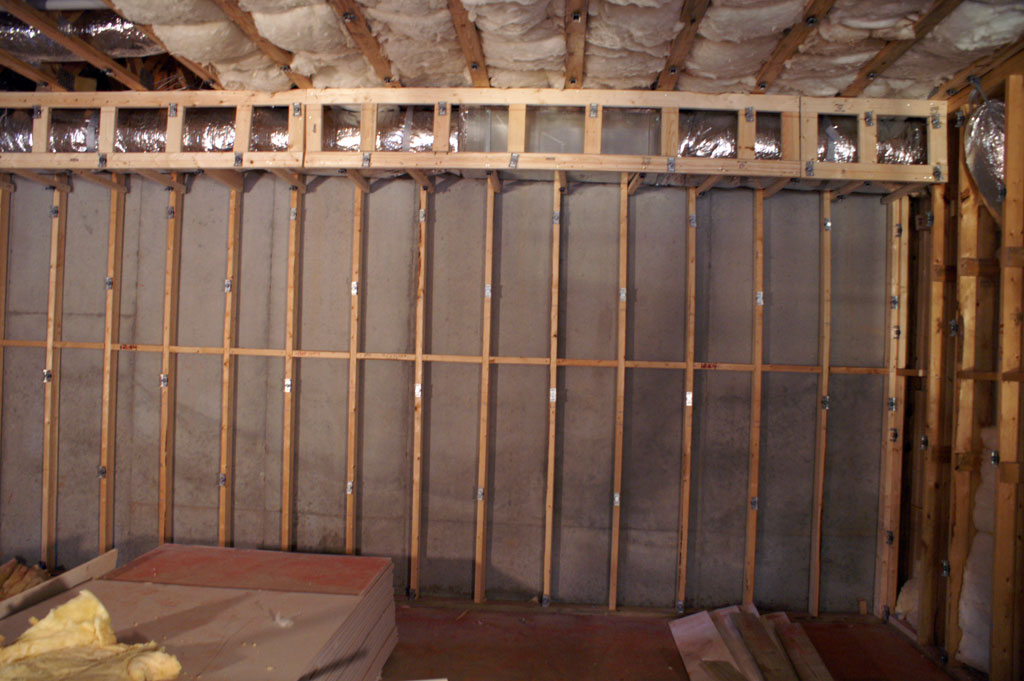
The rest of the pictures are of the room with the RSIC and channels installed:
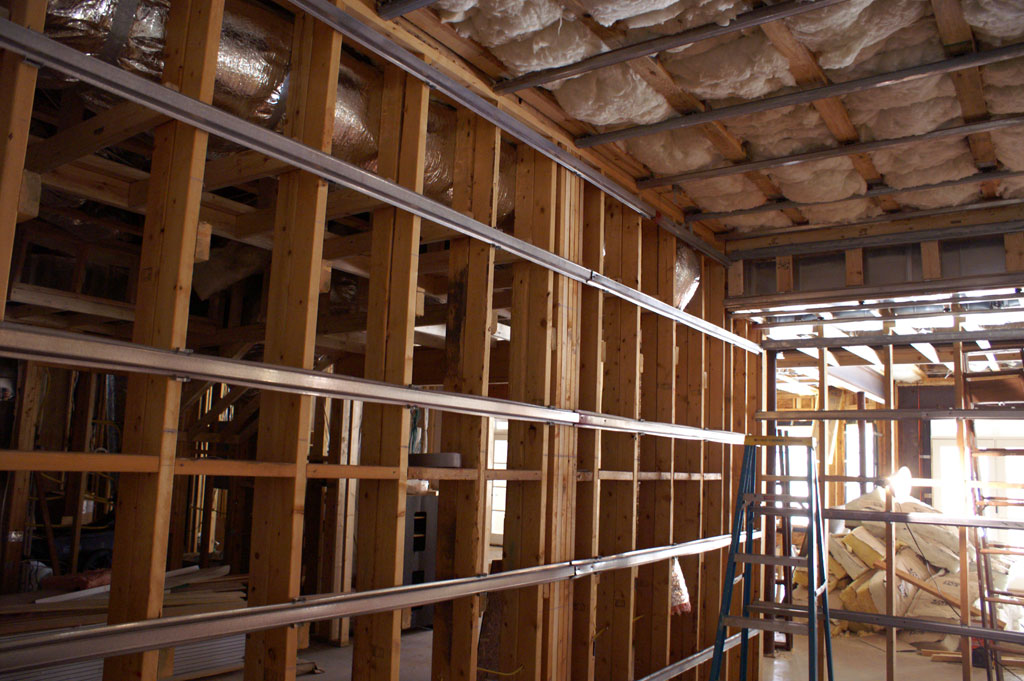
The wall on the left is the screen wall - Click to Enlarge
Two channels meet
Channels on the ceiling, screen wall on the right - Click to Enlarge
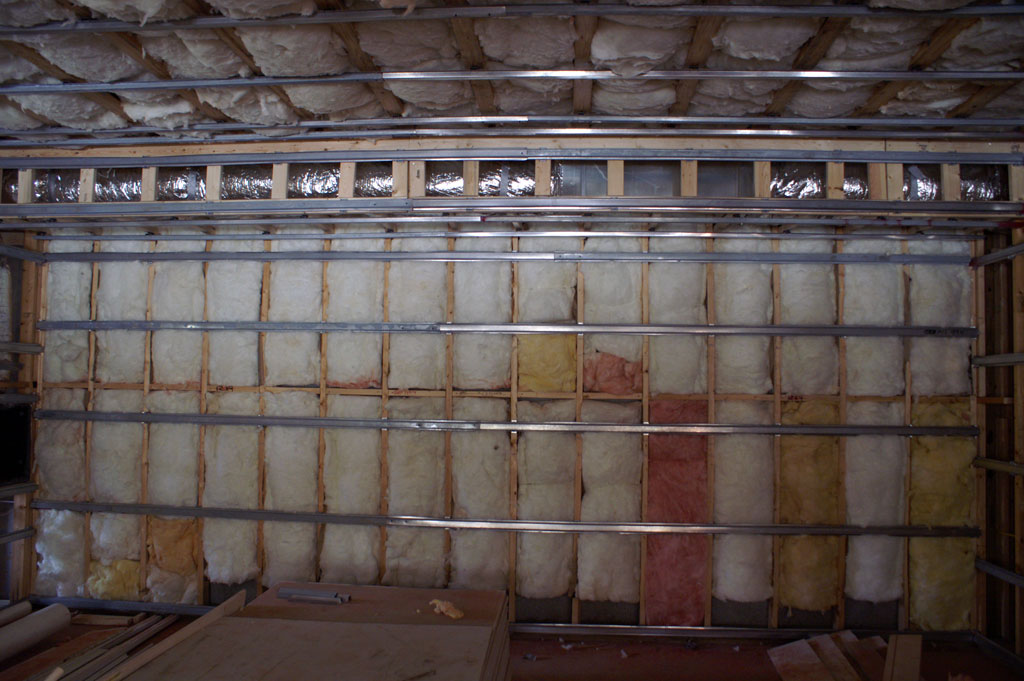
Channels on the wall, screen wall to the right - Click to Enlarge
Channels on the wall and duct overhead - Click to Enlarge
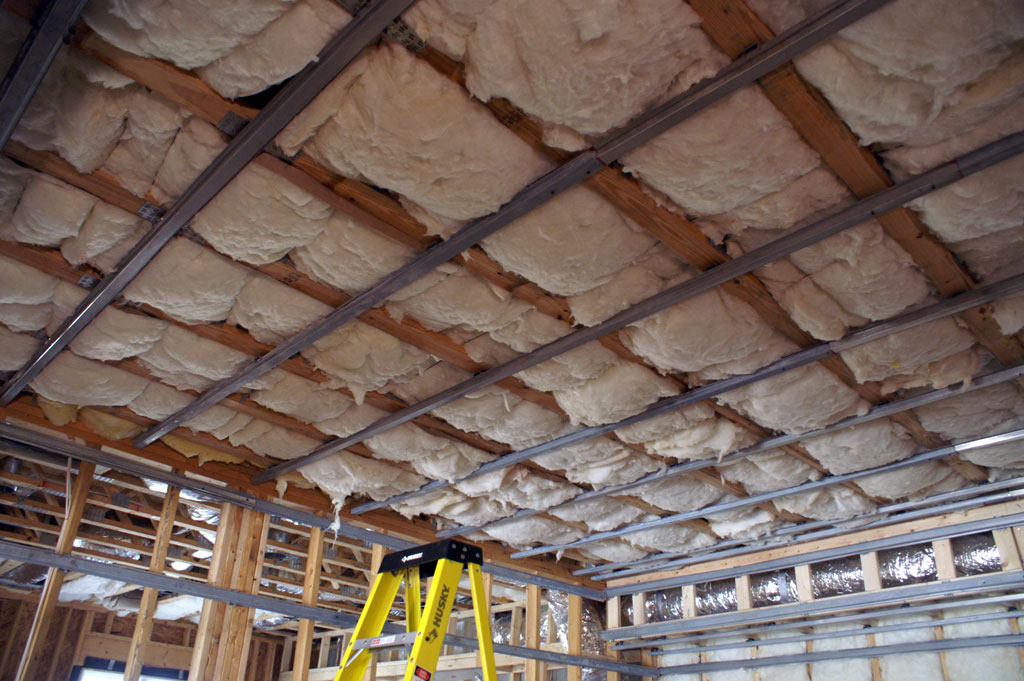
More channels on the ceiling, the back of the theater is on the left - Click to Enlarge
Next, I've gotta get some walls up. I'll see about getting another post done before CES starts, in the spirit of it being a consumer electronics show of course :)
Have a great weekend guys.


21 Comments
View All Comments
GlassesShop - Thursday, March 4, 2010 - link
You can get [url=http://www.uggsale.de/">http://www.uggsale.de/]ugg boots sale[/url],[url=http://www.uggbootsuk.org/">http://www.uggbootsuk.org/]uggs boots sale[/url],and
[url=http://www.myghdhairs.com/">http://www.myghdhairs.com/]ghd hair straighteners[/url] with high quality low price!