TheaterBlog: Hush Little Baby, Soundproofing the Room Part I
by Anand Lal Shimpi on January 5, 2008 12:00 AM EST- Posted in
- Anand
At this stage, progress in the theater was moving along quite nicely. As with most construction you get to enjoy these stages where it seems like the whole process will be done in 2 weeks, followed by periods where it feels like absolutely nothing gets done. If you want background, be sure to check out my first post.
Sound travels through the air as waves, when those waves collide with an object they cause it to vibrate. That's fine when the object is your eardrum, that's not so great when the object is a stud in one of the walls of your theater.
Bryan Pape, the sound guru, made it very clear: we wanted to keep noise in the theater from getting out, and noise outside the theater from getting in. In order to do that, we needed to isolate the theater from the rest of the house.
Normally, when you build a house you build a large wooden frame on top of a foundation, then frame out individual rooms within the house; in other words, everything is connected. The rooms are finished by nailing sheets of drywall to the frame. The problem in a theater is that when sound waves hit the drywall, they will vibrate the drywall, which will then vibrate the studs that it is nailed to and transmit sound out of the theater that way.
Luckily, there are ways to acoustically isolate a room and prevent the walls/studs from carrying sound around the house.
Since the theater was already framed I couldn't do some of the easier approaches to sound isolation, so Bryan instructed me to go the RSIC-1/channel approach.

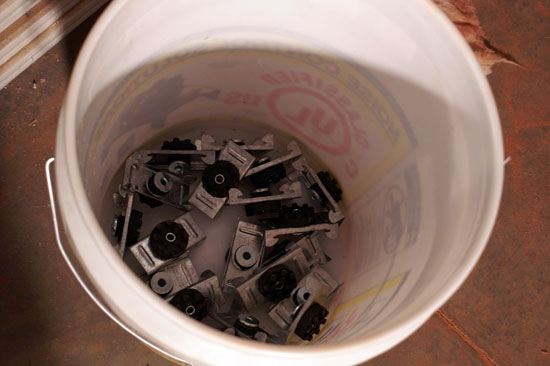
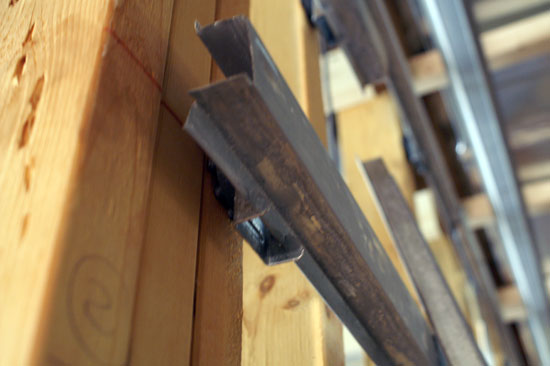
An overpriced piece of metal with some rubber on it - Click to Enlarge
A RSIC (Resilient Sound Isolation Clip) is a metal clip with a rubber back on it. You screw these clips to the studs in a room and run metal channels through the studs. Then, you hang the drywall off the metal channels instead of the wooden studs in the room. The benefit is that when the drywall vibrates, it sends the vibration through the RSIC clip which has a thick rubber mount where it attaches to the stud behind it. The rubber mount dampens much of the vibration and prevents it from being transmitted to the wood behind it.

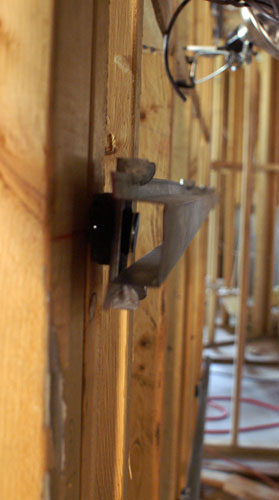
This is RSIC's photogenic side - Click to Enlarge
I couldn't get the RSIC clips locally, but the metal channels were easy to order. I had a channel every 24" down the walls, and a clip every 24", staggered:
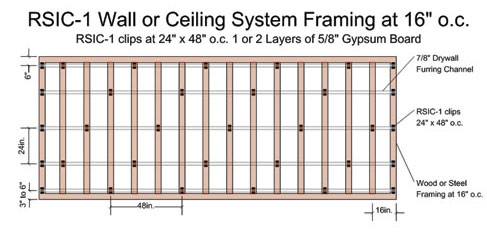
Installation picture, courtesty of Acoustical Surfaces, Inc.
Bryan sent me instructions on how to mount the clips and channels, just screw the clips into the studs and shove the metal channels in them.
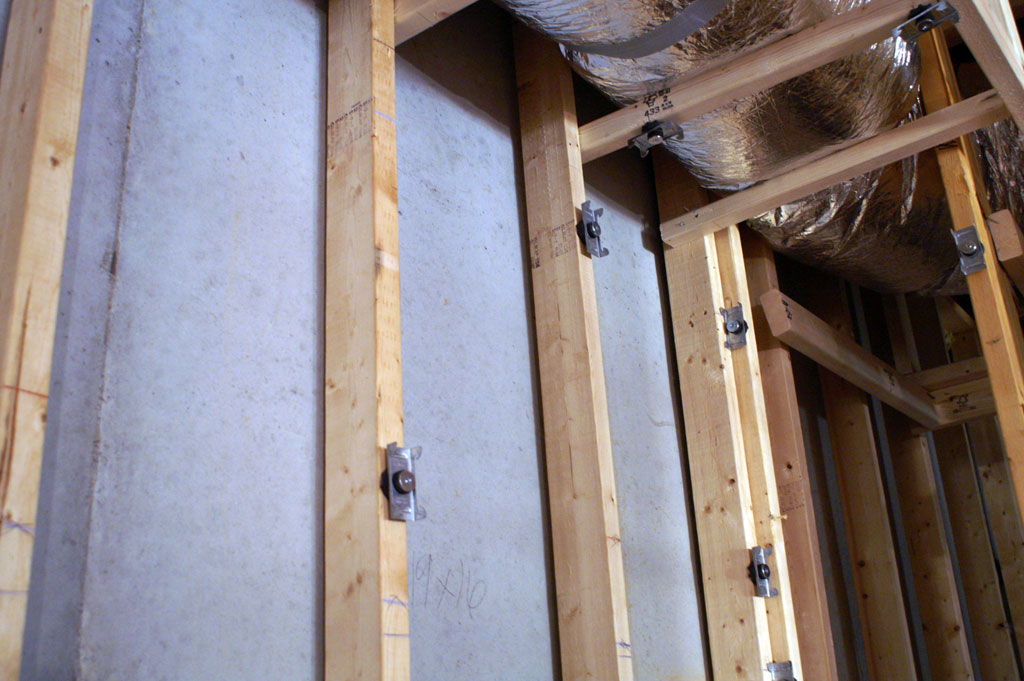

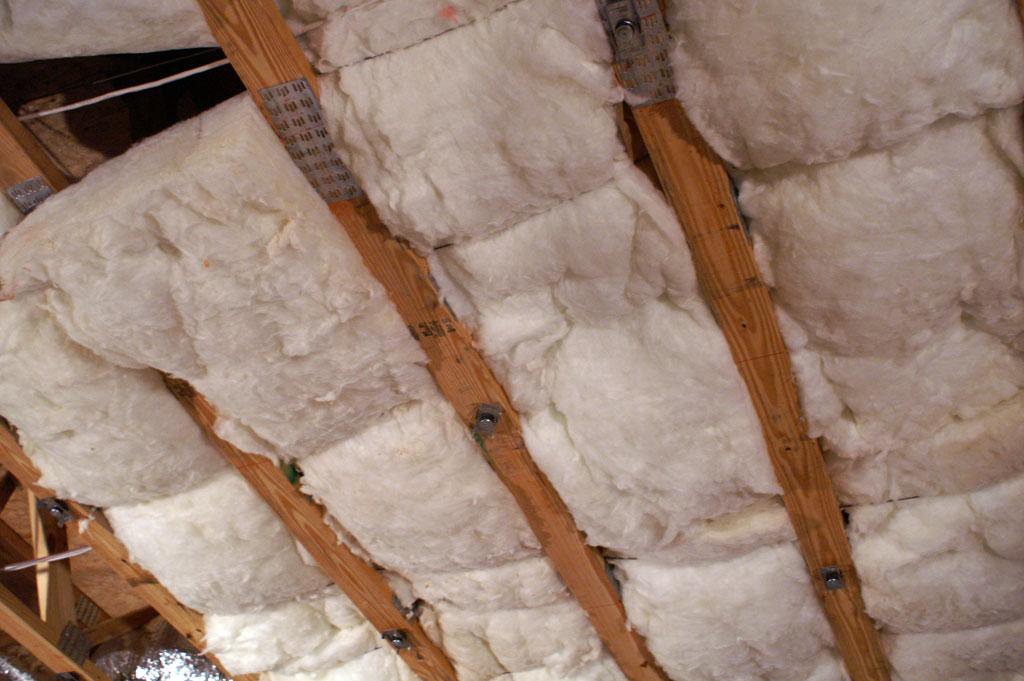
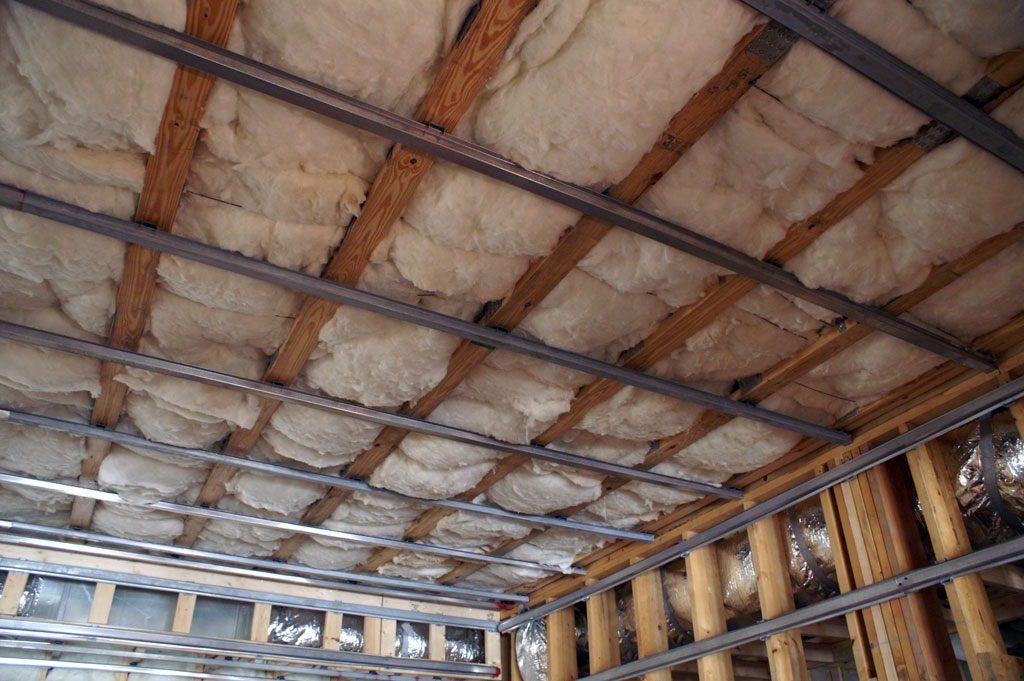
Yes they even go on the ceiling
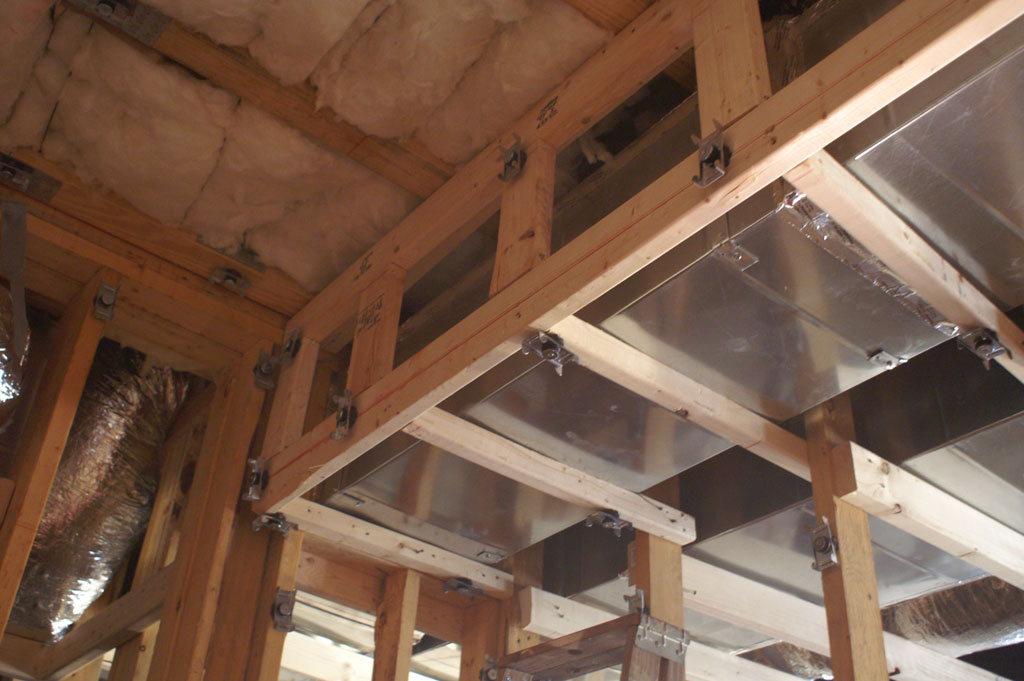
One side of the room already had a big duct going through it to carry HVAC to parts of the house. The problem with HVAC ducts is that they also carry sound really well, and I don't think a theater that broadcasts throughout every room in the house is a good feature for resale. I decided to treat the HVAC duct as external to the room, meaning that I'd run RSIC channels around its frame and drywall it as if it were a part of the adjacent hallway.
Apparently symmetry is a big deal in building a theater so I had to build a similar frame on the other side of the room and treat it as external to the theater. This ended up working out fine since I needed to run another duct through there anyways to get HVAC to the rooms in the basement.
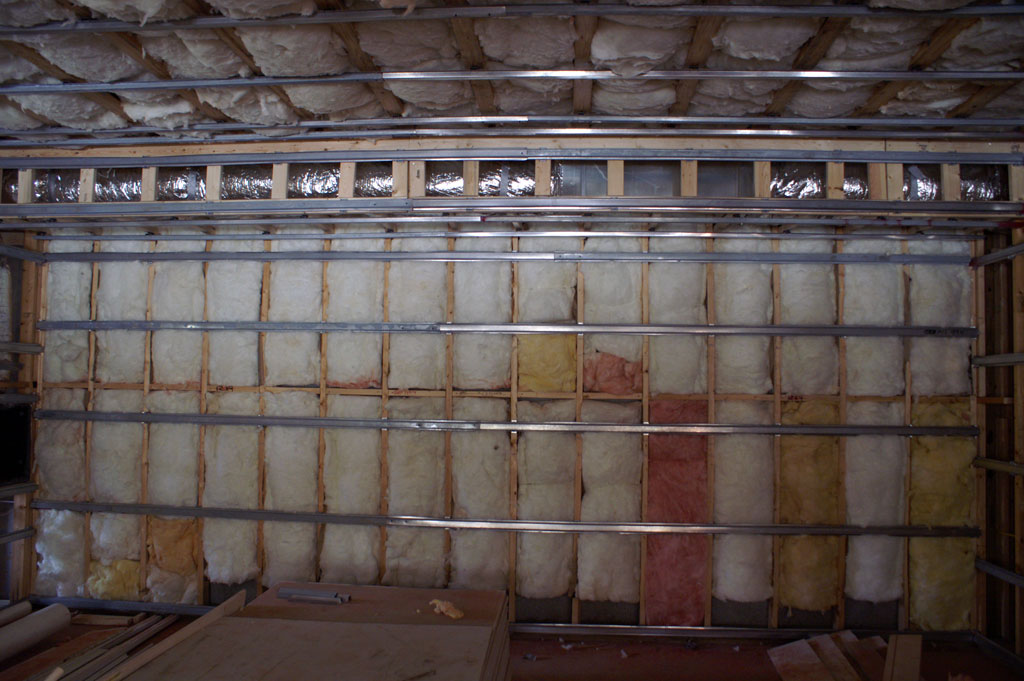
At this point I had decided on the right wall as the screen wall, so that would be where the air ducts entered the room. For now they were just hung up on the front wall, eventually I'll need to box them in to keep the soundproofing of the room intact. There will be two air vents, one on each side of the screen coming out of the false wall, here's one:
Bryan suggested that we go with flexduct for the air vents, and he also recommended that from the time the duct enters the room to the time that it actually reaches the vent, the duct should have 2 or 3 90 degree bends in it, to cut down on sound transmission. We'll deal with that later once the false wall is built.
The return is placed along the back wall, behind the rear row of seats:

The next step was to stuff insulation all throughout the walls; air transmits sound much better than dense material, and filling the walls with lead isn't really an option, so standard R19 insulation works to cut down on sound transmission out of the theater. At this point I was blindly following Bryan's suggestions, but he came well recommended and everything he was saying made sense so I went along with it (you guys should see how easy you have it, most people don't give you pretty graphs and pages of analysis when making a recommendation ;)...).
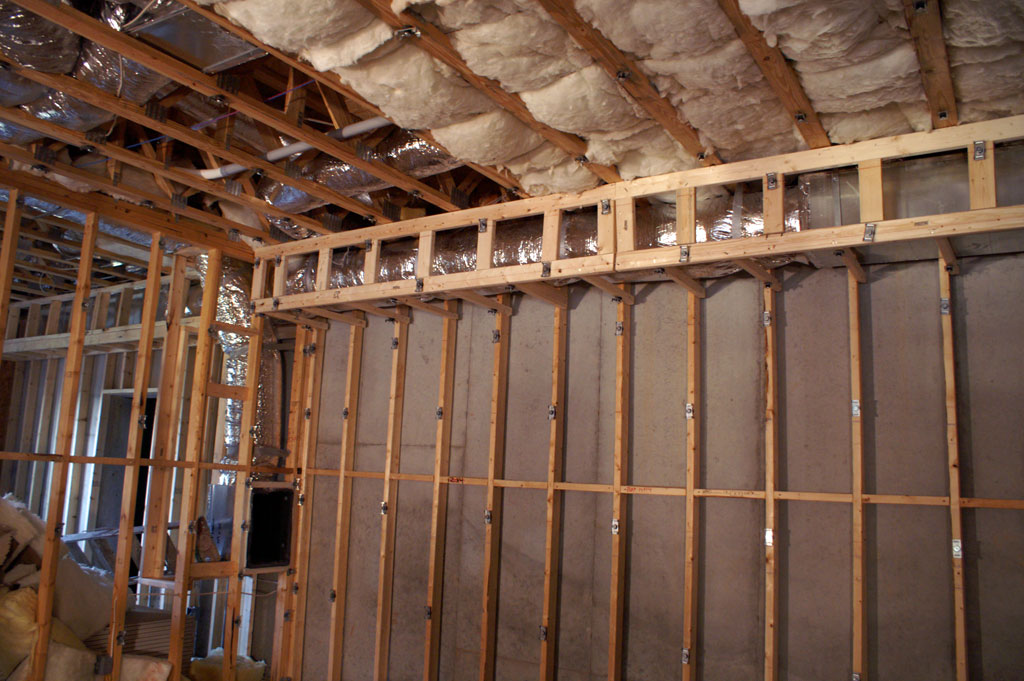
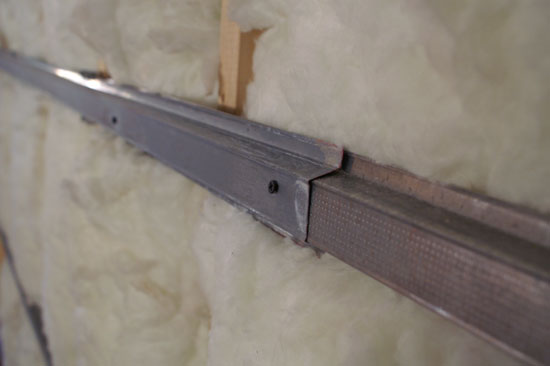
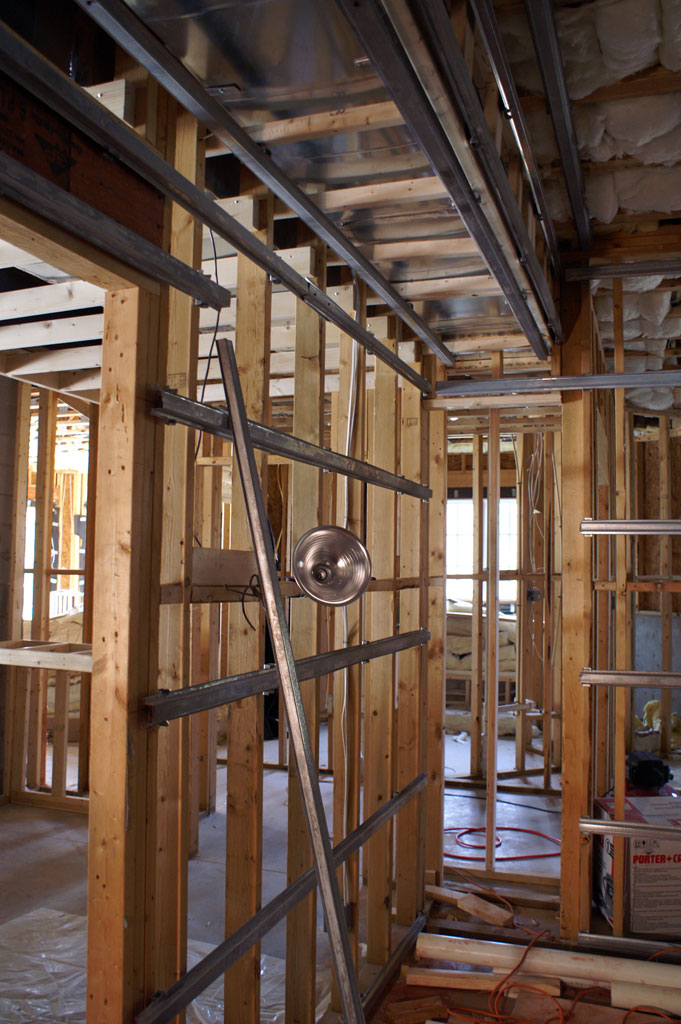
With the clips installed everywhere, it's time to get the hat channels in. Remember, these channels will be what we mount everything to. From this point on, no screw or nail will touch a single wooden stud in the room.
Channel, installed
The channels just clip into the RSICs mounted on the studs, it's not like installing a videocard though, there's a lot more force required.
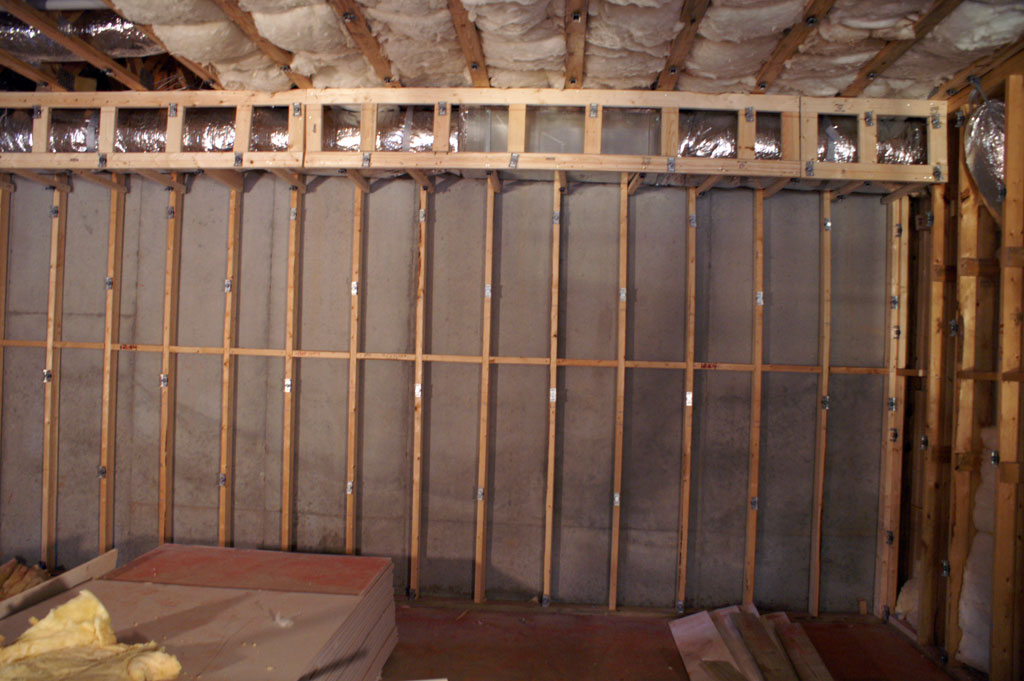
The rest of the pictures are of the room with the RSIC and channels installed:
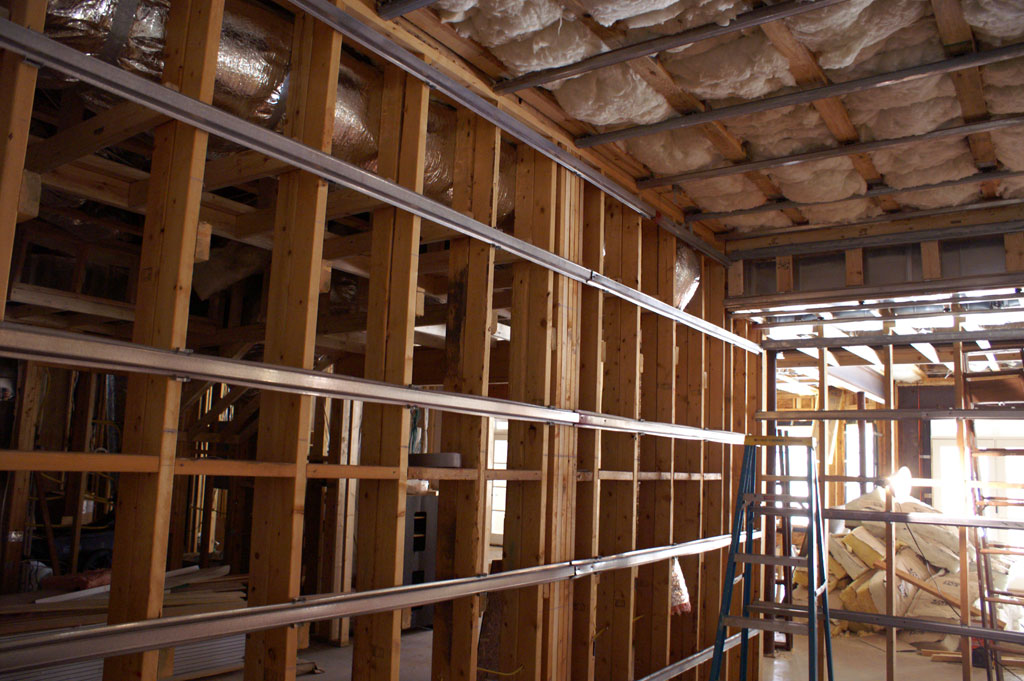
The wall on the left is the screen wall - Click to Enlarge
Two channels meet
Channels on the ceiling, screen wall on the right - Click to Enlarge
Channels on the wall, screen wall to the right - Click to Enlarge
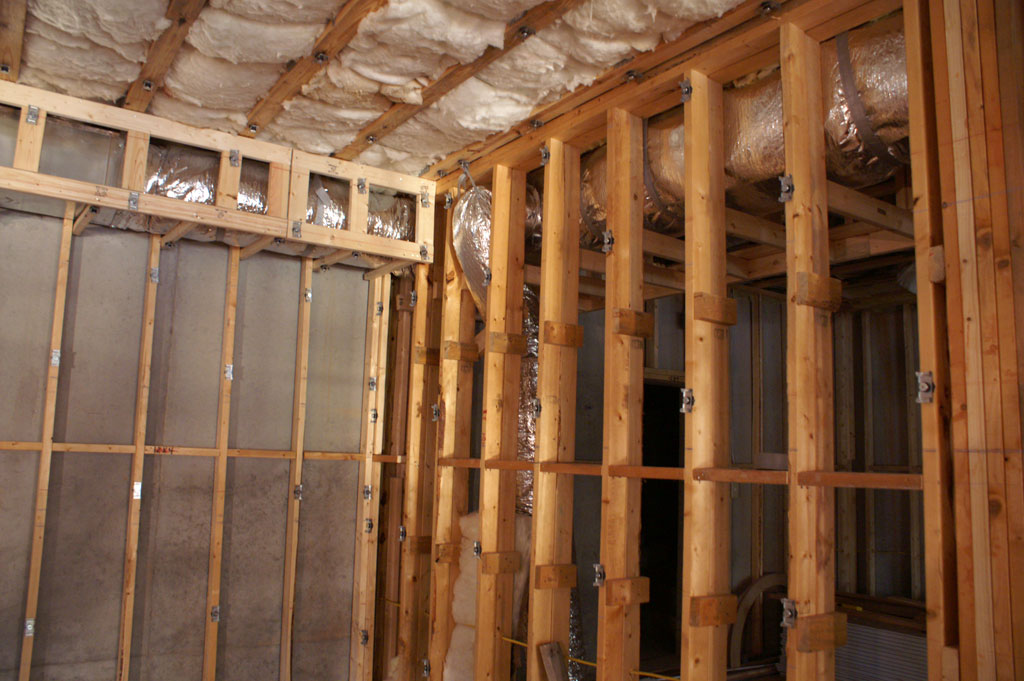
Channels on the wall and duct overhead - Click to Enlarge
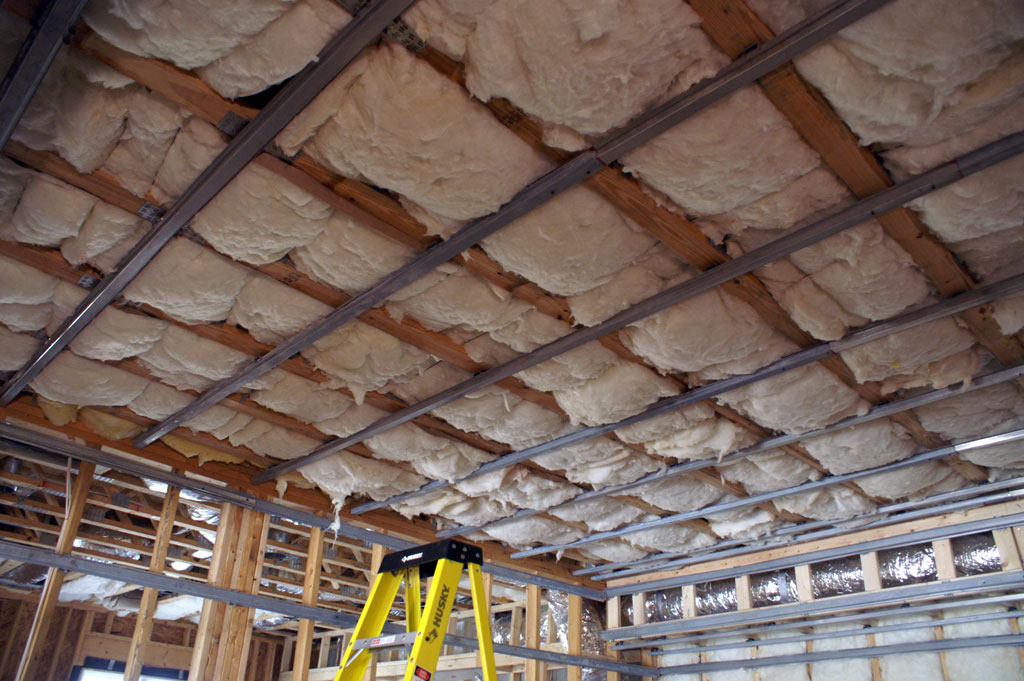
More channels on the ceiling, the back of the theater is on the left - Click to Enlarge
Next, I've gotta get some walls up. I'll see about getting another post done before CES starts, in the spirit of it being a consumer electronics show of course :)
Have a great weekend guys.


21 Comments
View All Comments
xxPaulCPxx - Thursday, January 24, 2008 - link
I've seen those clips before, but I've always wondered: How much space do they put between the stud and the inside of the drywall?RupTheKid - Monday, January 21, 2008 - link
Anand,Nice work. We use Acoustiblok for our installations...in staggared stud installs we get a theoretical STC70 across the spectrum, which is pretty unbelievable. If you've never used this stuff, I'd recommend trying it out in a boiler room or your HVAC room to really reduce noise. Cost is reasonable, and you hang dry wall directly onto it making sure your drywall guys don't need to learn any new tricks.
If you have any questions along the way feel free to ask. We've been building theatres and completing home automation for years now, and I'd be happy to answer any questions or point you in the right direction.
Best,
Rupesh Kapadia
www.mySystematiq.com
wizbang - Monday, January 7, 2008 - link
Howdy,A few tips first. Do not get to far along with the risc studs and panels. Make sure you plan out your speaker cables, power source, plugs here and there, overhead power source, hdmi cables, component cables, cat5 cat6 lines, coaxial feeds, etc... now is the time to plan these out and get them into place when its stick. It makes it a lot easier when its stick and not all panelled, and you remember you needed another speaker cable drop or something.
xsilver - Wednesday, January 9, 2008 - link
pardon my ignorance but is the finished project just going to be these damped drywalls with paint on them?how would that compare to using heavy curtains on a regular drywall?
PAPutzback - Monday, January 7, 2008 - link
Is it my end or yours?ElrondElvish - Sunday, January 6, 2008 - link
After 10+ years of visiting and reading AnandTech every single day (minus just a few for holidays, sickdays, etc), I've signed up for an account here... specifically because of this most interesting blog.I too followed SmX's thread for the past few years as well as many others on AVS, but this particular project of yours, Anand, has me most excited and intrigued. Being an IT guy has always been my main focus in life (well, and being a good husband, father and son ;)), yet I've found my interest in audio/video has been steadily growing through the years and a DIY project like this slowly increasing since we bought our dream house. I love your writing style and humor and you always nail the particulars of a subject better than any other tech writer I've read. I simply can't wait for each installment of your project now, Anand. You are getting me inspired to actually start my dream project now more than ever.
Thank you and I very much look forward to each of your posts on this project from your unique perspective as an IT guy.
Havor - Sunday, January 6, 2008 - link
Hey Anand looks like your well on your way till now :DA tip an question what for a Media Center software you going to use?
I have bin busy whit HTPC’s sins the first XBMC came out for the Xbox
(even before that I tried but HTPC soft/hardware then was mostly crap)
I have run a lot of Media Center (MC) I tried almost all MCs from Myth to MediOS and some others but noting was beating XBMC
Now a days I run the free OS MediaPortal (MP) whit the TV-server they developed.
MP was a spin-off from one of the original dev. of XBMC because he felt the XBMC was holding him back whit the options he wanted from a MC and found MS-MCE way to limited so he ported the XBMC to use as a HTPC
Its based on .NET and runs on any machine that can run that
Almost everything you wane do whit a MC you can do whit it, and then some more.
There are loads of plugins you can use like, automation, Audio/(web)Radio, EPG/TV, My Daily Comics (what I really love), Torrent client., ect. ect.,
And there are some really nice skins out there for MP
My favorit skins Xface 9/16 and PM III 3/4 skin
I like dark skins but there are lots more, and also brighter skins and even some weird skins.
MP works almost strait “out of the box” you have to follow a first setup install and install your codec’s and then it works like all other MC’s.
But if you put some extra time in, there are lots of options ware you can fine tune it like a race car it’s a bit of work but then, but when your done it will also handle like one and you have full control.
PM supports a lot of TV cards but at least all hardware that’s made for MS-MCE works under MP
I run now 4 HTPC in my house and they are all connected to my TV-server.
One whit top hardware for HD media, that’s connected to a 1080p TV and projector, and a Harmon Kardon 7.1 DD receiver.
And the tree other ones that are based on the VIA EPIA EX-series Mini-ITX
Two are connected to 720p TV’s in bedroom’s,
And one fitted whit a 15” LCD touch’s screens build in a kitchen wall to use as MC but also to look up recipe’s and so on. (plugin)
I have installed my TV-card’s (3x sat and 1x dual tuner digital cable TV-card) in the TV-server that is used also as a A/V file-serer
I have bin looking at the SandmanX tread at AVforum one thing I don’t understand is the fascination whit big touch screens
I have a Logitech Harmony 1000, but I still uses my old harmony 880 more because it got real buttons and I can still do anything I want/need whit it.
And in the bedroom I use the MS-MCE remote and I almost prefer that one over the Logitech one’s its simple and dose what it needs to do, its all you really need.
(but if I need to pick one now, I would properly get a harmony 890)
I don’t know if MP fits your bill, but I will give it a good chance ;)
But as your are a news site why not combine pleasure whit work and test the different MCs and tell what you think about them and of course what you going to use :-)
Havor - Sunday, January 6, 2008 - link
Some how I couldn’t insert hyperlinks in the text, and couldn’t edit him, so done a extra post whit the linksMediaPortal
http://www.team-mediaportal.com/">http://www.team-mediaportal.com/
Skins Xface & PMIII (Project Mayhem 3)
http://forum.team-mediaportal.com/xface_skin_versi...">http://forum.team-mediaportal.com/xface...version_...
http://www.team-mediaportal.com/screenshots/catid,...">http://www.team-mediaportal.com/screenshots/catid,...
VIA EPIA EX-series Mini-ITX
http://via.com.tw/en/products/mainboards/motherboa...">http://via.com.tw/en/products/mainboards/motherboa...
Logitech Harmony 1000
http://www.logitech.com/index.cfm/remotes/universa...">http://www.logitech.com/index.cfm/remot...ersal_re...
GTaudiophile - Sunday, January 6, 2008 - link
Anand,I too just got done (briefly) scanning SandmanX's massive thread at AVS. Question: What happened to his DIY Screen Thread? Did he decide to remove it as he wanted to start a company instead of sharing all of his research/secrets publicly?
Anand Lal Shimpi - Sunday, January 6, 2008 - link
I don't remember the DIY screen thread itself, but his screen research was still in the original theater construction thread the last time I checked. I believe the conclusions he came to were as follows:1) For a non-acoustically transparent screen, the fabric didn't really matter. In fact, his plain drywall was almost as good as most of the expensive materials.
2) For an acoustically transparent screen, the original SMX material was just Phifer SheerWeave 4000. I'm not sure if the SMX material has changed at all since then, but the SheerWeave 4000 is what I would've gone with had I elected to go the AT route. I believe the current SMX screens now promise the highest gain of any AT material, so I don't know if he's found a new material or has done something to the SheerWeave to make it better.
I'll post more about my screen decisions in greater detail later :)
-A