Inside Microsoft's Xbox 360
by Anand Lal Shimpi, Kristopher Kubicki & Tuan Nguyen on November 16, 2005 5:09 AM EST- Posted in
- Systems
Removing the Outer Shell
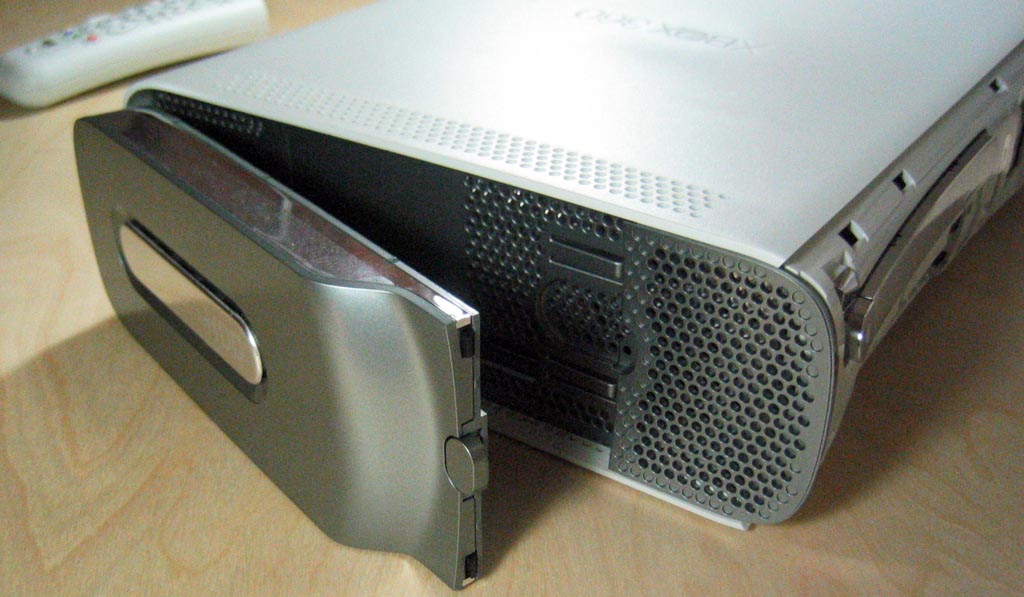
The first step is to remove the outer plastic shell that conceals the innards of the system. To do this, you must start by removing the face plate. Take a look at the front of the Xbox 360 and insert your thumb into the door that covers the two USB ports on the right of the unit. With your other hand squeezing the upper and lower sides of the face plate, pull out the face plate with your thumb. With not much force, the face plate should pop right off.

After the face plate has been pulled off you will see a silver Microsoft sticker covering a gap; remove this. You will also see four small clips locking the top half of the plastic shell to the bottom half. Do not attempt to wedge the clips out at this point.
With some care, gently bend outwards, the right gray ventilation shield on the right side of the unit so that you can see a bit inside. You will notice that the gray side piece attaches to both the bottom and top white chassis. Now look through the holes on top of the unit to locate the areas where the gray side pieces attaches to the white body. What you need to do is take the long but thin metal stick and push down, through the white holes (located on both the top and bottom of the Xbox 360) where the clips of the gray side pieces connect. Slowly pull out the gray pieces away from the unit while unlocking the clips and eventually the gray piece will release itself.
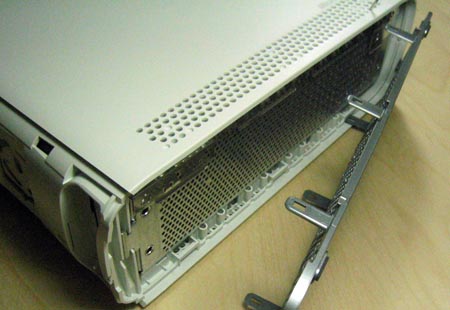
To remove the left gray piece, you must first remove the hard drive unit by pressing the button located on the unit itself. Then apply the same procedure used to remove the right gray ventilation piece -- except when you reach the bottom clip of the piece, you most remove the rubber feet located directly below, to reveal a hole where you can insert the metal stick.
Once you have both side gray pieces removed, you have essentially removed the main locking mechanism that holds the top and bottom shells together. At this point, return to the front of the unit and turn the entire unit upside down. Using a flat head screw driver or wedge, gently pry up the 4 clips holding the top shell to the bottom. Once the clips are unlatched, slowly lift up the front of the bottom shell about an inch.
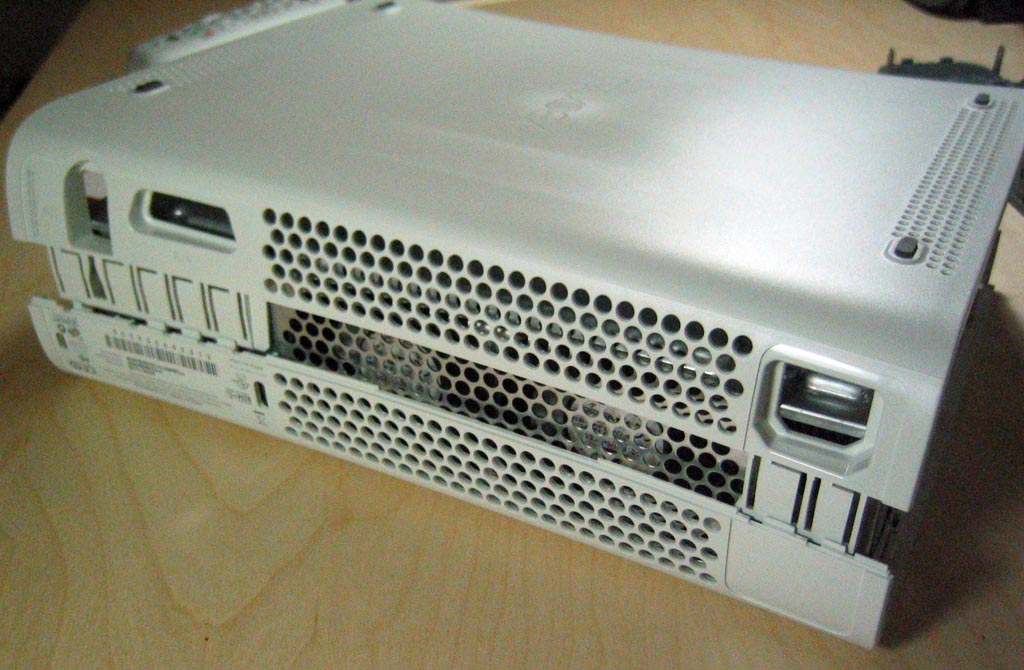
The last step to removing the bottom shell cover is to insert a thin and small plastic stick into the thin rectangular holes on the rear. The reason the front of the bottom shell needs to be lifted is to prevent the rear latches from reattaching themselves. Slowly insert the stick into each rectangular opening. You should hear a click sound for each clamp you unlatch. Once complete, you may lift off the bottom shell covering.
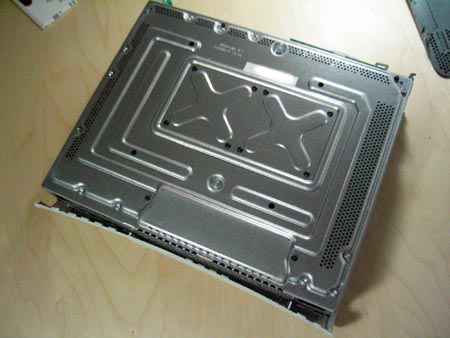
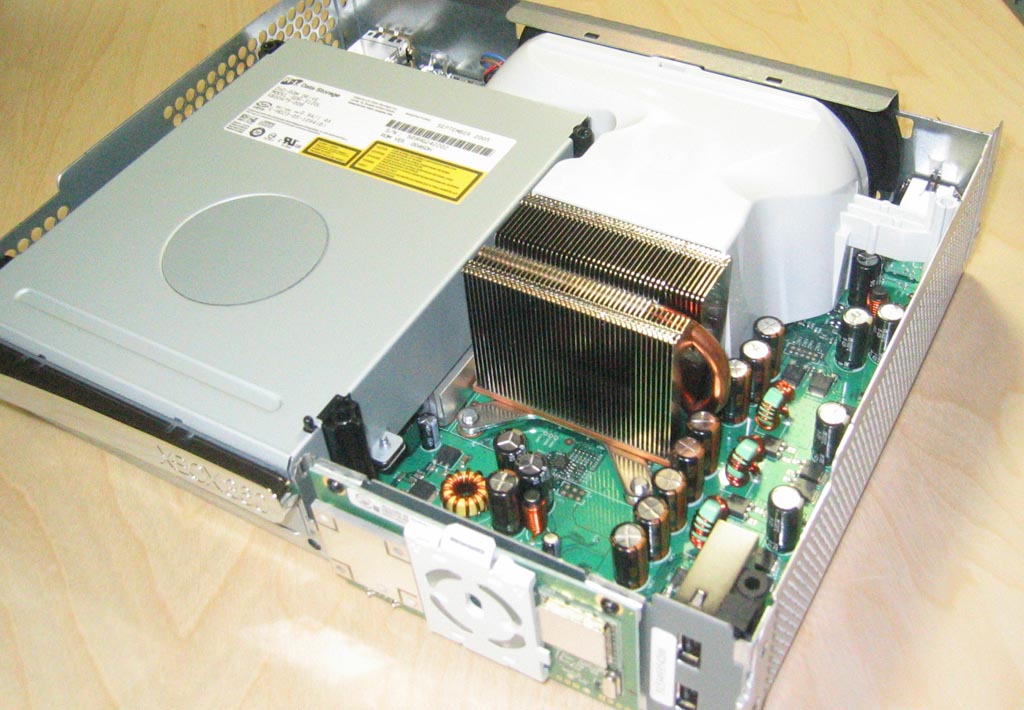
Looking inside the unit, you will notice that there are 14 silver screws (6 of which are long) and 8 black screws. Using your torx screw drivers, remove the silver screws using a size T12 screw driver and the black ones using a size T7. Once you have all the screws removed, flip the Xbox 360 right side up and lift up the top plastic shell. You should now be greeted with the internals of the Xbox 360.


91 Comments
View All Comments
Penth - Thursday, November 17, 2005 - link
In response to your second point, the XBox360 does include support for Windows Media center. That is my main point of interest as well. The latest update rollup for windows media center 2005 (was released just over a month ago) adds support for the xbox360. Notice in the picture of the remote it also has the green button.LoneWolf15 - Friday, November 18, 2005 - link
According to what I've read, that's support for a Windows Media Center PC attatched to it, not the ability to run Windows Media Center.. That's not really what I want. I want to be able to hook the thing up to a TV, insert a CD or DVD with DivX content on it, and just play back that way. Still not clear if I can do that.
Ecmaster76 - Wednesday, November 16, 2005 - link
I demand further disassemblage of the DVD!Check and see if it is a single chip SATA logic or a bridged soulution please. If its the former, I predict a surge in availability of cheap, (oem?) SATA DVD-ROMs.
Which is good news for people who like cable management or own a newer Intel mothernoard.
Xenoterranos - Thursday, November 17, 2005 - link
I was dissapointed in the RAM being soldered to the board. I was looing forward to ramming a couple gig-sticks in there.Griswold - Thursday, November 17, 2005 - link
Open case - ramm a couple sticks in - close case - shake it - done.Googer - Wednesday, November 16, 2005 - link
I went to my local Worst Buy and played call of duity 2. The graphics were cr*p with no anti-aliasing. If this is any indication of what to expect from this console then PC games and their players should have little to worry about.dj 315 - Wednesday, November 16, 2005 - link
Still it seems most have been set up incorrectlynyquistcapital - Wednesday, November 16, 2005 - link
Thanks for the close up shot of the South Bridge device. Can you provide more close ups of the 208PQFP directly above the GPU, and the other component to the left of the GPU, past the 2x DDR.Really cool stuff guys!
lymz - Wednesday, November 16, 2005 - link
The capacitors in the pictures look an awful lot like the ones that Dell and Apple are having problems with. Perhaps something worth investigating...kilkennycat - Wednesday, November 16, 2005 - link
Seems as if a fan failure (or blockage of the inlet air passage) could potentially cause catastrophic failure of the critical silicon without effective thermal protection.Anand, Kris, Tuan:-
Any idea of the nature and effectiveness of the thermal protection -- or wanna carry out a potentially destructive test by blocking up the inlet air on your presumably-rare Xbox360? An important issue for the TYPICAL technically-naive purchaser of the Xbox360, who is likely to be very careless about the Xbox360 ventilation and certainly will forget to regularly clear the inlet air-holes of sticky crud and junk. And what about the close-packed-finned heat-sink on the CPU? Such heat sinks on PC CPUs fill up completely with lint after about 6-9 months in a typical home environment. The Xbox360 is DELIBERATELY built to be non-user accessible for cleaning or any other purpose. A very big mistake. The internal air-duct should have been built on to a user-removable cover to expose the heat-sinks and fans for routine cleaning. I have had my share of cleaning out PCs that have become completely blocked up with crud, the first obvious symptom being erratic shut-down of the CPU by the motherboard thermal protection. The Xbox360 dissipates a lot of power in the core silicon --- much more than the old Xbox.
At present, I highly recommend taking a 2-year extended replacement warranty on the Xbox360, so that WHEN ( not IF) the heat-sinks fill up with junk (or the fans fail) and the box begins to function erratically, the owner can get a brand-new one :-) :-) :-)