SFF Roundup, Part I: Socket 478 and 754 Systems
by Jarred Walton on February 15, 2005 2:00 PM EST- Posted in
- Systems
ASUS T2-P Deluxe (cont'd)
Construction
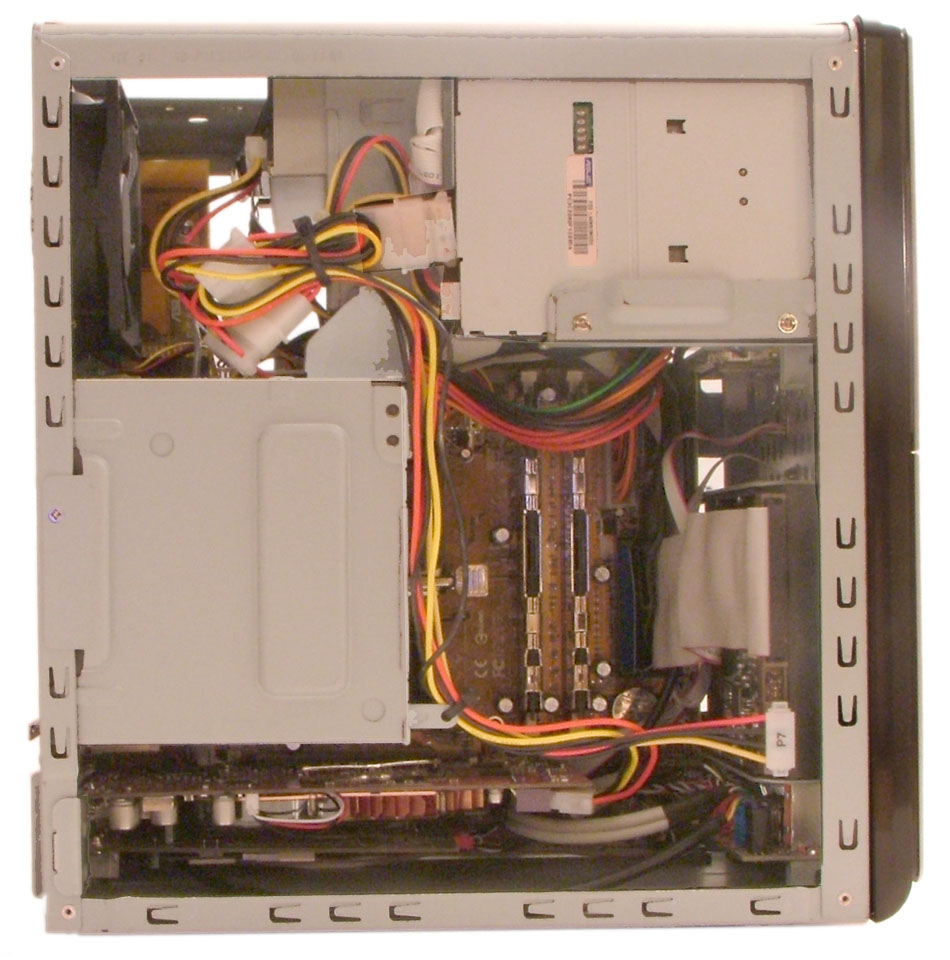 |
 |
| Click on images to enlarge. | |
The main case is very durable and sharp edges were not a problem. Unfortunately, it is also rather heavy, as it uses a steel shell instead of aluminum, and the added size only increases the weight. The internal construction is also sturdy, with the power supply latching into the rear of the case in two locations as well as the front drive bays. Unfortunately, the position of the power supply does present a problem in that it blocks access to the CPU socket and makes the routing of cables somewhat problematic. The RAM and expansion slots can still be reached with the power supply installed, however.
While the main body feels very sturdy, the same cannot be said of the front panel. The plastic covers for all of the drives are very flimsy and do not inspire confidence, and only the optical bays have spring-loaded doors. The door of the floppy bay in particular could use some sort of spring mechanism to hold it open when it's not latched shut, as it tends to rest half-way between the open and close positions. If you don't plan on moving the unit around much, this won't be a problem, but breaking one of the plastic hinges seems like a real possibility. Basically, they feel cheap. Most of the other cases have metal covers for the front plates or even no covers at all. On the plus side, the plastic doors do make the front look uniform, so you could use a beige or black optical drive and not worry about it ruining the uniformity of the case.
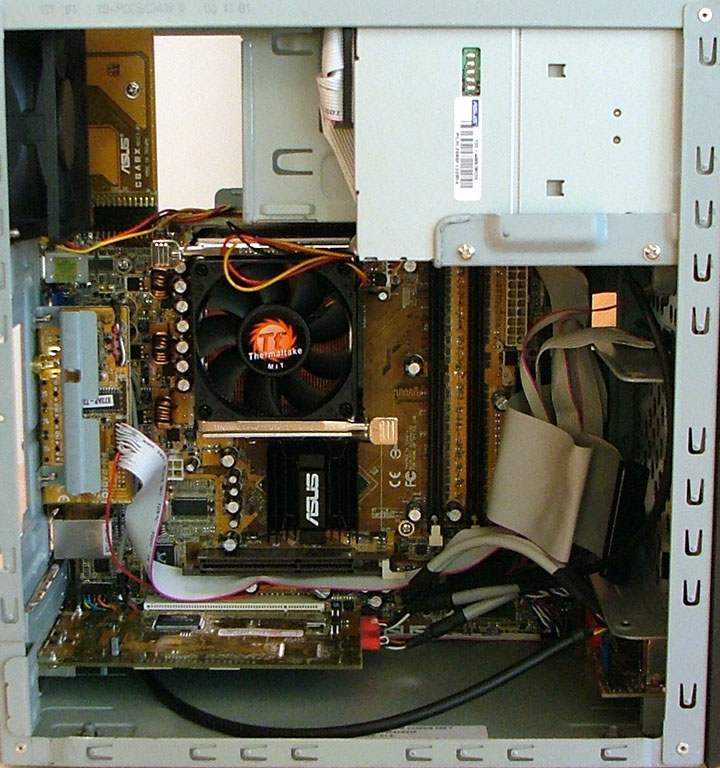
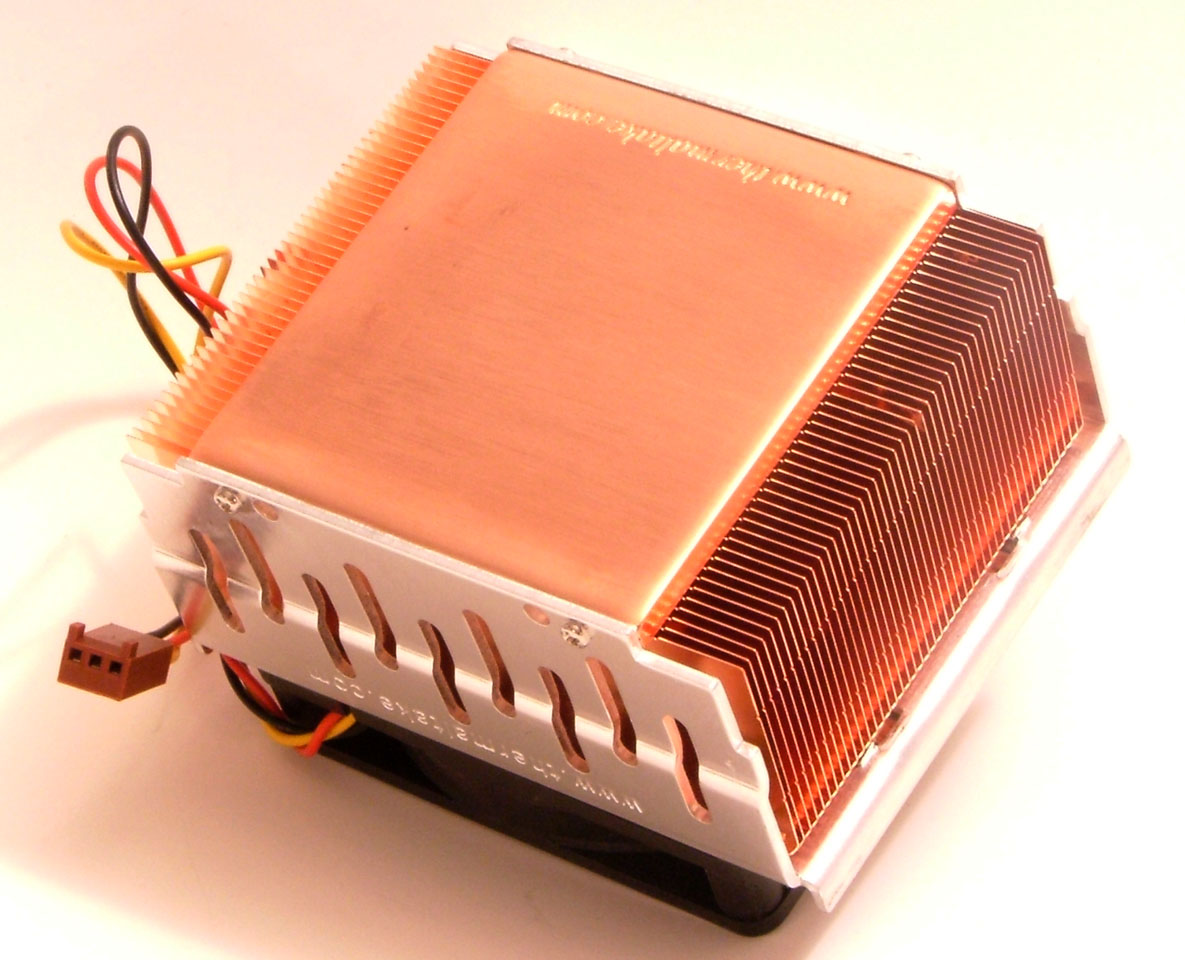 |
 |
| Click on images to enlarge. | |
The heat sink for the ASUS is a large, all copper Thermaltake unit. The design is basically a standard HSF, only with the use of copper to improve heat dissipation. We're a bit concerned about the location of the CPU socket and HSF once the unit is assembled, as the PSU is right above the CPU fan. We would expect this to hinder the ability of the CPU fan to draw in air, but we didn't actually experience any instability, so we can't really come to any conclusion on the matter. With the larger size of the case, though, there ought to be a better way to lay out the internals. A side-mounted, rather than top-mounted, CPU fan might also be a good modification.
The expansion slot area has a slightly different take on things, and in this instance, it's slightly better than some of the alternatives. A steel clamp can slide up and allow you to install your cards, and then you push it back into place to secure the cards. No screw holds the piece down, but once the cover is on, the part won't slide out of place. We wouldn't expect that to happen anyway, however, as the sliding action is very stiff and you really have to apply force before it will move. The steel piece is also one of the few areas where there are noticeable sharp edges, particularly with the metal points that take the place of screws in securing the expansion cards. If the part would slide a bit more easily, we would have liked it more, but either way, it gets the job done more conveniently than other options.
Setup
Assembling the case was a relatively straightforward process. The power supply must first be removed before you can access the CPU socket, and while it's out of the way, you can install the remaining parts. With the pre-installed PCI card, fitting a moderately large graphics card into the slot can be rather difficult, and removing the graphics card is also problematic as the AGP latching mechanism gets buried underneath everything else.The floppy cable was already installed, but we had to install the IDE cable for the DVD drive, and we would prefer a solution similar to most other SFFs where that cable is already in place. Virtually every PC out there has an optical drive, so there is little point in not having it installed at the factory and preferably routed along the edges of the case so that it doesn't get in the way.
The hard drive cage is mounted to the front of the chassis and secured by a single screw. While this works well once installed, it took several minutes of effort to get the cage to slot back in place, as there are numerous cables that can get in the way and the space is rather cramped. Also, the position of the front HDD cage makes it impossible to add a second IDE drive on the same cable, so the second 5.25" bay would either need to share the DVD cable or else you could use SATA drives.
As a whole, the case is designed to be assembled with a screwdriver. It's a bit odd that the one case that doesn't require any screws for the expansion card slots uses them everywhere else. Many of the other cases include thumbscrews for key components like the cover and HDD cage, which can be useful if you want to open your case on a regular basis. For frequent upgraders, then, the case is not the best choice, as it isn't the easiest design to work with. If you only want to build a PC and then leave it alone for a couple of years, however, it will work well.
The software installation is pretty standard, and it includes areas for driver installation as well as software and utilities. The drivers include the Intel chipset drivers as well as drivers for the gigabit Ethernet. Somewhere along the way, we misplaced the driver CD, unfortunately, and when we had to set up the system again, we had problems finding all of the drivers. The ASUS web pages include many of the drivers, but the drivers for the devices on the 3-in-1 add-in card are not present. We were eventually able to determine the chipset used for the GbE and download the driver elsewhere from ASUS' site, but the website could definitely use some updated information.
Noise, Heat and Performance
Noise levels from the ASUS were pretty average for the cases in this roundup. It wasn't the quietest case, but it wasn't the noisiest case either. The temperature-controlled CPU and case fans work well, and in use, there was very little fluctuation in fan speed. When the system is first powered on, the fans spin up to a high RPM and make a lot of noise for a couple of seconds, but afterwards, the case runs relatively quiet. Usually, the noise level was around 47 dB, but under the stress test conditions, it became as loud as 53 dB. That's still better than most desktop cases that we've used. Once you remove the X800 Pro from the system, noise drops quite a bit and our sound meter could no longer give reliable readings. Obviously, if you don't need a high-end graphics card, an older, fanless card or the integrated graphics will help a lot in reducing noise levels.The performance of the T2-P Deluxe was generally in line with the other 865G systems. It was a bit slower in some tests, but then it also came in as the fastest system for our encoding benchmarks. It seems that ASUS has simply tuned their motherboard somewhat differently from the other 865G offerings. We're looking at a performance difference of less than 5%, so it's not a major concern.


32 Comments
View All Comments
Midian191 - Tuesday, February 15, 2005 - link
The latest bios version of the 210P has voltage control and bios control of the fan speed.OrSin - Tuesday, February 15, 2005 - link
If you want smaller review a mini-itz systems.They are pretty weak, but it depends what you want to use them for.