Overclocking The AMD Ryzen APUs: Guide and Results
by Ian Cutress & Gavin Bonshor on April 16, 2018 2:30 PM ESTHow to Overclock With ASUS UEFI BIOS
Depending on which ASUS motherboard that is being used, whether that’s one such as the ASUS Prime X370-Pro (featured here) or a more gaming focused Republic of Gamers branded option, the only real differences come through the GUI and theme. The settings themselves remain the same and the ASUS BIOS offers both basic and advanced modes.
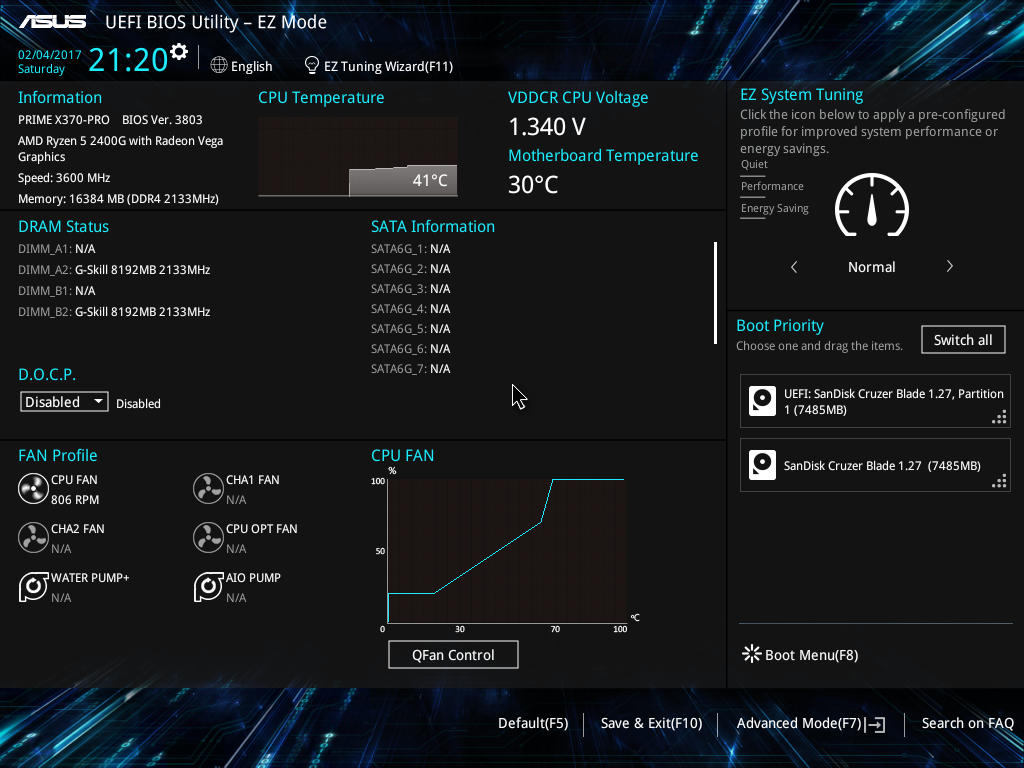
After entering the BIOS, the basic mode splash screen will appear. Here users can enable XMP (DOCP, Direct Overclock Profile), adjust fan profiles, and apply some 'EZ Tuning' for automatic overclocks that can be hit or miss. Pressing F7 enters the advanced mode.
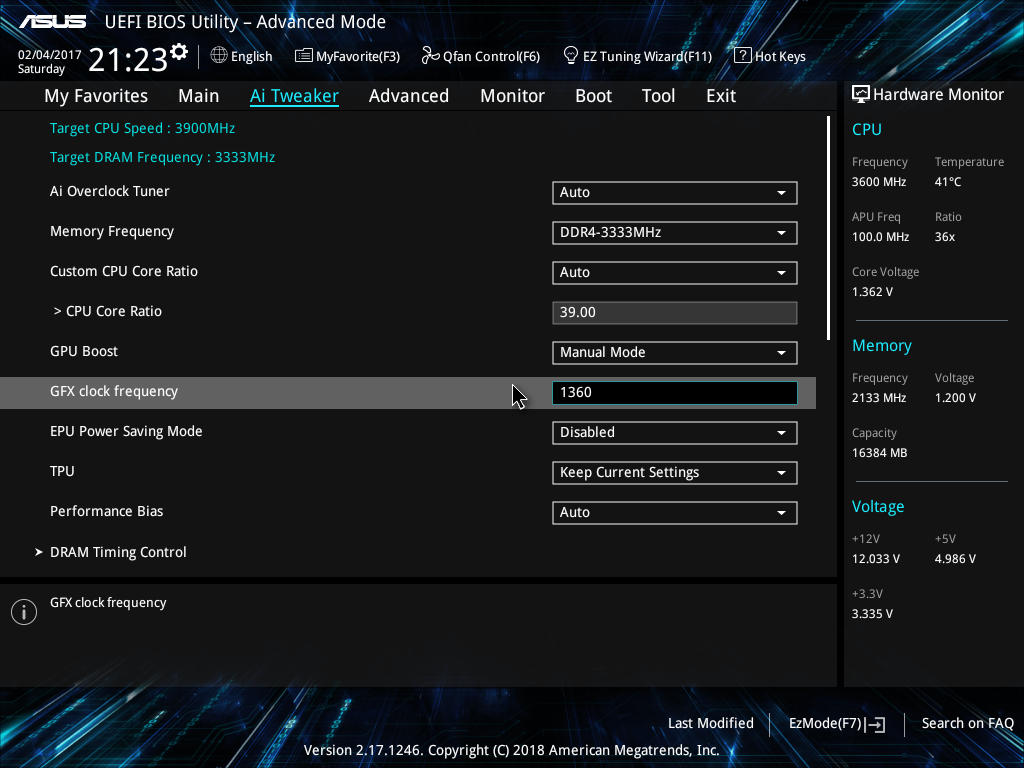
Once into the advanced section of the BIOS, all the overclocking related settings can be found in the AI Tweaker section. One interesting thing that was found within this particular BIOS was when XMP was enabled, it would remove access to the iGPU settings. Unfortunately we weren't able to determine if this was an isolated issue or whether it’s a more widespread across the entirety of the ASUS AM4 board range.
Changing the 'CPU Core ratio' to 39.00 will translate to 3.9 GHz. Due to the removal of the iGPU options when XMP enabled, the memory was changed manually within the BIOS; the easiest way to do this is to set the frequency and leave the sub-timings on auto, then manually adjusting the sub-timings to fit the module's rating.
To open up the integrated graphics options, setting the GPU Boost option to manual mode is required. This gives the GFX clock frequency option (note the lack of capital letters, perhaps this option was rushed in), while the voltage options are further down the list.

All the the voltage options further down. ASUS makes it a little confusing here, by not having the standard names for a few of these options - ASUS calls the CPU core voltage 'VDDCR CPU Voltage', for example. In each case for this sub-section, the manual mode option needs to be selected to offer the manual input for voltages. It is worth remembering to set the DRAM voltage if the timings were set manually.
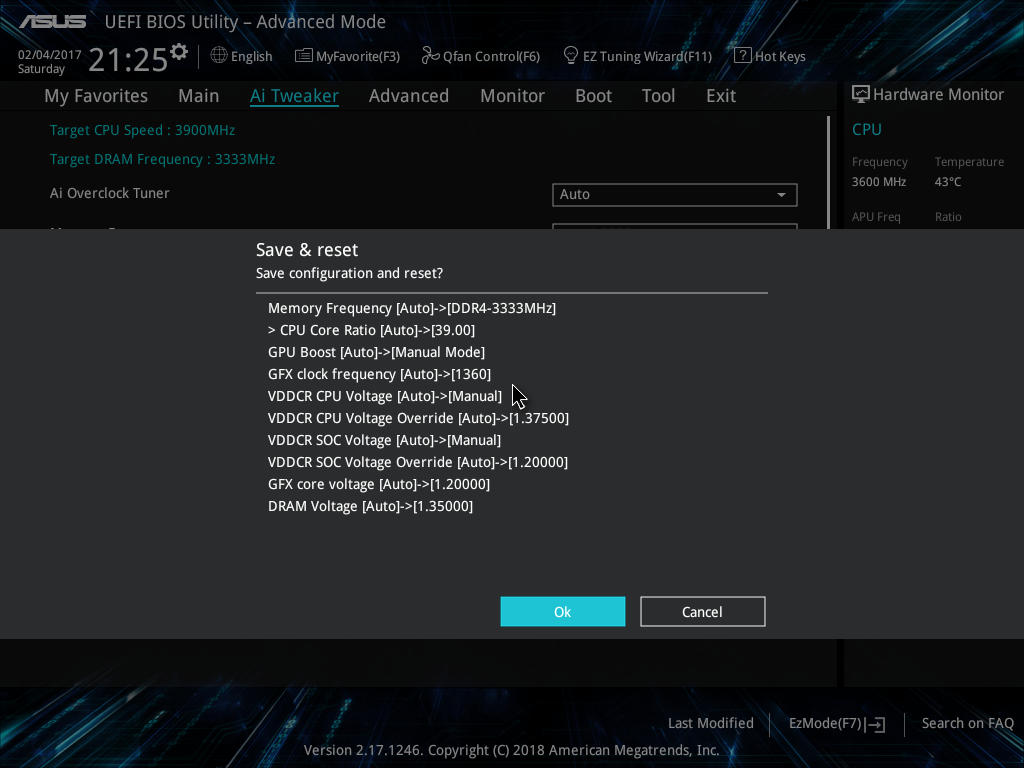
Once all the settings are entered, pressing F10 will bring up the save and reset box where the user can evaluate and comb over the changes made.
Many thanks to Lawrence Timme - due to not having an appropriate ASUS AM4 motherboard to hand (we somehow ended up with no ASUS boards with video outputs), he kindly provided the screenshots for this section.


63 Comments
View All Comments
jjj - Monday, April 16, 2018 - link
Yet to fully read the article but P-state OC and baseclock OC are nice if you can avoid entering OC mode that way, at least with Ryzen. No idea what works and what doesn't with RR, haven't kept up on it but do care about that with Pinnacle Ridge.RarG123 - Monday, April 16, 2018 - link
Look at this: https://www.gamersnexus.net/guides/3251-raven-ridg...So SoC (seemingly 2D clocks) voltage should be left at ~1.1V, and GFX (seemingly 3D clocks) voltage should be at ~1.2V max in order to remain within safe limits in all scenarios. This might have changed with the latest BIOSs but until such time that it's tested, it's better to err on the side of caution.
Also for anyone with HWMonitor, if some data points aren't getting displayed correctly, give HWInfo a shot it's more Ryzen friendly.
Lolimaster - Tuesday, April 17, 2018 - link
For true OC check techepiphany on youtube.eastcoast_pete - Monday, April 16, 2018 - link
Good and informative article. I had planned to build an HTPC setup around the 2400G, alas both the 2200 and 2400 seem to be falling short on the home theater side (4K HDR playback at 60p using MPC-HC with madVR). If this has changed, please correct me, with the link to the source showing that they are now able to do so - Thanks!Somewhat related: I would be interested to see how far one can undervolt the 2400G CPU and GPU and still get stable sort-of stock performance. [yes, I know - there's always at least one who has to be contrarian - still chasing the quiet setup]
JoeyJoJo123 - Monday, April 16, 2018 - link
I'd recommend just using MPV. The visual gains that the MadVR scaler uses can be extremely taxing on the GPU, depending on the settings used. With good MPV settings it literally looks 95% as good as MPC-HC + MadVR looks, at a fraction of the computational intensity, ie: less fan noise while playing back media, which you'll hear when playing back content.Lolimaster - Tuesday, April 17, 2018 - link
You always need to config the fans rpm, I lock my CM Hyper 212+ to 600-800rpm, dead silent.Lolimaster - Tuesday, April 17, 2018 - link
Undervolt helps achieving that without worrying about load temps.Lolimaster - Tuesday, April 17, 2018 - link
There's a reddit post (just google it)2400G system stock 105w
undervolted 75w
:D
eastcoast_pete - Tuesday, April 17, 2018 - link
Thanks! According the pictures posted on reddit, undervolting a 2400G resulted in almost stock performance (less than 5% difference vs. stock, and only one benchmark, but still, promising) and an almost 25% reduction in Wh drawn for the entire setup; he used a kill-a-watt Wattmeter.Just like some people here and on reddit, I wonder if the new MoBo chipsets could allow fine-tuning, so for GPU-limited games, undervolt the CPU, and use the ~ 10-25 Wh thermal headroom gained to overclock /overvolt the GPU. Doing so might even work just with the stock cooler. Has anybody tried? Ian, can you try it?
eastcoast_pete - Tuesday, April 17, 2018 - link
Sorry, meant to address both of you: Ian, Gavin, can you try it?