Commercial NAS Operating Systems - A Comprehensive Overview of Core Features
by Ganesh T S on November 14, 2016 8:30 AM ESTSetup Process and User Interface
The setup process adopted by different NAS vendors is similar in many ways. Connecting a diskless NAS unit to the network results in the unit getting a DHCP address, with a web server up and running. A web browser can then be used to follow the step-by-step instructions to insert hard drives, configure an appropriate storage volume, set up access credentials and some other essential aspects of the NAS.
In order to make the process simpler for the average consumer, some vendors supply a separate program to search for their NAS units in the local network. These programs occasionally come with value-added features. The setup process for each vendor is discussed in detail in this section. Vendors are covered in alphabetical order. Readers interested in jumping ahead to a particular vendor can use the list below.
Asustor
Asustor supplies the Asustor Control Center program that can recognize the Asustor units in the local network with its 'Scan' function. It helpfully provides the DHCP IP of the NAS unit also, and the user can open a web browser for further setup.
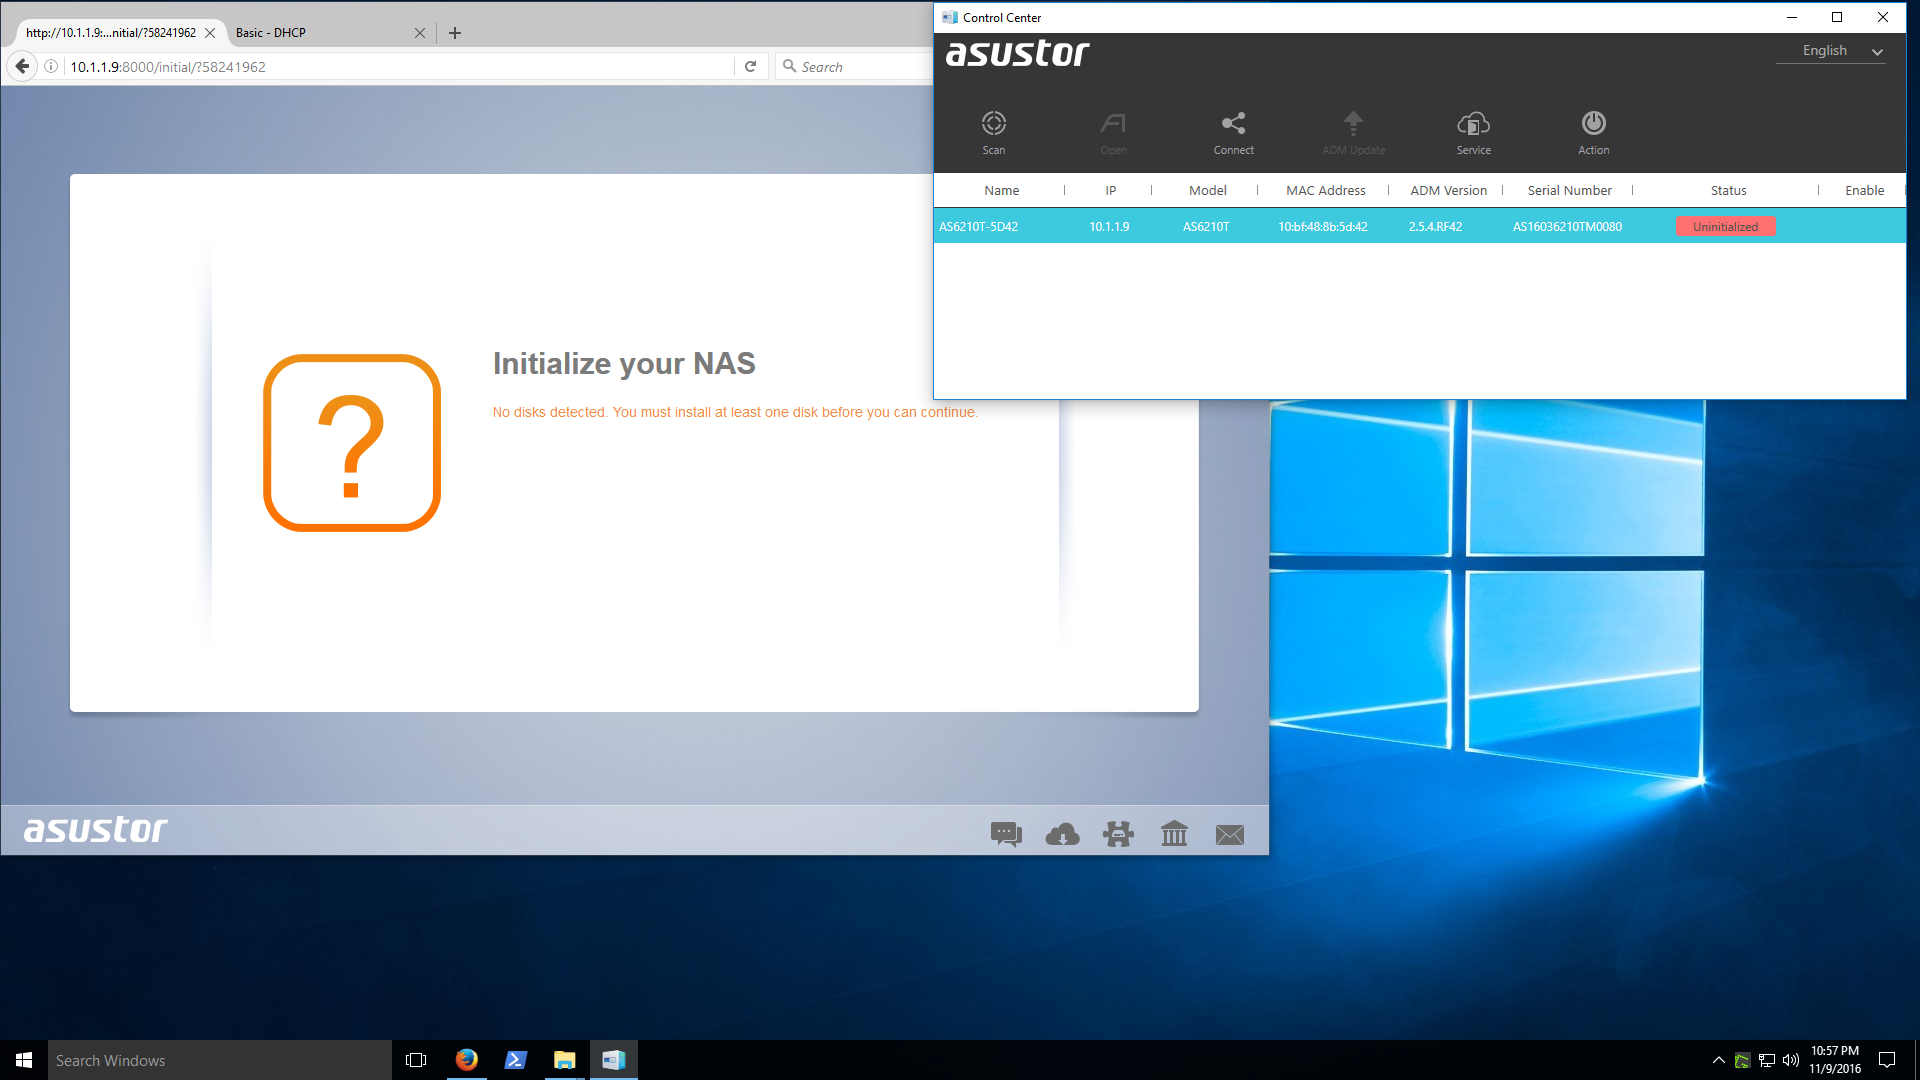
After inserting empty hard drives into the unit, the NAS can be initialized. The flow also checks whether a newer firmware version (compared to the one currently in the DOM inside the unit) is available. Users can opt to continue initialization without updating the firmware, or allow it to be updated directly off the net, or allow the upload of the newer firmware from a local source. The setup wizard allows 1-click configuration, but, advanced users will usually end up opting for the customized manual configuration.


The initialization process requires setting up a password for the admin account, date and time settings (computer time, manual, or synchronizing with a NTP server), network configuration (link aggregation configuration, IP settings - DHCP or static), and volume settings (RAID level configuration with selected disks in the unit). The final step in the process is the optional registration.
After the initialization of the NAS, the Asustor Control Center (ACC) becomes much more useful. The 'Open' button opens the browser interface for the NAS, and the 'Connect' option can be used to map network drives, create a remote file folder (WebDAV or FTP), or open a connection to the NAS via FTP. The 'Photo Gallery' and 'Surveillance Center' services can also be accessed via ACC. WOL settings can be configured, and power control options are also provided.


On the whole, the setup process is fairly simple and the Asustor Control Center provides easy access to tasks that might be essential for certain users.
Asustor adopts an app-style browser UI for the NAS interface. Various options are arranged as a rectangular array of icons similar to what one sees in modern mobile operating systems.

One of the important aspects highlighted above is the 'searchlight' on the top of the page to the right. Often, it is difficult to remember where a particular option is buried in the layout. The searchlight helps take the user directly to the relevant section. Beyond the initial app view, the various windows that pop up within after selecting the available options follow a desktop-style UI.
Netgear
Netgear has completely revamped their OS a couple of times in the last 5 years. Starting from square one has resulted in their OS not being as feature-rich as the ones from other vendors in the market. For example, their local NAS discovery tool - RAIDar - is quite dated and requires Java to be installed. None of the other vendors we are covering in this article require Java for that tool.
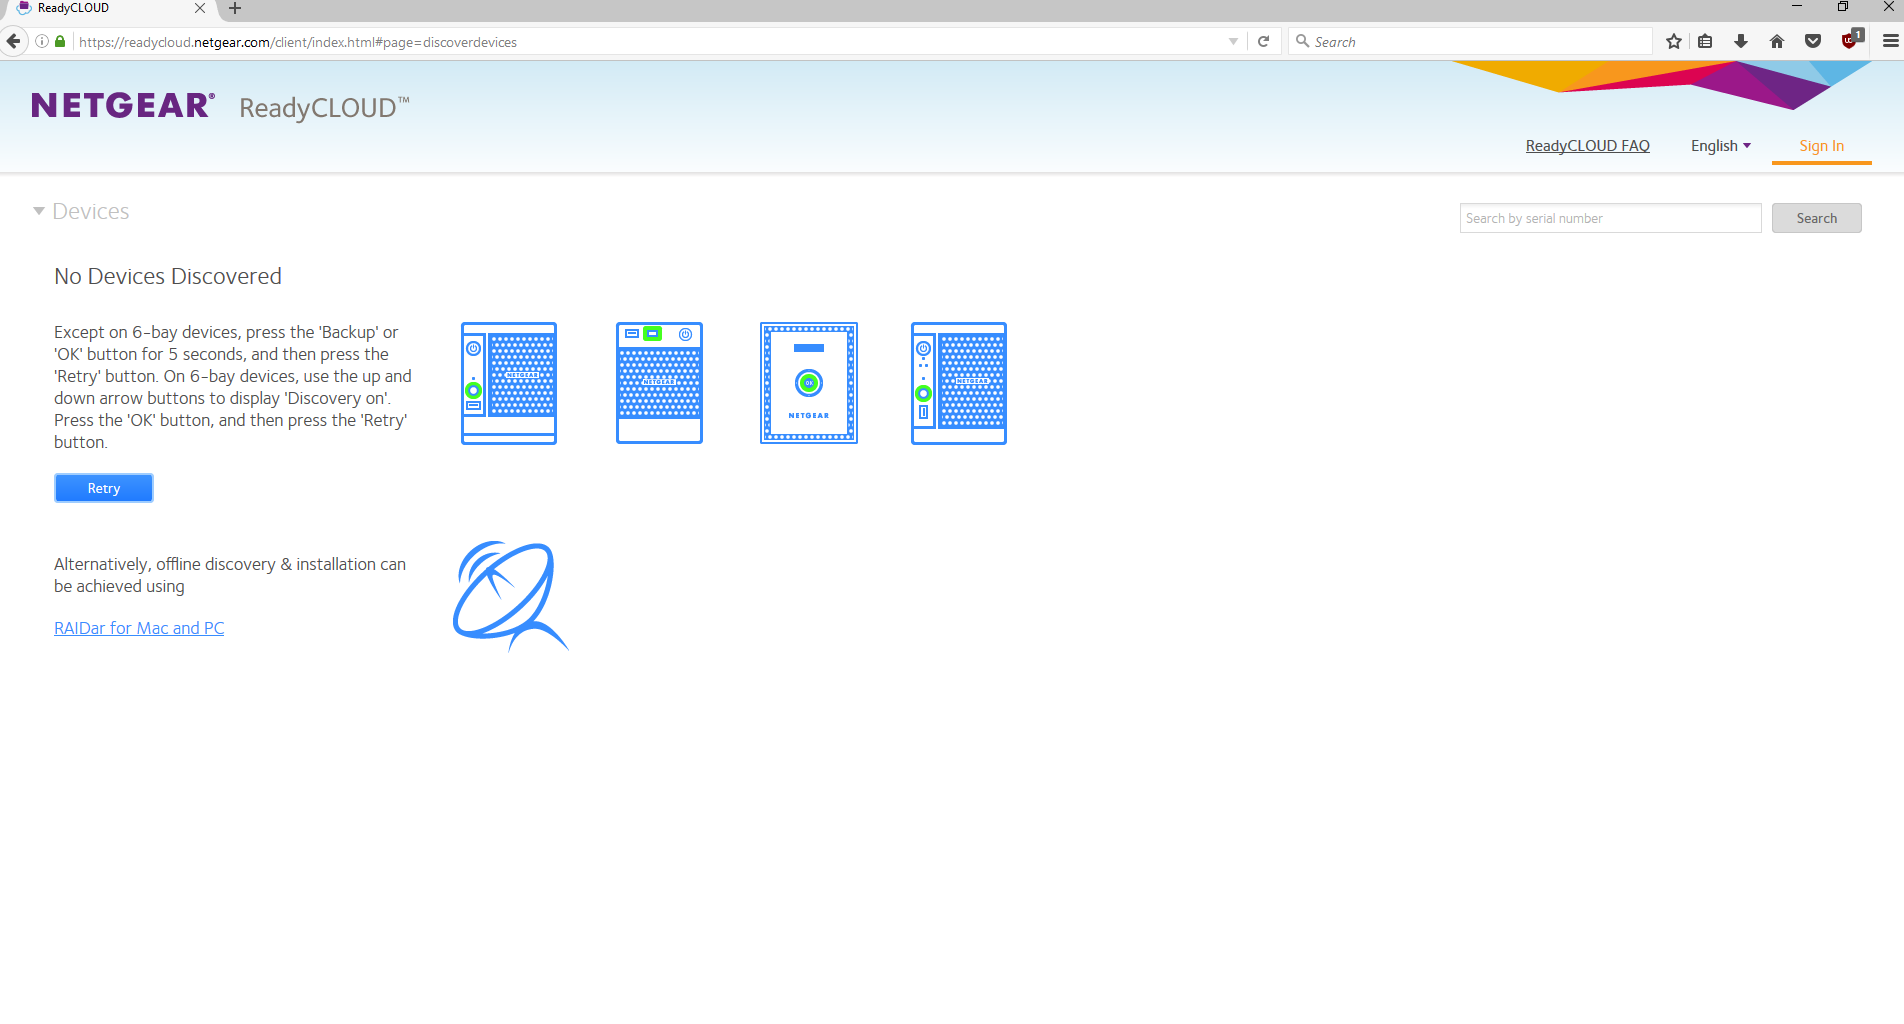
Fortunately, Netgear also has a cloud discovery mode using the 'ReadyCloud' feature. We tried it out with mixed luck, as shown the gallery below.


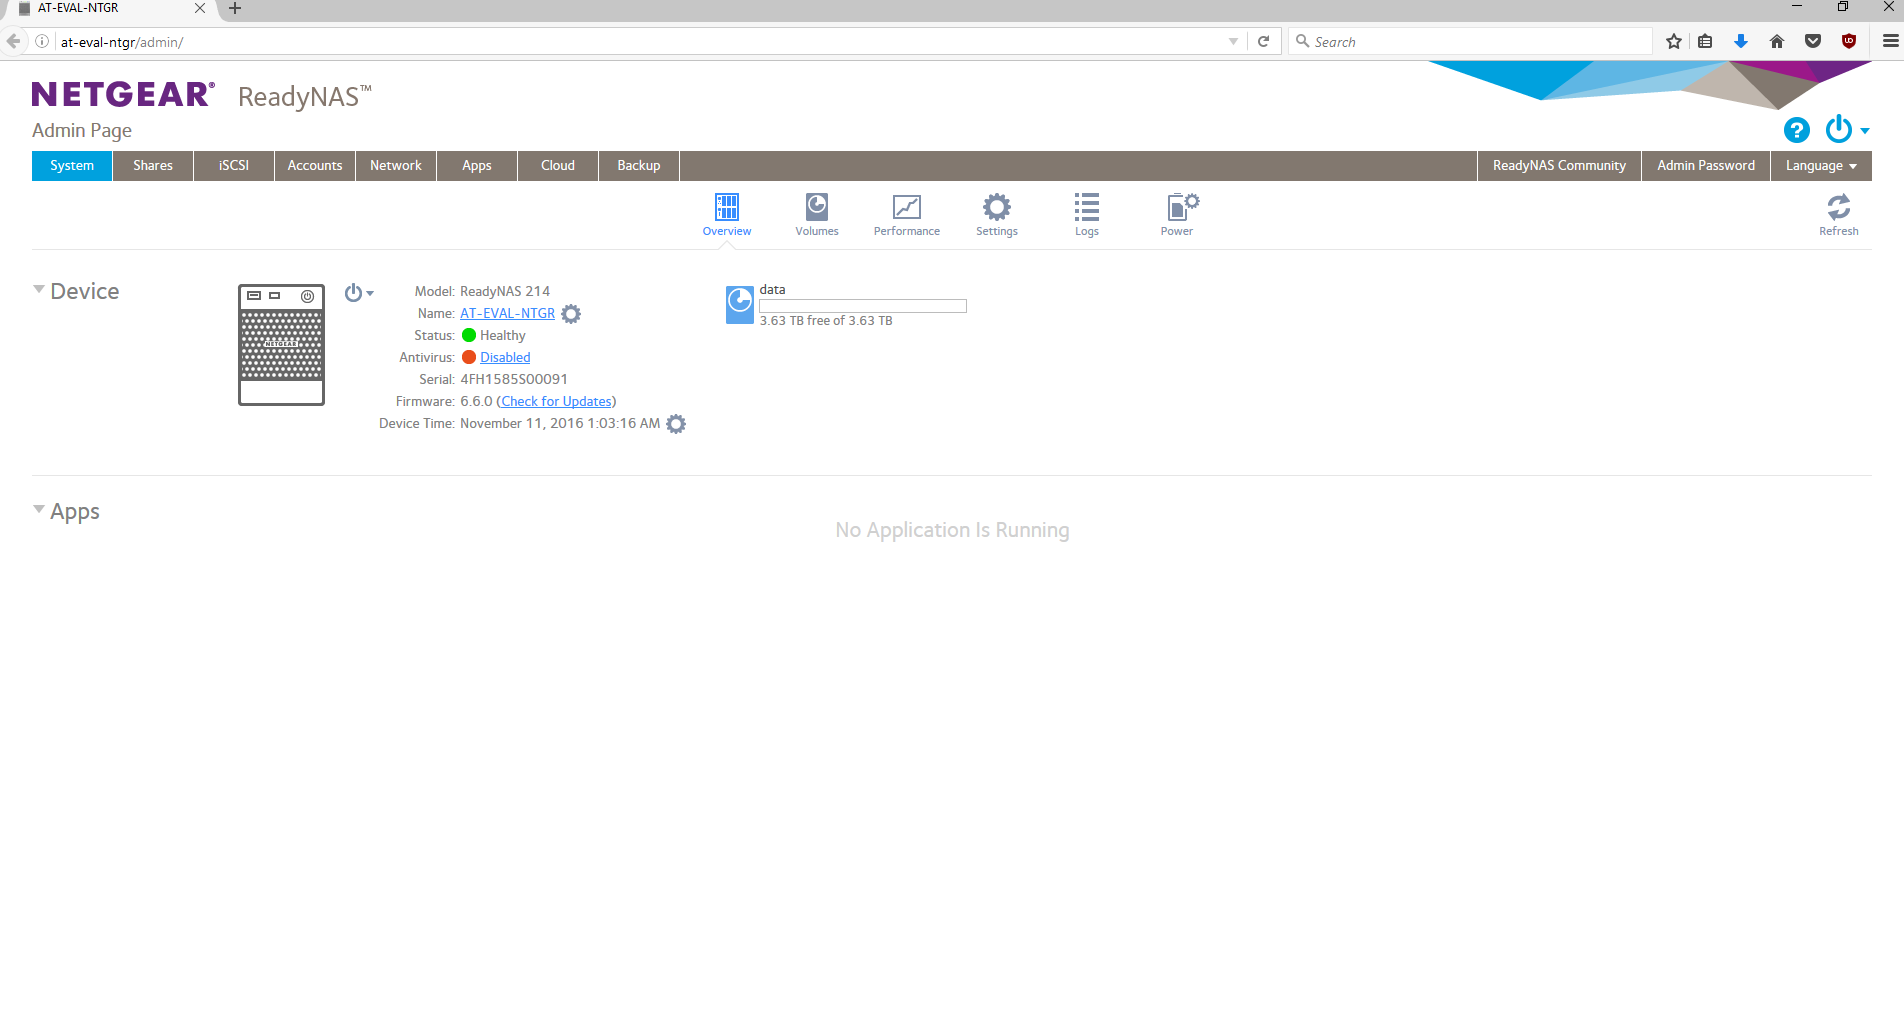
Eventually, we moved to the offline installation mode that involved accessing the DHCP IP (getting to that point still involved accessing the unit physically after inserting the disks - something that wasn't needed for units from other vendors). The usual time and date settings, host name, and login credentials could be configured. One of the interesting aspects was the ability to configure alerts to be sent to an e-mail ID during the setup process itself (other vendors have it as a buried option in their OS). The other was the automatic configuration of the disks in X-RAID (unlike other vendors who allow the RAID level to be chosen by the user during the setup process). End users can always remove the volume and reconfigure it after the initialization is complete.
In our evaluation, Netgear's setup process based on ReadyCLOUD doesn't appear to be very robust, while the offline installation mode requires more babysitting that we would like. Netgear also needs to create a version of RAIDar that can work without Java. All said, power users will not have any trouble getting a ReadyNAS unit up and running.
The ReadyNAS OS 6 browser UI is spartan compared to what we see from other vendors. It follows a ribbon-style set of menus - the first row is plain text, while the second row has icons with associated text. The UI takes some getting used-to, particularly if one is familiar with other COTS NAS operating systems.
Options and information pop-ups are placed in unlikely areas. The UI also suffers from some inconsistencies - for example, detailed disk information can be obtained by hovering over the green circle next to the 'Disk' entry in the 'Performance' view, but, similar green circles elsewhere in the UI are not of the informative variety. There is also no easy way to get to a desired option from the front page (i.e, no search box to put in keywords like, say, Samba or SSH). The UI is novel. However, it requires some rework to become more intuitive.
QNAP
QNAP's setup process is very similar to that of Asustor discussed earlier in this section. Like the Asustor Control Center, we have the QNAP Qfinder Pro program to identify and manage QNAP NAS units in the local network. The feature sets of both programs are similar. Double-clicking a NAS entry directly opens up the browser interface for the unit.
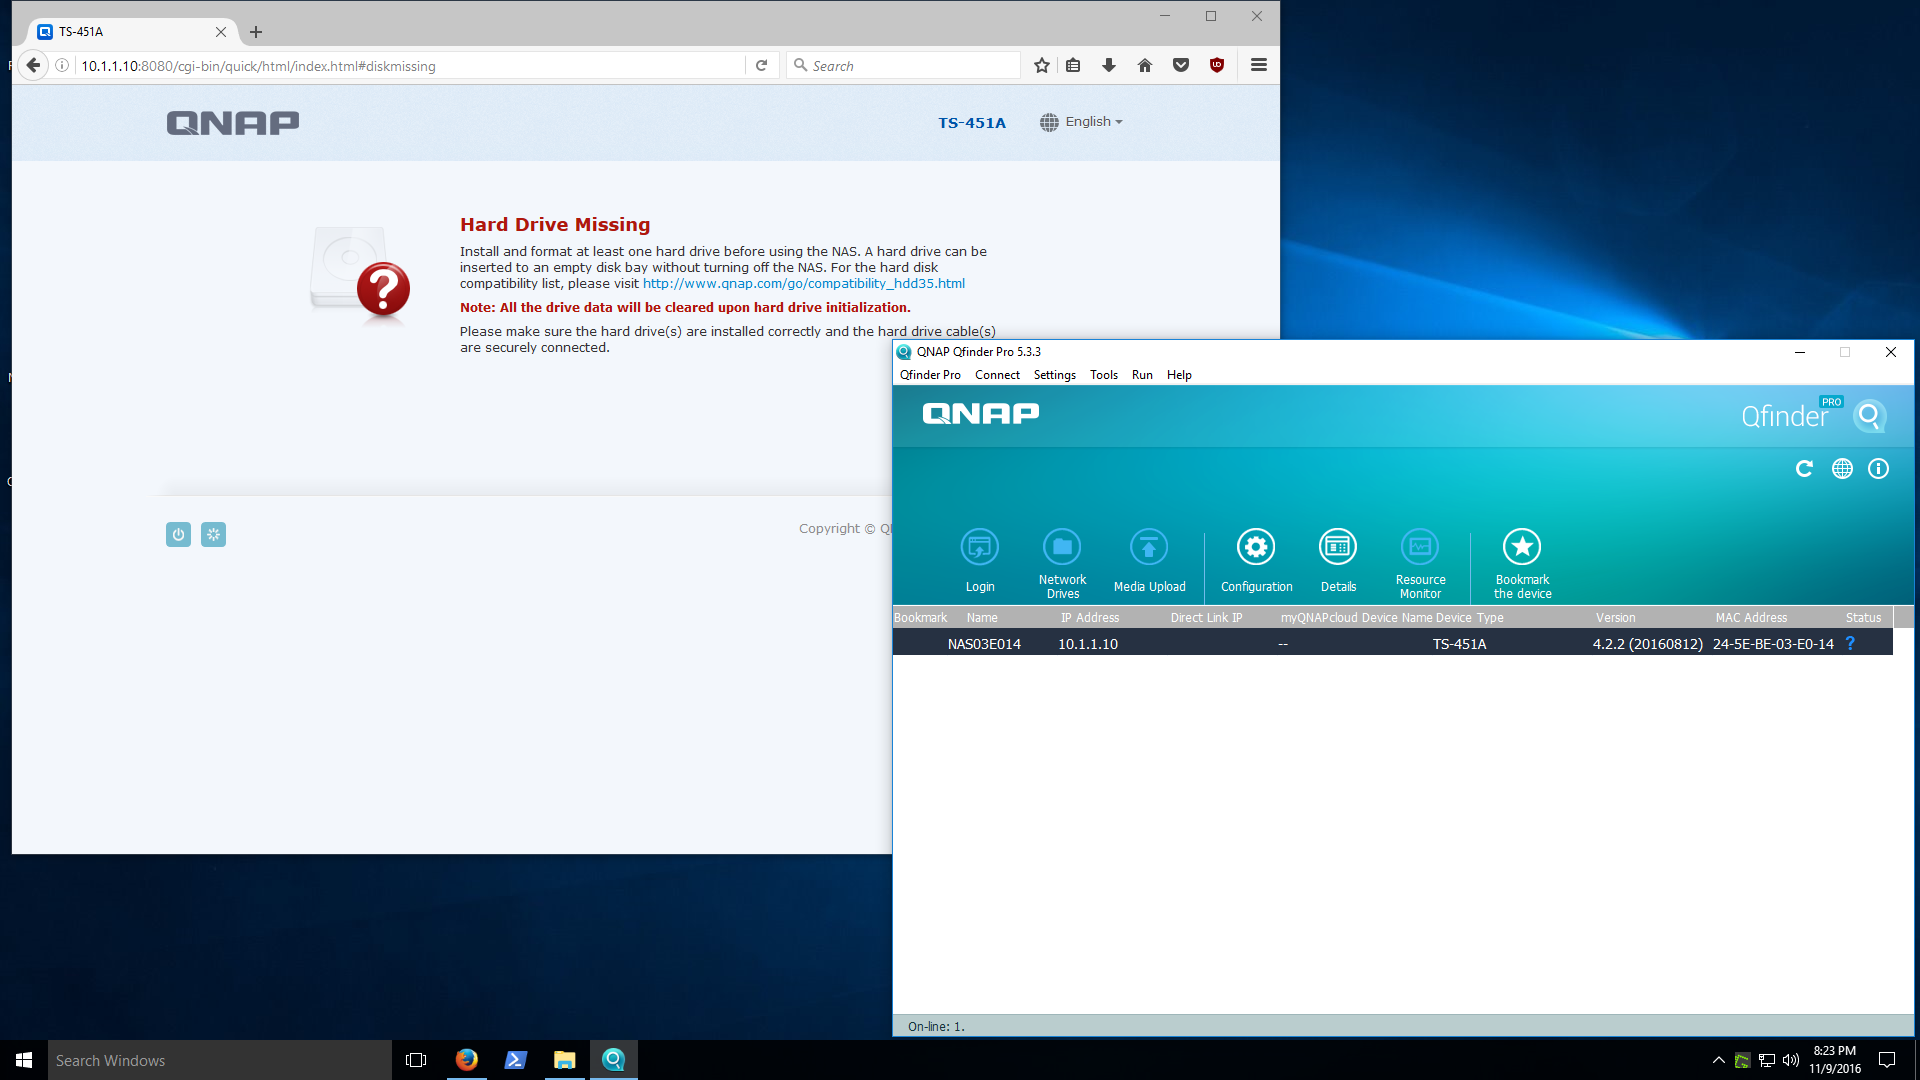
After inserting empty hard drives into the unit, the NAS can be initialized. QNAP allows the user to choose between setting up a NAS either for home use or business use. This just modifies the services / applications installed by default, and users can always add / remove applications after the initialization process. Subjectively speaking, QNAP's browser UI for setup is better than Asustor's, but, both get the job done. A point of difference is that Asustor's flow includes a firmware update check, while QNAP's does not. On the other hand, QNAP allows more configuration options for the enabled services and storage volume (such as turning on encryption and checking for bad blocks in the disks).


The initialization process requires setting up a password for the admin account, date and time settings (computer time, manual, or synchronizing with a NTP server), network configuration (link aggregation configuration, IP settings - DHCP or static), and volume settings (RAID level configuration with selected disks in the unit). The final step in the process is the optional registration.
After the initialization of the NAS, the QNAP Qfinder Pro becomes much more useful. Though there seems to be no direct access to the internal services via Qfinder Pro, it does allow for more management features compared to ACC.


QNAP's setup process is comprehensive, and there is little to complain about. For the average consumer, QNAP also includes a cloud setup process similar to Netgear's ReadyCLOUD (though it needs a cloud key that is tagged on to the unit, unlike Netgear). However, most users will find it unnecessary, given that the local network setup process is straightforward.
On the UI front, QNAP was one of the first NAS vendors to go with the app-style layout for the various segments of interest in the NAS OS. The spacing between the icons presents a better look compared to Asustor's ADM.
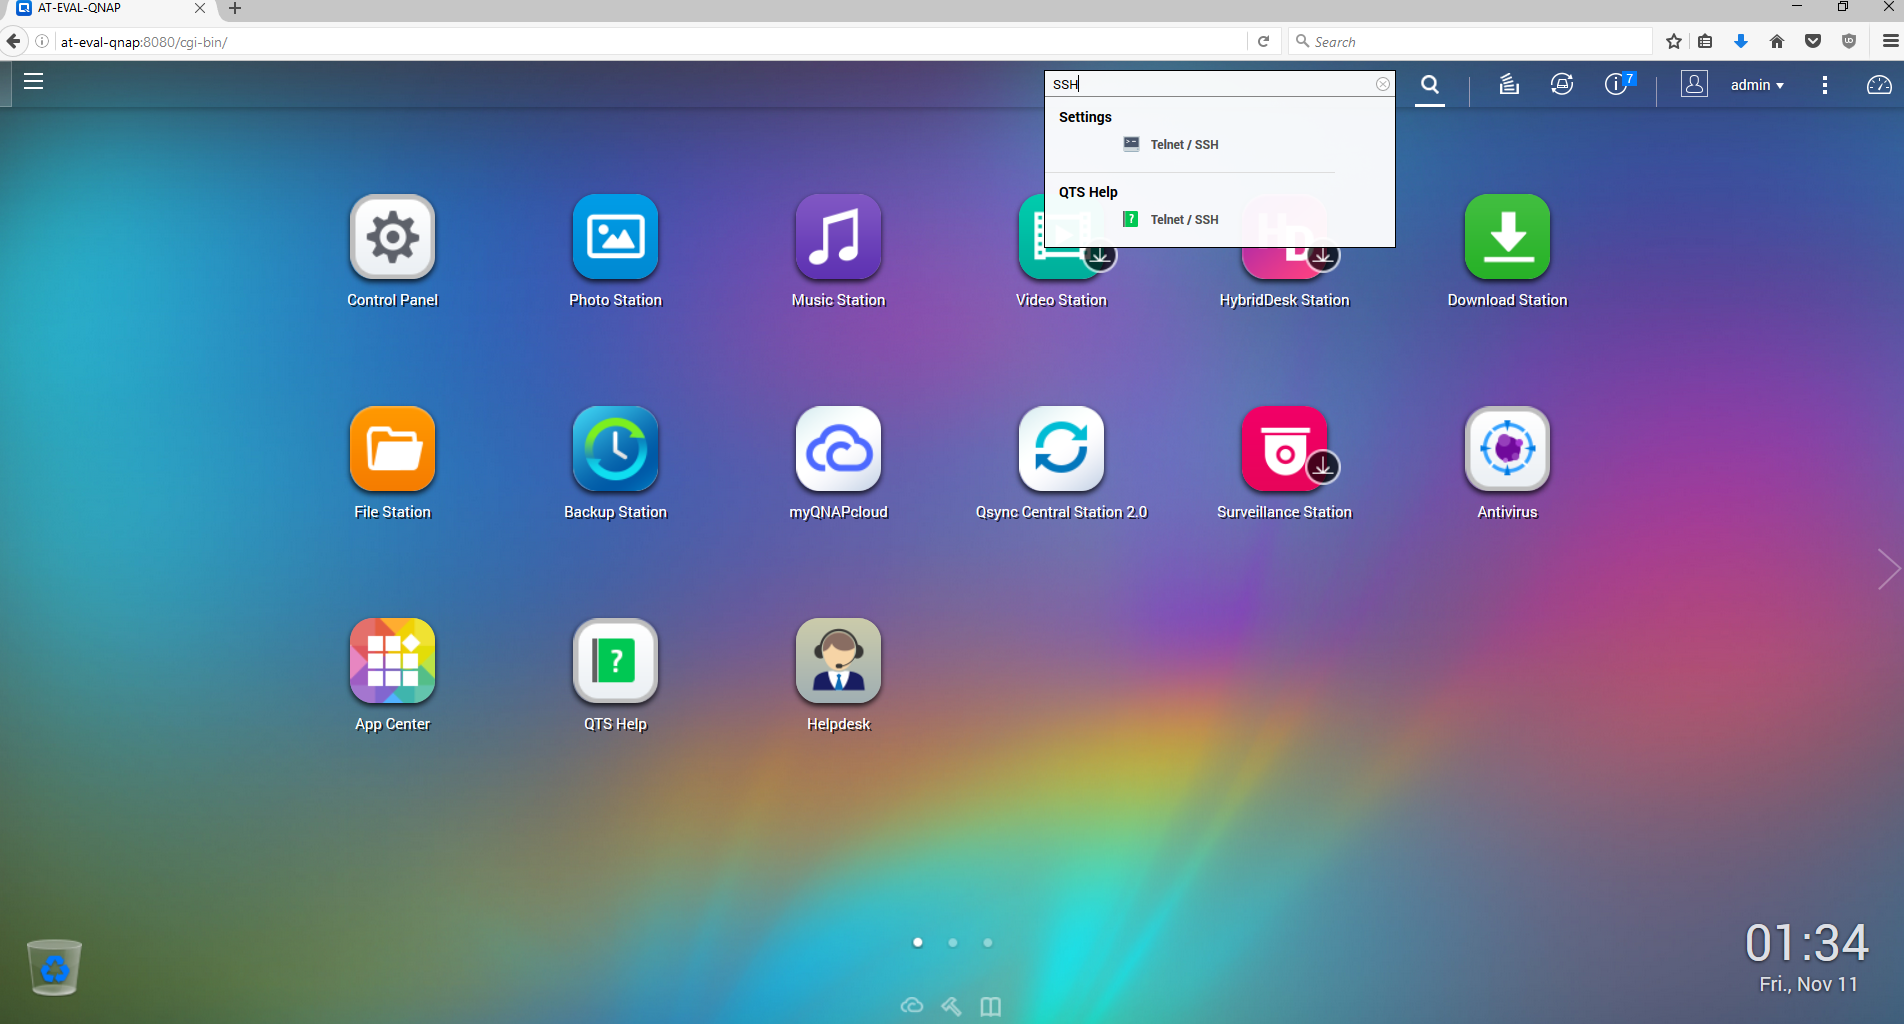
We have a search icon in the top bar that triggers a search box to get quickly to the desired areas inside the QTS OS.
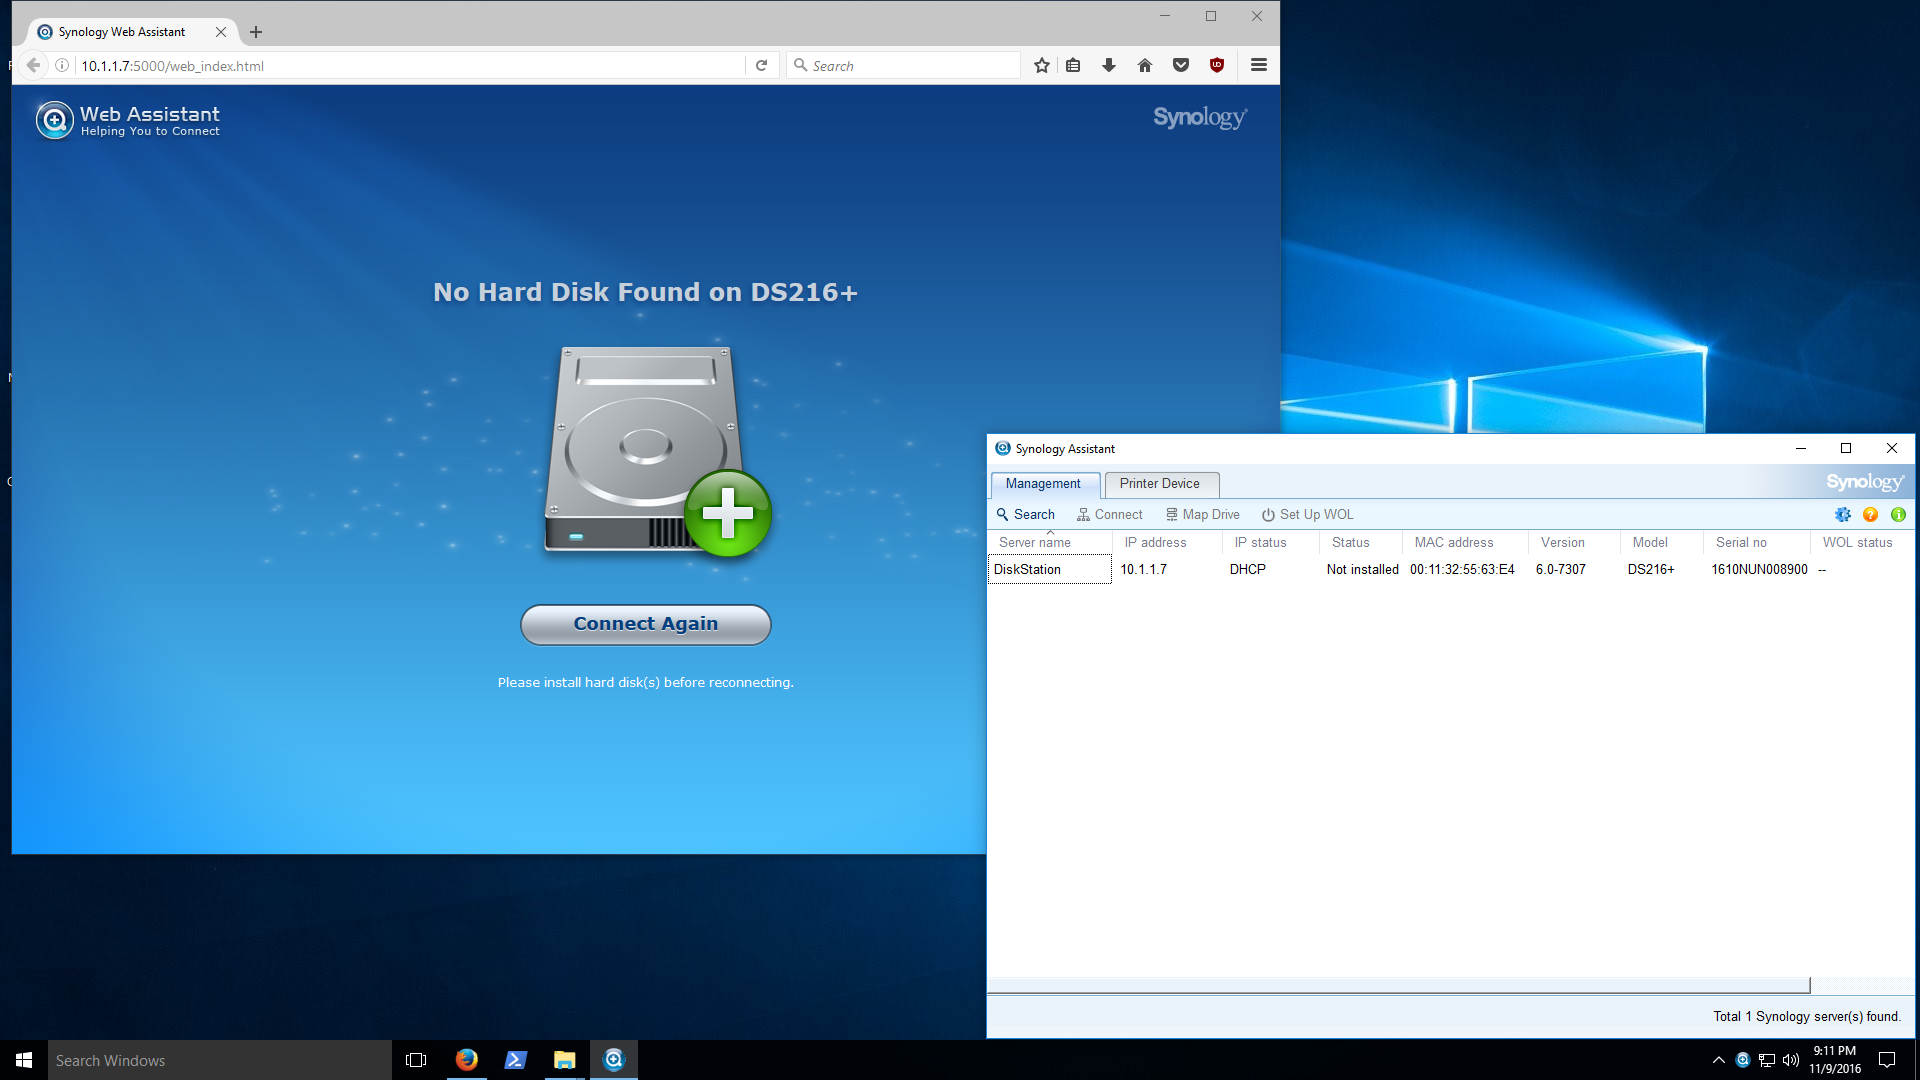
Synology
Synology, like QNAP, is a veteran in the COTS NAS market. The setup process is similar to what we have already seen with QNAP and Asustor. The Windows program for management of Synology NAS units in the local network is the Synology Assistant. Its features are similar to that of QNAP's Qfinder Pro and Asustor's Control Center.
The browser UI to set up the unit is similar to what we have seen earlier. A couple of points stand out - the Synology UI doesn't tell us the steps that remain to complete the initialization process, and the UI heavily promotes setting up of a Synology ID / QuickConnect for remote access. The other aspect is the focus on the DSM update process. Given the effects of the SynoLocker malware, it is only logical that Synology attempts to keep the DSM OS updated with minimal user intervention.


One of the unique aspects of Synology's DSM is the availability of both btrfs and ext4 as file system options for the storage volume in x86 units. However, it must be noted that the default volume that gets setup in the initialization process is btrfs (for the DS216+, it is a SHR RAID-1 volume).
The Synology Assistant is not as feature-rich as the offerings from QNAP and Asustor, but, it does have two unique features - a printer device tab to access / control printers connected to the Synology NAS unit's USB ports, and an advanced option to run a memory test for the RAM in the NAS unit.
Synology's setup process is user-friendly. The Synology Assistant could do with some additional features, but, the DSM desktop UI in the browser provides the same functionality with better user-experience compared to a standalone Windows program.

Synology's desktop UI with support for widgets was quite innovative when it was launched. Fortunately, it has withstood the test of time. The design of the 'Main Menu' that can be accessed from the top left is similar to the app layout adopted by QNAP and Asustor. Newly installed packages make an appearance in the main menu, and can also be added to the desktop, if desired.

Based on our experience, we believe that the Synology UI combines the best of both approaches. The search option in the front page ensures that it is possible to access the desired portions of the DSM OS quickly. Subjectively speaking, the DSM OS has the best UI and UX of all the NAS operating systems that we are covering here.
Western Digital
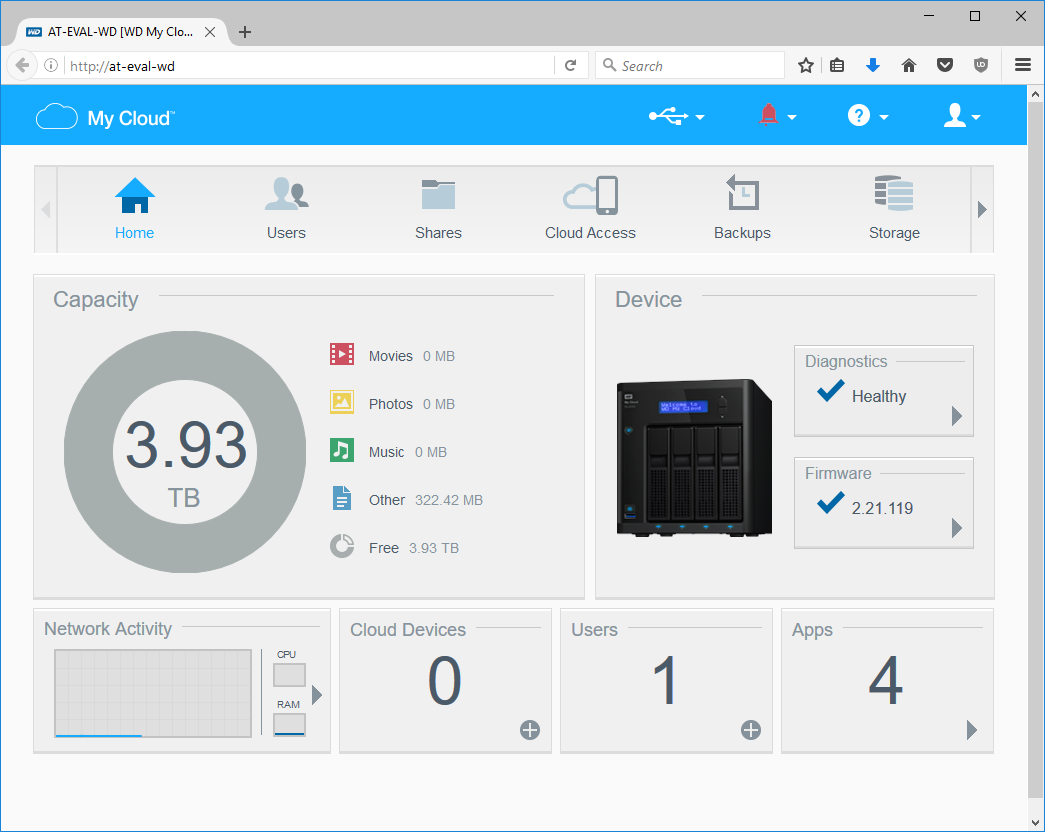
Western Digital's My Cloud OS was launched a couple of years back with the aim of unifying the software and UI across multiple product lines. While the NAS OS side has turned out to be acceptable, the Windows program side is still in a state of flux. Western Digital has two Windows program - the WD Quick View and WD Access - that have overlapping functionality. They can identify the My Cloud OS NAS devices in the network, and accessing the dashboard helps make progress with the setup process.
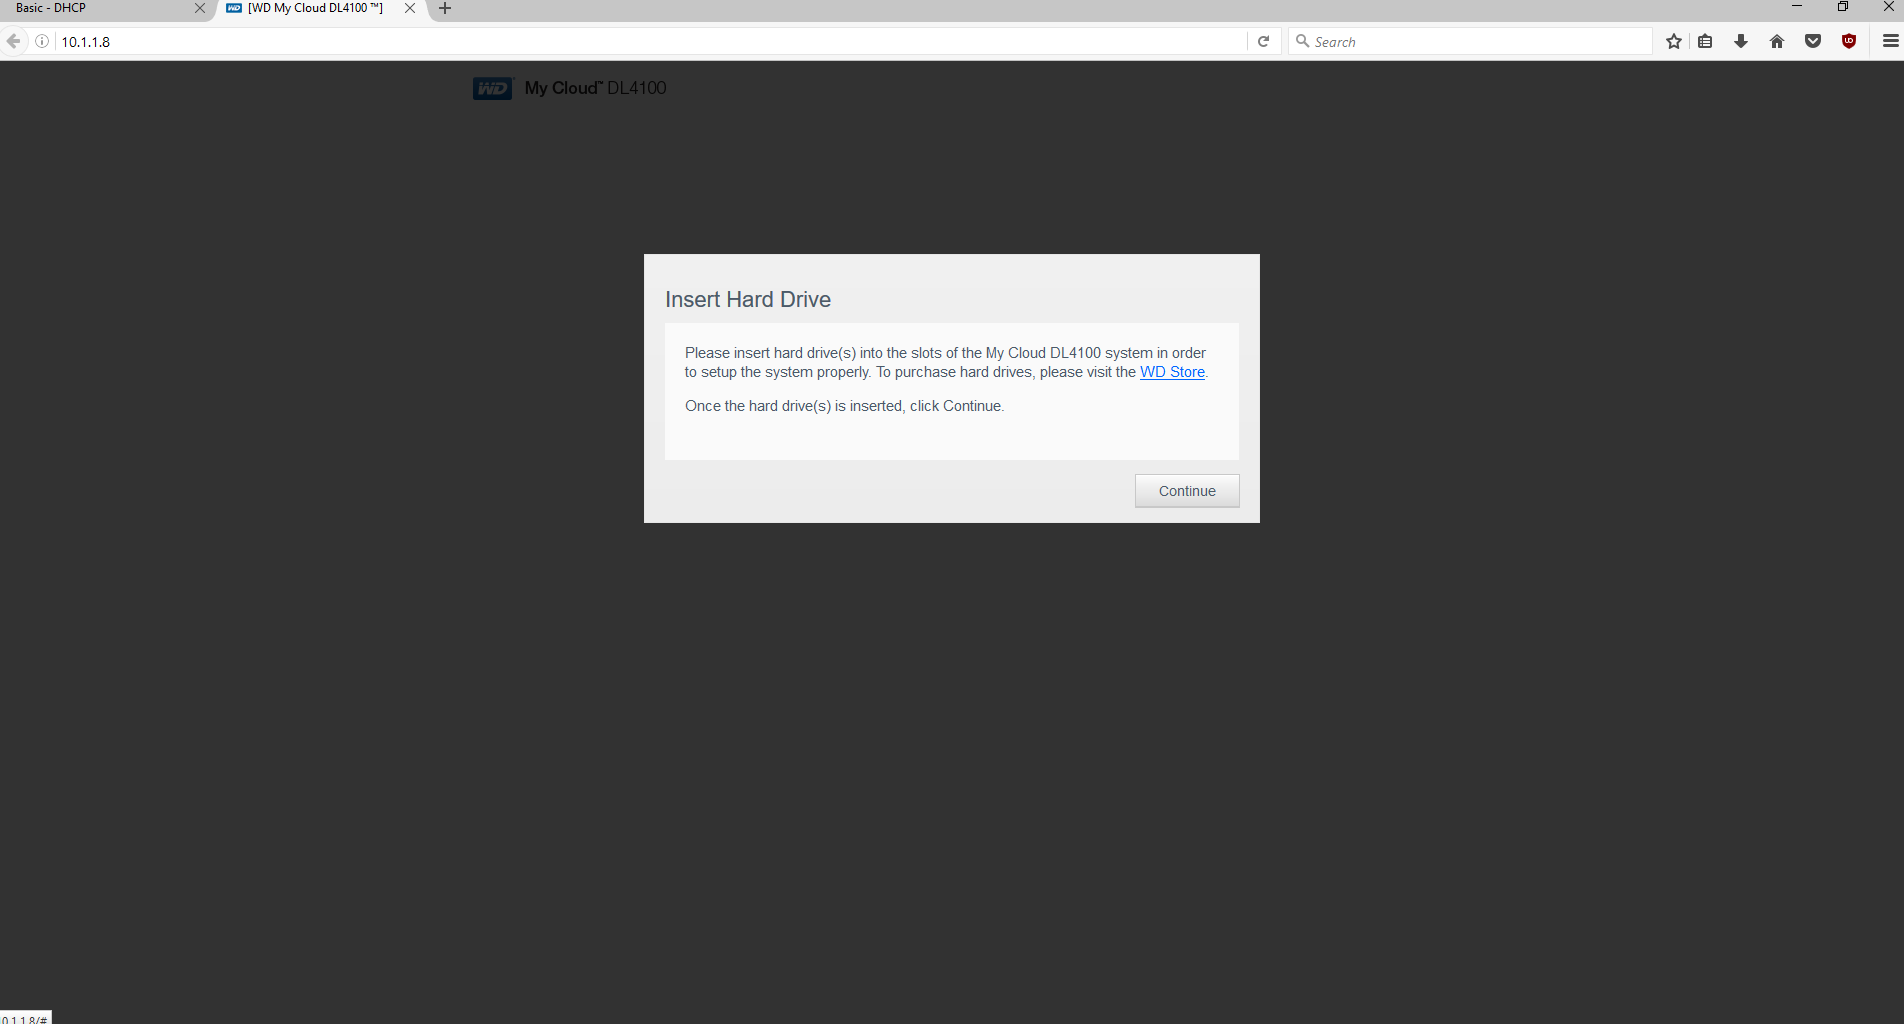
After insertion of the new hard drives, the setup process is automatic and ends up in the My Cloud OS browser UI's storage tab. An important point to remember here is that no volume is created by default. Without creation of one, it is not possible to, say, do a firmware update.


The RAID volume wizard is user friendly, and allows encrypted volumes to be set up in the step-by-step guide. A drive self-test is also processed before the volume is created. After reboot, the login credentials and cloud access can be configured.
The Quick View and Access Windows applications are meant to be used as taskbar-resident ones. From the viewpoint of the setup process, their main use is to provide access to the browser UI via the Dashboard option.


The My Cloud OS follows a ribbon-style user interface. There is a row of icons with associated text at the top, and the options in the main frame vary based on the choice at the top.
In some respects, the UI adopts an approach similar to Netgear's ReadyNAS OS. Despite not looking as polished, it is more intuitive. There is no search option in the Home screen to get quickly to buried options. This is one aspect that Western Digital could improve upon in future releases.
ZyXEL
ZyXEL has NAS units targeting the home consumer market only. Despite not being a very significant player, ZyXEL's setup process is surprisingly good. A diskless unit's DHCP address is visible via the NAS Seeker function in the NAS Starter Utility. The ZyXEL units come with default credentials of admin / 1234.
The setup process is similar to that of other NAS units with extra focus on the type of RAID volume to be created. Other than that, an update to the default login credentials is required.


The NAS Seeker and NAS Starter Utility provide some basic configuration options (enabled after the creation of the storage volume in the NAS).


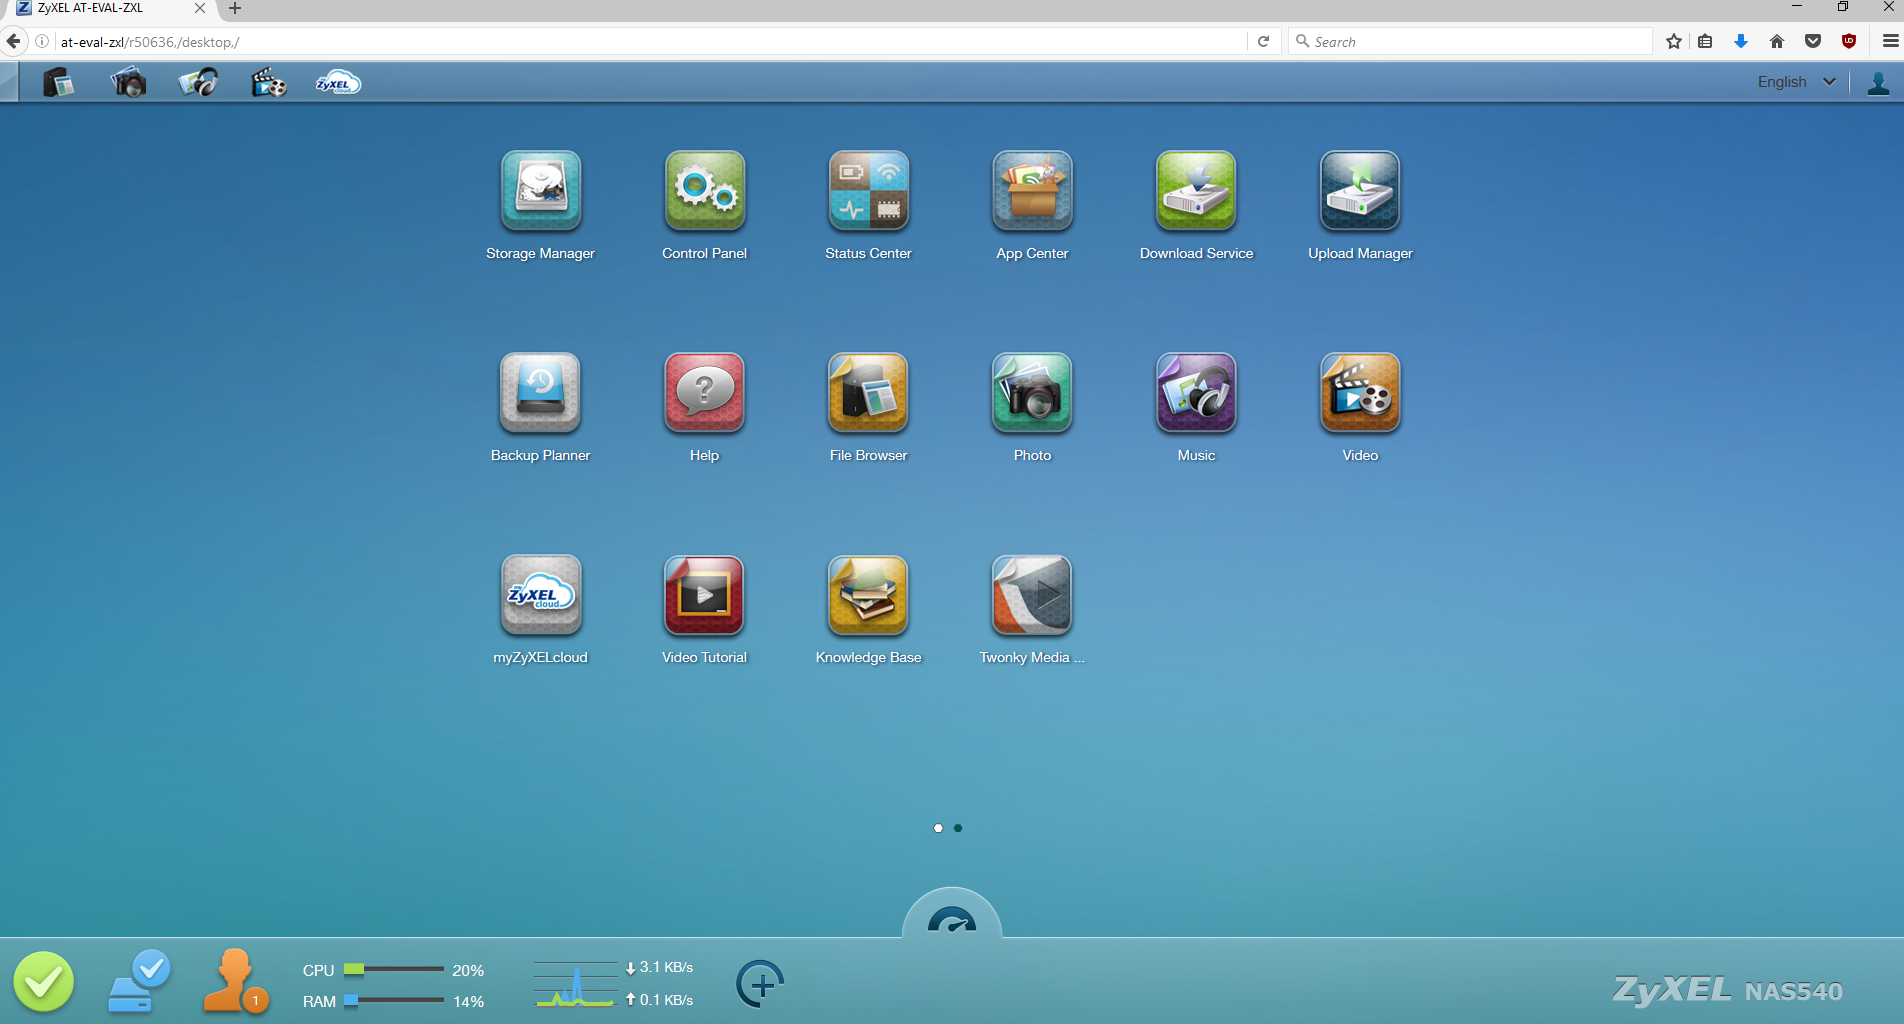
In terms of UI, ZyXEL adopts the app-style approach with a desktop back-end, similar to QNAP and Asustor. However, there is also limited widget support in the bar at the bottom. The older firmware versions had an advanced section with a tree-view of the available options (visible in the gallery above), but that seems to be missing in the newer versions. That said, recent firmware versions have hugely improved the number of available features, and the UI has been modified accordingly.
Since the advanced settings page seems to have been done away with, a search facility (similar to QNAP's or Synology's) would be very welcome in the front page of the browser UI.


103 Comments
View All Comments
cdillon - Monday, November 14, 2016 - link
I meant to say "data and metadata check for ZFS" above, because it does both by default. You can turn off data checksums in ZFS just as easily as you can change the checksum algorithm, but can never turn off metadata checksums. ZFS will also never store less than 2 copies of all metadata (optionally more), giving you built-in redundancy in that respect, even in single-disk setups. This is one of several reasons that ZFS doesn't have and doesn't need a "fsck" utility, because the filesystem integrity is baked in to the design.tuxRoller - Thursday, November 17, 2016 - link
Btrfs has actually supported sha256...TWICE. The first time was back during early btrfs development and then they removed it because of how slow it was. It was submitted in 2014 by a oracle dev but not merged because they want a general solution, and, potentially, much more flexibility (using the crypto API instead of having to maintain their implementations;per file hash algorithm (so, some files could use a stronger hash than others); different hash functions for data and metadata (metadata is limited to 256 while data doesn't really have a limit))It's been percolating its way towards the kernel but it's not seen as a huge priority because: 1) there've been very few incidences of corrupt blocks passing ("crc32's error rate works out to one false positive per dozen megabytes *of random errors*--- that's a lot of errors, even talking into consideration CERN's data), 2) they already use sha256 for dedup (both in and out of band, though groundwork has been laid to make that pluggable as well).
linux-btrfs@vger.kernel.org/msg39109.html" target="_blank" rel="nofollow">https://www.mail-archive.com/linux-btrfs@vger.kern...
linux-btrfs@vger.kernel.org/msg39162.html" target="_blank" rel="nofollow">https://www.mail-archive.com/linux-btrfs@vger.kern...
linux-btrfs@vger.kernel.org/msg39205.html" target="_blank" rel="nofollow">https://www.mail-archive.com/linux-btrfs@vger.kern...
linux-btrfs@vger.kernel.org/msg50364.html" target="_blank" rel="nofollow">https://www.mail-archive.com/linux-btrfs@vger.kern...
ghostbit - Monday, November 14, 2016 - link
Nah. I am very happy with the Web interface and iOS apps Synology offers along with a sleek and small low-power chassis.But I guess I should also be ashamed I am not running a desktop with pfSense as a router as well?
dave_the_nerd - Monday, November 14, 2016 - link
Aside from the pfsense / FreeNAS issue - if you're using old desktop hardware as a server, yes, you should be ashamed. :-PIf you are using a prebuilt distro like FreeNAS instead of rolling your own distro, you should also be ashamed. Or something.
MrCrispy - Monday, November 14, 2016 - link
ZFS is expensive and hard. Can't mix and match drives, RAM hog, to expand a vdev you need to upgrade all disks, needs ECC ram, keeps all disks spinning, will slow down as you near capacity.The ZFS hype needs to stop. Its not at all suitable for a home user NAS, its meant for data centers.
bsd228 - Tuesday, November 15, 2016 - link
some of us don't see a difference, Crispy. I value my data as much as my datacenters' data.doggface - Tuesday, November 15, 2016 - link
Pfft. RAID is dead. Any decent array these days, is likely to get data corruption from hw raid.ZFS is rock solid. Also, if for some reason your OS/COTS solution dies your data is at significant risk of death. ZFS datasets are kept locally and you can rebuild the dataset regardless of the hardware.
eldakka - Wednesday, November 16, 2016 - link
RAID is dead? Huh?Sure, you can use ZFS without RAID, but that doesn't give you any hardware failure data protection.
I've rarely seen someone not use ZFS in some sort of RAID arrangement:
ZFS RAIDZ = RAID5
ZFS RAIDZ2 = RAID6
Software RAID (ZFS RAIDZ, RAIDZ2 and others) is still RAID.
doggface - Wednesday, November 16, 2016 - link
Ok. You got me, yes, it is uses an array of disks. Let me be more specific, RAID5 is a risk not worth taking. The reason they call it RAIDZ and RAIDZ2 is because they are significantly different to normal raid 5/6. Any RAID5 array that is over 12tb total size (not pool size) is at a very high risk of corruption as soon as a disk dies, its not conjecture - it is math. ZFS mitigates the risks inherent in a system designed decades ago, and is a far superior option for massive and small deployments.eldakka - Friday, November 25, 2016 - link
OK, then let me be more clear.RAID = Redundant Array of Inexpensive Disks.
ANY technology that uses multiple disks and incorporates some level of redundancy such that the ARRAY spread across MULTIPLE DISKS that can withstand the failure of 1 or more of those disks (you know, REDUNDANCY) IS a RAID array. Whether it's in software or hardware, whether they are fixed size stripes or variable sized (ZFS uses variable stripe sizes so it can optimize the size of the striping to each individual file) stripes, whether it uses stripes or separate ECC disks or complete mirrors, it is ALL a subset of the RAID paradigm.
ZFS RAIDz, 2z etc are RAID arrays. Their implementation of adaptive striping sizes per file is a significant enhancement over standard RAID5 and 6 and so on, but it is just that, an enhancement of, or more sophisticated implementation of, RAID.