The ASUS X99-E-10G WS Motherboard Review: 10GBase-T Networking with Intel’s X550-AT2
by Ian Cutress on November 7, 2016 9:00 AM EST- Posted in
- Motherboards
- Intel
- Asus
- 10G Ethernet
- X99
- 10GBase-T
- X99-E-10G WS
- X550
- X550-AT2
ASUS X99-E-10G WS BIOS
Part of this BIOS overview mirrors that of our ASUS X99-A review and recent 100-series reviews due to the extreme similarity in options, aesthetics and features.
The ASUS BIOS for X99 is on parity with Z170, given the unified nature of the brand message. The main difference will be catering for the X99 specific features, such as eight DIMMs and the dual AHCI controllers in the chipset. While I would assume that very few users are upgrading from Z170 to X99, those that coming from the 9-series or 8-series motherboards should feel at home as the ASUS BIOS at this stage is a continual evolution, rather than jumping from one interface to another. Users coming from the latest X79 builds will notice a slight change towards something more user friendly. First screen up is the EZ mode:
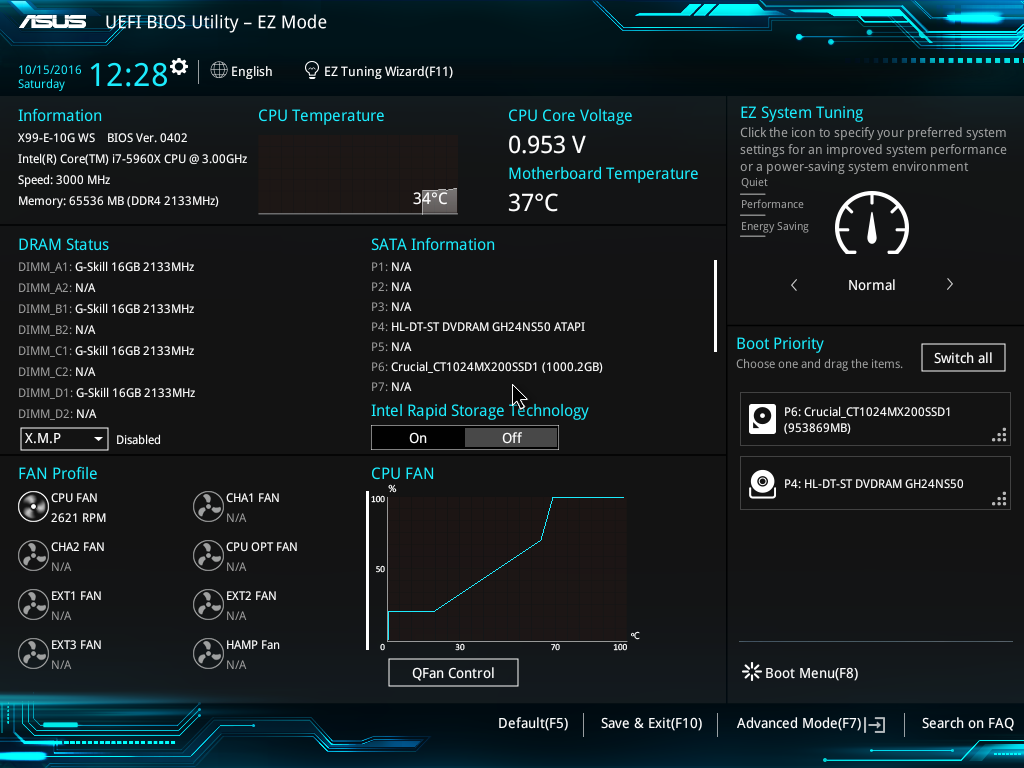
Due to the increased info placed in this first screen, the font size has been reduced slightly, especially when detailing all the DRAM and SATA slots ports that are connected. In this front screen we are told the name of the motherboard, the CPU used, the speed of the CPU, where the DRAM is populated and how much, only with the speed and options for XMP. The CPU and motherboard temperatures are here, with the CPU getting a graph in real time showing how the temperature changes. Voltages and fan speeds are here as well, with a point-to-point graph showing the fan profile of the CPU fan. On the right hand size is an EZ System Tuning icon for performance or energy saving modes as well as a Boot Priority list. On the top of the screen is an option for the EZ Tuning Wizard.
For the fan profiles, selecting QFan Control allows the user to adjust the three point fan gradient:
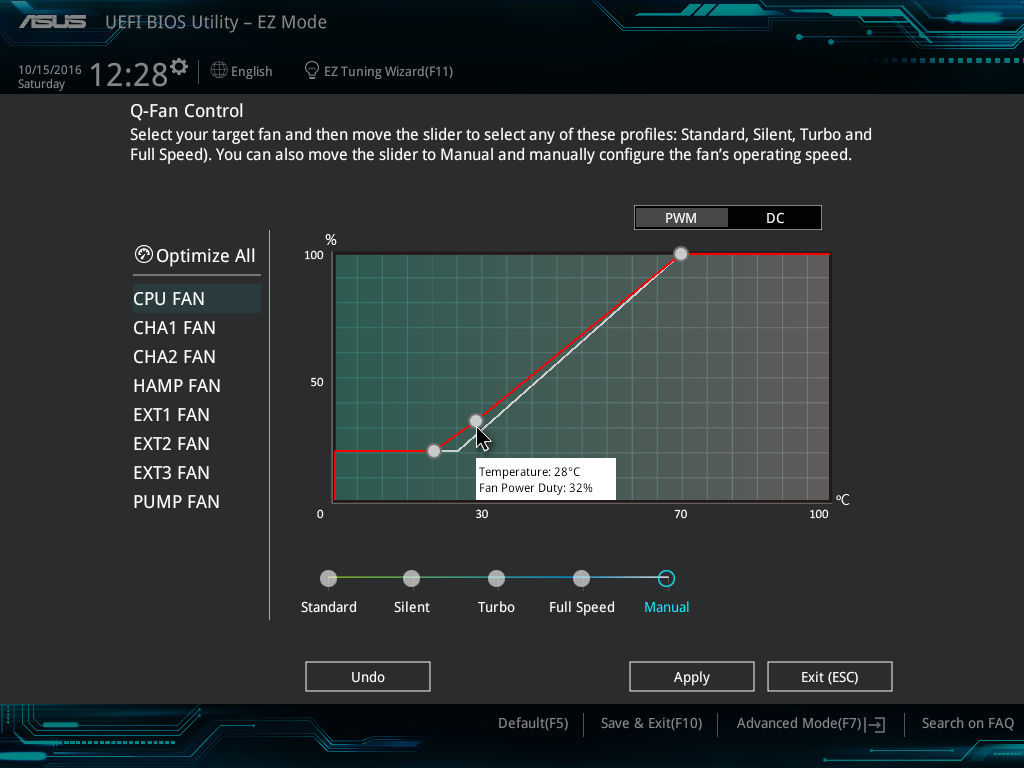
Each of the fan headers can be controlled by in either DC or PWM mode, with several presets at the bottom and a choice of fan headers on the right. This is ASUS’ most interactive BIOS fan control system within a BIOS to date, however I would suggest a an add-ons: text showing the current fan speed of the fan selected along with the temperature associated with that fan. There is an optimize all feature, which does per-fan testing to find the right fan profiles for each.
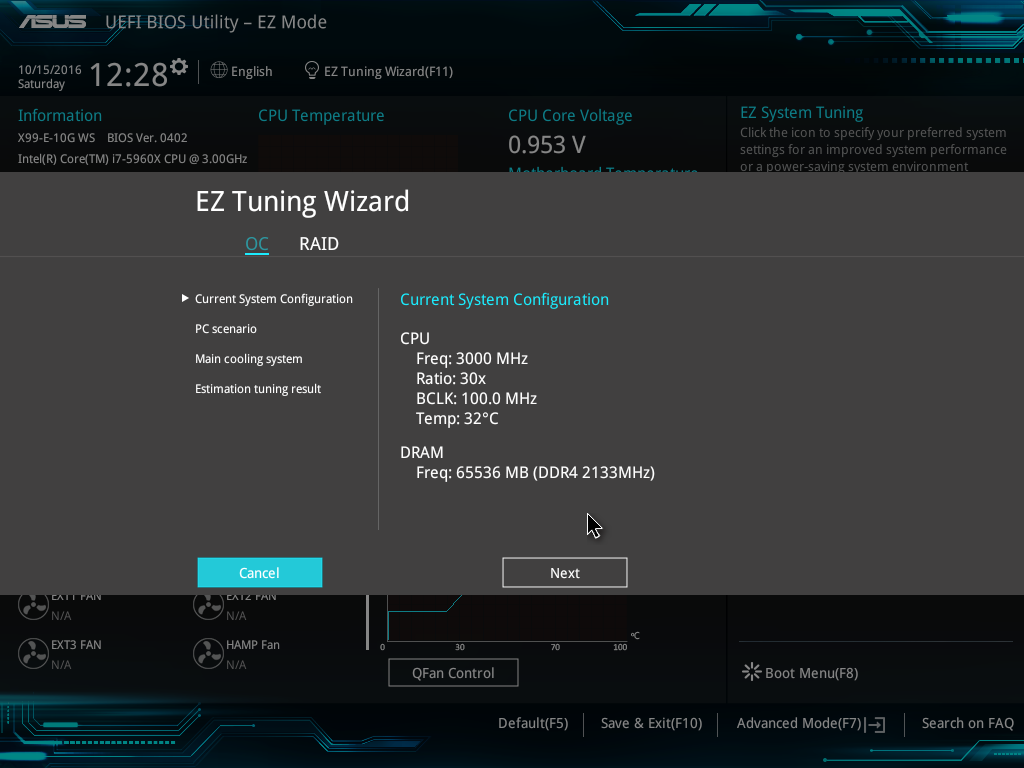
The EZ Tuning Wizard at the top is the new auto tuning mechanism in the BIOS to apply overclocks. As with other ASUS chipsets, this system detects the current outlay, asks what cooling is being used and what the system is for, and then goes back into its internal database to suggest an overclock. This overclock can then be applied automatically:
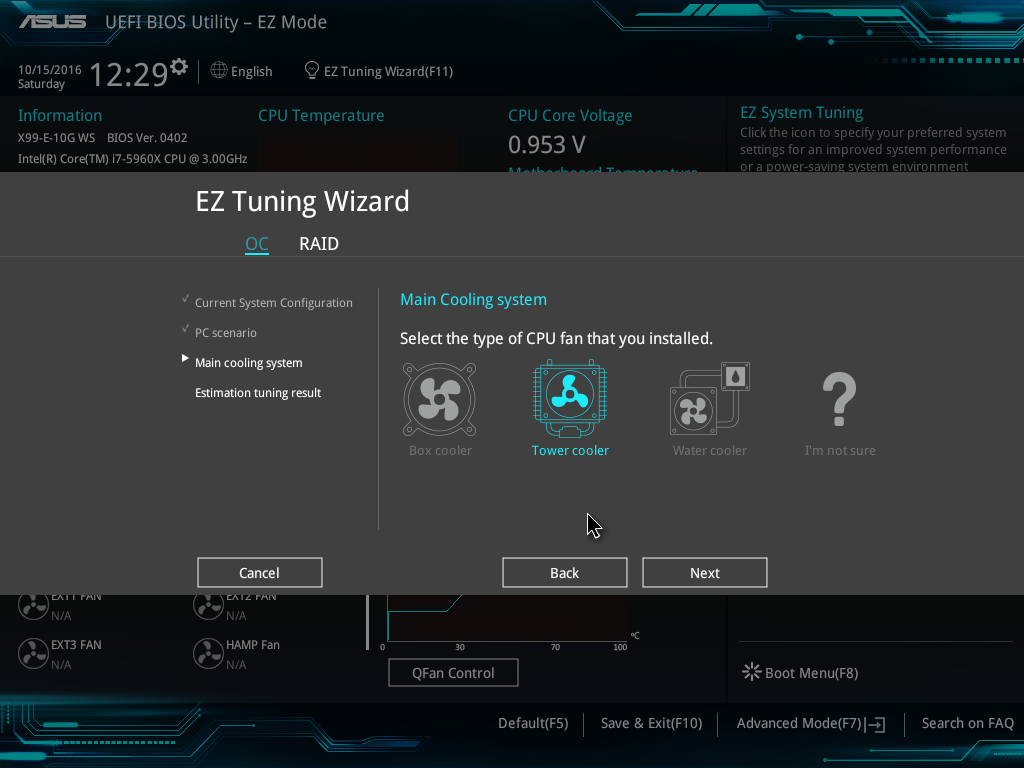
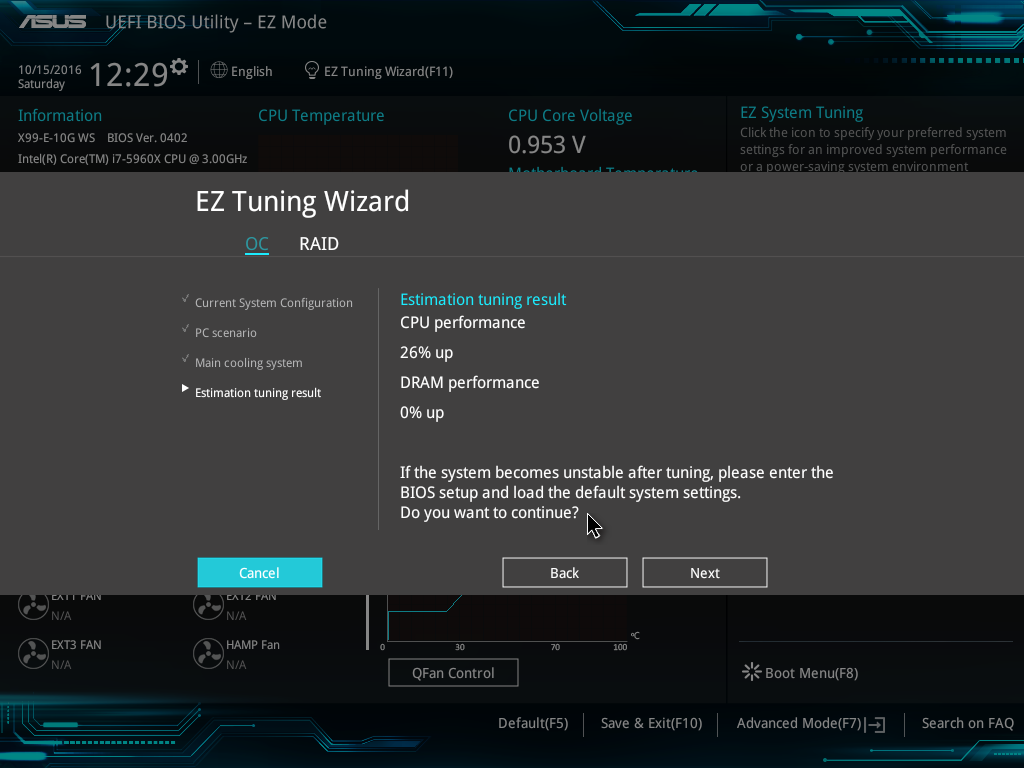
So here the system is suggesting a 26% overclock, from 3.0 GHz to 3.8 GHz when I selected that I had tower cooling. The reason why the system asks about different types of intended use should come down to single core turbo modes – users interested more in day-to-day responsiveness will want a high single-core turbo, whereas gamers and media editors will want all the cores boosted to the maximum.
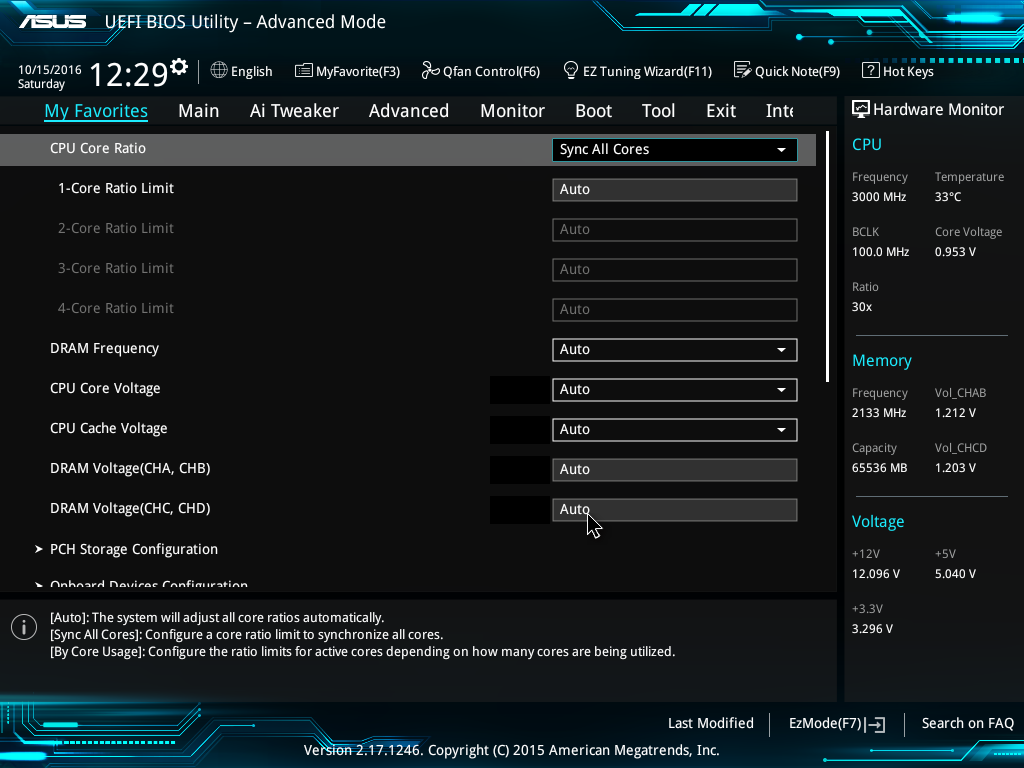
Alongside the EZ Mode, the ASUS BIOS offers its characteristic Advanced Mode:

Options here are a little more in-depth and clinical, although ASUS has taken on board suggestions and added both an information section at the bottom and a list of information on the right hand side telling the user what the current state is. Users jumping into X99 from very old systems might be interested in the My Favorites menu, which allows users to select certain options from the BIOS for a custom menu interface or use ASUS’ defaults for easier manual overclocking.
My Favorites is aimed more at overclockers than anything else, allowing these enthusiasts access to frequent settings while bypassing others that are present but might not make a difference in line with the overclocking skill of the individual.

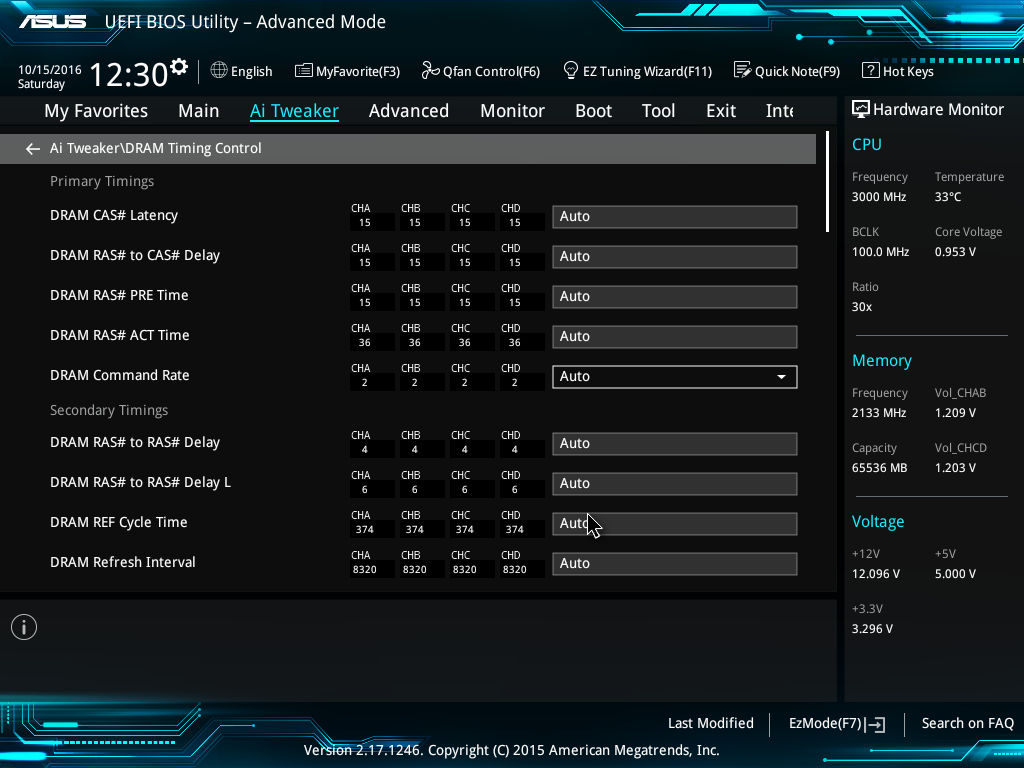
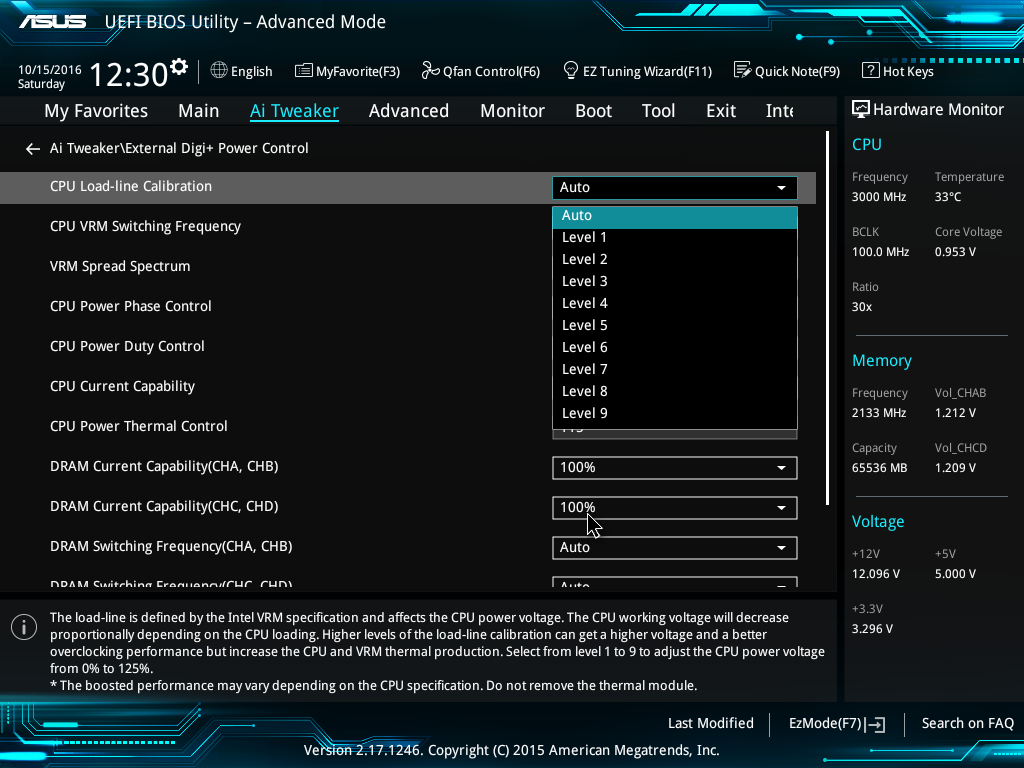
ASUS still keeps the full-fat overclocking menu on hand, giving a full set of options for CPU, DRAM, DIGI+ Power, voltages and power management.
The Advanced Menu gives the usual array of CPU, PCH and Onboard Devices set of configuration menus. A few changes from previous platforms are worth mentioning, such as individual core selection for overclockers:

Because not all cores are created equal, the new topology allows users to select specific cores for frequency records.
The onboard devices configuration menu gives the option for adjusting the bandwidth between the controllers onboard that share data paths:
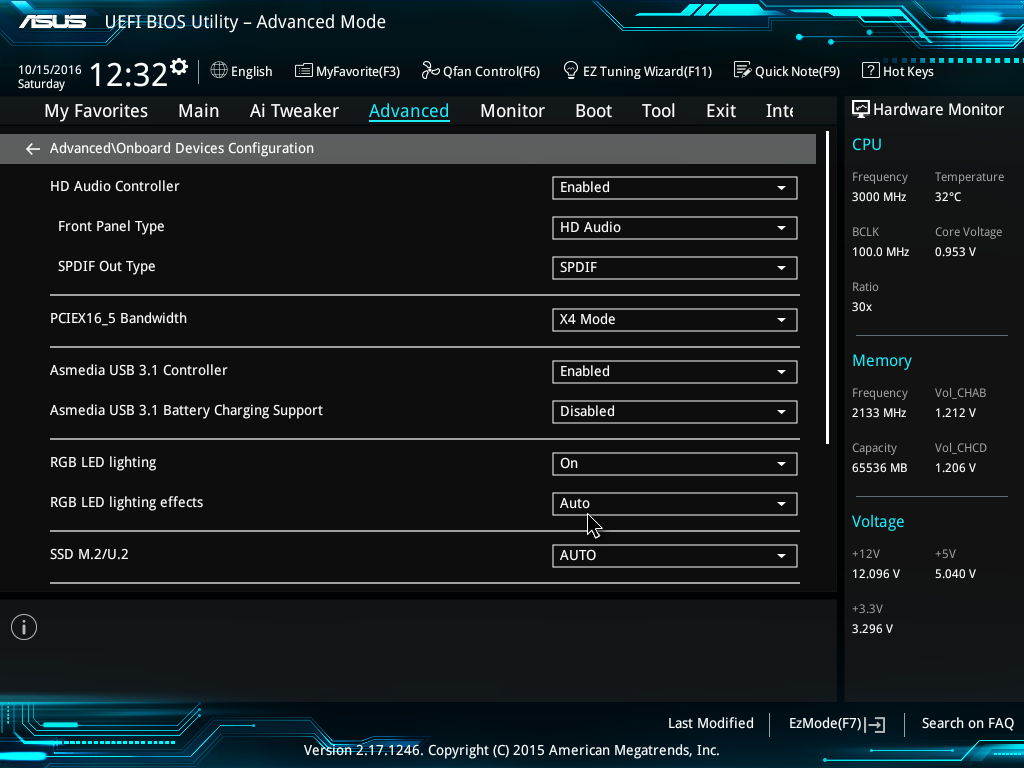
This is particularly pertinent if a user wants to manually switch between M.2 and U.2, or adjust some of the PCIe bandwidth.
The Monitor tab gives all the temperature and fan speed data, along with options for the fan headers in a less-interactive but classic implementation:
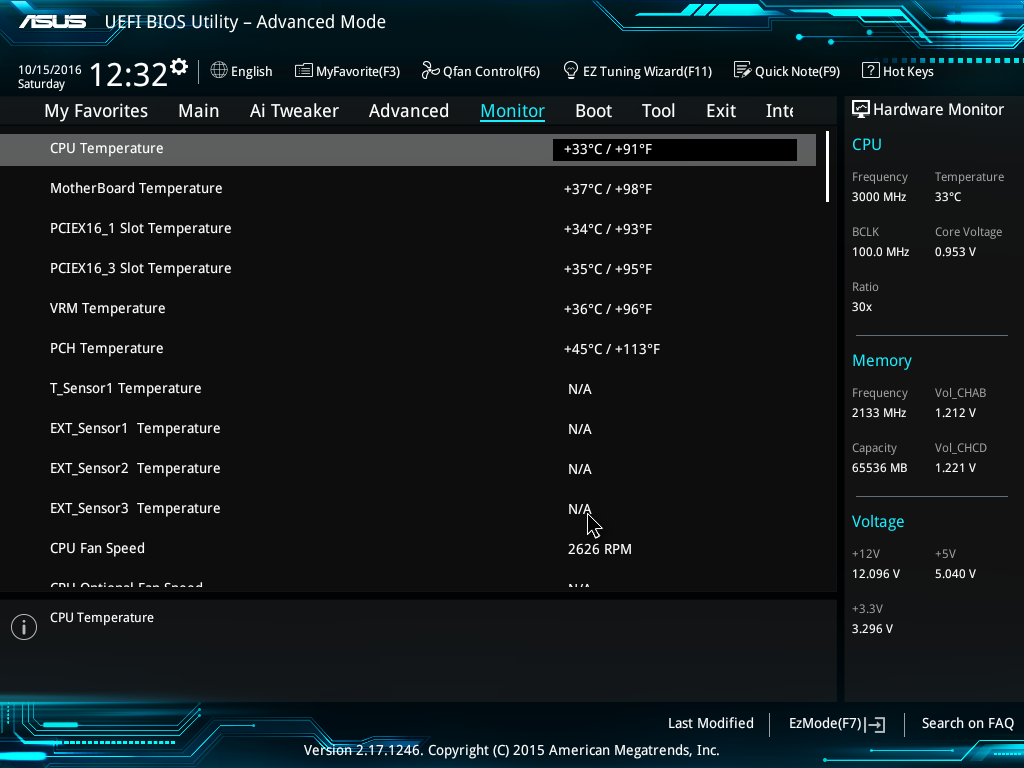
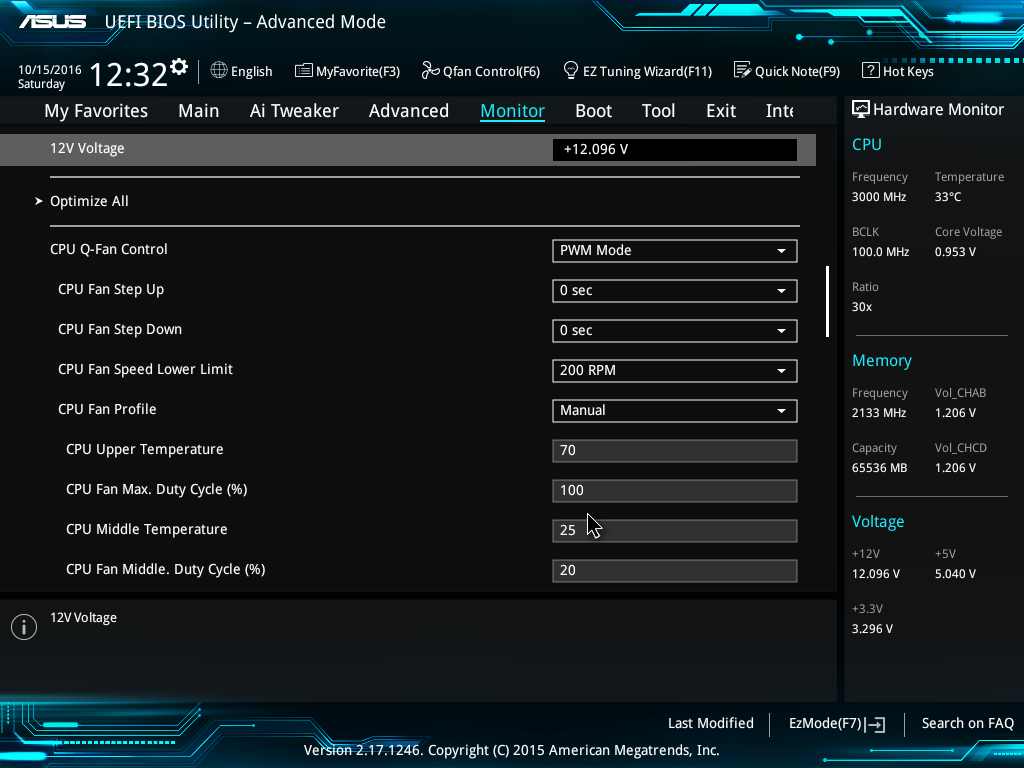
Users can select different modes for each header (PWM or DC), different preset profiles (Standard, Silent, Turbo), adjust which temperature sensor is relevant or adjust a two point gradient manually. The QFan Tuning option provides insight into the workings of each fan by detecting the low-end dead points.
The rest of the BIOS is the standard array of booting options, fast boot options, BIOS flashing tools, OC profiles and SPD information. There is one last feature to mention, the GPU Post screen:
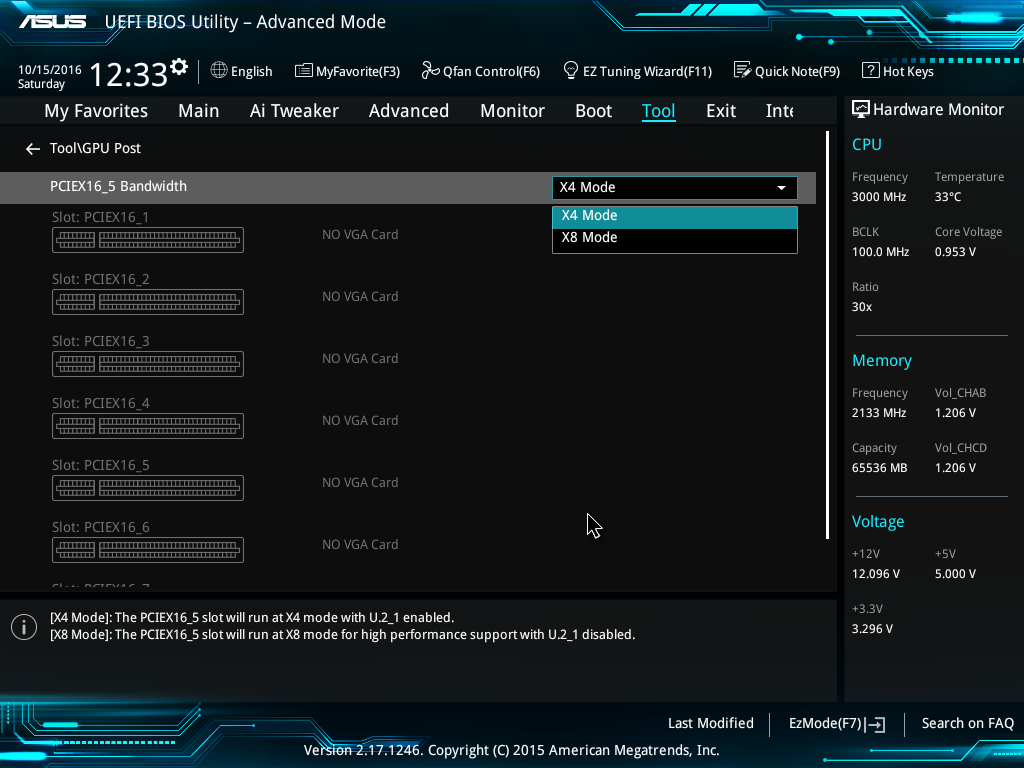
This shows each of the PCIe slots, what is installed and at what speed they are running. Interestingly on our test BIOS it didn’t detect the R7 240 graphics card.
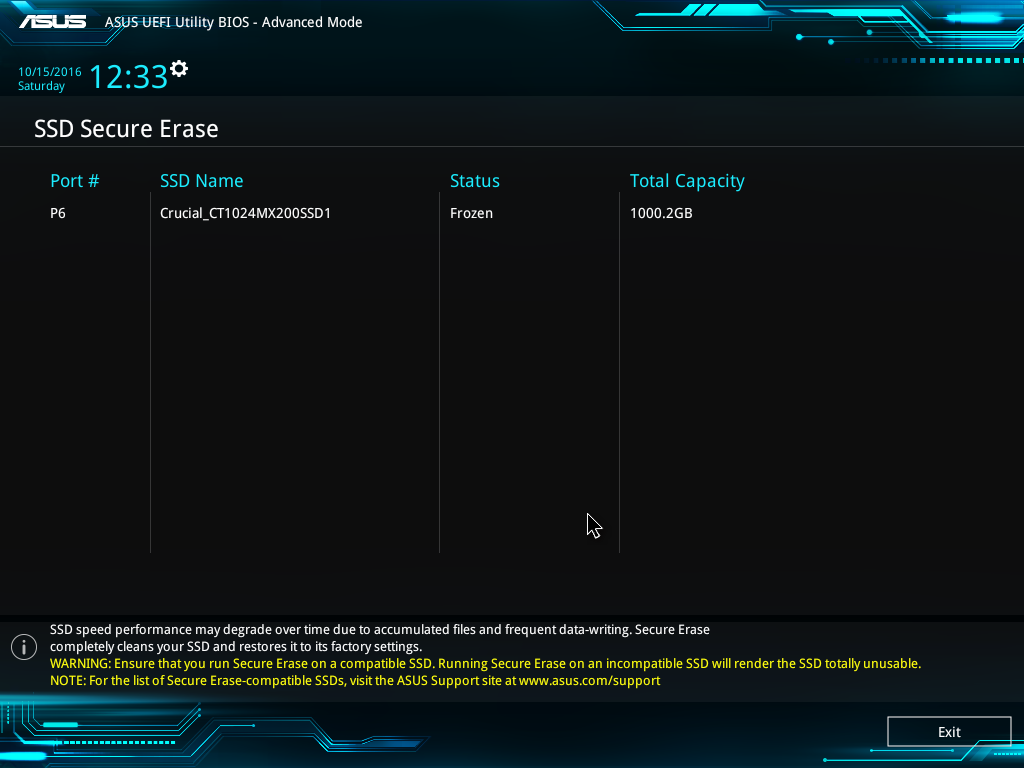
Secure Erase, to restore SSDs to their factory state, is now part of the high-end channel line, previously being an ROG exclusive feature.
There is one aspect where ASUS is lagging behind the other manufacturers, although GPU Post is part of the way there. ASRock and MSI now implement a ‘Board Explorer’ type function that shows a 2D representation of the motherboard and tells the user what is installed at each point. ASUS should think about this going forward.


63 Comments
View All Comments
kgardas - Tuesday, November 8, 2016 - link
Looks really nice, ~6W for 10Gbit is good and very low on todays standard. The only drawback in comparison with Intel is PCIe 2.0 support only, so for 10Gbit you need 4 PCIe lanes. Otherwise I'm looking forward to see this card here...Notmyusualid - Friday, December 2, 2016 - link
@ kgardas: You should have seen our 10G DWDM telecom equipment, back in late 1998... more than 6W I can tell you :) , in fact we couldn't get it to work without forced air, each transceiver taking up a whole rack shelf, and we could only fit three shelves / rack space. The electrical complexity / number of boards to make it work was astounding.Incredible to see it done on a single card now, and more often now, even multiples of, on a single card.
So yes, tech moves on...
Lolimaster - Tuesday, November 8, 2016 - link
I think you should dive the PSU's used.Only a high wattage for multigpu test (850w+)
500-650w Titanium for any cpu + single gpu / APU-intel IGP powered systems
ads295 - Wednesday, November 9, 2016 - link
You know how those clickbait websites show cleavage or a$$?The thumbnail for this article led me to open it in the same vein. :O
Breit - Thursday, November 10, 2016 - link
Thanks for this review Ian, very informative.While reading the comments here, the single feature that seems to attract the most attention is the inclusion of 10G Ethernet. As it seems rather hard to implement a good performing 10G network compared to 1G, maybe an AnandTech-style in-depth article about 10G networking in general would be appreciated by the readers of this site. Just a suggestion.
At least I would appreciate it... ;)
JlHADJOE - Friday, November 11, 2016 - link
Didn't think I'd see the day when an ASUS motherboard is both cheaper and has more features than it's ASRock counterpart.Notmyusualid - Friday, December 2, 2016 - link
More features?I don't see a SATA DOM port.
It is missing 2x 1GB Ethernet ports.
It is missing 2 SATA ports (12 vs 10)
It has only 10-phase power solution, vs 12 phase.
It has no USB 2.0 ports did I read correctly?
It has no fan on the 10G heatsink also, which allows the case temp to equalize with outside temps for some time after shutdown, to avoid condonsation building up in the case.
Can you mount the same range of M.2 SSDs in this? I see only two mounting holes, mine has four...
Board-mounted USB port, for DRM-related stick, or whatever you need connecting / secured on the INSIDE of a case.
I also believe I have LAN LED headers to put network activity on the front panel, as one does with their hard disks.
So tell me if I'm wrong, please.
One thing I'll say, I do find the 6-pin board power connector much more elegant than my 4-pin Molex connector. And I cannot STAND my anodized blue... the black on the ASUS is also more elegant.
Anybody who needs their pcie slots lit, to choose the right combo shouldn't be allowed to buy it..
Notmyusualid - Friday, December 2, 2016 - link
also @ JihadjoeMine has TB header too. Almost forgot about that...
Hixbot - Tuesday, November 22, 2016 - link
Don't understand the move to 10G copper. We should be transitioning towards 10G fiber. Copper can't carry 10G a practical distance. 55 meters for unshielded Cat 6 cable. That't not very far. 100 meters for shielded Cat 6, thats more reasonable. but has anyone priced Cat 6 shielded cable? It's very expensive, and good luck terminating the shielded RJ45 yourself to Cat 6 standards. In my workplace, we've had to order pre-terminated lengths of shielded Cat 6. Whenever we use fiber it's easier to terminate, costs are much cheaper, and distance is practically unlimited.So what is with the move to 10G copper?
Notmyusualid - Friday, December 2, 2016 - link
As an owner of the asrock, I too would have preferred SFP sockets.But SMBs CAN afford $700 for a switch, and many of them have little fiber. My 2c.