VIA's KT133A - Overclocking w/ the 133MHz FSB: The "Issue"
by Mike Andrawes on March 20, 2001 2:09 AM EST- Posted in
- Guides
The Ancient art of Bridge Cutting
We just mentioned that with certain CPUs, such as the 1.1GHz Athlon, all of the L6 bridges are closed at the fab meaning that it is necessary that you cut at least one of the four bridges. But what's the best way to go about doing so? Unfortunately there is no easy way to approach this task, however we have been able to successfully break the L6 bridges on a CPU in the AnandTech lab. Want to know how we did it? Keep on reading but we must warn you, if you wish to repeat this experiment we take no responsibility for anything that may happen to your CPU.
The only tool required for the job is a $20 electric engraving tool that can be found at most hardware stores (see www.dremel.com for more information). We found that this particular tool did the job relatively well, but don't get fooled by that statement. It's still a daunting task.
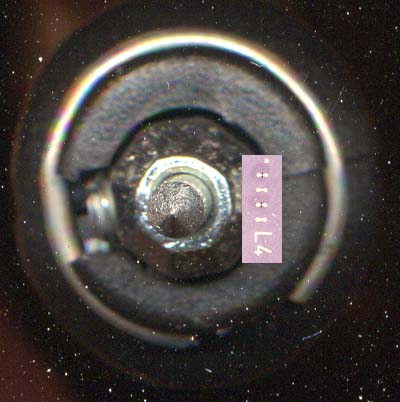
This brings up the next issue, if you look at the picture below, we have the tip of this electric engraver scanned in at the same resolution as the L4 bridges off of an Athlon CPU. Looking at the tip of the dremel, and the small section of the bridge that must be cut, this is indeed going to be a difficult task.
Trying to break the bridge by just making contact with the electric engraver proved to be one of the less efficient ways of approaching this task. Instead, we set the engraver to its highest speed setting on the dial, and ran it across the area where we wanted to break the bridge. This helped to wear down the bridges and make the process of breaking the bridge much easier.
Then, setting the engraver to a lower speed setting (at the highest speed setting it is difficult to keep steady, this helps somewhat), we lightly tapped the engraver's tip against the bridge we wanted broken until the bridge did break.
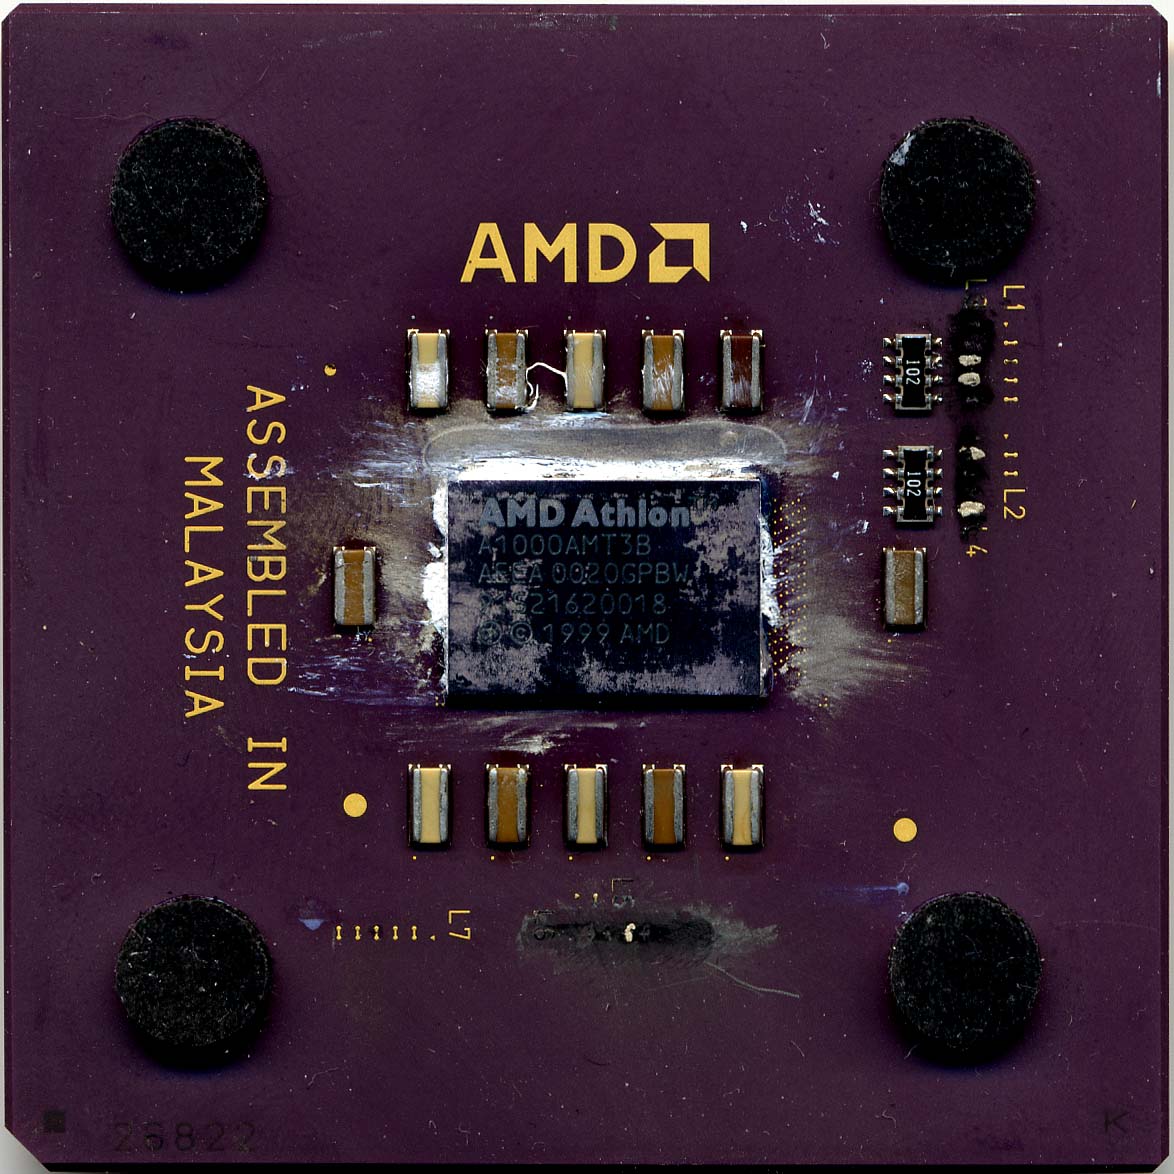
The black areas around the L3, L4 and L6 bridges are where the electric engraver was used. For this particular project, we broke all of the L3, L4 and L6 bridges and used conductive ink to connect the ones we needed, thereby making this Athlon 1GHz processor a 750MHz processor that would work at 7.5 x 133MHz (1GHz) on any KT133A motherboard. We actually needed to make this CPU for an upcoming chipset comparison we are working on, more on that later though...
This process requires a lot of patience and you do run the risk of actually damaging the contacts on both sides of the bridge, thus rendering the bridge useless so we do caution you if you wish to proceed using this method: do so at your own risk.


0 Comments
View All Comments