990FX Motherboard Roundup with Thuban and Bulldozer – A Second Wind for ASUS, Gigabyte, MSI and Biostar
by Ian Cutress on April 5, 2012 11:00 AM ESTGigabyte 990FXA-UD5 BIOS
With the advent of all singing and all dancing graphical BIOS interfaces and UEFI implementations, Gigabyte was slow off the mark. Their first iterations were observed in X79 - so while their main competitors were enjoying the highlife since P67 and Sandy Bridge, Gigabyte was always playing catch-up. This is, as a result, also seen on their 9-series motherboards, as we have nothing more to look at than a very simple Award software implementation.
Nevertheless, this suggests that this system should be stable and rock solid, given that Gigabyte has been using it a long while and that the 9-series AMD boards are just a step up from the 8-series. Whilst navigating the BIOS, it is indeed stable and I found few issues in using it. The primary downsides however are a distinct lack of options and functionality, to which I will go into detail. But first, I would like to consider CPU voltage.
The whole backbone of a system is the power plane – the part of the motherboard that distributes the power to where it is needed and gets everything going. Using a series of FETs and other utilities, the board has to deliver a clean source of power to ensure stability of its components, and thus also the longevity. In this instance, the CPU is an excellent component requiring stable voltages to run at required speeds. Load Line Calibration is a feature on motherboards that reduces voltage drop across the processor at high loads, and to ensure that the processor has enough voltage to cope with the extra requirements. All this boils down to one issue I saw whilst running a five minute OCCT – OCCT measures the voltage of the system during its stress test, and then outputs into a graph:
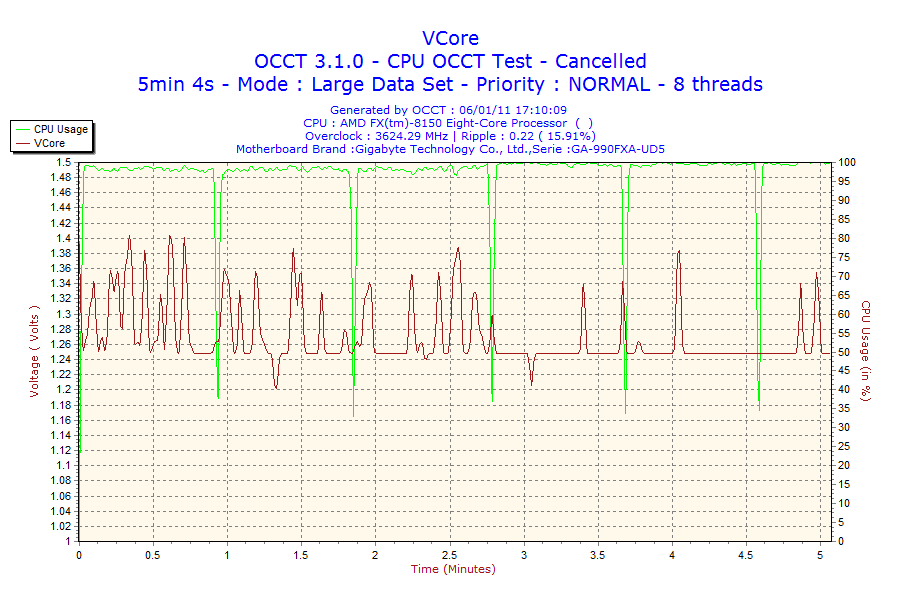
The green line shows CPU usage whilst using an FX-8150 Bulldozer processor, which is essentially 100% all the time. The red line indicates the voltage, which as shown on the graph, can vary between 1.2 volts and 1.4 volts, rippling around the 1.25 volt base line. Naturally, this is not good for stability (~16% ripple) during high load scenarios. Unfortunately I have here the 1.0 revision of this board – there has since been a minor revision (1.1 and 1.2) which changes little on the board functionality wise, but improves this ripple. This would point the finger at a fundamental design change with the power placement or its management, so it might be worth a user checking your board revision if there are issues at high load. After this review, where possible, CPU voltage ripple testing will become a more prominent feature in our AnandTech testing.
As for the actual BIOS interface which users can see and manipulate, welcome back to the era of blue screens and white writing:
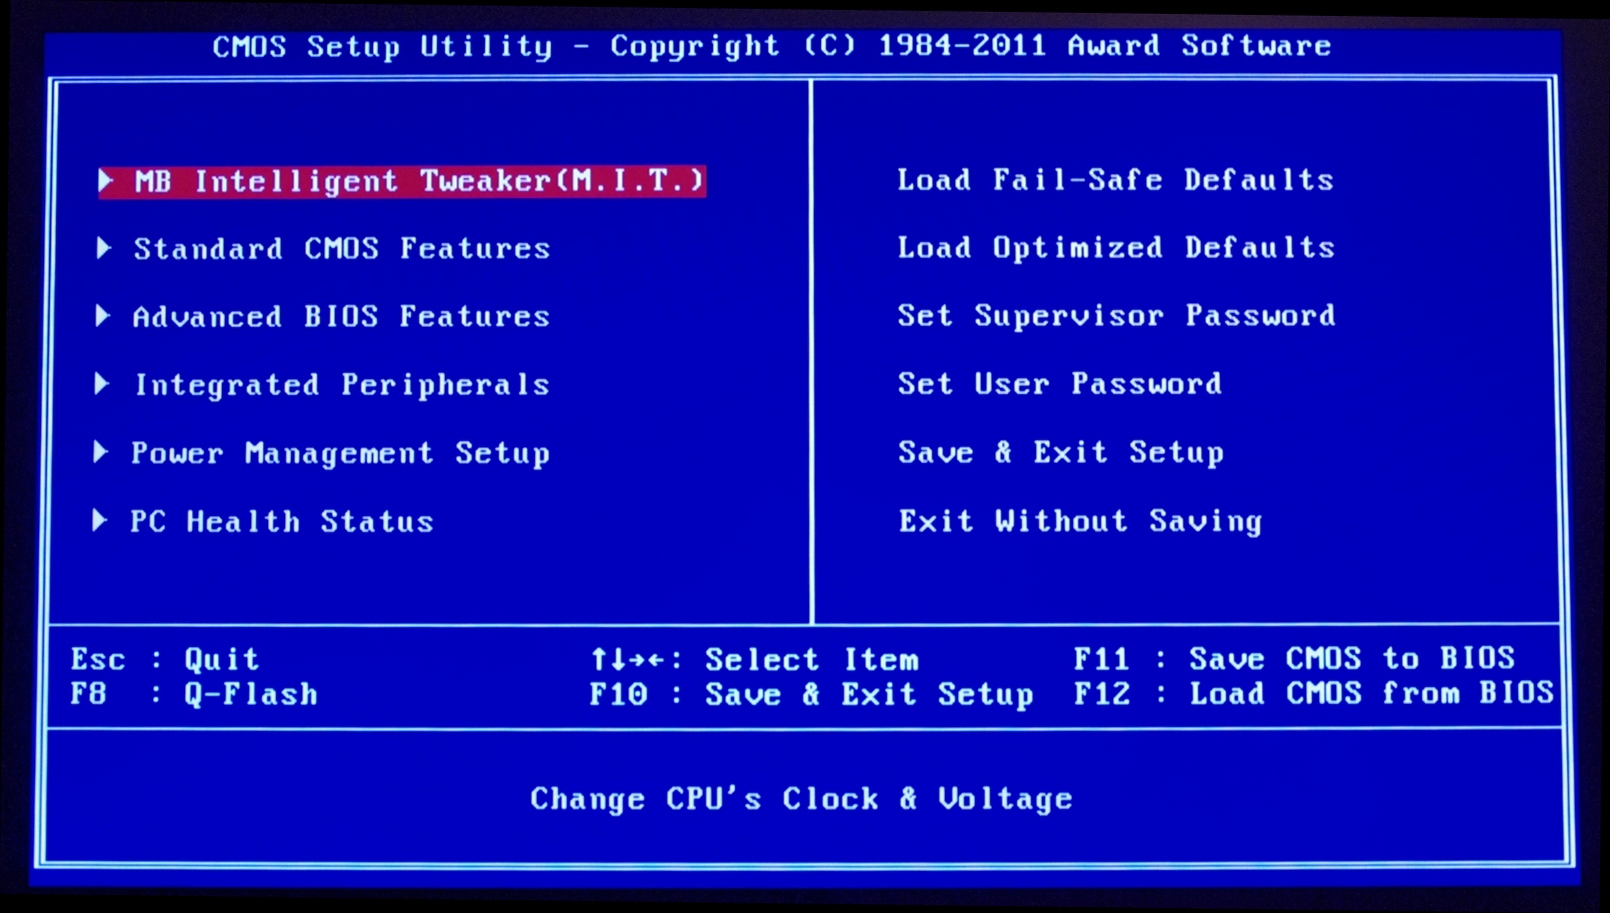
The limitations of this system stem from the base on which it is built – these types of BIOSes are limited in terms of applicability and features. Almost everything comes under the three important headers – MB Intelligent Tweaker, Advanced BIOS Features and Integrated Peripherals, where options are bunched together.
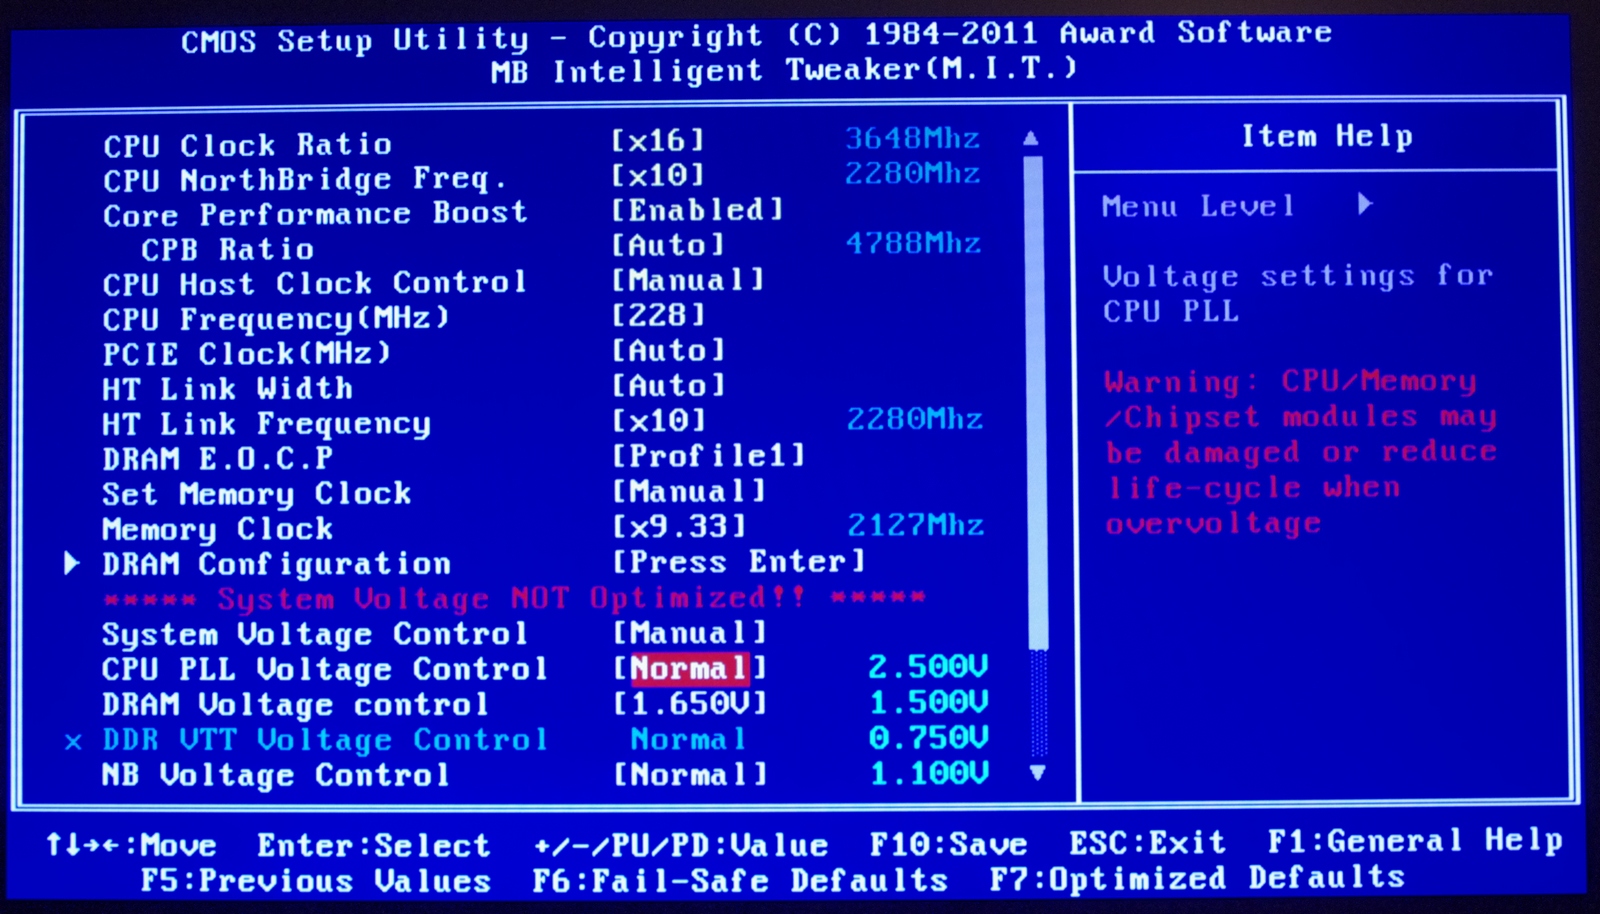
The image above shows one of my tweaked overclock setups, where we have access to the entire main overclock features for the motherboard. I actually found this easy to use and adjust all the options, although it is worth noting that for the voltages, the +/- buttons were configured the wrong way – pressing + would cause it to raise up one option, which then translated into a negative change in voltage. Also, in an effort to support XMP on AMD boards, we have EOCP which allows users to select memory profiles, but it may adjust the CPU multiplier/frequency to achieve that result.

Memory overclocking works right if you have a set of memory with good JEDEC values installed – selecting the memory clock will apply the appropriate divider and sub-timings when they are on auto. When they are not on auto, it gets a little tricky. Rather than have each sub timing as a separate auto switch, it is either all auto or not all auto. This means that if a user wants to change one sub timing, they have to make sure they know all the rest as well in order to ensure stability. Unfortunately, the fine details of all the sub timings are not often made to consumers.
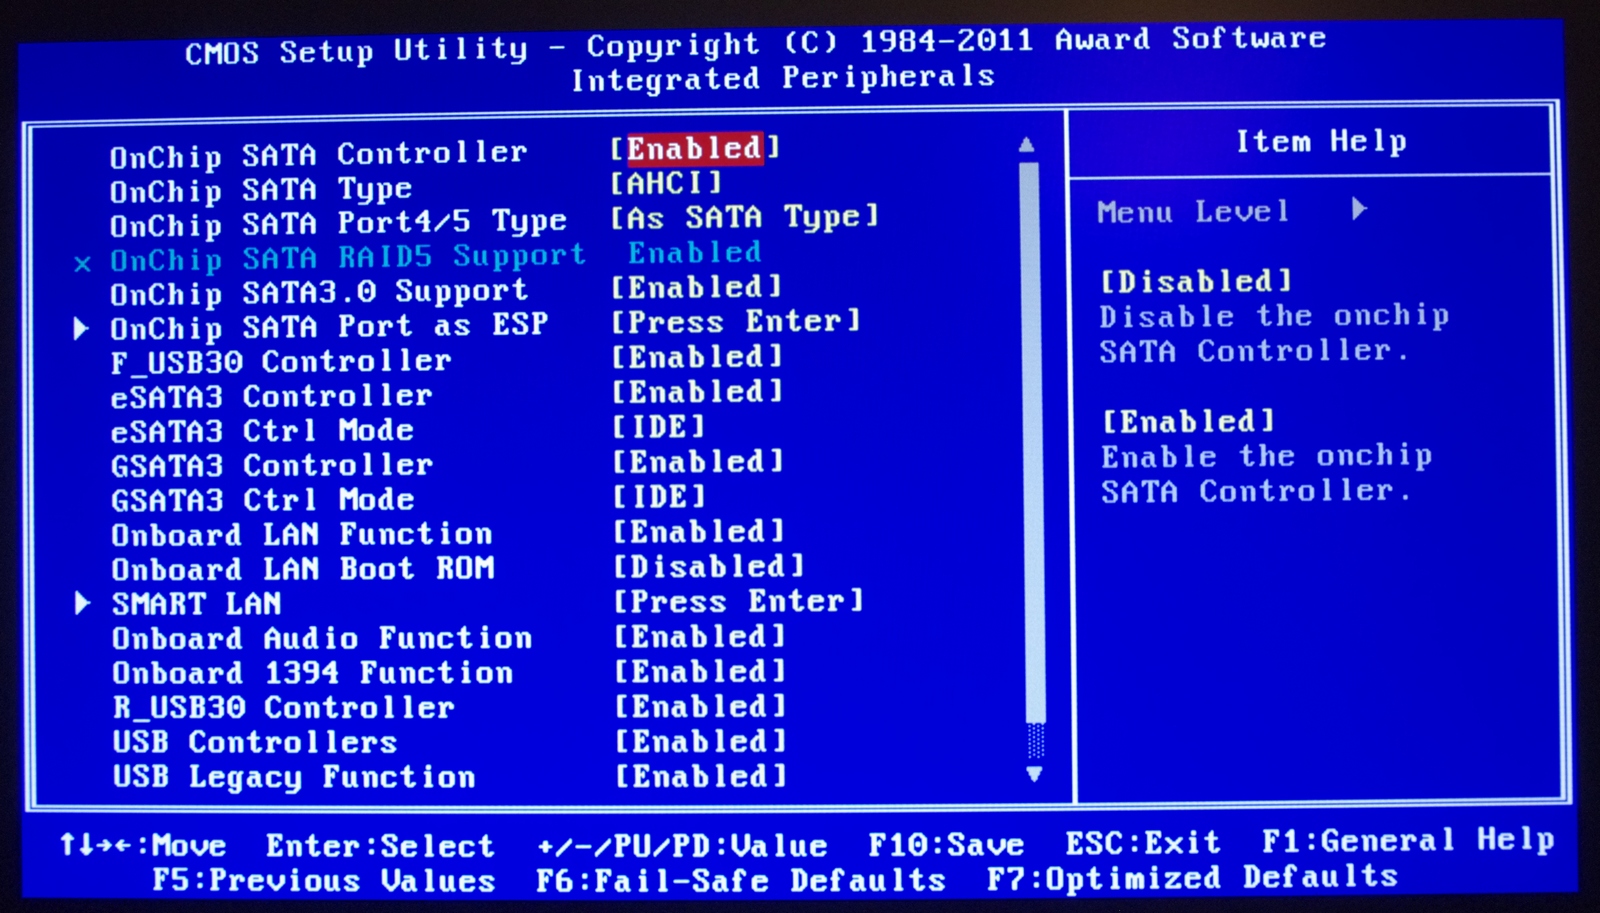
As we are on the 990FX platform, by default, the SATA type for the ports is listed as IDE. Users of SSDs and modern HDDs may wish to switch this to AHCI to get the best benefits from their products.


Overclocking
Similar to the previous reviews, I am testing both a hex-core X6-1100T (Thuban) and octo-‘core’ FX-8150 (Bulldozer) in three overclocked scenarios of highest bus frequency, standard bus frequency but high multiplier, and then a mix of the two. Auto overclock settings were also tested.
Thuban X6-1100T Overclocking
For automatic overclocking, the only options here are to utilize Gigabyte’s software in the OS – EasyTune6. Normally, and as seen on the Bulldozer processor, the software offers three levels of overclock with pre-defined settings. There was no such luck with the Thuban processor, meaning the only option available was an ‘Easy Boost’ setting. When clicked, this option is supposed to stress test the system while increasing the overall frequency of the system. In reality, I did see it stressed the system that much, and slowly raised the base frequency by 1 MHz per minute. This led to a slow overclock scenario! Twice in a row, the software crashed after 4 MHz, closing the EasyTune software. On the third attempt, I got a little further – when the base frequency has been raised to ~15MHz, the system increases the multiplier by 0.5x, then starts again at 200 MHz base frequency. In the end, the application crashed again at 17.5x and 212 MHz, giving 3710 MHz. This is a long and arduous way to achieve an overclock for just clicking an ‘auto’ setting, and pales in comparison to other comparative systems that dynamically determine decent overclocks on a system.
In terms of manual overclocking, there is a small hitch with the Gigabyte board. The voltage for the CPU is given as an offset, and thus we cannot set it at an exact value similar to our other testing. Thus it was set to the nearest available value (~1.4 volts) to provide comparison. When this was adjusted in EasyTune6 in the OS (either voltage or base frequency), the OS would blue screen, meaning tweaking via the OS on Thuban processors is not appropriate with the CD version of ET6. Also, for all the overclocks, the HyperTransport Link and Northbridge Link frequencies were adjusted via their multipliers to remain approximately 2000 MHz.
a) High Base Frequency: To start, as with the other boards, the CPU multiplier was lowered to 10x, and the base frequency risen until it was unstable then backed a little bit, then the multiplier was risen back up. In this case, I was able to hit 325 MHz base frequency, but this was not stable when running a Blender stress test. I had to back the base frequency back to 310 MHz to get a stable running system. At this frequency, the automatic memory sub timings were reported to be quite odd, at DDR3-1650 11-11-11-15. This last number should have been around 31, making it oddly tight. Nevertheless, at 310 MHz, the multiplier was raised back up to the maximum stable – this was at 13x, giving a total frequency of 4030 MHz. At this speed, the system was Blender stable, hitting 53ºC under full CPU load.
b) Default Frequency, Maximum Multiplier: This test, whilst reminiscent of most Sandy Bridge testing, it the easiest to perform. The system was stable up to and including the 20x multiplier, giving an overall speed of 4000 MHz. At this frequency, the CPU reported 1.456 volts at full load, and reached 53ºC maximum during the Blender stress test.
c) Combination: The best way to tackle a combination overclock is to go for a base frequency which aids your memory the most. So when running 2133 MHz memory for example, choose a memory strap and base frequency which goes for 2133 MHz easily. In this case, I went for 266 MHz base frequency, and adjusted the multiplier until it was stable. This only led to a 15x multiplier, giving 3990 MHz on the CPU (2130 MHz NB/HT). This also registered 1.456 volts at full load and 53ºC during the Blender stress test.
Bulldozer FX-8150 Overclocking
I almost became a cropper when it came to tackling the FX-8150. Normally when you replace a CPU in a motherboard, the motherboard detects it is a new CPU and sets the BIOS to default automatically. However on the 990FXA-UD5 this did not happen – it kept all my X6-1100T settings and then applied them to the FX-8150. This could have been a disaster; however I was quick to act in setting the BIOS to default before anything happened. I am surprised at this action, and am told it happens across the 990FX range. I will test on the next boards to see what happens.
Also of note is that even the F7h version of this BIOS has issues with Bulldozer processors, in terms of CPU voltages. While I was able to apply an offset to the CPU voltage, in the operating system I got a completely different set of values. CPU-Z (my normal voltage monitoring tool) was saying that although I had 1.4V set in the BIOS, only 1.28 volts were being applied in the OS. This is also different to EasyTune6’s reading. Thus for these overclocks, I had to use my own judgment when it came to applying the appropriate voltage.
For automatic overclocking, EasyTune6 actually gives a series of buttons for easy overclocks, rather than the slow system we encountered with the X6-1100T. The options are 4.0 GHz, 4.1 GHz and 4.2 GHz. These are not stellar overclocks by any means – 4.2 GHz is the turbo speed of this processor when under light loads. But 4.2 GHz all the time is not to be ignored, and EasyTune6 applied it (with a restart) without any hassle. Also of note is that with the Bulldozer processor, the ratio and base frequency can be adjusted without the computer crashing on every change (unlike the X6-1100T).
a) High Base Frequency: Given the disparity in the CPU voltage readings, we should not expect much from any of our overclocking results. With the base frequency testing, this was shown in the fact that at our ‘1.4 V’ BIOS setting, we could only hit 285 MHz with any degree of stability (tested with both Blender and PovRay). Upping the multiplier gave 285 MHz at 15x multiplier, which is 4275 MHz for a total overclock – barely above the automatic overclocking. While this led to a 63ºC CPU temperature under load in Blender, the VRM heatsinks were noticeably hot to the touch, allowing only several seconds before I had to remove a finger. Users should consider some good VRM cooling when utilizing this board.
b) Default Base Frequency, High Multiplier: Many issues were encountered in this testing. At the higher frequencies and under load, the system would trigger a clock back of the CPU multiplier to 16.5x (3.3 GHz) in order not to overheat the VRMs. As such, even at the 22x multiplier, while the CPU was approximately 65ºC during the PovRay benchmark, the CPU would fluctuate between 4.4 GHz and 3.3 GHz. This does not bode well for users inside a case and Turbo modes.
c) Combination: Using a 250 MHz base frequency, I was pushing the memory to DDR3-2000 speeds, and upping the multiplier to achieve something of a decent overclock. The highest multiplier on which success was had was 16.5x, meaning a total CPU clock of 4125 MHz. This gave a respectable 59ºC during Blender, meaning no throttling.


57 Comments
View All Comments
phys1cs - Thursday, April 5, 2012 - link
Spamming affiliate links, I see.R3MF - Friday, April 6, 2012 - link
"The third generation FX processor, codename Steamroller, is still reported (not confirmed) to use AM3+, meaning that there are still quite a few years left in this platform when taking the AMD route."If this is true then i simply cannot believe that AMD will continue on socket AM3+ without a chipset that supports PCIe 3.0!
Where, when, and what will the 1090FX chipset arrive?
SilthDraeth - Thursday, April 5, 2012 - link
This seems to be an ok roundup of AMD boards.However, how do the latest Windows 7 tweaks increase the performance of the Bulldozer? Can we get a before and after benchmark based on Win 7 and or Win 8 (beta) optimizations?
I was hoping we would get that information. Also, how does it compare to similarly priced Intel offerings?
IanCutress - Thursday, April 5, 2012 - link
Thank you for your comment. I didn't perform comparisons as Anand did a comprehensive look at the scheduling updates here:http://www.anandtech.com/show/5448/the-bulldozer-s...
(Also reviewing five boards and writing 20,000 words about them takes longer than you think!)
If there are any motherboards you would like to see in the future (or particular tests), drop me an email (ian AT anandtech.com) and I will have a look. Obviously I can't take care of every little niche test that everyone wants, otherwise we'd only get one board a month out for review, but I'll do what I can!
Ian
SilthDraeth - Thursday, April 5, 2012 - link
Thank you for the link. That is what I wanted.StevoLincolnite - Thursday, April 5, 2012 - link
I noticed your Thuban was hitting 60'C+So I was just wondering if you took the Thubans thermal bug into account on those readings? On my old 1090T and 1045T I had to have a 13'c offset to get a correct thermal reading.
sumitlian - Saturday, August 4, 2012 - link
Temperature related problem have long been rectified in C3 stepping of Denab CPUs and in Thuban as well. There is no fault in temperature sensor anymore in our CPUs.Only C2 rev. or earlier rev. AMD CPUs suffered from this issue.
Download and Read:
"Revision Guide for Family 10h CPU"
ExarKun333 - Thursday, April 5, 2012 - link
More to life than gaming on your PC. If you read the article, you could see how terrible the non-gaming benchmarks are for 'only' a Intel 4 and 6-core vs the 8-core AMD. Fanboi much?blazeoptimus - Thursday, April 5, 2012 - link
I bought an MSI 990FX-GD80 board a couple of months ago and was looking for a review like this one at the time. I would have loved the info you brought up here and I hope it will help others looking into the available 990FX boards.I went with the MSI board since it seemed to hit a sweet spot on features, price (newegg was offering $20 off which put it to $169) and performance. I also went with a Zosma processor since it seemed to hit the price elbow and had the most unlocking potential. I've been very happy with the experience thus far. I've been able to unlock the 2 additional processors and have pushed the clock to 3600mhz (stock is 3k). My next push will be to see if I can hit the aggressive clocks listed in this article.
Thanks again for the write up. I'm a long time reader and frequently use the information in these reviews to make hardware decisions.
Taft12 - Thursday, April 5, 2012 - link
Very comprehensive, thank you Ian!Of course now that you've exhausted so much energy on this review, the 1090FX chipset is right around the corner alongside the 2nd gen FX CPUs.
Such is life for a desktop hardware reviewer!