Palo Alto Products PA-600 ATX Mid-Tower
by Anand Lal Shimpi on September 12, 1999 5:05 PM EST- Posted in
- Cases/Cooling/PSUs
 Bringing
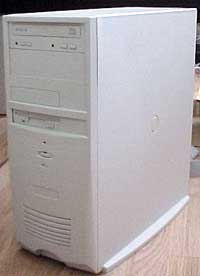
back the same streamline look we enjoyed from the ATCX, Palo Alto made the standard bezel
on the PA-600 virtually identical. The main difference between the exterior of the
PA-600 and the ATCX other than the missing 2nd external 3.5" drive bay are the
horizontal air vent cutouts at the bottom of the PA-600's front panel.
Bringing
back the same streamline look we enjoyed from the ATCX, Palo Alto made the standard bezel
on the PA-600 virtually identical. The main difference between the exterior of the
PA-600 and the ATCX other than the missing 2nd external 3.5" drive bay are the
horizontal air vent cutouts at the bottom of the PA-600's front panel.
Unlike the ATCX, this ATX Mid-Tower doesn't offer the same convertible functionality that made the ATCX such a big OEM win (the ATCX could be converted into a desktop with a different front bezel). For most users, however, this won't be a big disadvantage if it is one at all, as it is mainly a benefit for large OEMs that have to tailor to the needs and wants of more than one user.
The 17 lbs (7.7kg) PA-600 stands a little over half an inch shorter than its more expensive brother, the ATCX. The case is quite similar to the ATCX, although it does measure in a tad wider at 6.7". However just like the ATCX, the case is made out of a very solid plastic that won't break or chip easily. So for those of you that have a tendency to bang your case around, you won't easily injure the beauty of the PA-600. Palo Alto does offer four standard front bezel designs, as well as a customizable bezel for OEMs.
In accordance with the style of the PA-600, the only two buttons on the front of the case are a power and a reset switch, and are accompanied by a total of two indicator lights, a hard drive activity LED and a power LED. The power button is large enough to easily be pressed and features an integrated power light. The reset switch however is considerably smaller, and can be difficult to press if you have larger fingers. The main purpose behind this is to make sure that you don't accidentally hit it, a goal which it accomplishes wonderfully as it is almost impossible to accidentally bump it.
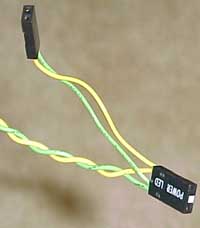
After our complaint about the inclusion of a 3-pin power LED connector with the ATCX it seems like Palo Alto addressed the problem and our PA-600 review sample featured both a 3-pin and a 2-pin connector for motherboards with a 2-pin power LED connector as seen to the left.
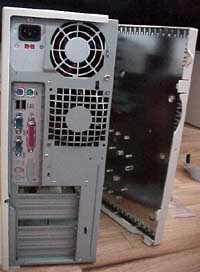
Just like the ATCX, opening the PA-600 is a very simple task. A single thumbscrew holds the right side panel securely in place, however unlike the ATCX, the thumb screw isn't "captive" meaning that you must physically remove it in order for you to remove the panel unlike the ATCX where the thumbscrew remained attached to the panel at all times. Just be sure you don't lose the thumbscrew and you'll be fine.
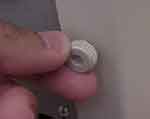
The side panel attached via the thumbscrew is fairly easy to take off, it attaches via the lone thumbscrew and two locking indentations that snap into the chassis. The left panel (the one attached via the thumbscrew) is covered on the inner side with a sheet of metal for purposes of EMI shielding.
The front bezel snaps it fairly
easily via a total of six snapping indentations, however there are no handles with which
to pull off the front bezel so the easiest way to pop it off is to take off the side
panels and unlock the snaps from the inside.
Also like the ATCX, the PA-600 allows for the prevention of unauthorized entry into your
case via a tiny loop on the back of the chassis and the left panel. A simple luggage
or combination lock placed through those two loops can render the case somewhat secure.


0 Comments
View All Comments