AnandTech Guide to Better Photos: Night Photography
by Stephen Caston on February 18, 2005 12:05 AM EST- Posted in
- Digital Camera
Take Two: Removing Hot Pixels
One of the problems that you may run into when shooting long exposures is the appearance of “hot pixels” in your images. These are pixels on the image sensor that suffer from charge leakage after being exposed to light for a certain amount of time. The effect is bright out-of-place pixels appearing throughout your images. You may notice that these hot pixels are appearing in the same places in each of your long exposures. Although this can be frustrating, there is something you can do about it. In fact, the consistency of the location of the hot pixels is beneficial because it allows us to use a method called “dark frame subtraction” in order to remove them. Some cameras will perform a dark frame subtraction automatically, but we are going to show you how to do it manually.Immediately after taking your normal long exposure frame, cover your lens and take an additional “dark” frame with the same exposure settings. A change in temperature may result in more or less hot pixels (higher temperatures result in more), so be sure to take the dark frame right after your original image. Taking the dark frame with the same exposure settings will be easiest if your camera has a manual exposure mode. Otherwise, you can try to lock the exposure before covering the lens. In some cameras, this can be done by half-pressing (and holding) the shutter button or pressing the “AE Lock” button. The idea here is that the dark frame will be used later as a map of all the hot pixels. This makes it very easy to remove them later. Now that you’ve taken your original image and a dark frame, let’s look at some ways to remove those dreadful hot pixels.
NOTE: For this section, we will be referring to steps that can be used in either Photoshop or Photoshop Elements. Photoshop is the industry standard for graphics design and likewise, it carries a hefty price tag. Photoshop Elements is a simplified version of Photoshop that offers many of the same useful features at a fraction of the cost.
- Open your original image and your dark frame.
- Select the “Move” tool from the tools palette (or press “v”).
- Click and drag the dark frame over into your original image while holding down the Shift key. By holding Shift, the dark frame will center itself automatically on top of your original image. This is important so that the hot pixels will be aligned perfectly in both images.
- On the layers palette, change the blend mode of the dark frame layer to “Difference”. At this point, you should no longer see the hot pixels in your image. You can adjust the Opacity of the dark frame layer until the image looks good to you.
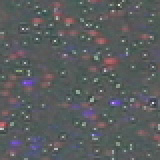
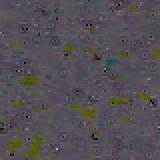
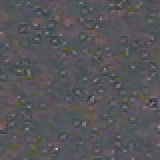
| Dark Frame Subtraction (200% crops) |
||
 Original image |
 Dark frame at 100% opacity |
 Dark frame at 50% opacity |
In the 200% crops above, we have demonstrated a dark frame subtraction. The original image suffers from a high frequency of blue and red blobs. In the second crop, we added the dark frame layer and set the blend mode to “Difference”. With the opacity at 100%, you can see that the blue and red blobs are gone. However, in their place are dark pits and greenish blobs. By setting the opacity to 50%, we were able to find a good balance to produce a much cleaner image. As we stated before, temperature plays a large role in the amount of hot pixels that will occur. Even so, each sensor will be different and consumer digicams tend to suffer from hot pixels more than prosumer and professional models.


20 Comments
View All Comments
sxr7171 - Saturday, February 19, 2005 - link
You can find upto 30 secs on all the Canon S and SD series point and shoot digital cameras.AtaStrumf - Saturday, February 19, 2005 - link
That flashlight trick is realy neat. You can also use a flashlight to illuminate just parts of the scene or to outline certain objects like cars and stuff.Night and dusk photos are great fun to do, but the problem that I have is picking the best digicam (not DSLR) for long exposures. As far as I have seen FUJI seems to be the best in terms of noise, but I really don't know for sure. Exposures longer that a few seconds are also not that easy to find in a compact digicam. And then there's the problem of apertures, ...
Suggestions anyone?
Jeff7181 - Friday, February 18, 2005 - link
Maybe a "choosing a digital camera" article would be a good addition to the series? Explain the features... include photos take with different features. That's what I've always looked for but never found when shopping for a digital camera. Sure, a 5 MP camera will take a more detailed photo than a 3 MP camera... but how MUCH more detailed? Would it matter to me? Stuff like that is hard to find answers to unless you can take two cameras side by side, shoot the picture, and examine the results yourself.shuttleboi - Friday, February 18, 2005 - link
Good article, but you fail to mention the importance of the digital camera's sensor size. The Canon 10D that you have (as well as my 300D) has an APS-C size sensor, much larger than those found in point-and-shoot digital cameras, resulting in MUCH less grain and noise during night shots. If you are shooting with high ISO, then the grain will be unacceptable. Long-exposure shots will also have pretty bad grain.shuttleboi - Friday, February 18, 2005 - link
How about reviewing the Epson P-2000 and the Archos AV400 as digital storage devices, like I've been suggesting the last 7 months?Vinney - Friday, February 18, 2005 - link
steve - awesome article, esp. because i've been waiting to do some shots similar to the cars on I-40 .. now i have no more excuses to delay.. (well except for all the ones i keep telling myself)Poser - Friday, February 18, 2005 - link
Thought it might be worth mentioning the open source photoshop imitator, GIMP here. Windows binaries are available, and it provides a zero cost way of doing many of the things photoshop can do.http://www.gimp.org
Jeff7181 - Friday, February 18, 2005 - link
Ok... gotcha... I didn't mean RIGHT under the lense, but wasn't sure if the ideas was to heat/light the air just in front of the lense or what. I understand now, thanks.HauntFox - Friday, February 18, 2005 - link
This is just what I needed, I been wanting to take some night photos :Dstephencaston - Friday, February 18, 2005 - link
Please don't hold a lighter under your lens! :-) The idea is to stand several feet in front of your camera and use a flashlight or lighter to "draw" in the air. This light will be recorded by the camera and can look really cool. A flashlight doesn't necessarily have to be pointed directly into the lens; pointing the light somewhere in the direction of the camera will work. Pointing the light directly at the lens will create a lens flare effect if thats what you want. There really are no rules for this type of thing, but its a fun creative way to paint with light. I hope this helps to clarify.