Original Link: https://www.anandtech.com/show/1835
Introduction
With the special niche market that Shuttle has created pretty much on their own due to the release of the XPC series, a myriad of other small form-factor PCs have sprung up all over the place. Not long ago, we examined the well-designed X-QPack by Aspire, and found that for people interested in the portability and flexibility of a smaller PC, there was really a lot to appreciate in that enclosure.
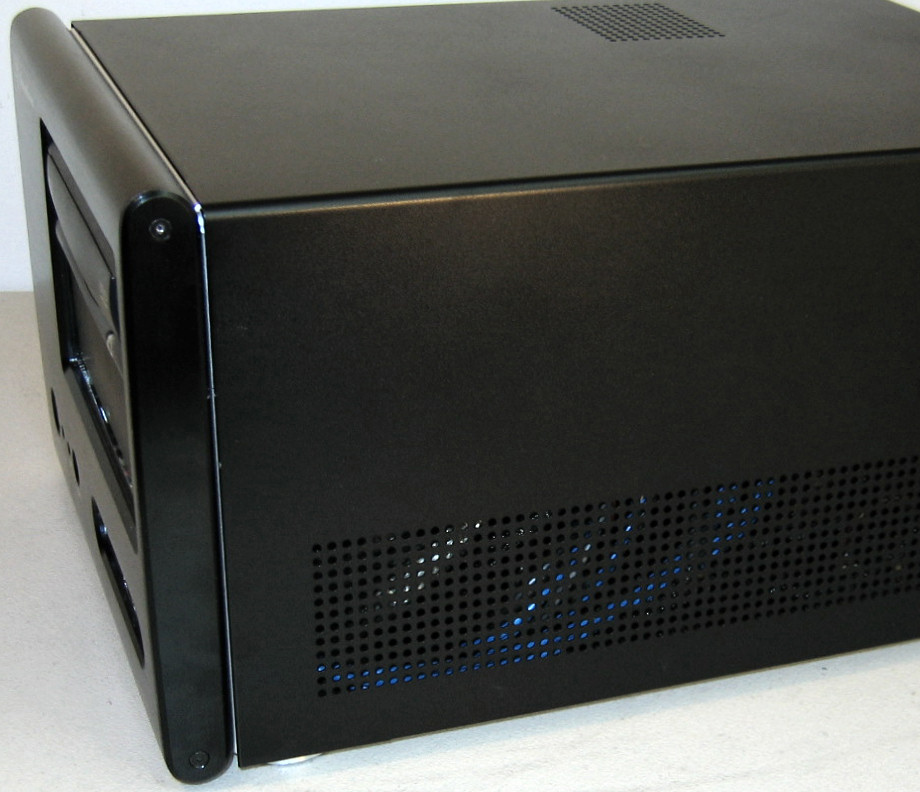
Perhaps a bit too gimmicky-looking for some users, we are happy to follow up now with a much sleeker case from SilverStone, the SG01. For the most part, this case has all the same offerings as the X-QPack, but there are a few differences that we will examine in detail throughout this review.
| SilverStone SG01 | |
 |
Offerings |
| - Clean, professional appearance - Easy install process - Removable HDD cage - Can hold normal PSU's |
|
| Possible Improvement | |
| - Larger fans for less noise/lower temperatures - Layout could be better - Tool-Less Features (minor) |
|
The SG01 is silver in color, while the SG01B – the case that we’ll be reviewing in this article – is black.
More information on the SG01 can be found on SilverStone’s website.
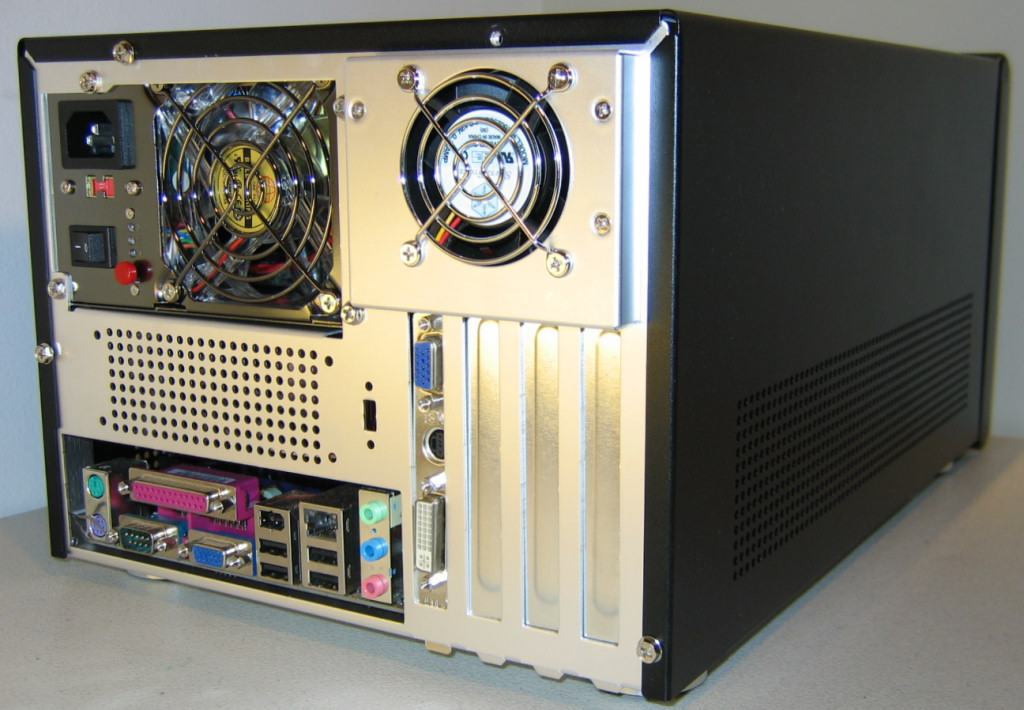
External Design
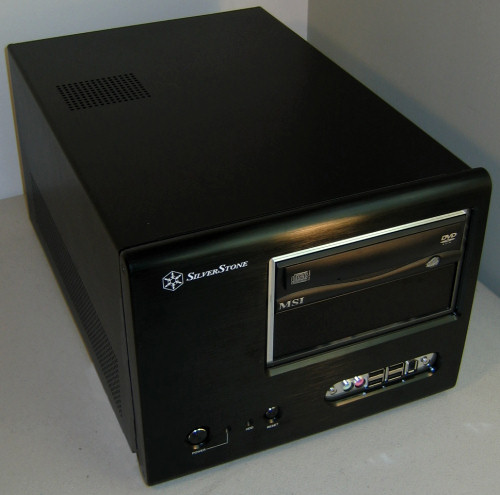
The SG01 definitely takes a more sophisticated approach to its styling, with no case windows and a relatively clean looking front bezel. In this shot, we've already placed a black CD burner from MSI into one of the two 5¼" drive bays to give you an idea of what one potential system could look like.
Click to enlarge.

Click to enlarge.
External Design (cont’d)
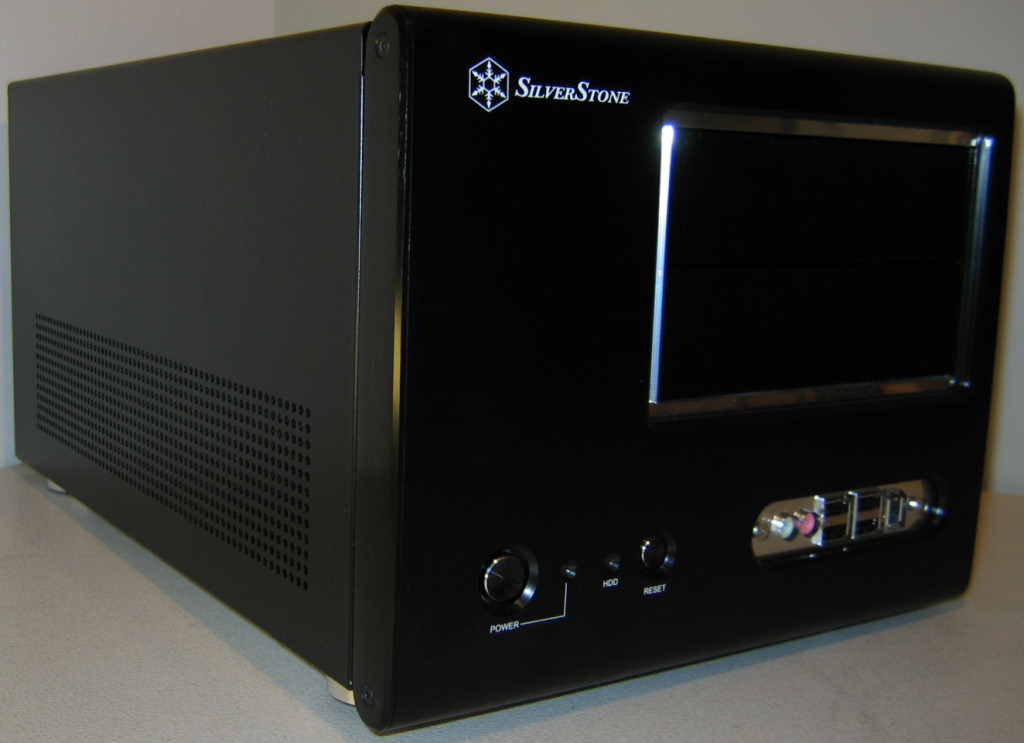
Taking a look at the SilverStone case from other angles, we find again that the case is much simpler than the X-QPack, and certainly as sleek as most Shuttles.
Click to enlarge.
Click to enlarge.
Click to enlarge.
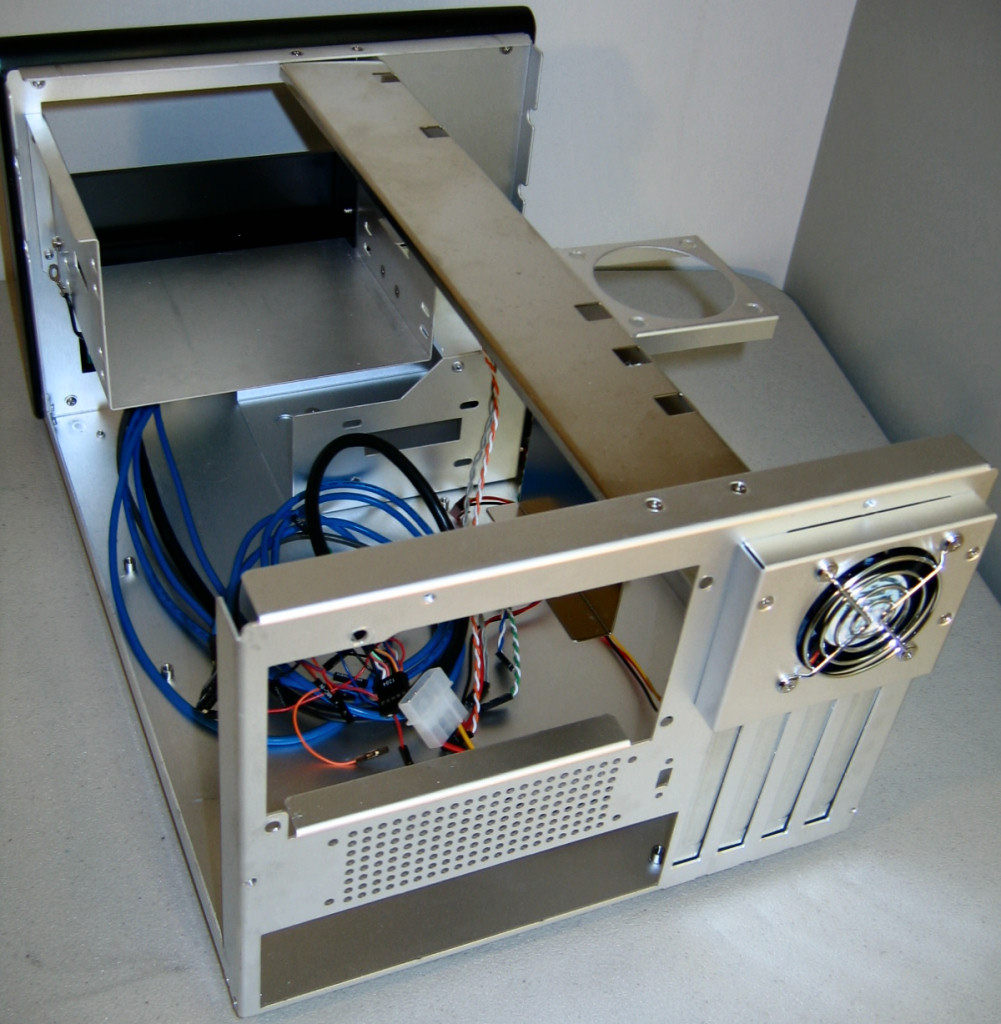
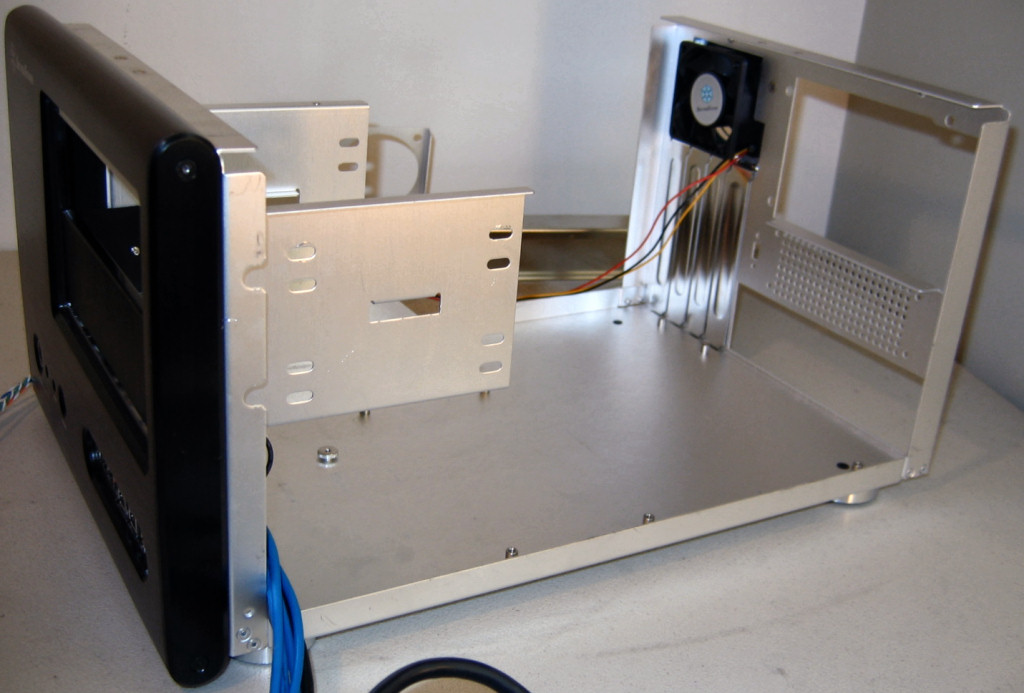
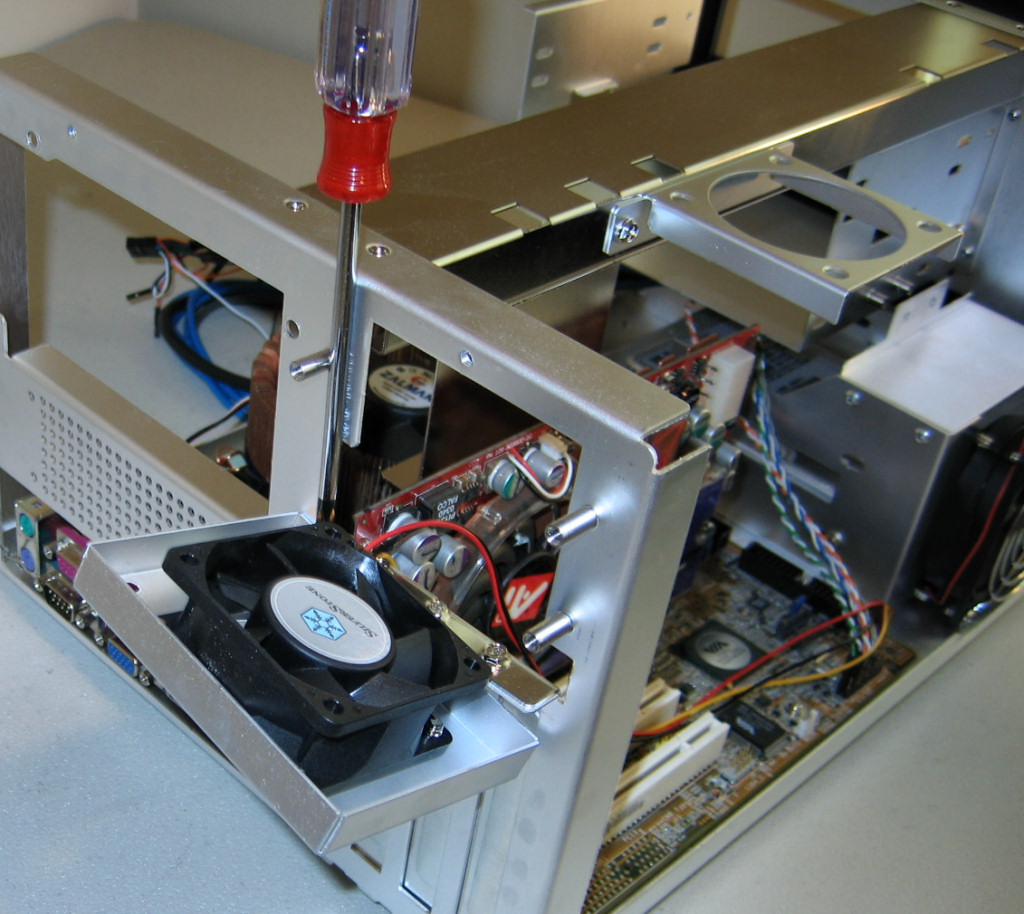
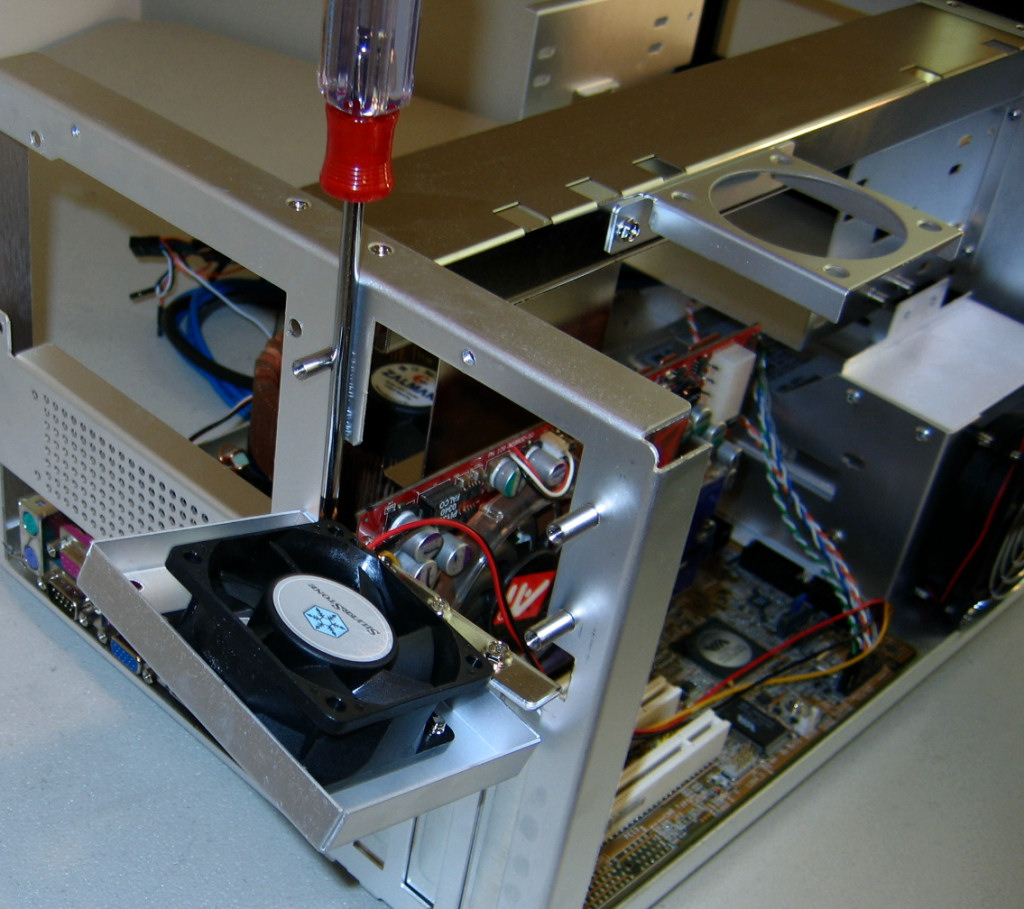
Internal Design
Thumbscrews would have been nice on the SG01, but considering that there are a lot of normal screws which hold the system together, one would have to have a screwdriver handy to work on this case, so it’s not too big of a problem.
Click to enlarge.
Click to enlarge.
Click to enlarge.
Click to enlarge.
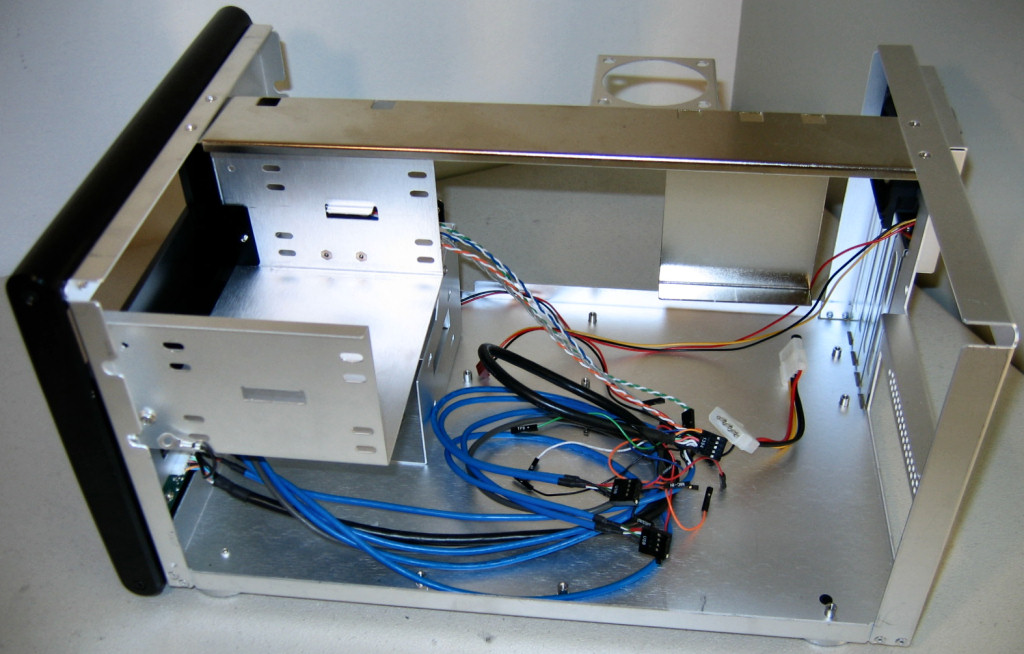
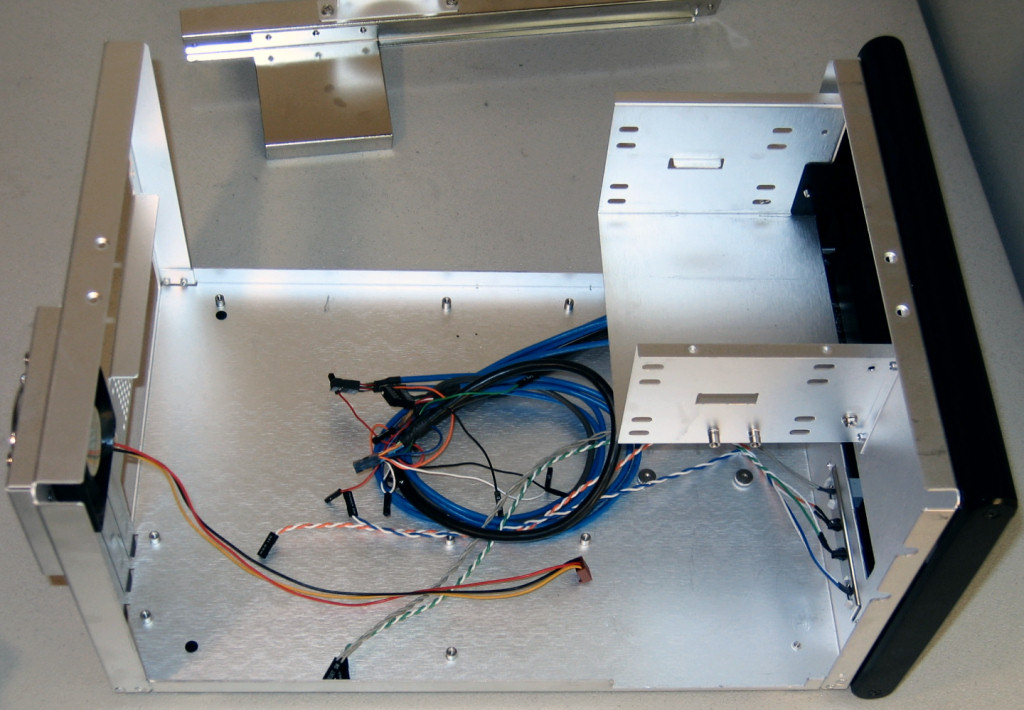
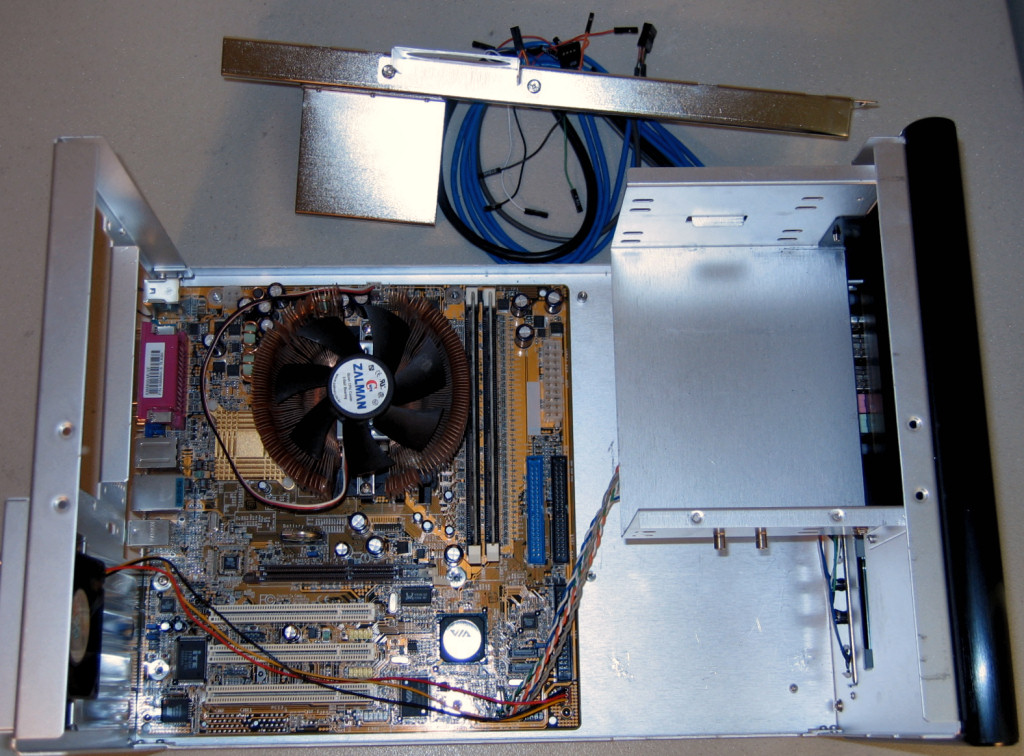
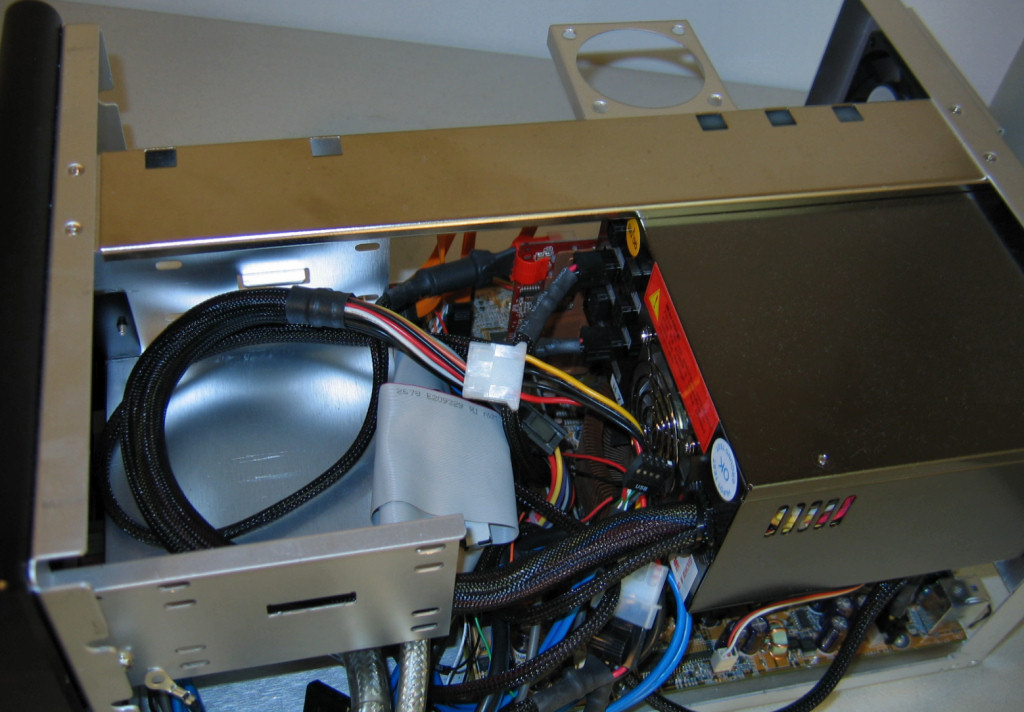
Internal Design (cont’d)
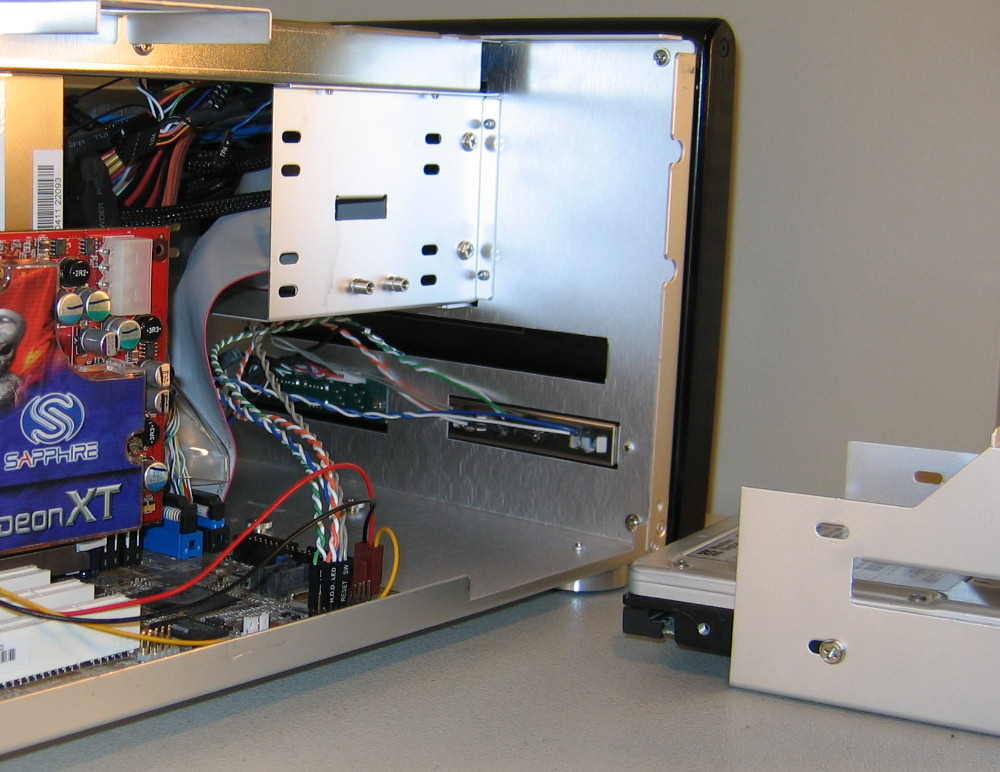
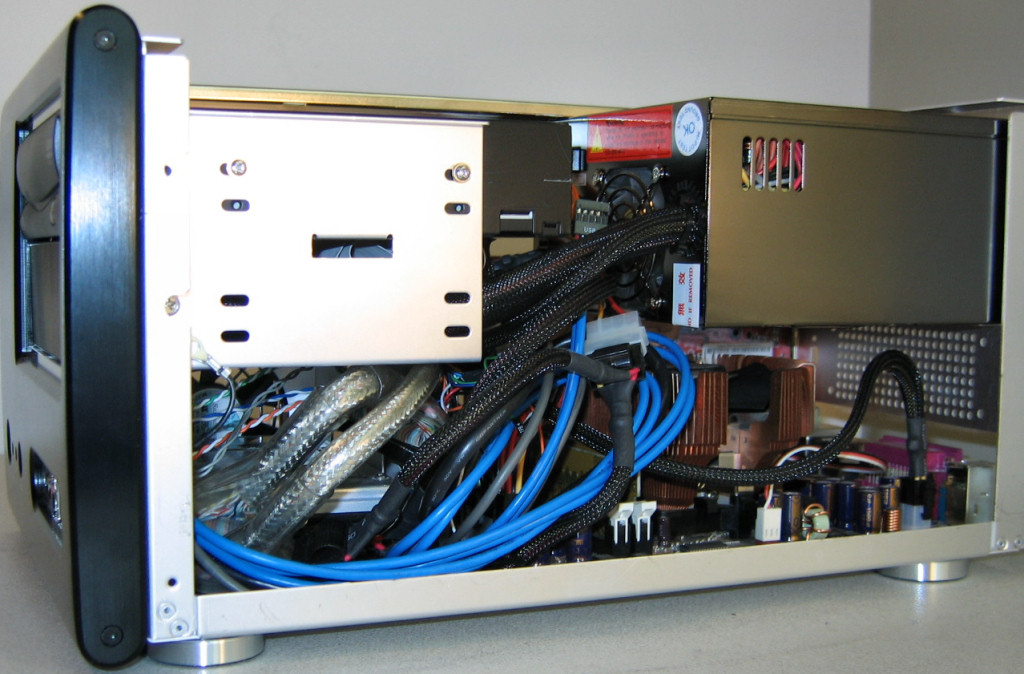
The included cables are comprised of pretty much everything that one would expect: power and reset buttons, HDD activity and power LEDs, and the front panel port cluster. Luckily, all the cables for the front port cluster are long enough to ward off any potential routing problems. This shot also shows that the front bay covers for the 5¼” drives are held in place by screws, which is certainly nicer than punch-out steel that almost always leaves behind sharp edges.
Click to enlarge.

Click to enlarge.
Click to enlarge.
Click to enlarge.
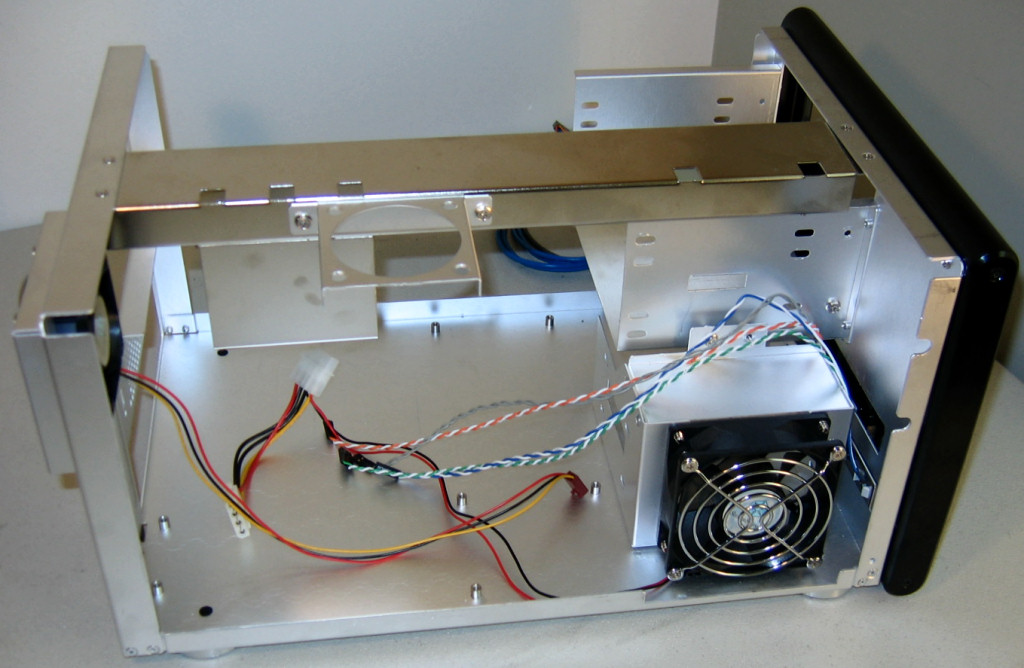
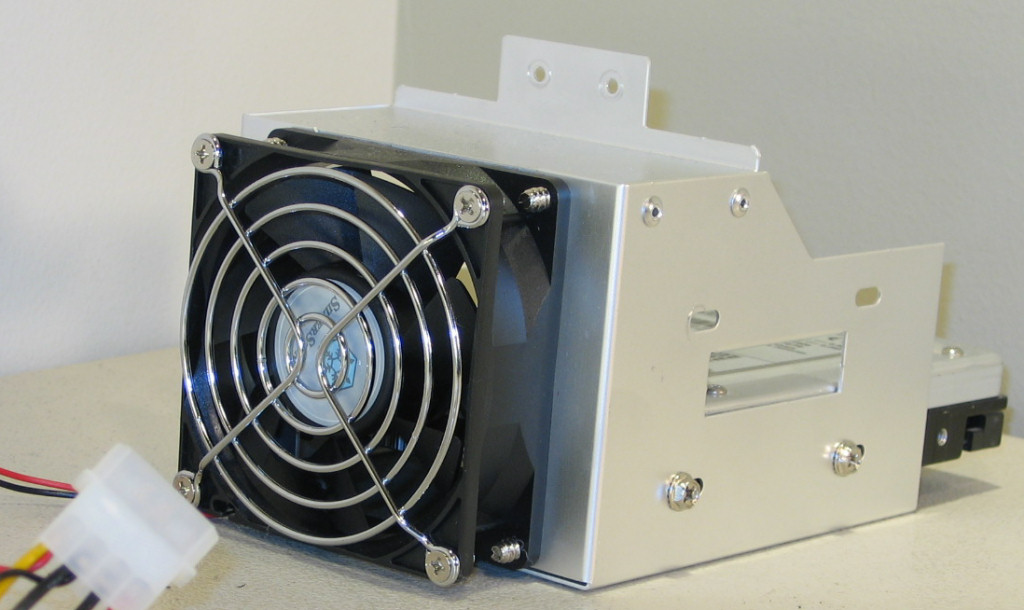
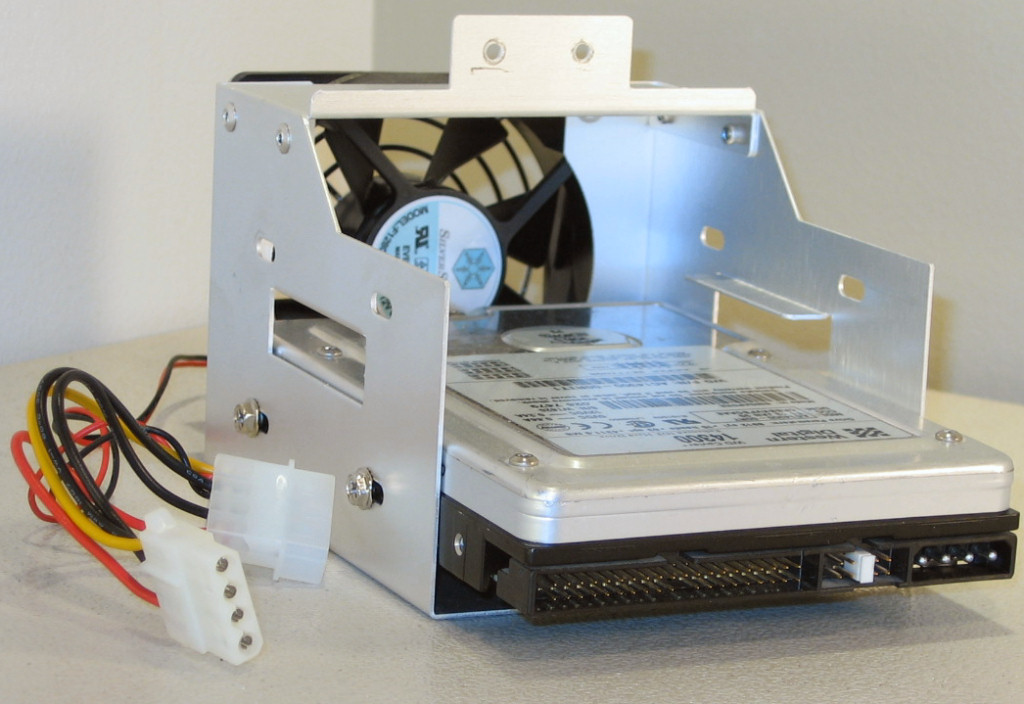
Cooling and Construction
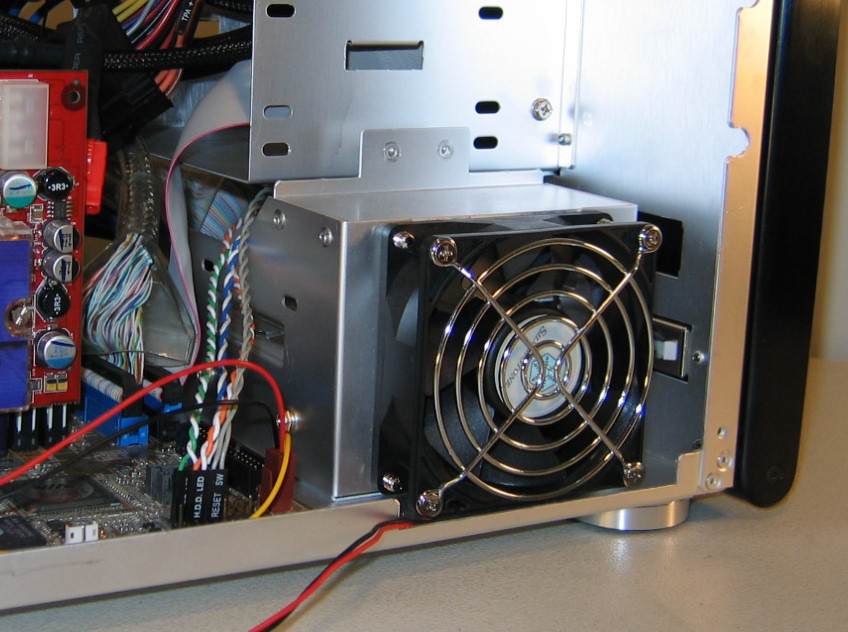
Without an included power supply, the rear 60mm and the hard drive cage 80mm make up the only included active cooling parts of the SG01. As mentioned before, there is the option to add another 60mm at the top. But, we really must admit that we’re not wild about the idea of several smaller fans, as they still probably won’t provide nearly as much total air flow as a single large fan such as the X-QPack’s 120mm. They most certainly won’t be as quiet, either.
Speaking of the fans, the rear 60mm fan must be removed to get at the expansion card mounting screws, which although isn’t difficult, does require an additional step.
Click to enlarge.
The main crossbar of the case is a bit bulkier and is secured by more screws, but in comparison to the X-QPack’s trio of crossbars, the SilverStone case doesn’t have quite as solid of a feel to it. The workmanship and quality of aluminum is awesome, however, and each part really seems to be made very well.
Another annoyance that we had with this unit, however, was the fit of the triple-side panel. Taking a closer look at this picture of the right side of the chassis, we can see that it’s not actually fitting right at all.
Click to enlarge.
Installation
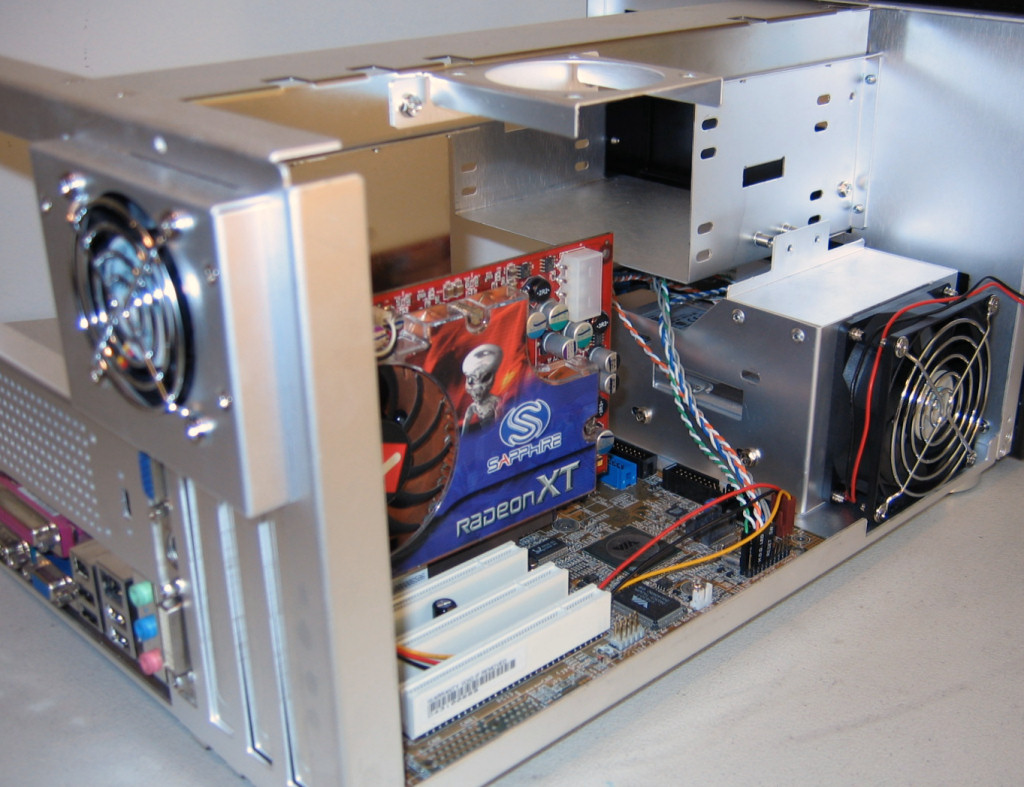
Without a motherboard tray, we found it to be advantageous to remove the top support to make it easier to install the motherboard in the SG01.
Click to enlarge.
Click to enlarge.
Click to enlarge.
Click to enlarge.
Click to enlarge.
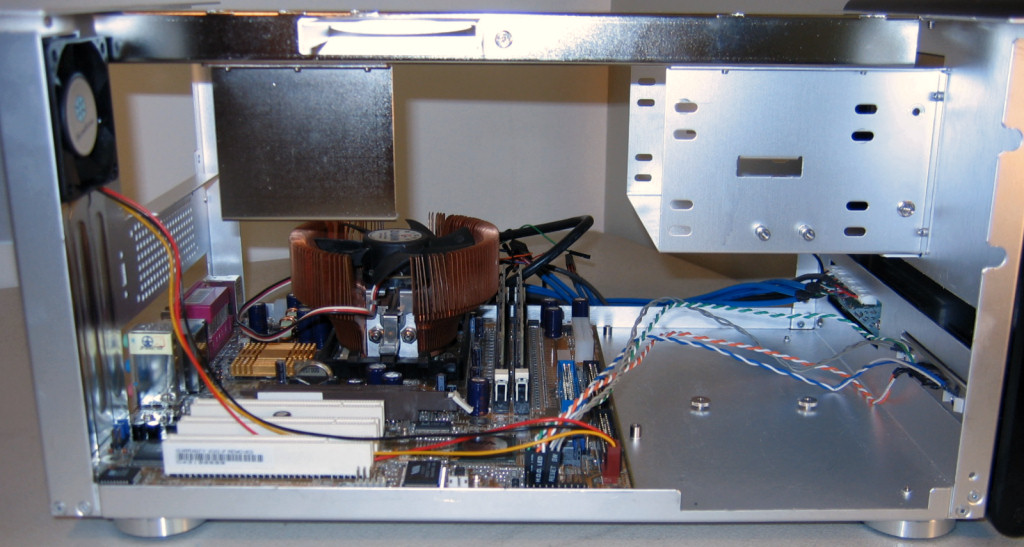
Installation (cont’d)
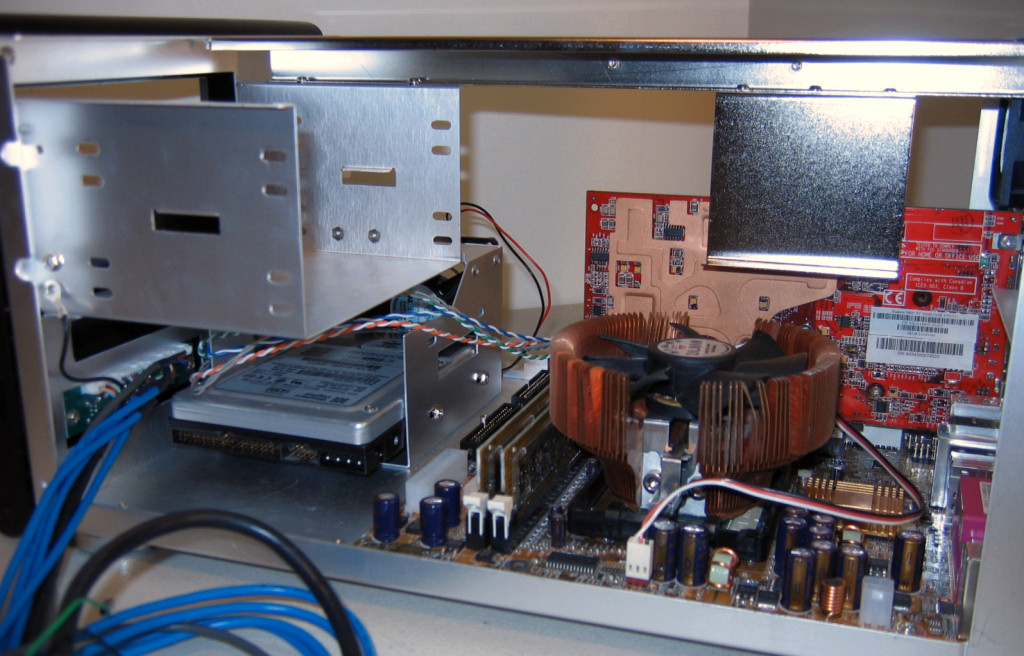
Looking at the case in the same state from the other side, we can see that routing the cables from the front panel to the motherboard could be really tricky if one would install two hard drives in the cage. We found that it’s actually easiest to go under both drives, but it could be different for other motherboards.
Click to enlarge.
Click to enlarge.
Click to enlarge.
Click to enlarge.
Click to enlarge.
Click to enlarge.
Benchmarking - Thermal
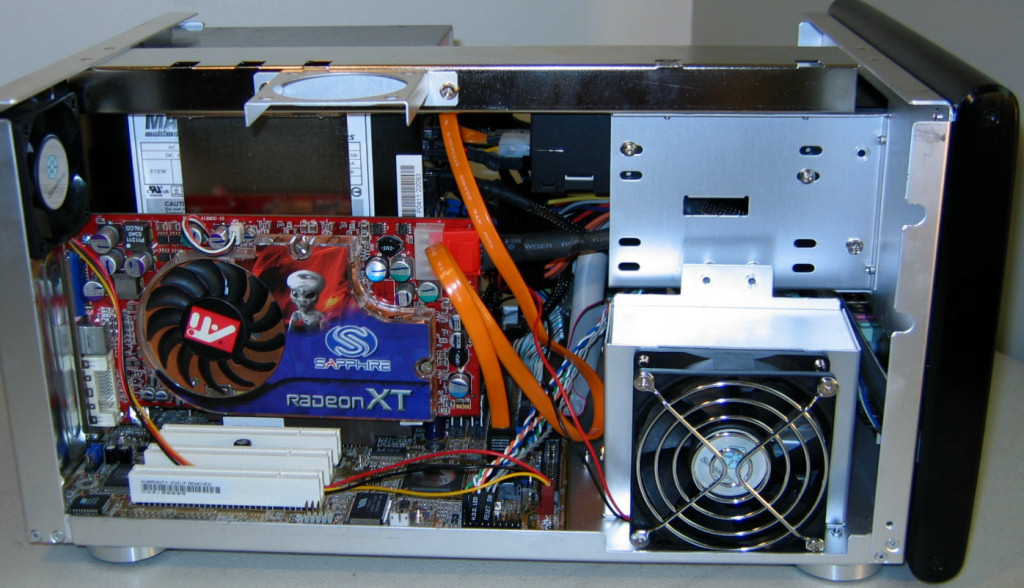
To test the case’s ability to keep temperatures of key components in check, we installed our standard micro ATX test bed, using a MadDog Sure Power 550 watt power supply, along with a CD/DVD combo drive into the top 5.25” bay.
| HTPC Micro ATX Test Bed | |
| DFI K8M800 MLV AMD Athlon 64 3200+ OCZ PC3200 512MB DDR x 2 Zalman CNPS7000 Copper Western Digital IDE Hard Disk Sapphire 9800XT AGP8x |
 Click to enlarge. |
For the same reasons as the X-QPack, it was both difficult and somewhat pointless to do an inch-by-inch analysis of ambient air temperatures, but after leaving the system running for a while and waiting for our thermometers to settle, we recorded the exhaust air at 33.7 degrees Celsius from the 60mm fan, and 34.2 degrees from the power supply exhaust. The SG01 was tested in a room with an ambient temperature of 23.0 degrees, which means that this case certainly didn’t keep the components as cool as competing cases, but it wasn’t letting dangerously hot either. Keep in mind that the figure of the 60mm fan exhaust is the one to use when considering the ambient air temperature inside the case, as the extra heat generated by the power supply is not a factor. Here’s a look at how the SG01 did at keeping the components cool in comparison to our previous reviewed Aspire Micro ATX case:
| Component Temperatures | ||
| SG01 | X-QPack | |
| Exhaust Air | 33.7 C | 28.3 C |
| CPU | 34 / 47 C | 32 / 44 C |
| GPU | 53 / 69 C | 49 / 64 C |
| HDD | 29 C | 30 C |
| Northbridge | 36 C | 34 C |
| Power Supply | 32 C | 32 C |
All in all, these aren’t terrible numbers, given the case’s size, and the hard drive especially is being kept nice and cool. However, the video card is a full five degrees warmer in this case than in the X-QPack under full load, and the CPU is also not having as much warm air taken away from it. Unfortunately, this is all simply the end result of a decision to only use a single small exhaust case fan, and if it wasn’t for the four-fan power supply, these numbers might have been quite a bit worse.
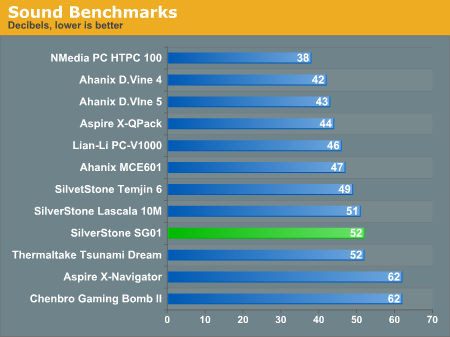
Benchmarking - Sound
The price one has to pay for a sleek little box like the SG01 is normally acoustic output, and unfortunately, this is certainly the case here. Smaller cases and smaller fans mean more noise, so to test that theory, we measured the SilverStone enclosure by holding a sound pressure level sensor twelve inches away from the closed case with our test bed installed and running. Take a look at the level compared to some of the other cases that we have reviewed recently.
Using an even better power supply with a massive 120mm fan, the SG01 would probably be capable of outputting much better temperature / noise ratios. However, the MadDog power supply isn’t exactly a slouch at moving air either, so these figures still probably represent fairly good numbers for this case.
Final Words
As case manufacturers continue to come up with new designs to try to entice consumers, many designs come out on top in some ways and fail in others, as it isn't as easy as one might think to get everything right in designing an enclosure.
Overall, the shift to smaller cases makes sense - the computer itself is more portable, easier to put "out of sight", and in some situations, it makes it possible to have a computer in a particular location - peroid.
With SilverStone's SG01, they certainly have the "looks" aspect of the case done well, but while this certainly is a huge factor for many people, there are other important issues that we feel on which they just didn't spend enough time.
The biggest problem is that the case simply makes too much noise. With looks this nice, one would think that this could have great potential in a living room or even a kitchen perhaps, but certainly no one would want a computer in an otherwise quiet room to make a persistent whine of 52 dBa. Almost as bad though is the fact that even with all this noise, the case doesn't move enough air to keep the components cooler than competing cases, which is exemplified by the SG01's ambient exhaust temperature of 33.7 degrees Centigrade. On top of everything else, this is still a rather expensive option, as the lowest price that one might find the SG01 is right around $150, and that won't include any power supply.
Regrettably, we can only recommend the SG01 to people who are eager to build a Micro-ATX system, absolutely love the styling and are either willing to put enough effort into the system to quiet the fans or simply ignore the noise (perhaps by using the small size to put the computer in a very out-of-sight place). Thankfully, these people will get to enjoy the good layout and decent expansion options, but otherwise, there are several other options out there for less money, and they run cooler and make less noise.


