Apple's New iPod - Evolutionary, not Revolutionary
by Anand Lal Shimpi on June 3, 2003 3:30 AM EST- Posted in
- Smartphones
- Mobile
Taking it apart
Of course what review of the new iPod would be complete without a complete dissection of the unit?
Although taking the new iPod apart follows the same principles as the old one, its small size guarantees a slightly tighter fit that required even more finesse initially. The process is simple; the iPod's casing consists of two parts, the white face and the chrome backing. The two parts are held together through a total of 12 plastic clips. You have to unlatch each one of the 12 clips in order to separate the two parts, and the only way to do so is by wedging a rigid piece of plastic (or metal, although plastic is less likely to scratch the unit) between the two parts of the iPod's casing and work them apart.
After a bit of patience and elbow grease, you'll begin to separate the two parts and things will become much easier. After you've fully separated the two you'll see the following:
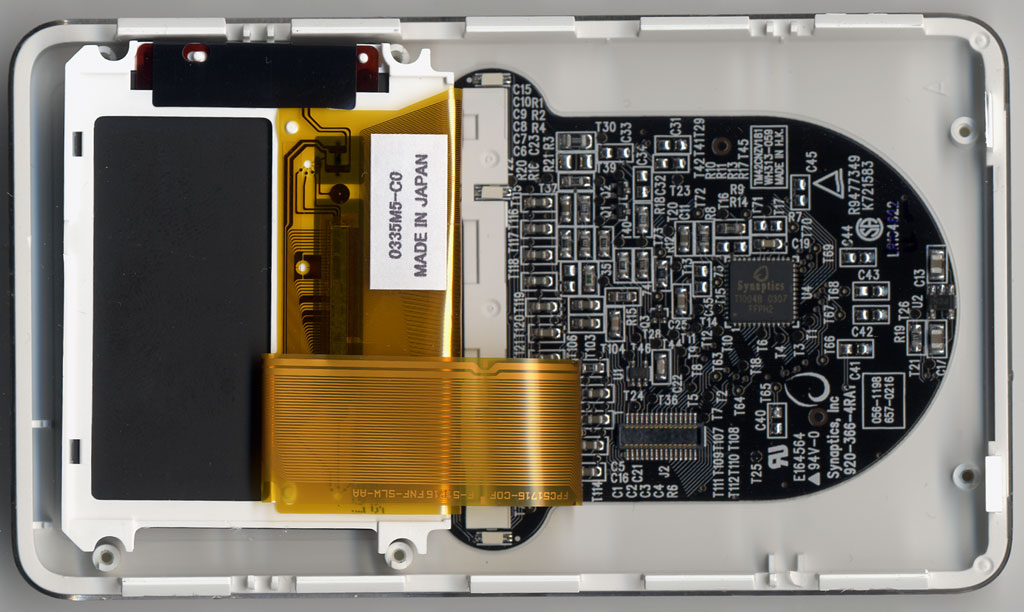
On one side you'll see the back of the LCD display as well as the controller logic for the LCD and the buttons on the front. The other half of the iPod will be covered completely by the 1.8" Toshiba hard drive.
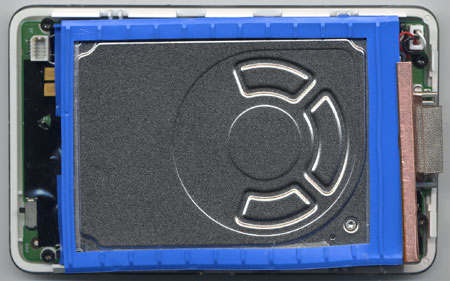
Since there's not much to see on the LCD side, let's focus on digging out that iPod motherboard. The hard drive is set in a piece of blue rubber that boarders the drive, we're assuming its purpose is mainly shock absorption and to keep the drive's casing from touching any PCB (and causing a short).
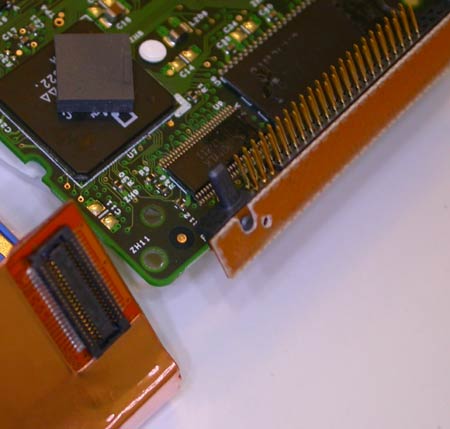
The old iPod HDD connector (top right) vs. the new iPod HDD connector (lower
left)
Apple improved the interface between the hard drive and the iPod motherboard; reducing it from a fairly large connector to one that is extremely small in comparison, in an effort to keep the size of the unit as small as possible. Lifting up the hard drive reveals the iPod's battery and motherboard.


0 Comments
View All Comments