Hardware Tricks: Can You Fix a Failing Mobile GPU with a Hair Dryer?
by Jarred Walton on March 19, 2013 1:45 AM EST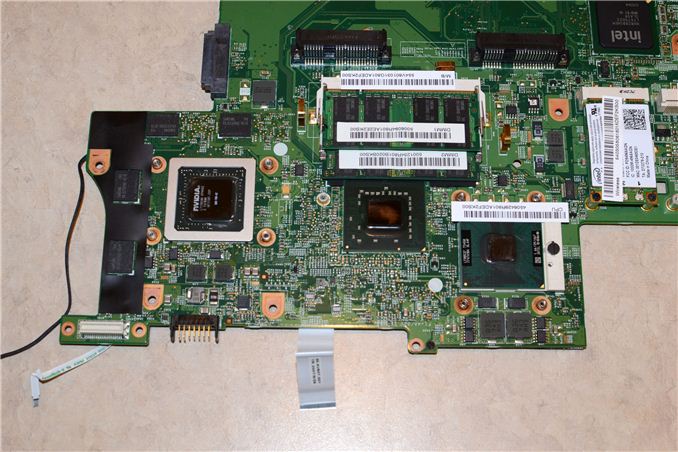
Over the years, I’ve encountered my fair share of hardware failures while writing for AnandTech. For example, nearly every SFF I reviewed back in my early days failed within a couple years (usually a dead motherboard); Both of the first AM2 motherboards I reviewed also died within six months. I’ve seen more than a few bad sticks of memory, particularly overclocking RAM that couldn’t handle long-term use at higher voltages. And let’s not even talk about hard drives—lately I’ve noticed an uptick in the number of people coming to me with laptops that have a dead hard drive; so far I’ve only managed to successfully recover data from one drive using the famous (infamous?) “put your hard drive in the freezer” trick.
Needless to say, when a friend came to me with an old Gateway P-6831 FX from early 2008—a laptop I awarded a Gold Editors’ Choice award to, no less!—and it was giving him a “Code 43” error on the GeForce 8800M GTS graphics, I didn’t have much hope of fixing the problem. Still, five years out of a $1300 gaming notebook isn’t too bad, and when I saw some suggestions online that I might be able to fix the GPU by putting it under the heat of a hair dryer for a couple minutes, I figured, “What do we have to lose?” Well, what we had to lose was about four hours of my time, as this particular notebook is something of a pain to disassemble down to the GPU. But in the interest of testing out the “hair dryer” trick, I though it worth a shot. Here’s the video footage of the process.
Much to my surprise, all of the effort proved worthwhile, at least in the short term. Most fixes of this nature will only prolong the lifetime of failing hardware, but if you can get another several months—or dare we hope for a year?—out of a laptop with such a simple solution, that’s pretty good. I did take a moment to at least do a quick check of graphics performance. Five years ago, the 8800M GTS was one of the fastest mobile GPUs on the block—surpassed only by the more expensive 8800M GT and 8800M GTX. 64 DX10 CUDA cores running at 500MHz might not seem like much, but the 256-bit memory interface (clocked at 1600MHz) is nothing to scoff at.
And what sort of performance does the 8800M GTS deliver? Even when paired with a now-decrepit Core 2 Duo T5450 (1.66GHZ), the notebook still managed a reasonable score of just under 7000 in 3DMark06. To put that in perspective, however, Intel’s HD 4000 with a standard voltage mobile CPU now manages around 7500. Of course, 3DMark06 optimizations are pretty common, but we’re basically looking at top-end mobile GPU performance from five years back now being found in Intel’s IGP. When Haswell launches in a few months with GT3 and GT3e mobile parts, we’ll likely see IGP performance start to encroach on decent midrange GPUs like the GT 640M and HD 7730M—at least, that’s what I’m hoping to get!
Anyway, if you’ve got a failing GPU or other component and you’re at the point where you’re ready to throw it in the trash, if you’ve got a bit of time you might give this hair dryer trick a shot. I’ve seen others recommend baking a GPU PCB in the oven at 200C for eight minutes, and while that could work as well it seems more likely to burn out some other component if you’re not careful. Sadly, this trick (and the freezer trick) both failed on another recent HDD failure; next up on my list of hardware tricks to try: transplanting a dead HDD’s platters into a working drive. Wish me luck; my dad’s data needs it!


30 Comments
View All Comments
Freakie - Tuesday, March 19, 2013 - link
Hey Jarred, I've done the platter transplant (successfully) and here's a few tips: powder free gloves, non-cloth surface and environment (wood, plastic, metal desk/table/counter ect), facemask, synthetic t-shirt that covers as much as possible, freshly cleaned hair and maybe even head covering, and a can of compressed air.Careful with the compressed air, don't want the chemicals coming out and depositing, also make sure to be extremely careful with the needles, don't go playing with them just because they are there! You'd be surprised at how easily you can screw up the needles as well as the platters! And make sure to keep track of all of the filters in the drives. There are usually two white filters on the end opposite to the drive heads that come out VERY easily so keep an eye on them and don't let them go flying everywhere and collecting dust and particles.
Also, before swapping the platters, try swapping the PCB's on the hard drives if you aren't 100% sure it's a mechanical problem. Sometimes it's just irrecoverable damage on the PCB that kills the drive and it's worth trying to swap them. If the drive is discoverable after doing that, I'm not sure how the data will or will not appear, might have to run a deleted file recovery program like Recuva. But I'm not 100% sure what happens to the data if you just swap PCB so I'd do a little bit of research into it first to make sure not important parts of the platters will be wiped xP
Paladin21 - Tuesday, March 19, 2013 - link
I've done a PCB swap a couple of times, mostly with drives that had obviously blown controller circuits on the board. The most annoying part of the process is finding the *exact* same drive revision and size for a donor board. If it goes well, your data is immediately accessible again, no need for a data recovery solution. If you've got a common drive type, I'd suggest trying the PCB swap out first, as it only takes a couple of minutes to verify that you actually have burned out motor or rotor damage instead of having a dead controller signal.JarredWalton - Tuesday, March 19, 2013 - link
The drive is a Western Digital WD2500JB -- EIDE if you can believe it. I've ordered a similar drive (not sure about firmware or anything else, but it's the same model) off Amazon that should arrive this week. The symptoms right now are that the drive powers on and spins up, then about eights seconds in there's a "click" and it sounds like the power resets. Immediately after the click, the drive repeats the process, so it never fully spins down but it does start to slow down for a moment. After the first click, the process repeats about every three seconds.My guess at this stage is that it's potentially a bad circuit somewhere, though it could be a bad drive head as well. We'll see how it goes later this week, but the recommendations on gloves and clothing and such are welcome!
Paladin21 - Tuesday, March 19, 2013 - link
Since your drive spins up and seeks, I'd definitely try a board swap before doing any "brain sugary" on it. I've had several in the past with similar symptoms that worked (at least long enough to back up data) after doing a PCB transplant. With your symptoms, I'd guess that the issue is in the controller board, not the drive itself. Issues with the internals of the drive usually result in either the platters not spinning (burned out bearings/motor), or massive internal damage (crashed head). If you're spinning, neither of those issues should be your problem.JarredWalton - Tuesday, March 19, 2013 - link
Yeah, sort of what I'm thinking. It's not the click of death (where the drive head seeks back and forth), and it's possibly a short somewhere in the power circuitry. My donor drive should arrive in the next day or two I think....JPForums - Tuesday, March 19, 2013 - link
You are correct. The solder will not liquify at 200C (and that is actually preferable in this case). Left alone this will not resolder any joints. However, it is possible to close the gaps enough to facilitate resoldering. You need to provide even downward pressure on the chip in question. Any horizontal pressure will push the chip out of alignment. The best way I've found is using sand. You have to make sure the board is level while baking, but you can use sand on the entire board if you don't know which chip is the issue. Keep in mind that baking of any kind won't fix a bad chip, just a bad solder joint.
MrSpadge - Tuesday, March 19, 2013 - link
> Keep in mind that baking of any kind won't fix a bad chip, just a bad solder joint.And probably not a broken HDD.
tipoo - Tuesday, March 19, 2013 - link
Same idea as the various Xbox 360 heat tricks. I got a few extra months of use out of an RRoD 360 with a corrupted GPU by escalating the heating each time it failed again, first I just did the towel trick, then let it run with q-tips blocking the fans, then opened it up and let it run without the fans while using a high powered heatsink on the front and back of the GPU side, then eventually threw the motherboard in the oven. Each time got me a bit more use, but now it's perma-dead.Still haven't gotten a replacement, come on next gen!
Daniel Egger - Tuesday, March 19, 2013 - link
You've just explained the concept of reflow soldering. There's nothing bad about this approach as this is also the way most components are nowadays banned onto a PCB. The typical problem why some connections don't stick properly is that mechanical shearing happens when two connected materials expand or contract differently when applying a temperature change. With GPUs there are actually three common cases why those connections might get lose:1) GPU is used outside the specified environment (i.e. gets too hot, or warms up too quickly)
2) The GPU vendor screwed up in specifying the reflow process needed
3) The PCB assembler screwed up implementing the specified reflow process
Using a hairdryer or oven is a perfectly valid method fixing reflow problems, however it is also quite easy to do permanent damage. If it is done right though it might even hold "forever".
Heck I know some people who bought broken iBooks on ebay in the hope to being able to fix them just by baking and reselling them. They have quite a decent success rate of about 90%.
faster - Tuesday, March 19, 2013 - link
Excellent video. You have convinced me to never take apart my Gateway FX P-7805u.A word on the laptop though. My Gateway FX P-7805u has the C2D P8400 @ 2.66, 4GB DDR3, with a 9800m GTS with 1GB. I bought it in early 2009. The reason that I still use it today is because I was able to easily install the early Intel 80GB SSD in the second open hard drive bay and put Windows 7 pro 64 on it. It is a dual boot system with Vista/7, although I can't tell you the last time I booted Vista. I also use the Vista drive as a data storage drive for the smaller Win7 SSD.
My job entails hauling this thing all over Manhattan. Its a heavy beast and I have broken quite a few shoulder straps over the years and sent this thing tumbling to the ground. My chassis is cracked with small chunks missing in four seperate places and the two of the main support screws on the left are broken through. I can seperate the chassis vertically over an inch on the left front side by the DVD drive by lightly lifting up on with my finger. That being said, I it still works perfectly and I use it nearly every day.
The SSD and Win7 make it a snappy performer. I scroll huge PDF's smoothly in presentation and I can play Battlefield 3 at medium settings. This machine has also logged many hours of BF2 and BF2142 without any problems. Not too shabby for a 4+ year old laptop. The downside is the battery life. If I get 3 hours on light usage, I'm lucky.
My original purchase price was $1500. I received good value for that purchase and this would be a great laptop for someone on budget to pick up used even for modern gaming.