Gigabyte H77N-WiFi Review – First Look at Ivy Bridge with mITX
by Ian Cutress on November 6, 2012 12:00 PM EST- Posted in
- Motherboards
- Gigabyte
- H77
- mITX
Gigabyte H77N-WiFi In The Box
Gigabyte packages are very black and white in their offerings – either it contains the ‘bare minimum’ or there is a lot for your cash. We have seen the former plenty of times, especially on low end or sub $150 models, and the latter on examples such as the Z77X-UD5H and G1.Sniper 3. The Gigabyte H77N-WiFi is currently e-tailing at $120, putting it square at the low end of the full size Z77 market. For this, we have the following:
Driver DVD
User Manual
WiFi DVD
Rear IO Shield
Two SATA Cables
Two Antenna

In the grand scheme of things, it was probably a stretch to have expected anything beyond this in a mITX setup. Perhaps another couple of SATA cables would have sweetened the deal, an extension cable for that oddly placed 4-pin CPU power connector, or a molex-to-SATA power connector or two.
Gigabyte H77N-WiFi Software
I started reviewing Gigabyte motherboards in January 2011, and since then I have had at least 10-12 pass through my fingertips and there is one constant throughout – the cornerstone included software package. Namely I am talking about EasyTune6.
EasyTune6
EasyTune6 has had a hard life. It shows sign of age, and shows sign of a design team that during its conception did not understand how important included software may be to the system as a whole. Not least of all that it seems to interfere in our testing (see DPC Latency testing later in the review).
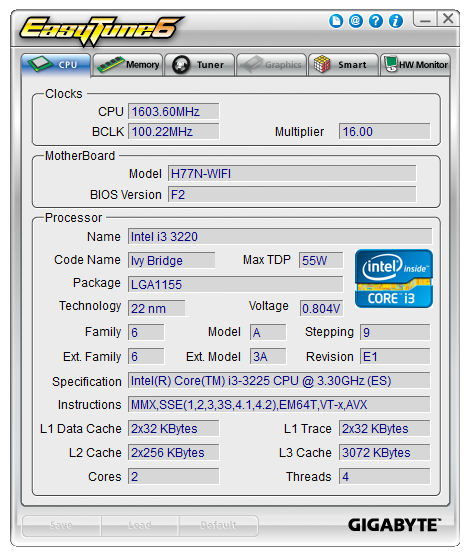
On a Z77 product, EasyTune6 is the hub that controls the preset automatic overclocking options, as well as the manual overclocking options. That functionality is practically gone in H77 – all we can control is the BCLK, memory strap for next boot, and memory voltage. This leaves EasyTune6 with the other options – displaying information such as the CPU, the Memory, the GPU, the HW Monitor, and the fan options.
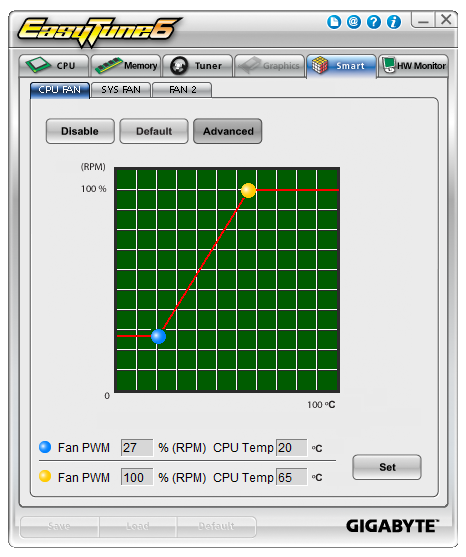
The fan element of the software allows a user to determine a single gradient for each set of controllable fan headers. This is basic fan functionality indicative on a lack of imagination – the system can output whatever % value to these fans, and they have inputs of CPU temperature, system temperature, and a software backbone. It should not be too difficult to envisage software that manages a multipoint system with hysteresis.
@BIOS
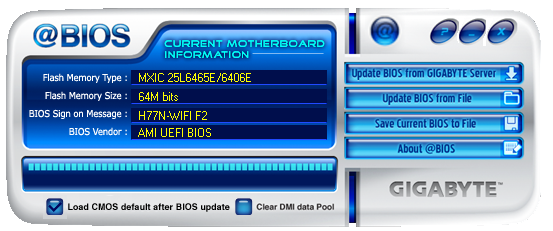
The other element consistent with all the other Gigabyte motherboard reviews has been @BIOS. This software is a simple BIOS update tool for the operating system designed to search the cloud for the latest BIOS version, download it and update the system. I should point out that I have found times when the latest BIOS version the website is actually newer, but users can download this and use @BIOS to update the system. @BIOS also comes in handy when Gigabyte to large changes that cause the BIOS update route through the BIOS to fail, and thus @BIOS must be used. There are horror stories about updating a BIOS in the operating system (I prefer to update through the BIOS if I can), but I have not had any issues with @BIOS to date.
Realtek LAN Optimizer
While not part of the Gigabyte software package, the Realtek LAN Optimizer is included with the Driver DVD. The LAN Optimizer allows users to prioritize certain programs over others for network traffic. This can either be done on an individual level, or as a ‘mode’, such as for gaming or web-browsing. Essentially this is to make sure that while a user is downloading a large amount of data, the bandwidth is not choked for normal activities.
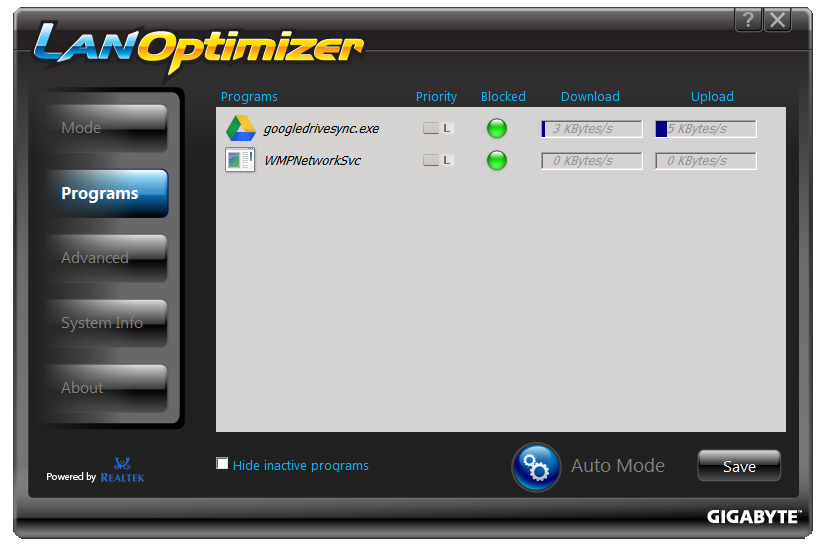
This software is essentially a poor mans cFos. cFos is a great software based LAN utility, available to buy or license, and is included in other motherboard manufacturers software packages. Gigabyte has chosen not to use this route, as their high end motherboards come with Atheros Killer NICs and their appropriate software.


Also available for download is Gigabyte USB Blocker, which allows administrators to block certain types of devices from being used in the system.
Gigabyte H77N-WiFi Overclocking
‘What so you mean, overclocking?’ I hear you cry. This is a H77 board after all – we cannot adjust the CPU multiplier above the CPU base, and we are restricted to DDR3-1600 MHz by the BIOS. But we can adjust the BCLK, and Ivy Bridge is usually good for 105-108 MHz, but this is highly dependant on the processor and the other sub-systems on board. Normally in my overclocking parts to these reviews I do not push BCLK, but the majority of Z77 motherboards can achieve around 109 MHz except one or two that fail to go beyond 104 MHz.
But a user should not honestly buy a H77 for overclocking. Some users will be interested in underclocking though, and the H77N-WiFi is not the best for underclocking. To start, while we can adjust the CPU multiplier down from its original value, we have no control over the CPU voltage. Yes, that is right – no CPU voltage control. For all intents and purposes, the F2 BIOS restricts the user to the VID voltage and idle states. I do hope that in a later BIOS that the voltage can be adjusted.


52 Comments
View All Comments
extide - Tuesday, November 6, 2012 - link
Seems like it would be more appropriate than using a 7970 or 580desiredusername145 - Wednesday, November 7, 2012 - link
C'mon Anandtech whats the point testing this with an i3???Now I wasted time even opening this article, shame on you
cjs150 - Wednesday, November 7, 2012 - link
"C'mon Anandtech whats the point testing this with an i3???"That is a bit harsh. I suspect lots of people will pair an i3 with a mini-itx board.
Personally I have an i7-3770T in my mini z77 board but lots of people would regard that as overkill (also runs a bit hot - I suspect the culprit is intel using cheap thermal paste on the IHS as widely reported).
HappyCracker - Wednesday, November 7, 2012 - link
Agreed. Even a Clarkdale i3 will happily push 1080p content to a 1080p display with its integrated graphics and I think this is where a lot of users will position their ITX boxes. As long as you're not in a huge hurry, you can also encode video. It's all about positioning the right computer in the right spot.hasseb64 - Wednesday, November 7, 2012 - link
mITX boards are more and more intresting, but I want you as a reviewer to focus more on power consumption.Th-z - Wednesday, November 7, 2012 - link
Is there going to be a review on APU (FM2) with mITX? I'm also looking for a prebuilder that sells APU mITX system using small chassis with external power supply. Puget has them using Antec ISK 110 and 310 cases, but you can only customize them for Intel parts.Last question, isn't it illogical to say "UEFI BIOS"? As UEFI is to replace BIOS, not an extension of BIOS, as "UEFI BIOS" would imply. The F in UEFI already stands for Firmware, so conceptually, it's like saying "Firmware BIOS". If wheel is to replace feet, we just need to call it wheel, not wheel feet.
Urbanos - Wednesday, November 7, 2012 - link
you didn't cover wireless! its a main feature of this mobo.missing all networking bench's, also does it allow for teaming? and how well?
did you test the raid setup? will each controller see each other's array in the config utility?
chassis options? temperatures?
dual HDMI tests and examples? image quality?
don't mean to be a dick here, but anandtech has a much higher standard than this.
klmccaughey - Wednesday, November 7, 2012 - link
We need you to spot the flaws before we buy it Ian, so I see no problem with you being critical as you are always constructive.Keep up the great reviews! I'm still waiting for my ITX HTPC killer board - they are all far to expensive.
rwpritchett - Wednesday, November 7, 2012 - link
Good review Ian. I've been running with this motherboard for about a month now in an ISK 310-150. It's good to see someone review the H77 version rather than the Z77.I'd like to add another gripe about the layout- the 24-pin power header. It's right on the top edge of the board. My case has fans on that side and the fan blades hit the clip on the power connector. If it was moved away from the edge just 2mm it would be in the clear (or better yet, it should be on the memory side of the motherboard like the Asus H77 ITX) . I had to forego a fan in that position for now, but I plan to add washers to slightly space a fan away from the 24-pin connector.
Another slight annoyance is that the BIOS refuses to see my SSD if the SATA is set to RAID. I don't know if it is specific to my model of SSD, a Crucial M4, or there is a bug that needs to be fixed.
cjs150 - Thursday, November 8, 2012 - link
Would the 24 pin position work for you ?I prefer the 24 pin to be at the edge of the board but at right angles to current position (ie not pointing straight up). Would be nice if someone would prefer a 90 degree 24 pin adapter