Gigabyte H77N-WiFi Review – First Look at Ivy Bridge with mITX
by Ian Cutress on November 6, 2012 12:00 PM EST- Posted in
- Motherboards
- Gigabyte
- H77
- mITX
The nature of living beings is to adapt to the surroundings around them – if it is cold, we put on warm clothes, and when it is wet, we tend to seek shelter. When it comes to technology and electronic products, the same can not be said. Innovation is driven by competition, otherwise product lines stagnate. If there was a technological elixir to end all competition, that would be it. By now you are probably wondering what this has to do, if anything, with the BIOS for a motherboard.
Adaptation of the BIOS in the past couple of years has been driven by competition. Before graphical interfaces for the BIOS became the norm, we were greeted with white text on blue screens, or white on black. Now we have a vast array of graphical options at our disposal, and each company is trying to outdo the other.
Initially two companies had the upper hand – both ASUS and ASRock had systems to use multiple colors and mouse movement, making BIOS navigation more intuitive. MSI went a different route and included games in their BIOS as part of a technical exercise to see what was possible. Gigabyte sat back and kept with the old style BIOS. At the time, that meant they were not on the crest of that innovation wave, but I am told by Gigabyte that the reason was due to development of their own BIOS system rather than reskinning an AMI or Phoenix BIOS base code like the other manufacturers. When X79 motherboards were released, Gigabyte showed us the fruit of their endeavors, which ended up being an adapted AMI BIOS rather than a complete rewrite. I was not impressed.
The initial release was slow, bulky, and along with many other reviewers, was baffled by the naming system. Gigabyte called it their ‘3D BIOS Technology’, using 3D to mean 3-dimensional. The majority of users would have been exposed to a 3D environment on their computers, either through games or design. But Gigabyte had construed this terminology to apply to images drawn at an oblique angle. There was noting three-dimensional about it – the user could not navigate from foreground to background (anyone remember playing Tombi/Tomba on PSX?). All we had was an oblique image with clickable parts that gave smaller versions of the advanced BIOS functionality. This 3D BIOS aside, due to the slow and young BIOS which had not had time to develop, we struggled to deal with odd decisions regarding menu allocation (overclocking voltages were several clicks away from the CPU speed adjustment) or fan control terminology. At the time, and since, I made a raft of criticisms and suggestions.
Fast forward almost a year and several things have changed for the better. We can now navigate the Gigabyte BIOS at speed, which is most important. Boot times on certain models can be aggressive, and Gigabyte is opening up more options in the BIOS than before. I love the fact that we can screenshot the BIOS rather than having to photograph the screen (despite some reviewers still miss this feature and get the camera out). We are still stuck with this 3D terminology though, and some odd fan terminology. I have explained to Gigabyte that normal users do not work in PWM values / °C, so I am hoping that will change in the future.
Gigabyte H77N-WiFi BIOS
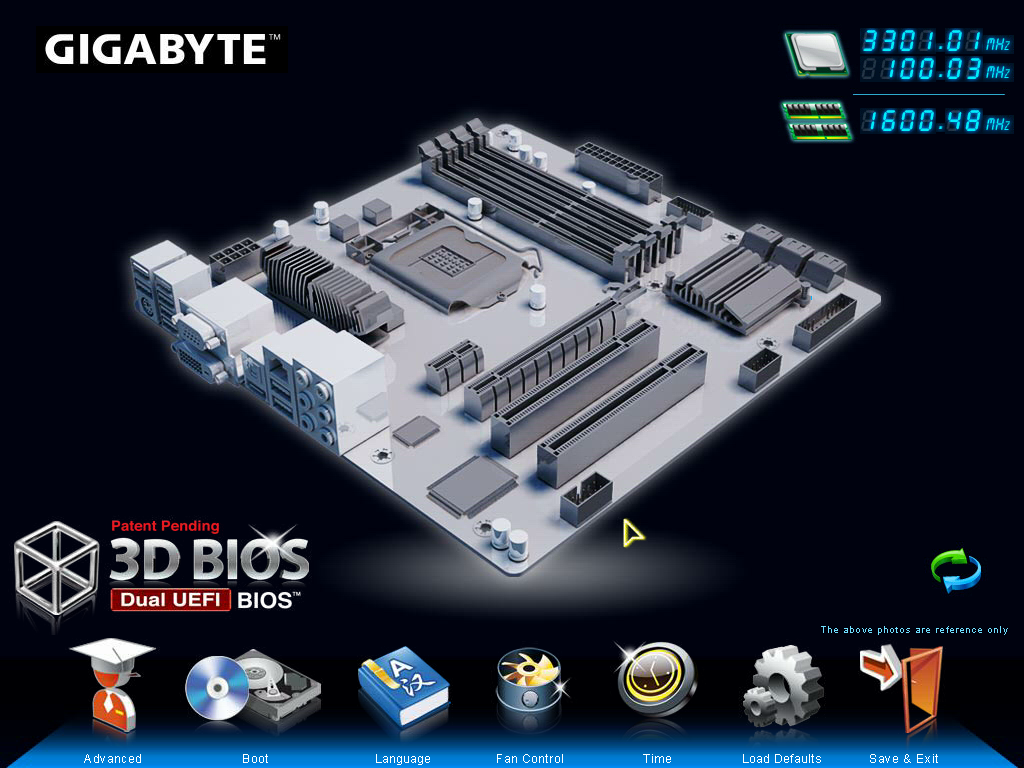
For the H77N-WiFi explicitly, the first odd feature to point out should be the ‘3D’ image used at the front head of the BIOS. Despite the disclaimer that ‘the above photo is for reference only’ we would expect the motherboard to resemble somewhat like the board at hand. For the H77N-WiFi though, we get an image of a micro-ATX board, with the chipset and socket area in different places. Is it that time consuming to put in a mITX image? I fear that this was just an oversight with this BIOS version and should be corrected in the future.
My usual gripes with BIOSes are going to be expressed again, because very few manufacturers seem to take these hints on board (maybe I am not shouting loud enough). Nowhere on this front screen does it tell the user (or system builder, debugger) at least the two main things that should be present on the front screen of ALL BIOSes – the model of the motherboard and the CPU present. This information should be in the face of the user when we enter the BIOS so mistakes are not made with the system we are working with. Alongside this I would also want the current speed of the processor, memory installed (along with module size and memory speed), CPU temperature, chipset temperature, important voltages and fan speeds. If we count the first two requests as the primary detail and the others as secondary detail, what is to stop the primary details being shown on the front screen and the secondary details being shown in a pull out menu when the mouse drifts to the side or corner (like in Windows 8). This is a graphical BIOS – a metaphorical playground to make the experience of owning the product come to life and exciting. I see very few motherboard manufacturers taking advantage of this to the full.
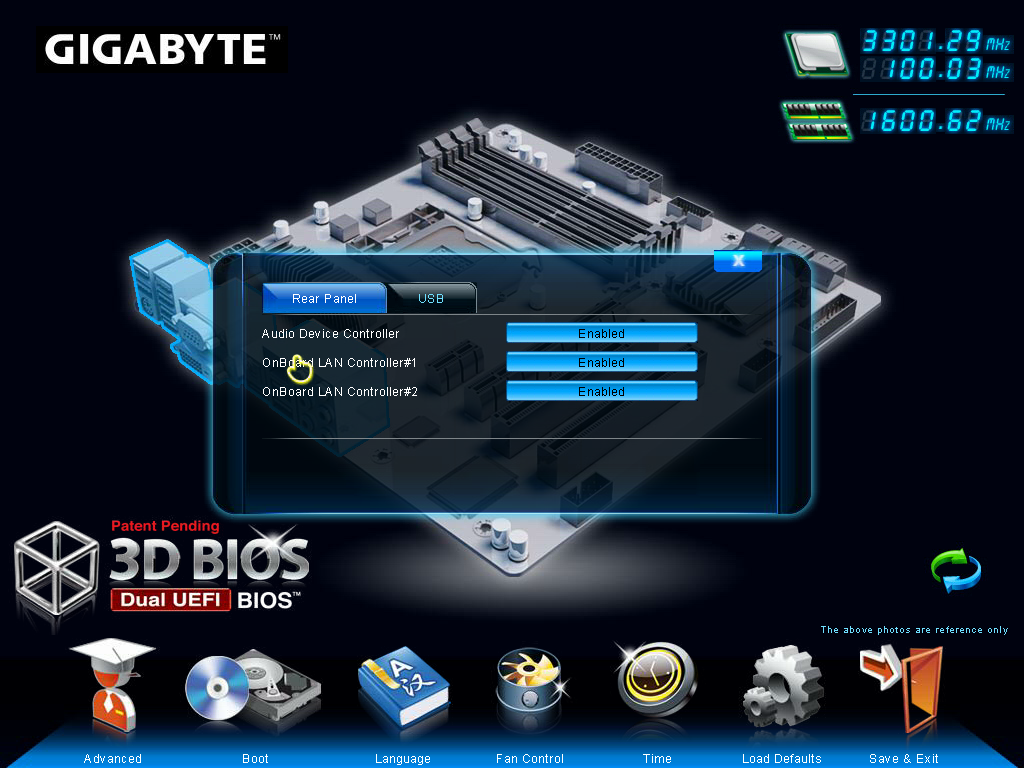
Despite this, the functionality of the H77N-WiFi BIOS is as follows. The main screen gives an image of a generic BIOS of which various areas of the motherboard can be highlighted and clicked, such as the CPU, the memory, the chipset, the SATA ports, the IO panel and so on. When clicked, each area will bring up a limited set of options pertaining to that motherboard section – the rear panel section for example will give options to enable/disable audio and LAN ports as well as USB legacy support. Also available are options to adjust the boot order, change the language, or deal with fan controls. It would be ideal if the areas on the motherboard, when highlighted, gave a small indication of what they are – asking a family member to ‘select the SATA ports’ on the BIOS over the phone is a bit useless if they do not know what a SATA port is. These are small little adjustments that could be made to make the experience smoother.
The bulk of the options are found in the Advanced menu. This opens up into a typical modern day graphical BIOS interface where we have the main options along the top, with options and sub-menus in the main area. The first advanced screen is the ’MIT’ (Motherboard Intelligent Tweaker), where we actually get some details regarding what is onboard – off the bat we have the BIOS version, CPU Frequency, Memory Size and frequency, CPU temperature and some voltages. All that information (along with the motherboard model more importantly) should be in the 3D menu previous.
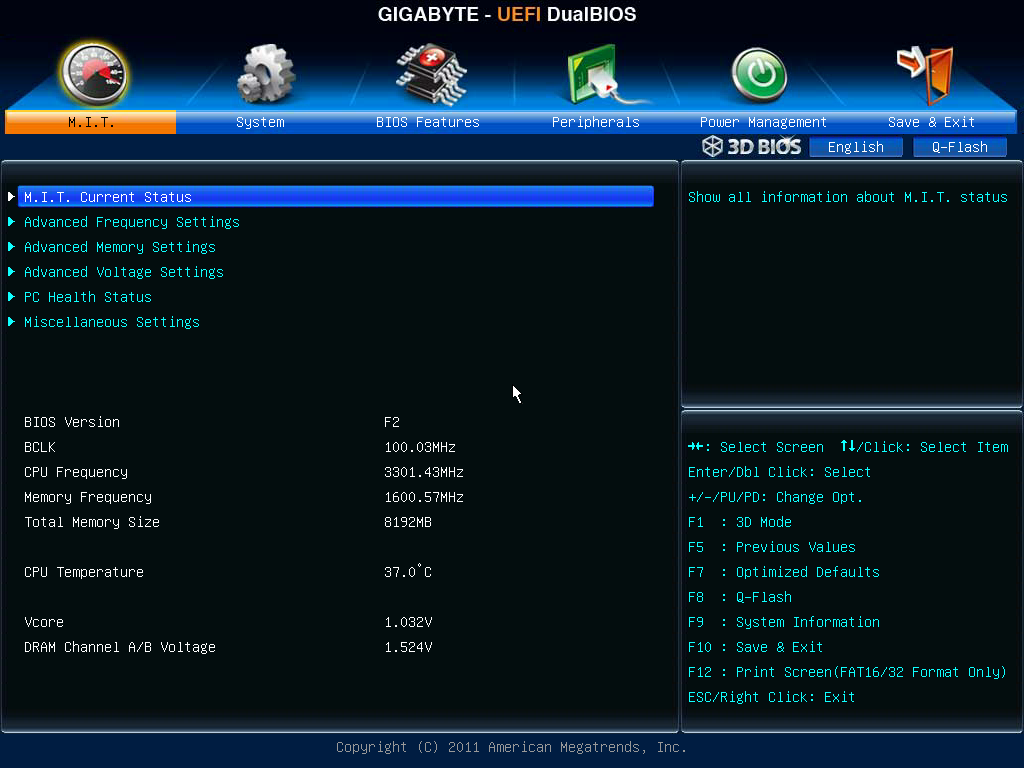
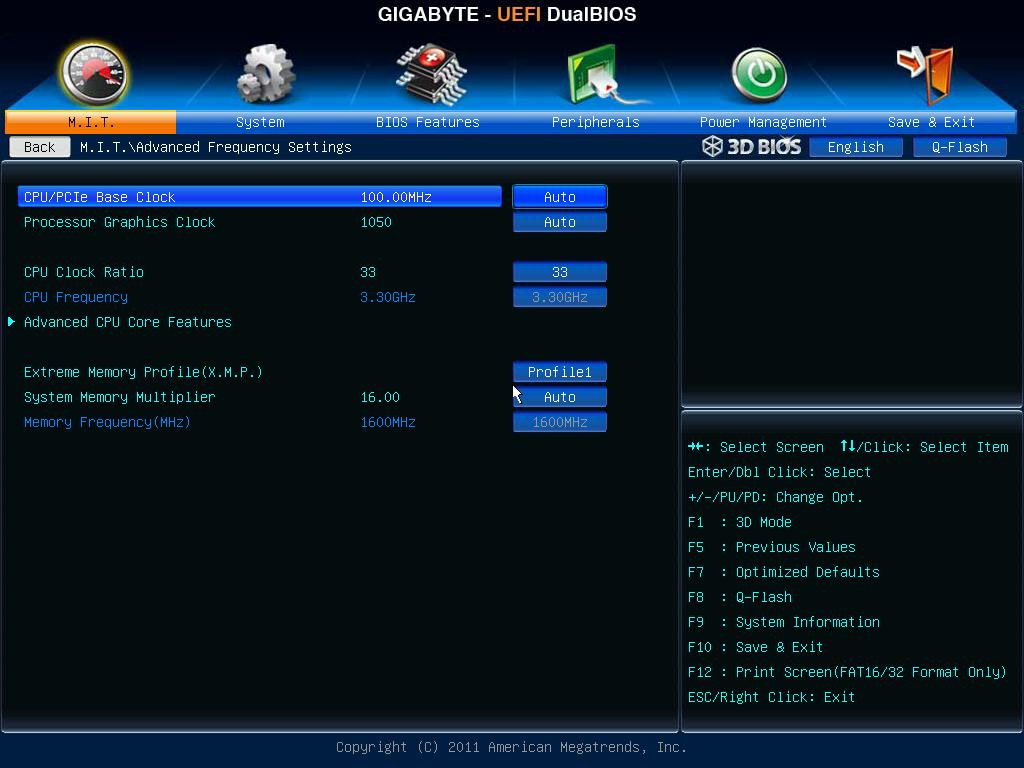
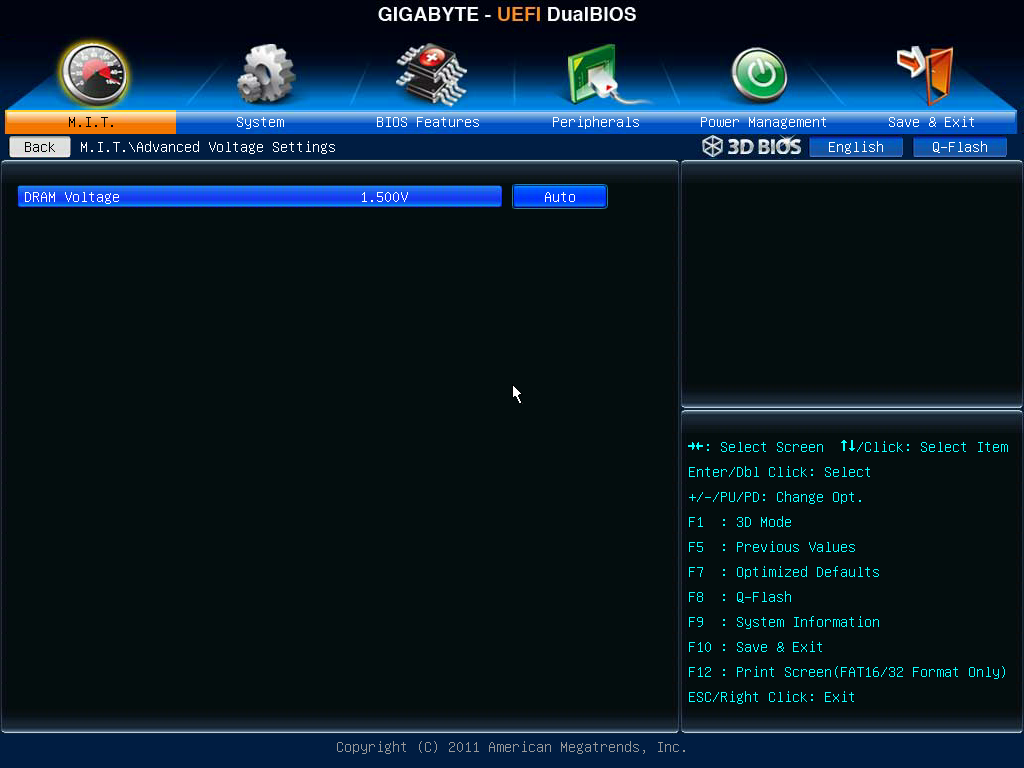
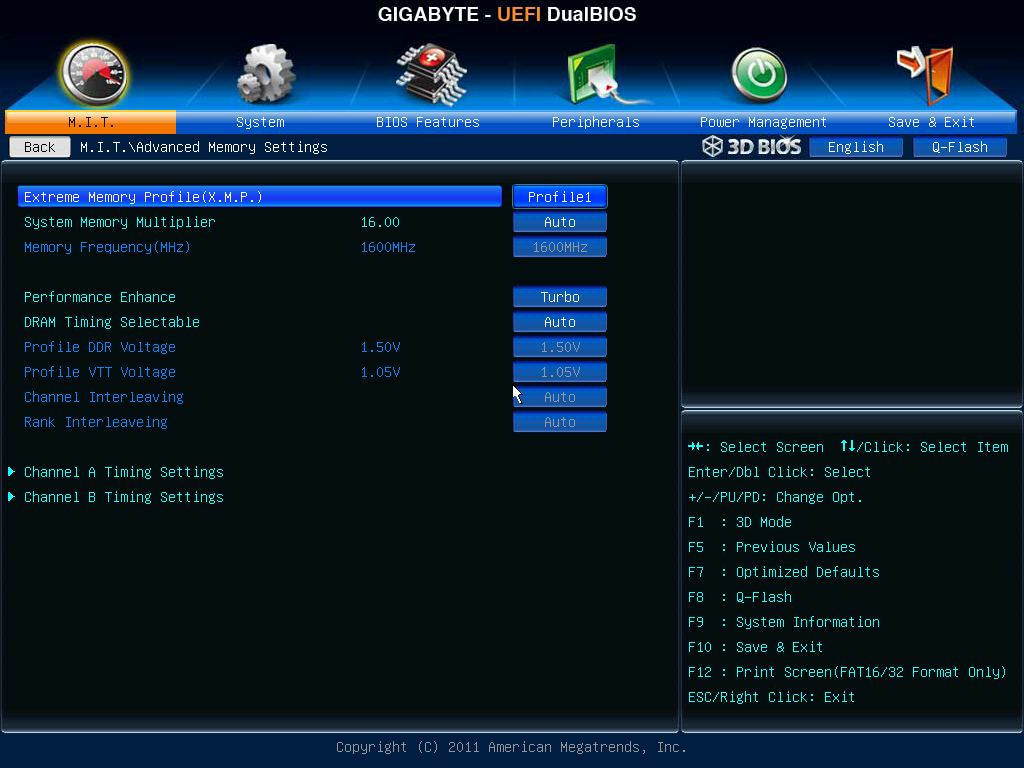
Various sub-menus can be spawned from the MIT menu. We can select ‘Current Status’ to give a more detailed rundown of the CPU and memory; the frequency settings which can adjust the speed of the processor (only below the rated speed on an H77 by multiplier but BCLK can be adjusted up), memory (max 1600 MHz) and IGP. We also have the advanced memory settings sub-menu where XMP and sub-timing adjustments can be made. The advanced voltage settings offer only the memory voltage to adjust, so do note that the H77N-WiFi does not allow down-clocking. Finally the ‘PC Health’ sub-menu which gives voltages, temperatures, fan speeds, and the fan speed control which gives options in PWM values / °C.
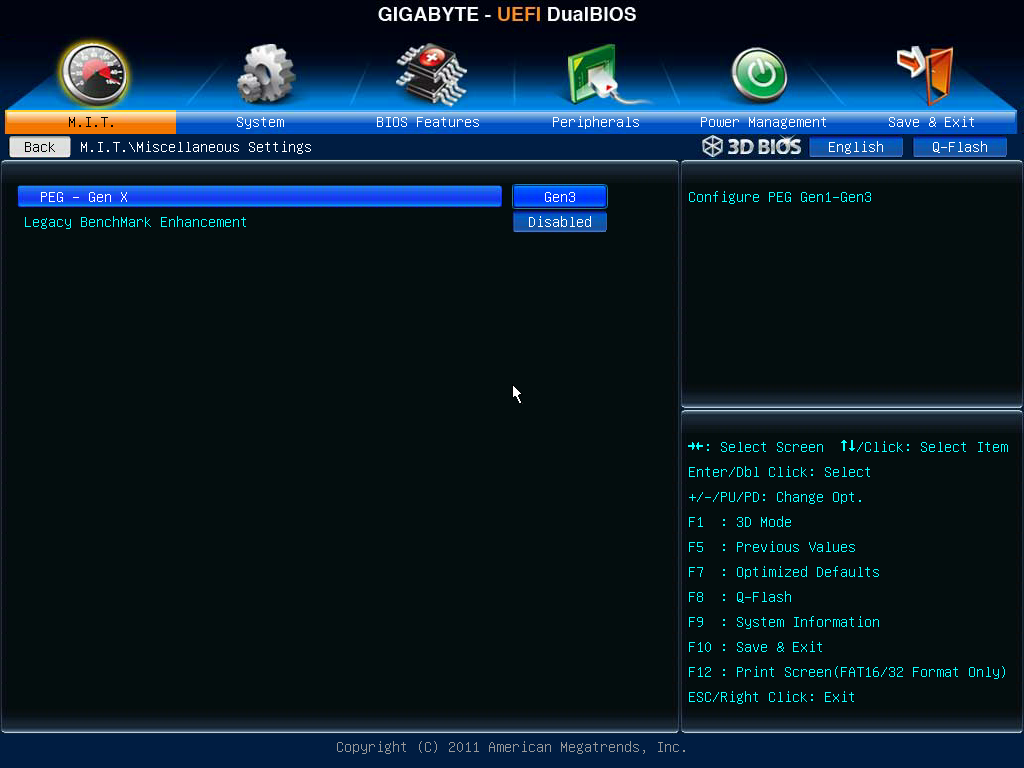
An important menu to consider is the final sub-menu ‘Miscellaneous’ settings. Here we have two options – one for legacy benchmark enhancement (an odd option to include for overclockers on a non-overclocking motherboard) and the other to adjust the PCIe slot bandwidth. When the system was left on auto, I had trouble getting any of my graphics cards to run at the full 16x lanes – I initially thought it was some clever down clocking, but it never seemed to come back up and use the full 16 lanes at PCIe 3.0 for a 7970 for example. By navigating to this menu and adjusting the option to Gen3, the graphics sub-system never faulted and we got accurate benchmark results. If this is a BIOS issue rather than individual issues, I hope it is fixed after F2.
Elsewhere in the BIOS is our standard array of BIOS Features (Boot options, Logo on Boot), Peripherals (to enable controllers, change SATA mode), and boot override system.


52 Comments
View All Comments
Senti - Tuesday, November 6, 2012 - link
Default is teh default and stripped is after manually turning off unused features like network boot and various additional controllers boot roms that are needed only if you intent to boot from those devices.GoodBytes - Tuesday, November 6, 2012 - link
Ah Thanks,To be clear, these values are still with a dedicated graphic card, right? cause I know those add time to the POST process.
IanCutress - Tuesday, November 6, 2012 - link
Yes, these post times are with a GPU installed.dishayu - Wednesday, November 7, 2012 - link
Hey Ian, you mention "four SATA 4 Gbps" ports for H77 chipset on the first page. I'm assuming that's a typo and Intel haven't actually implemented a non-standard 4Gbps port?Dug - Tuesday, November 6, 2012 - link
All of your complaints sound like you aren't a typical mITX user. You are comparing against ATX boards? Why?Of course you can't put giant heatsinks on this, and why would you when you are testing an i3-3225 and its designed to go in a case that's 7". You couldn't anyway with 99% if mITX cases out there.
Test stability and reliability, how well the wireless works, ethernet, USB, and SATA performance.
Why do we need to see a benchmark of an i3225 against and Asus P9X79 Pro with an i7-3960X? This is a motherboard review, not a cpu review.
And what is with the game benchmarks? What video card did you use? Don't tell me you used a video card that's 3 times longer than the motherboard.
Sorry but this doesn't seem like a review for the intended audience of mITX.
crimson117 - Tuesday, November 6, 2012 - link
After all the notes about the odd component positioning and theories about how it might complicate the installation, he doesn't even try installing it in a real mITX case...Armourcore9brker - Tuesday, November 6, 2012 - link
I agree with this.About the complaints about component placement. That's dictated by the Intel socket pinout. See here: http://www.intel.com/content/dam/www/public/us/en/...
Starting on page 94.
Essentially the entire pinout shows where components would be placed. There isn't the room like on ATX boards to route the traces to other parts and have it be all neat.
What Asus and EVGA had to do was to add more layers to the board to get the traces to not interfere with the PCIe signals. That in turn will increase cost.
IanCutress - Tuesday, November 6, 2012 - link
Then the option becomes to just do it, or do it right. Different motherboard manufacturers have different mandates when it comes to this, and it shows in the cost.Regarding benchmarks, I have these numbers in the database, and thus it is interesting to see the difference between the two. I'd rather have an excess of data points than a limited field of view. As for using a high end video card, the whole point of a motherboard review is to test the limits - make the motherboard be the limiting factor in all testing as much as possible. There are now plenty of cases that deal with long discrete GPUs so that is not an argument against using one, and when going around a large LAN event it is interesting to see a double digit percentage of mITX builds around a powerful GPU. Similarly these users are also using cases that can accommodate larger heatsinks.
"Sorry but this doesn't seem like a review for the intended audience of mITX." - I feel the market for mITX is larger than you think. This Gigabyte board was built at the request of a system integrator in Asia, who bought 10000+ units for a specific need. The result of spending the time and effort made Gigabyte release the product to the general market. What may have been the plan for that system integrator may not be the plan for users - particularly when it comes to that 4-pin CPU power placement.
EnzoFX - Tuesday, November 6, 2012 - link
I agree that mITX is flexible and can accommodate powerful gaming rigs. However I'd say that is the minority. My concern with my mITX builds is always a balance of feature set. Stability. mITX to me is taking the, as Anand calls it "device-ification" of computers into my own hands. They go in smaller cases, whose components won't be changed all that often, so stability and build quality is actually even more important to me. The other thing is heat, while this is characteristic of cases and component selection, I think it would help us greatly if we got these mITX boards tested in practical use cases as well.My personal annoyance is seeing 500W+ PSU's with mITX builds that don't go anywhere near even half that wattage.
The mITX reviewing can use a boost here. Usually I find myself looking for reviews of what do become widely recommended boards. Test the top contenders, I'm always hearing about that ASRock ITX board, that's the #1 recommended board I see recommended in forums. Gigabyte is a brand I rely on, so I welcome their reviews, so thanks.
Termie - Tuesday, November 6, 2012 - link
Ian - thanks for this review. I built up a system using AsRock's z77 ITX board, and was also puzzled by the socket placement, but ultimately not everything will be as neat as on a bigger board because there just isn't as much board edge space available. No matter what, at least one power cable will be stretched inelegantly across the board.A few comments:
(1) your OCCT load numbers with the 7970 appear to be incorrect - perhaps this was actually running on the internal HD4000, judging by the wattage.
(2) testing power consumption on a platinum PSU is a bit unrealistic, as there are no SFX platinum PSUs available, as far as I know, and while some ITX builds go into cases, like the Prodigy, that can hold an ATX PSU, the use of Platinum PSUs even in these builds is unlikely due to cost.