ASUS P8Z77-V Premium Review: A Bentley Among Motherboards
by Ian Cutress on August 13, 2012 10:30 AM EST- Posted in
- Motherboards
- Asus
- Z77
ASUS P8Z77-V Premium Overclocking
Note: Ivy Bridge does not overclock like Sandy Bridge. For a detailed report on the effect of voltage on Ivy Bridge (and thus temperatures and power draw), please read Undervolting and Overclocking on Ivy Bridge.
Experience with ASUS P8Z77-V Premium
Overclocking with the P8Z77-V Premium was as straightforward as any other ASUS motherboard. In terms of automatic overclocking, we have two options in AI Suite – Fast and Extreme. The TPU switch and OC Tuner option in the BIOS both perform the ‘Fast’ option equivalent. The Extreme setting performs automatic stress testing in order to raise both the multiplier of the CPU and the BCLK to get the best overclock based on cooling and environment.
Manual overclocking was a little mixed - the way that ASUS performs the overclock is to apply the settings after the POST, which means that a user is almost always guaranteed to get into the BIOS. However, for the most part of our overclock testing, the system would go straight through into our testing, and would seem stable during the first couple of minutes in our testing before producing a memory error if the voltage is not sufficient. Nonetheless, we did get a competitive result for our overclocking.
One note I should point out – after seven weeks of dull and dreary weather here in the UK, during testing of this motherboard we ended up with bright sunshine, causing ambient temperatures to raise from 15°C to 25°C, and humidity to also rise. As a result, overclocking on this system hit its peak earlier than in other environments. Unfortunately it is not common for residential properties in the UK to have air conditioning either, so we had to make do with an additional pair of powerful Delta fans to aid cooling.
Methodology:
Our standard overclocking methodology is as follows. We select the automatic overclock options and test for stability with PovRay and OCCT to simulate high-end workloads. These stability tests aim to catch any immediate causes for memory or CPU errors.
For manual overclocks, based on the information gathered from previous testing, starts off at a nominal voltage and CPU multiplier, and the multiplier is increased until the stability tests are failed. The CPU voltage is increased gradually until the stability tests are passed, and the process repeated until the motherboard reduces the multiplier automatically (due to safety protocol) or the CPU temperature reaches a stupidly high level (100ºC+).
Our test bed is not in a case, which should push overclocks higher with fresher (cooler) air. We also are using Intel's All-in-one Liquid Cooler with its stock fan. This is a 120mm radiator liquid cooler, designed to mimic a medium-to-high end air cooler.
Automatic Overclock:
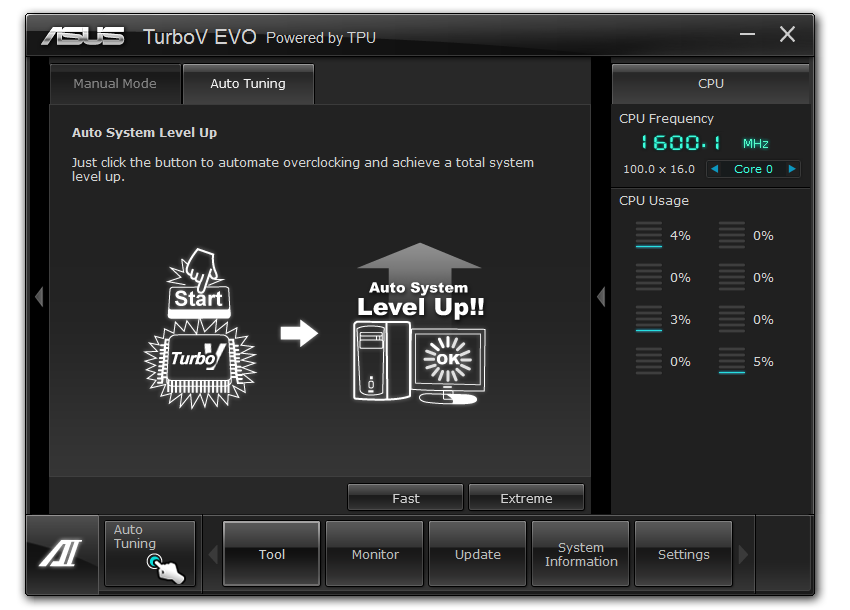
The two options for the automatic overclocking are found in AI Suite – either Fast, which applies a fixed overclock series of settings, or Extreme, which uses stress testing and sensors to find the best overclock with respect to the local environment. Here are our results.
At the Fast setting, the CPU was raised to the 41x multiplier and 103 MHz BCLK, giving an overall overclock to 4223 MHz. In the OS, this showed an OCCT load voltage of 1.128 volts, and peak temperatures during PovRay of 76°C and OCCT of 78°C.
At the Extreme setting, the CPU was raised to the 45x multiplier and 103 MHz BCLK, giving an overall overclock of 4635 MHz. In the OS, this showed an OCCT load voltage of 1.296 volts, and peak temperatures during PovRay of 98°C and OCCT of 102°C.
Manual Overclock:
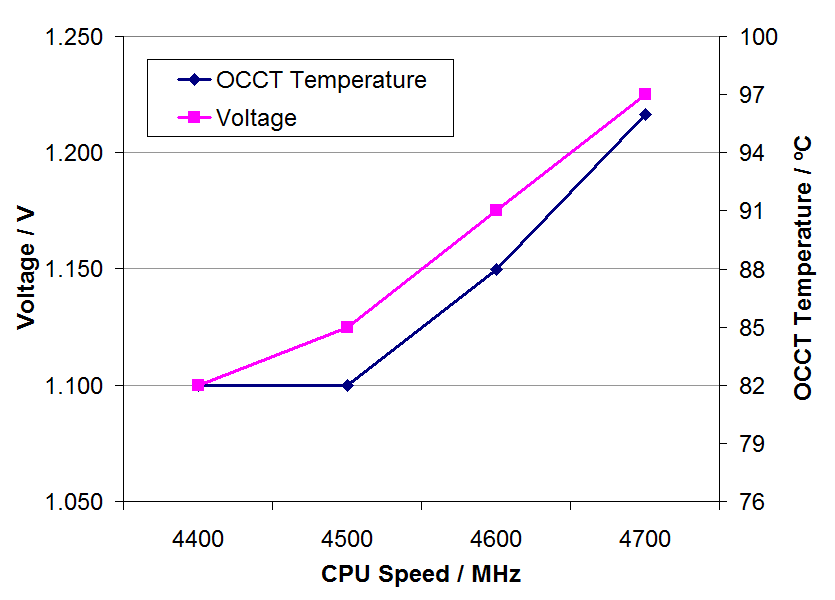
Manual overclocks were performed purely by entering the BIOS and adjusting values. With the AI Overclock Tuner mode set to ‘Manual’, the main options being changed were the 1-core Ratio Limit and the CPU voltage set to a fixed value. Load Line Calibrations were left on Automatic. Here are our results.
Starting at the 44x multiplier and 1.100 volts set in the BIOS, the system showed an OCCT load voltage of 1.112 volts, and peak temperatures of 79°C during PovRay and 82° in OCCT were observed.
At the 45x multiplier, the minimum voltage stable was 1.125 volts set in the BIOS, which showed an OCCT load voltage of 1.128 volts. Peak temperatures of 80°C in PovRay and 82° in OCCT were observed.
At the 46x multiplier, the minimum voltage stable was 1.175 volts set in the BIOS, which showed an OCCT load voltage of 1.176 volts. Peak temperatures of 85°C in PovRay and 88° in OCCT were observed.
At the 47x multiplier, the minimum voltage stable was 1.225 volts set in the BIOS, which showed an OCCT load voltage of 1.232 volts. Peak temperatures of 93°C in PovRay and 96° in OCCT were observed.
At the 48x multiplier, a BIOS voltage of 1.275 volts was not stable in the OS, giving memory errors in PovRay and showing 98°C peak temperature during the initial PovRay running.


43 Comments
View All Comments
Deptacon - Tuesday, August 14, 2012 - link
Does the eSata port support Port Multiplier??? This should always be addressed when dealing with an eSata port.Arcanedeath - Tuesday, August 14, 2012 - link
the Asmedia controler used for the Esata ports does support Port Multipliers and FIS based switching which is required to work with most of the SI based backplanes.MacGyverSG1 - Sunday, August 19, 2012 - link
I am very interested in both the Premium and Maximus V Extreme for my next build. I just can't decide which would be the better choice. The extreme overclocking features of the V are useless to me, but I do like that the mSATA is optional.Hopefully a review of the Maximus V Extreme is in the works and it will be compared to the Premium.
The best review for the Premium I've read so far.