ASUS P8Z77-V Deluxe Review - Know Your SKU
by Ian Cutress on May 12, 2012 8:45 AM EST- Posted in
- Motherboards
- Asus
- Z77
ASUS P8Z77-V Deluxe BIOS
In the past, when you had seen one BIOS then you had generally seen them all - white text on blue screens (or white on black if you were lucky). Now that we are firmly in an era of graphical interfaces and user operability, as users we get to see and play with the combination of designs that teams and BIOS engineers can envisage. Leading the field during P67 was ASUS, but now with Z68 and X79 out of the way, MSI and Gigabyte have been hot on their heels in an attempt to offer a superior experience.
The problem with consecutive iterations of innovation is how to innovate next - more functionality, or improvements on current functionality? ASUS will perhaps have to invest in deciding which direction to take over the next few chipsets - but nevertheless, the BIOS we have access to today is still very well thought out, easy to use, and one of the better graphical BIOS implementations for users and enthusiasts to enjoy.
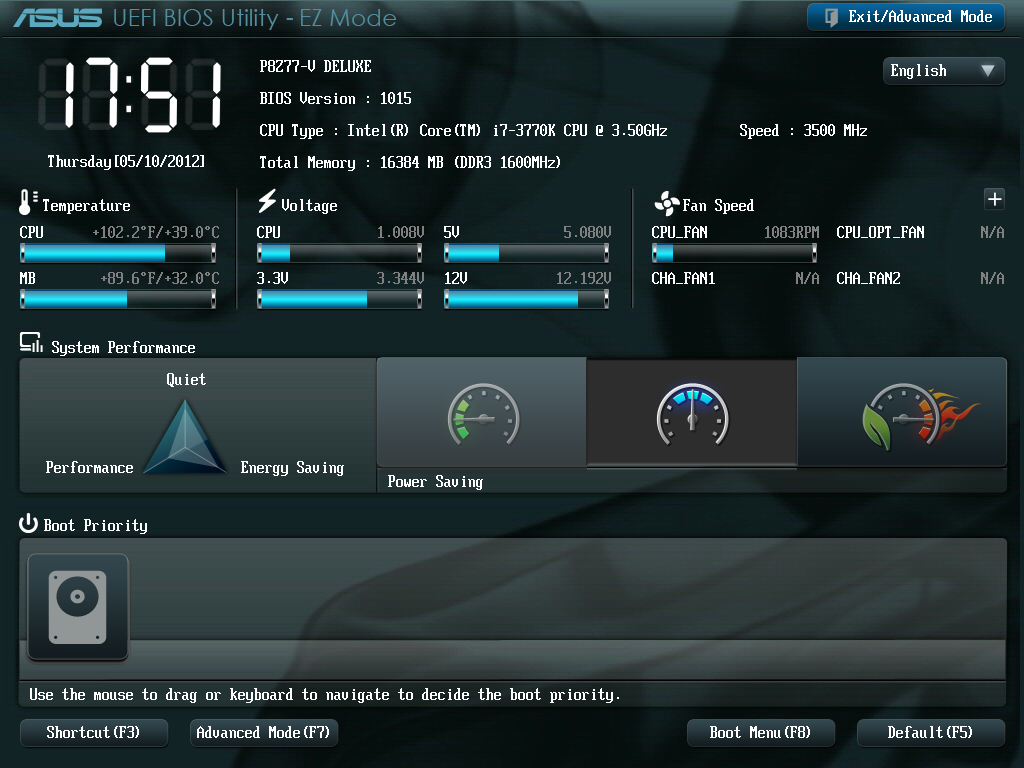
The initial screen as we may all know by now for ASUS products is the EZ Mode - showing everything a user needs to know about what they have just bought or are using. We have the board model and BIOS version (always important to know without opening up a case to find out or loading CPU-Z), CPU type and speed, memory amount and speed, CPU/chipset temperatures, as well as voltages and fan speeds. For ease of use, system performance can be adjusted for low power, normal, or high performance. The boot priority is also changed by dragging drives into their appropriate positions. Pressing F3 will bring up shortcuts to the main sections in Advanced Mode, whereas F8 offers a one-time boot choice for the next boot (useful for installing OSes in my case).
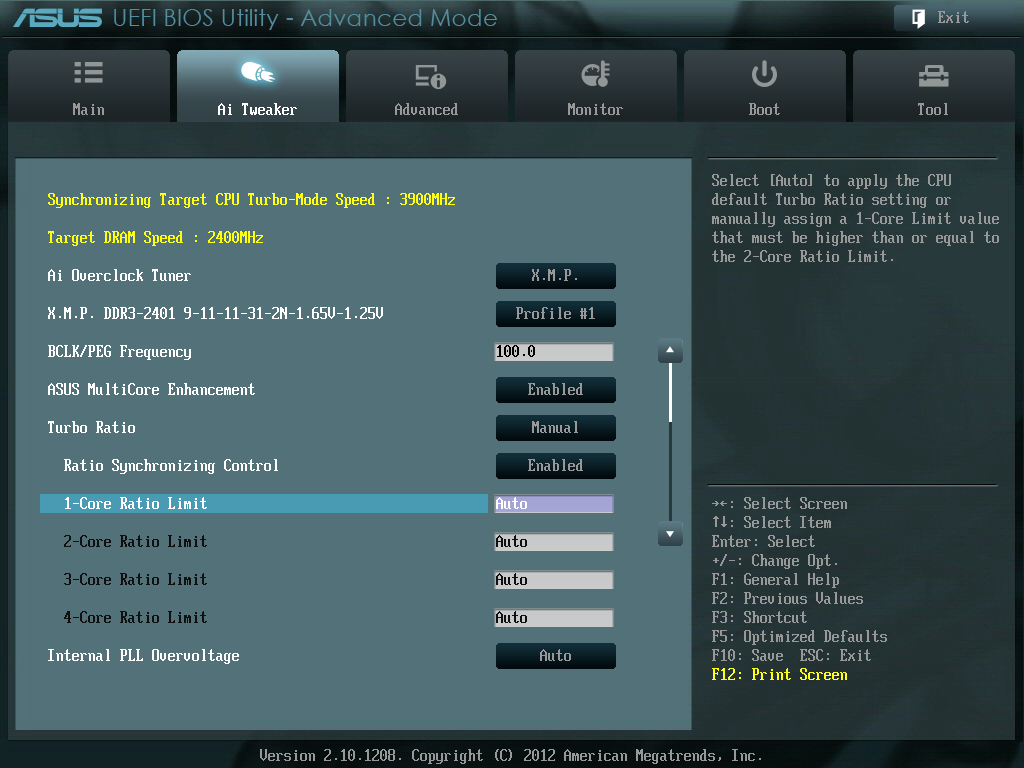
Advanced mode is where the meat of the BIOS action happens as per usual, with AI Tweaker holding all the overclocking secrets a general enthusiast could want. Users coming from ROG boards will find far fewer options on the Deluxe than on ROG boards, as the Deluxe focuses on delivering secure performance rather than bleeding edge - this may discourage a few extreme (sub-zero) overclockers, but chances are those users will be heading for ROG anyway. For the rest of us, the main option is 'AI Overclock Tuner', which offers Auto/Manual/XMP options.
Under XMP, the following options are opened up, with 'core ratio limit' determining the multiplier. The BCLK Frequency is also adjustable. When pushing the CPU above 4.6 GHz, it is recommended that Internal PLL Overvoltage be set to enabled. XMP is automatically set in this mode, including memory strap, voltage and subtimings. These can also all be adjusted as required.
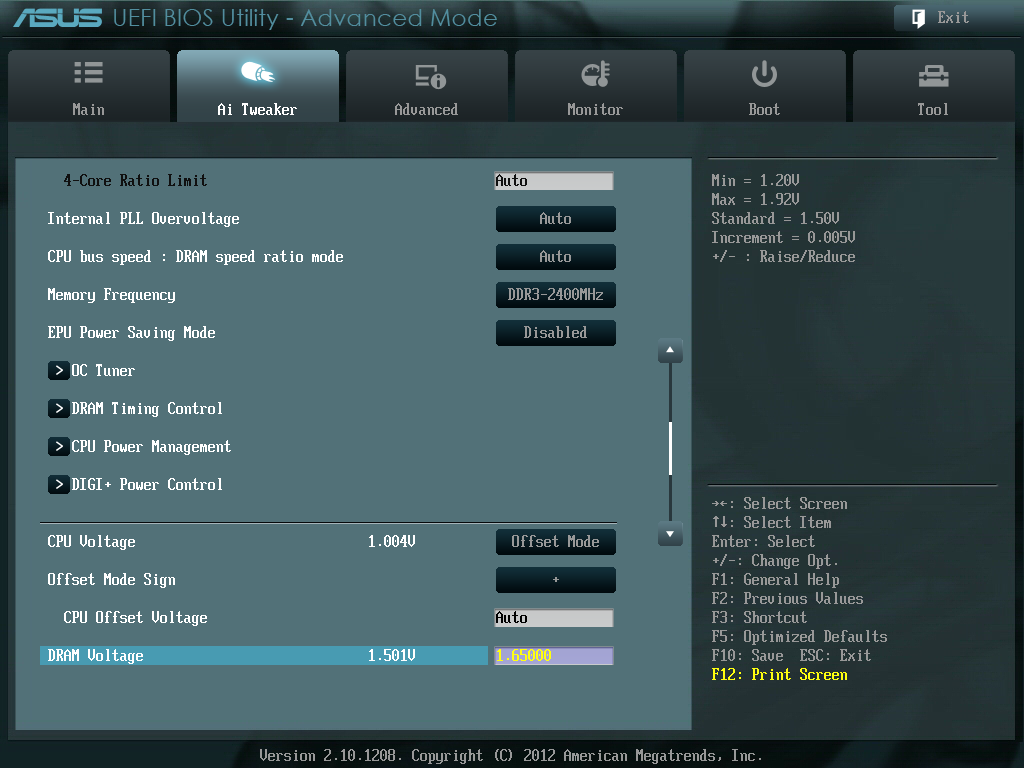
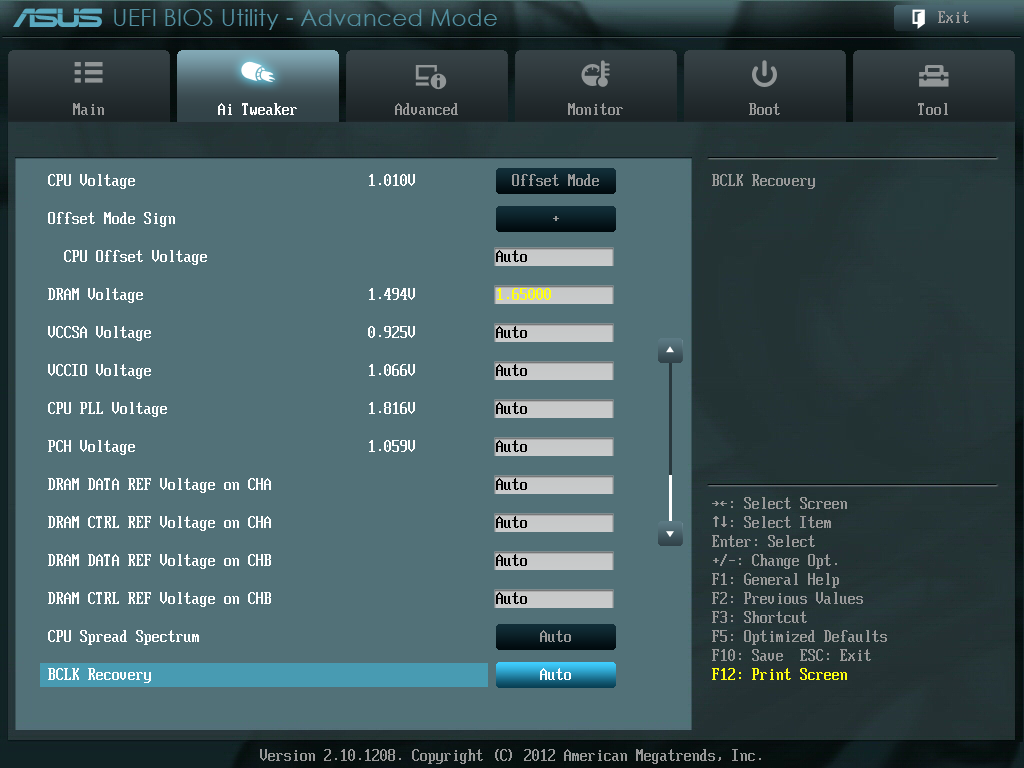
Voltages are set below the main settings, and the DIGI+ VRM option allows adjustment of all the digital power delivery - CPU, DRAM and iGPU as required.
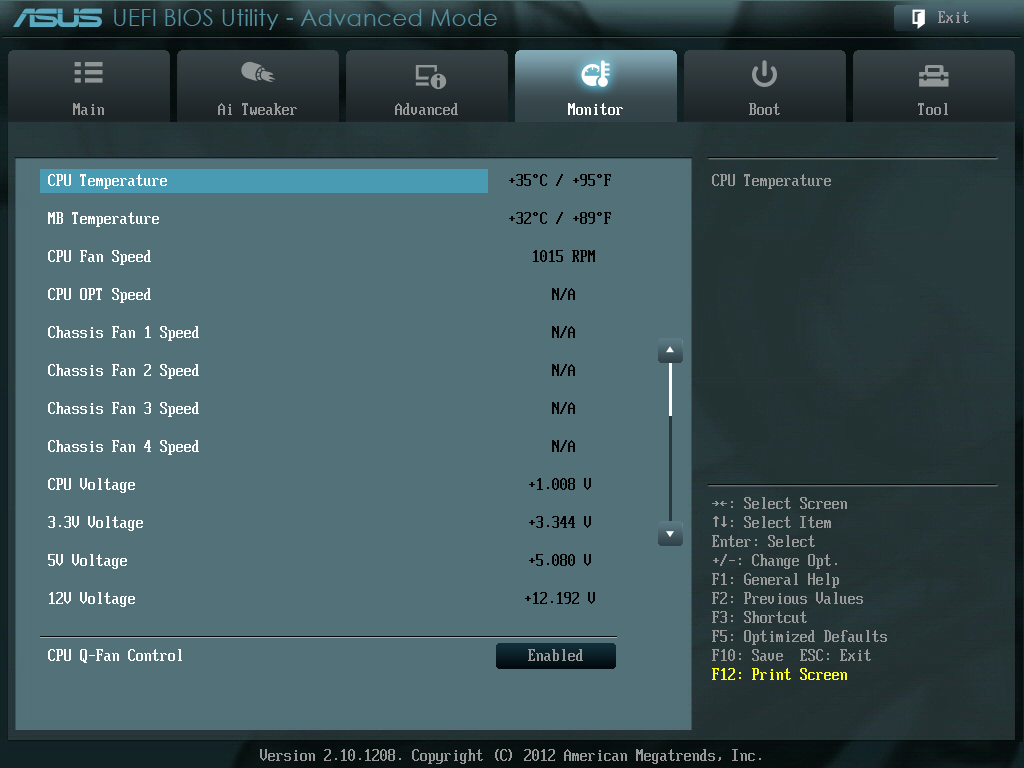
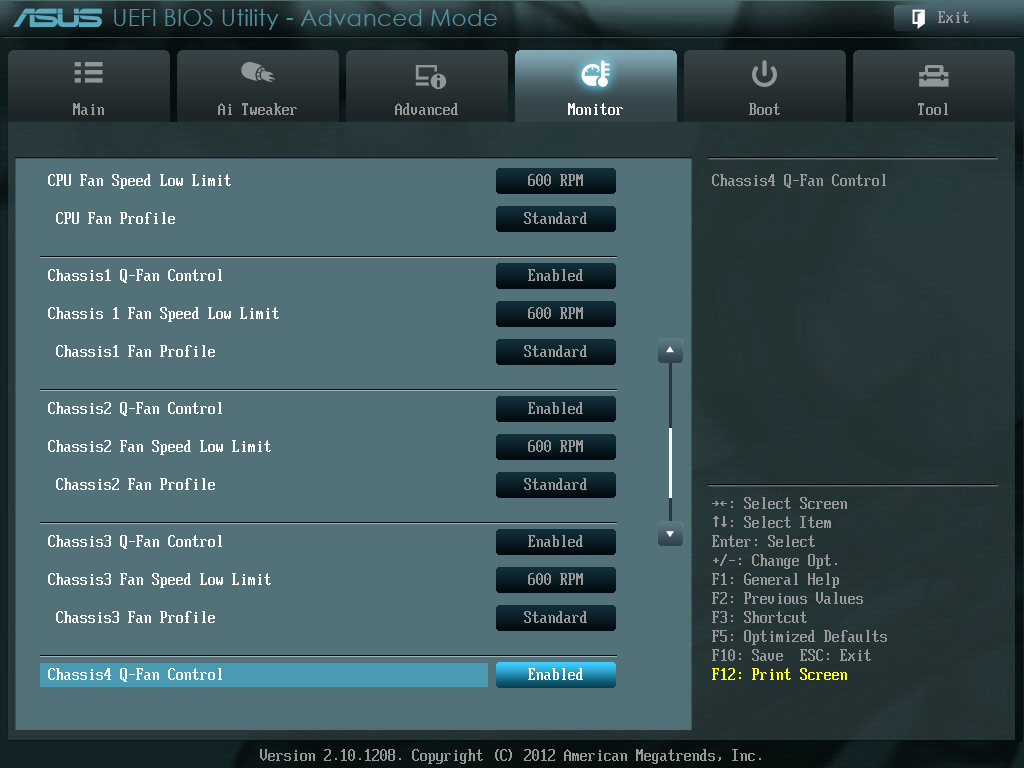
The main other section of the BIOS for users is the fan controls, found in the Monitor section. This shows the current temperature and fan speed settings, while underneath gives the variety of fan controls to which we are accustomed to with ASUS - actual numbers in terms of RPM and temperatures, rather than obscure units that some other manufacturers like to use. It is also worth pointing out that alongside all the fan headers supporting 4-pin fans, the chassis fan headers also support 3-pin fan control due to the upgraded fan controllers ASUS use.
ASUS also offer saving of OC Profiles, and an easily updateable BIOS through EZ Flash as long as you have a USB stick with a BIOS downloaded on to it.
It is very hard to criticize an ASUS BIOS, as it does almost everything really well. Other features I would like to see included are perhaps an Internet BIOS Update in the BIOS (like ASRock), graphs representing the fan controls (if possible) or perhaps an option to turn off all lights on the board (for dark gaming experiences).


Software
For the last few generations of motherboards, ASUS has pushed their AI Suite software. Acting as an all-in-one interface, AI Suite aims to bring all the separate areas of ASUS functionality into the same, consistent implementation so nothing catches a user by surprise (or fills the spare memory of a PC with 18 different processes).
AI Suite covers the following features:
TurboV Evo: Overclocking Settings, Auto and Manual
DIGI+ VRM: Power delivery settings for CPU and Memory
EPU: Energy Saving
Fan Xpert II: Fan testing and controls, featuring full automatic testing of fans and user-changeable configurations.
Probe II: Monitoring of on-board factors (temperature, fan speeds, voltages)
AI/USB Charger: Quick device charging utilities
USB 3.0 Boost: Superior USB performance on any USB 3.0 port using the UASP protocol
Network iControl (NiC): Priority configuration of software through network ports
SSD Caching: Integration of Z68 SSD Caching on Z77
USB BIOS Flashback: Set up a USB to flash a BIOS without any CPU/Memory/GPU required.
Our P8Z77-V Pro review covered AI Suite II, as well as USB 3.0 performance, in detail.


52 Comments
View All Comments
maximumGPU - Saturday, May 12, 2012 - link
i recently build a pc around an Ivy processor, and that's the motherboard i went for.Very happy with it, and the software bundle you get with Asus mobos is really useful.
One annoyance thought is that the cpu temperature reported in Fan Xpert did not seem to match the temperature readings i get from Real Temp or other software, especially under load. And since fan control is tied to that reading it makes it rather pointless.
Did you encounter that Ian?
Great review too.
Lonyo - Saturday, May 12, 2012 - link
I've noticed that as well, to the point where the numbers in the Asus software don't seem to update properly OR match the numbers in Realtemp, making the Asus software pretty useless for checking temperatures, and something I'm not entirely comfortable with in terms of controlling fan speeds, since it would be based on temperature readings I'm not comfortable with.webs0r - Saturday, May 12, 2012 - link
Run AIDA64 alongside fanXpert. You will find that ASUS uses the sensor named "CPU" rather than the individual core temps.While it reports lower than the core temps, it moves in line with the CPU temperature, and is a good proxy for fan control.
I would not worry about this at all.
So you should put the CPU under various loads and monitor in AIDA where temps get to, and construct your fan profile as you desire to balance the cooling power with noise.
I'm not sure what realtemp reports, it may not report the overall CPU sensor if it is only reporting each core temp.
The ASUS software is not useless/pointless at all.
maximumGPU - Saturday, May 12, 2012 - link
under Prime, both Aida and Asus mobo report 33 deg, while real temp shows 50-52 across all cores, which certainly makes more sense than the other reading.That makes fan controlling based on the number reported by the deluxe pointless.
mdev - Saturday, May 12, 2012 - link
I'm currently preparing to start building my new Ivy Bridge setup, with the ASUS P8Z77-V Pro motherboard.I'm interested to know if this would be the case with the Pro too. Is ASUS aware of this issue?
webs0r - Saturday, May 12, 2012 - link
You are all wrong, it is not pointless!Are you using the latest beta version of AIDA? It will show you both the 4 core sensors AND the CPU sensor.
So on mine (4.4ghz), right now my
CPU = 22
Cores = avg 28
Running IBT
CPU = 54
Core = avg 70
So what does this tell us??
1) In terms of *absolute temperature readings* they are probably all inaccurate to some degree.
2) Of course the die temp is going to be higher than the overall CPU sensor die, they are monitoring different places on the CPU.
3) By looking at the pattern in AIDA, I know that the CPU sensor idles around 25 and scales to 55+ when the cores get HOT (70+). So - I can control the fans with this. It scales in line. It is a proxy for the CPU temp. As good as any. It doesn't matter that it is not equal to the average of the die temps. As long as it goes higher when the CPU gets hotter - you get the same end result? Get it??
If it went the other way or didn't move while the CPU got hot, then that's a problem.
So I made a fan ramp that stays at minimum until 25 deg, ramps slowly until 50 deg and ramps a bit faster until 55 deg, then caps out to the loudest I want the fan to be at 55deg. This gives the exact behaviour I want, thus it is not useless.
althaz - Saturday, May 12, 2012 - link
Ian, it's great to see somebody take on board suggestions from their readers and apply them so quickly!In the Z77 roundup people asked for stripped and default POST times and here they are in the next review just a couple of days later.
Fantastic review all-around and I eagerly await the incoming Intel board reviews (so I can decide what to buy :)).
BlueReason - Sunday, May 13, 2012 - link
I believe he said such tests would be included in the future, not in this review. Not sure how that could be confused with a bar chart of test results, but the mind works in mysterious ways.arvee - Saturday, May 12, 2012 - link
Can you elaborate at all on the thunderbolt support in this? Will an add on card be as good as an integrated solution like on the MSI Z77A-GD80?tyger11 - Saturday, May 12, 2012 - link
I think I heard somewhere taht the add-in card via the TB header is a single channel, and the future mobos with it onboard will be dual channel. I could be misremembering.