Antec P280 Review: When Enthusiasts Are Engineers
by Dustin Sklavos on November 15, 2011 10:20 AM EST- Posted in
- Cases/Cooling/PSUs
- Antec
- P280
Assembling the Antec P280
If you ever dreaded assembling or working in Antec's P180 series, the P280 is going to seem like a breath of fresh air. The interior is incredibly spacious, but not just that...Antec has produced an enclosure that is nearly as easy to work inside as any of Corsair's (still the standard for ease of assembly as far as I'm concerned.)
The two side panels are held on by thumbscrews and are extremely easy to remove. From there, Antec has included six mounting screws for the motherboard and includes the rest in a kit with the enclosure. Our I/O shield snapped into place easily enough, and the board went in without any fuss. Wiring things up was a little bit trickier; it would've been nice if Antec had routed the cables through the motherboard tray in the first place and bound the motherboard headers together, but once you do it yourself the inside feels a lot cleaner.
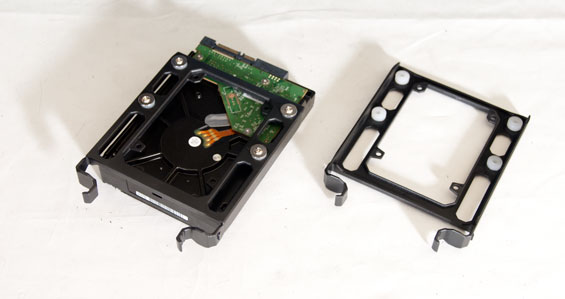
As for mounting drives, that's more of a mixed bag. I had to pretty much jimmy the optical drive in, applying force until it eventually just went all the way in. On the flipside, the toolless locking mechanism is incredibly secure (although you can still use screws if you're so inclined.) This is still a big improvement over having to manually attach rails to the ODD. The 3.5" drive trays are sturdy enough, though remember to stash the screws in a safe place for when you want to add additional drives. Where things do get a bit tricky is in the 2.5" toolless cage: SSDs slide in pretty firmly (I'd really recommend against putting a mechanical drive in here), but it doesn't feel super secure, and you'll want to route cables through the cage ahead of time as it's difficult to access the back of the drive from the other side. There's no locking mechanism either, just the pressure of the cage on the sides of the SSD, although you can use a screw to mount them in place. If you're not a fan of this approach (and I wouldn't fault you), it's worth mentioning 2.5" drives can also be mounted on the drive trays.

Mounting the power supply and video card was easy enough; there's a healthy amount of space inside the enclosure, and things lined up just fine. Where Antec has made their biggest gains, however, is in cable organization. The P180 really pioneered cable management back in the day but by modern standards it's pretty dire. That's not the case with the P280, where there's nearly enough space behind the motherboard tray to stand up a molex connector on its side. Wiring up the P280 was very easy, with copious space above the tray for the AUX 12V line, and plenty of space around the motherboard to squeeze in the side-mounted SATA cables. I also plugged the three included fans into the set of headers in the back of the case, and routing the single molex power cable was a breeze.


Honestly, the P280 is just tremendously roomy and easy to work in, the polar opposite of its predecessor. With the tremendous amount of space behind the motherboard tray, sliding the back panel on required none of the force it usually does with most other enclosures. This is a design that was clearly put together by engineers who also happened to be enthusiasts, and it really shows.


164 Comments
View All Comments
geniekid - Tuesday, November 15, 2011 - link
You're right. The temperature of the air around the CPU is probably the peak temp in the entire case.Because hot air rises and there are two fans on top, I think the CPU cooler is kind of fighting against the flow of air in its current configuration. I wonder if a CPU cooler blowing upwards would have an improvement in this scenario.
Strunf - Tuesday, November 15, 2011 - link
I don't think it would matter, natural convection doesn't have much to say when you have fans creating a flow of air, also if you turn the radiator by 90° then you'll be "aspirating" the air around the graphics card and that's counter productive.Folterknecht - Wednesday, November 16, 2011 - link
Take a Corsair H50 or something alike. Mount the the fans in the rear of the case (push/pull) and you ll get much better cpu temperatures - promised ;-)Folterknecht - Wednesday, November 16, 2011 - link
addition: The fans should blow/pull the cool from the outsidewelshy992 - Tuesday, November 15, 2011 - link
ANTEC TAKE MY MONEY!futurepastnow - Tuesday, November 15, 2011 - link
This may replace my old P150, which now has some noticeable chips in its paint, and is awfully cramped inside now that I have a real video card.Belard - Tuesday, November 15, 2011 - link
Hope you don't just give them money.... they have enough. Give it to me.And then I'll buy the case and send you photos.
Death666Angel - Tuesday, November 15, 2011 - link
I think I missed a trend. I have a Gigabyte P55M-UD4 and the CPU fan control is very adequate, silent in idle and good cooling under load when I want to. Are other mainboards from GB so bad concerning fan control? Because it's been mentioned in a few articles here and in comments.Other than that, good article and good case. Though too big for me. :-)
MrSpadge - Tuesday, November 15, 2011 - link
Don't know.. been using 5 different Gigabyte boards (home + work) during the last ~2 years. Fan control via PWM and SpeedFan has been fine, just not with their own utilities.MrS
ehume - Tuesday, November 15, 2011 - link
I quite agree. Read the manuals of Gigabyte boards and you learn that they control fans through both PWM and Voltage variation. There is one exception I saw (PWM only), but on all the rest, Gigabyte boards sure beat my PWM-only Asus board. Of course, you must enter BIOS to set this up, and if you haven't read your manual or thoroughly explored your BIOS you might miss it.