Corsair Carbide 400R: Succeeding in Reverse
by Dustin Sklavos on September 3, 2011 12:30 AM EST- Posted in
- Cases/Cooling/PSUs
- Corsair
- mid-tower
Assembling the Corsair Carbide 400R
You'll forgive me if this part of the review is pretty boring: putting together the Corsair Carbide 400R was basically a painless procedure that I once again have a very difficult time finding any real faults with. Internally the 400R is very similar to its predecessors, just a little bit smaller. One disappointing loss is the latches Corsair uses for mounting side panels in its other enclosures, with the side panels now affixed using thumbscrews.


Getting the motherboard in was easy enough to do, although the 400R is missing the center "alignment nub" that the other Corsair cases have. On the flipside, the motherboard standoffs were already installed, a much appreciated convenience. I can't stress this enough, and it's something I want other enclosure manufacturers to pay attention to: Corsair designs these things to be as convenient as humanly possible. Whatever their acoustic or thermal properties, Corsair cases are incredibly user friendly. Even the thumbscrews used for the side panels in the 400R are at least loosely attached to the panels themselves, making the screws impossible to lose.
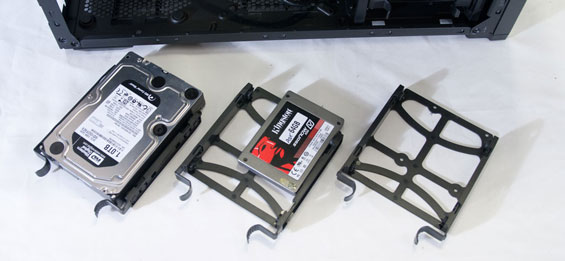
Mounting the optical drive, hard drives, and SSD was almost exactly the same procedure as in previous Corsair cases, except once again Corsair has done us one better. The optical drive mounting system is nigh identical, but the 2.5"/3.5" drive caddies now feature a bar with two pins that snaps in and out of the side of the caddy. In their older design, you'd have to pop a pin out to mount a 2.5" drive, and that pin was hilariously easy to lose. The bar is much bigger and thus much easier to keep somewhere safe. It's a small touch but still an improvement.
Clearance for the video card was just fine, and the rubber grommets require effort to pop out of the holes around the motherboard tray. The cutout in the tray for heatsink backplates is also a bit bigger now. In fact, getting the power supply in and routing the cabling was relatively simple and resulted in a very clean interior, with my only concern and sticking point being the AUX 12V line (as it so often is). Clearance above the motherboard could stand to be improved, and I'm honestly not 100% certain this is the best case for a 240mm radiator. Corsair swears on their page and on the 400R's spec sheet that there's support, and I'm sure Corsair's own H100 probably fits just fine, but I look at the Asetek 240mm liquid cooler I have handy and become much more skeptical.
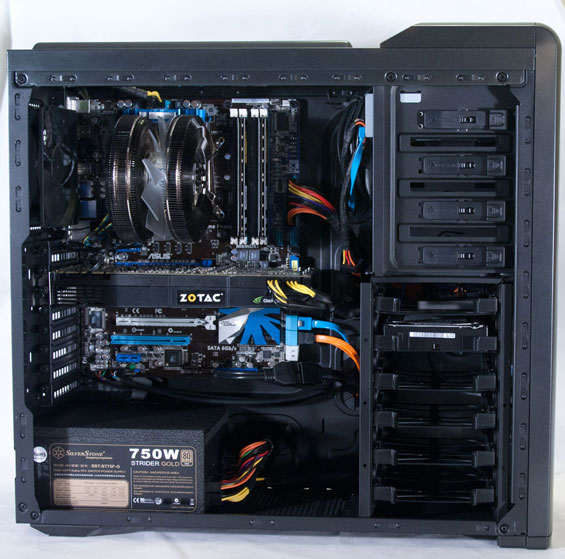
Corsair's interior design for the 400R is one of the best I've seen, at least from a user experience perspective. Whether these things work out thermally and acoustically is another matter entirely, but at least the enclosure is very easy to work with.
For noise and thermal testing I figured I'd have a little fun with the Carbide 400R, though, and test a pet theory. I'm of the opinion that side intake fans are oftentimes very effective at improving airflow and as a result can actually reduce fan noise. Outside of SilverStone's rotated enclosure designs, our best-performing cases thus far have had massive intake fans (at least 200mm) mounted on the side panels. Curious to see if there's a pattern here, I mounted two 140mm SilverStone air penetrator fans to the side as intakes and used the included power cables to run them at five volts instead of their native 12. This creates an enclosure with just one exhaust and four intakes, which could very well be an imbalanced design, but isn't that what testing is for?


21 Comments
View All Comments
SuperGazerBeam - Thursday, April 19, 2012 - link
Is it possible to replace the two fans in the front. For example to install 2 120 mm RED LED fans