Airport Extreme (5th Gen) and Time Capsule (4th Gen) Review - Faster WiFi
by Brian Klug on August 5, 2011 10:22 PM EST- Posted in
- Mac
- Airport Extreme
- Time Capsule
- WiFi
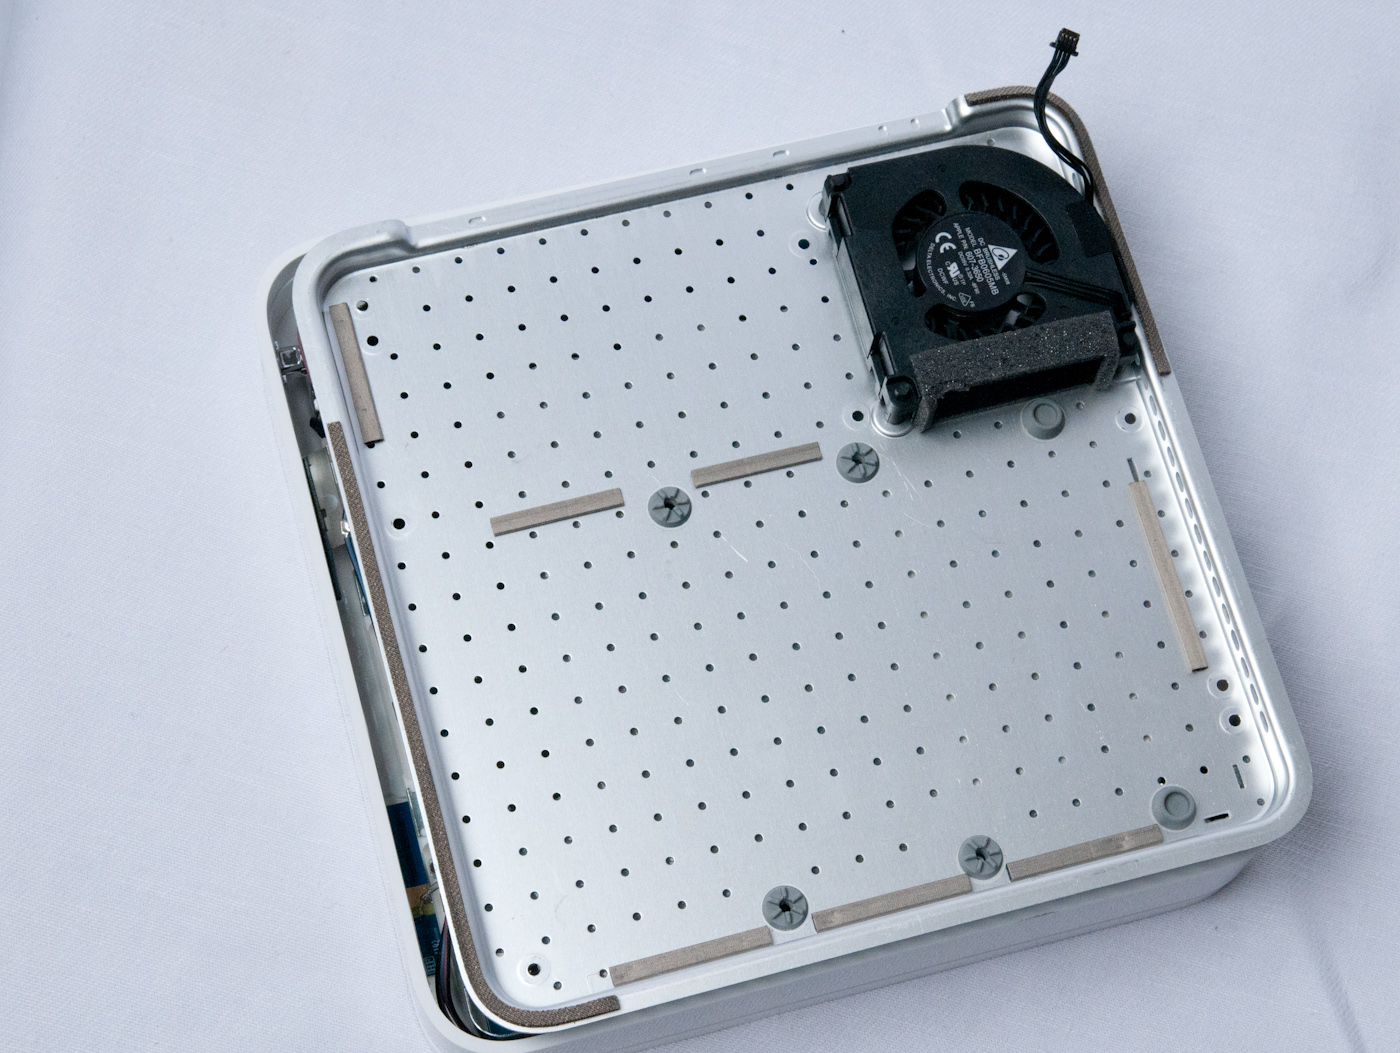
Construction overall is like the Airport Extreme, however, heat up the back to soften the adhesive, pry off, remove some screws, and then the top metal lid lifts off gently. There’s a fan attached to the lid which is plugged into the mainboard, however. That requires some care to unplug gently to avoid damage.
Unlike the Airport Extreme, the Time Capsule has an internal power supply, and, of course, a 3.5” HDD for Time Machine backups. With the lid off, you can already see that the mainboard has a short SATA cable, and the power supply has a SATA power connector in addition to another for the mainboard. The power supply easily lifts out, revealing the board underneath.
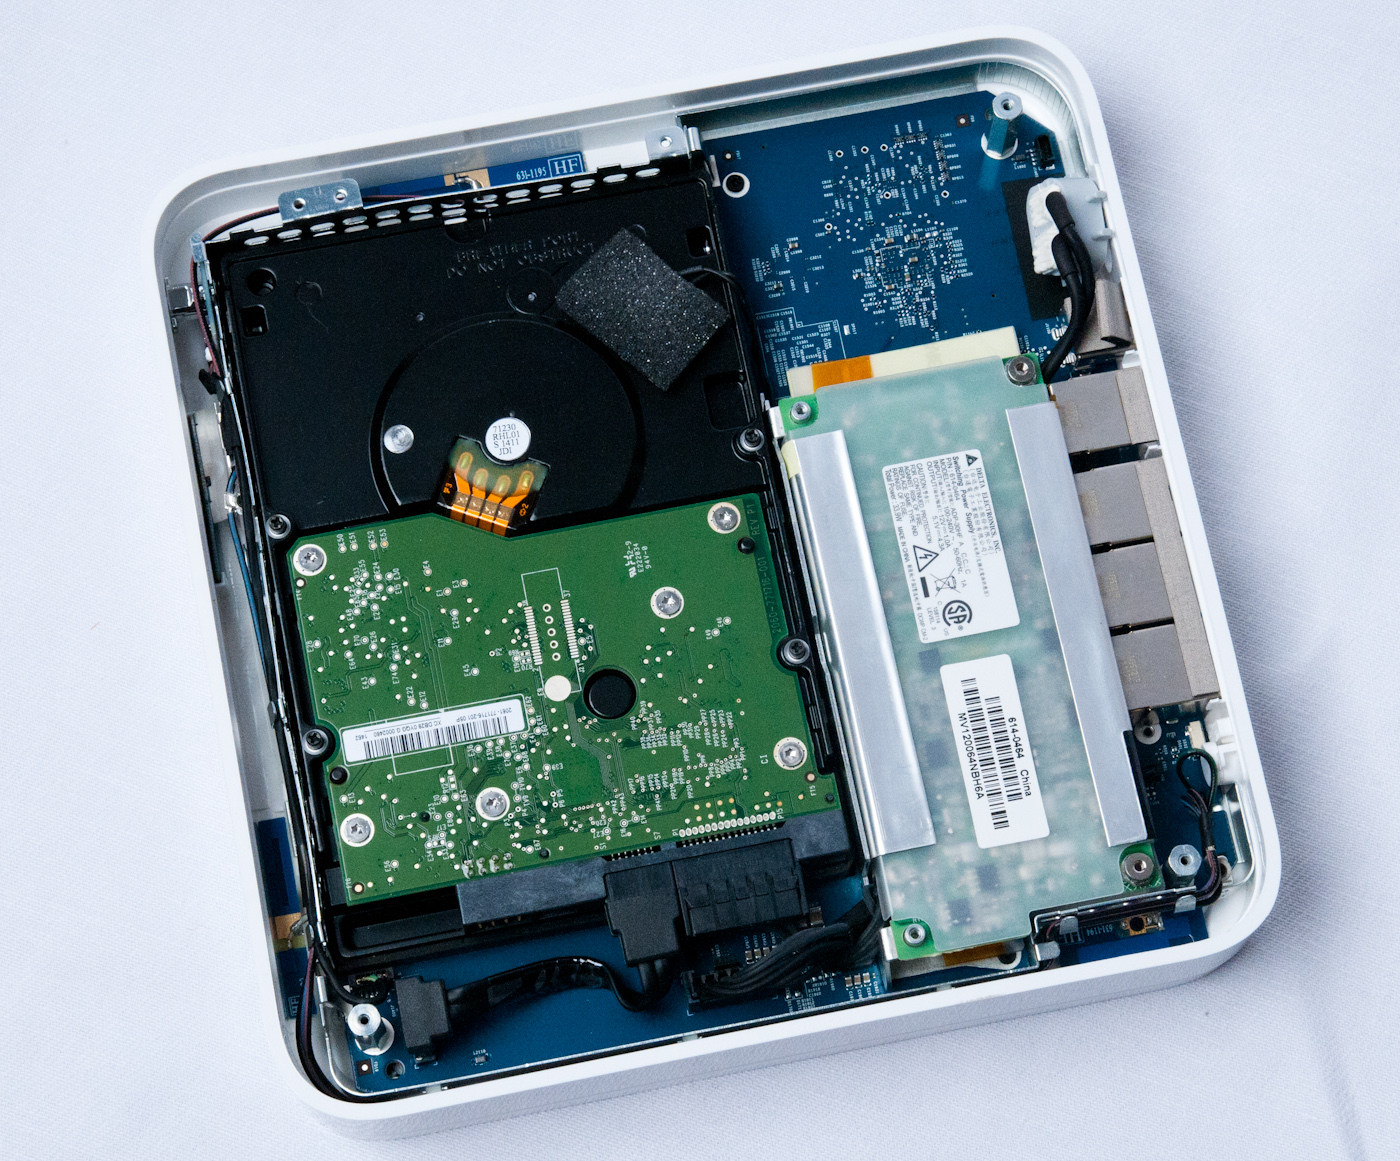
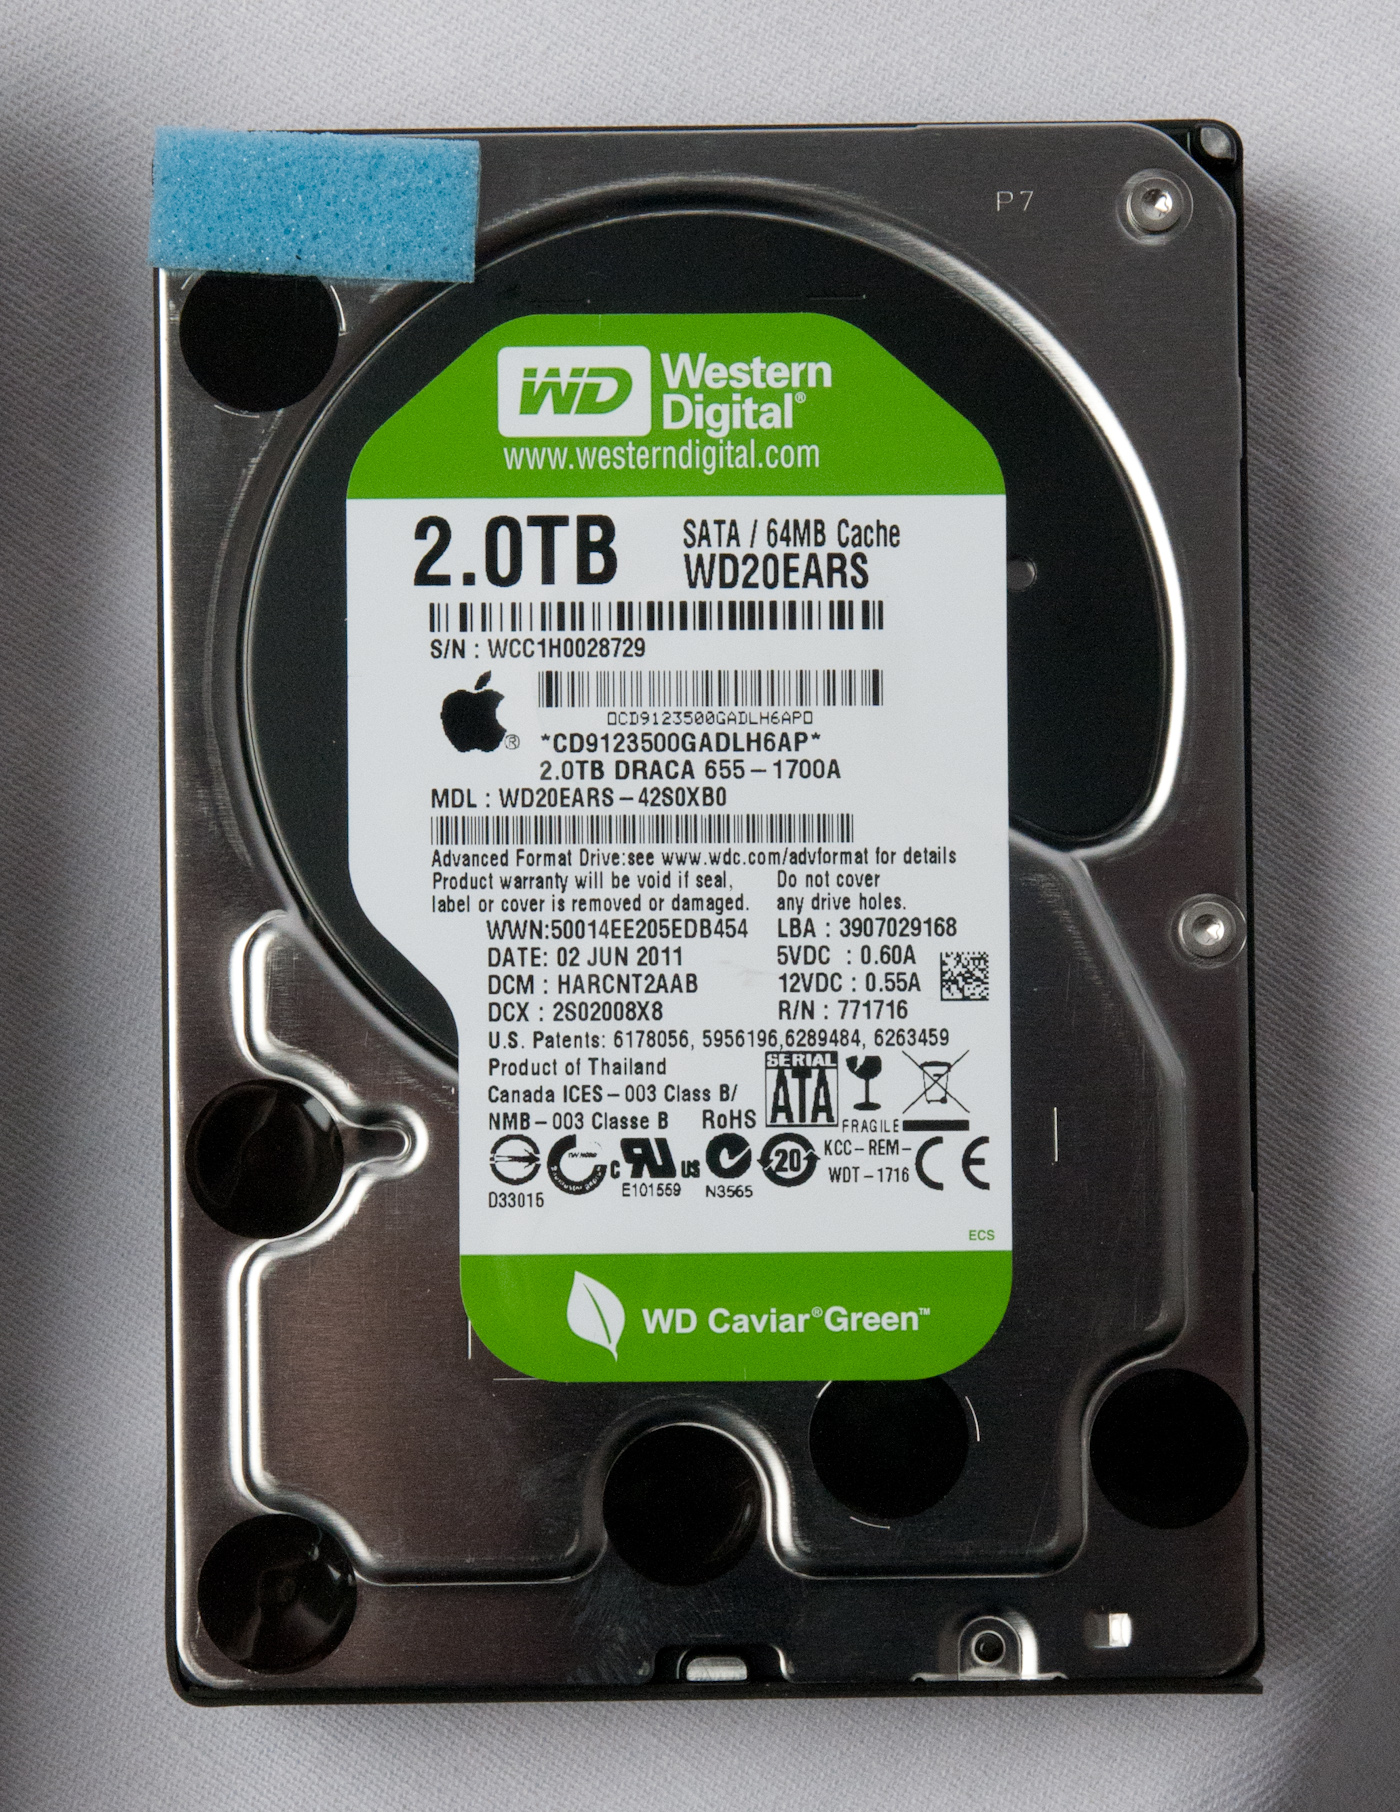
I suspect that some users are interested in doing things like buying a 2TB Time Capsule ($299) and bringing along their own 3TB drive instead of paying $499 for the 3TB version. I can’t speak for the 3TB Time Capsule version, but inside the 2TB Time Capsule is a relatively consumer level WD Green WD20EARS SATA II 2TB, 64MB of cache HDD.
It’s lipped with rubber and rests inside a metal caddy on three pieces of foam. On the PCB side the four mounting holes are home to some screws which mate up with a rubber support on the Time Capsule’s base. If you’re looking carefully, you’ll note one more foam piece with a cable leading off—there’s a thermistor attached to the drive using some foam and a plastic bracket.
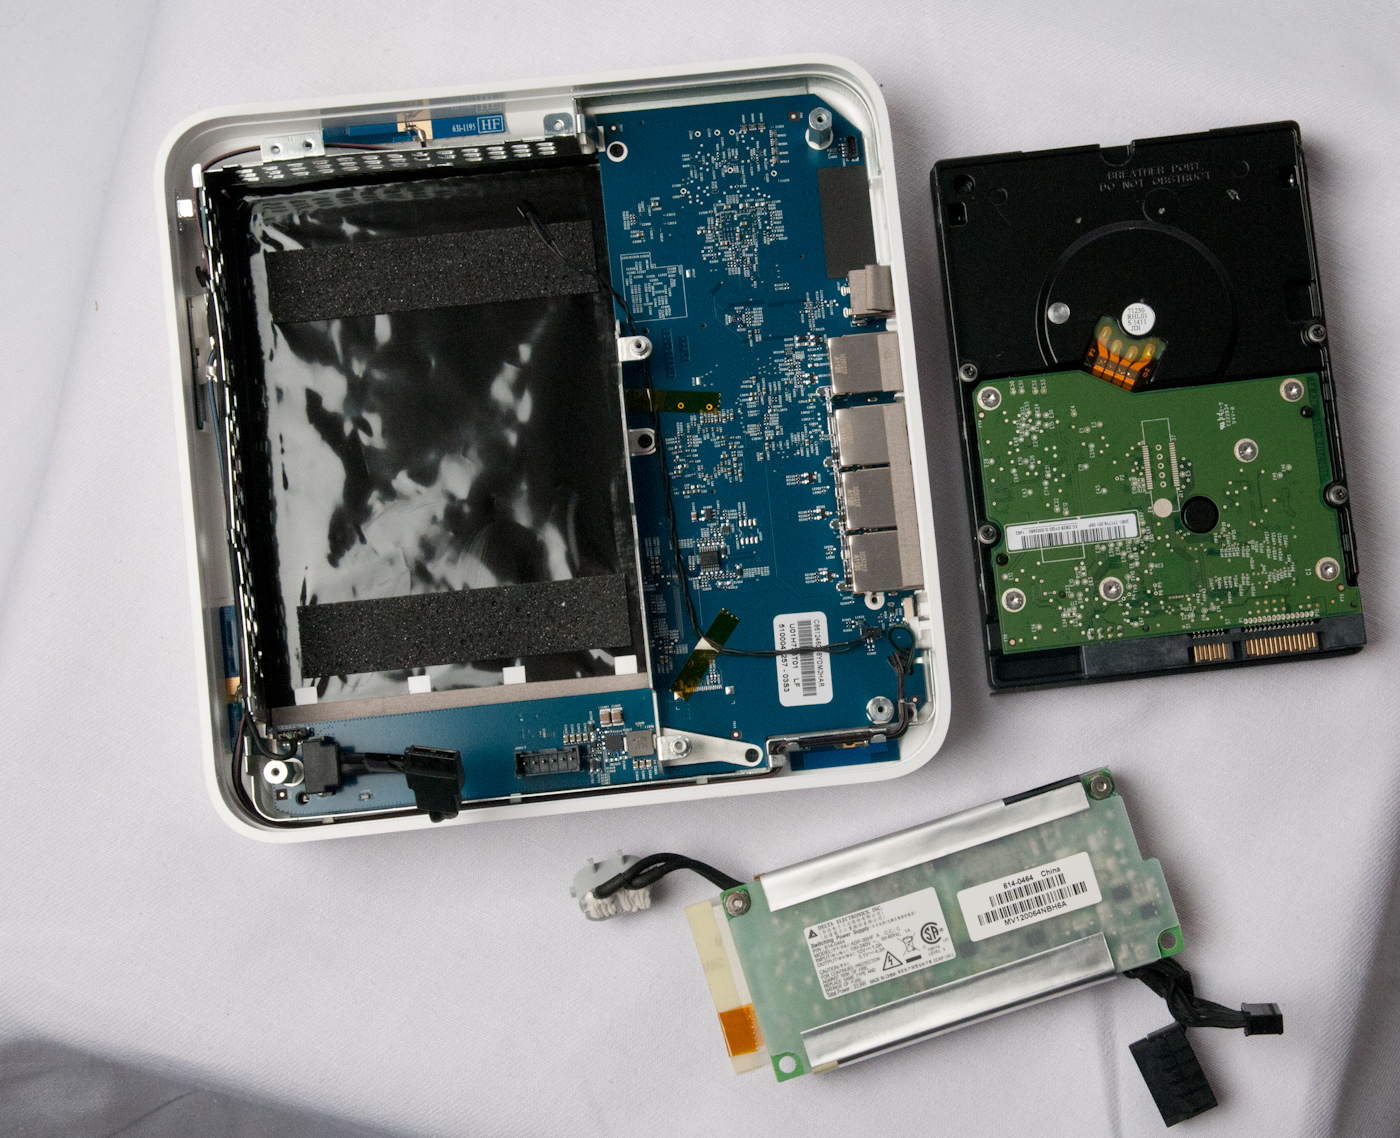
The temperature sensor is used in conjunction with the SoC to control the Time Capsule’s fan. I played around with the drive and a heat gun (not the two together) alongside a contact-less IR thermometer, and found that the fan seems to turn on and spin at a moderate level at just above 120 F (49 C) and stays active during normal use when the sensor is around 115 F (45 C). At below 110 F (43 C), the fan turns off. At around 140 F (60 C) the fan will spin at maximum and the front LED light will flash amber, and note overheating is happening in the Airport utility. 60 C is the maximum recommended operating temperature for the WD20EARS, so this makes sense.
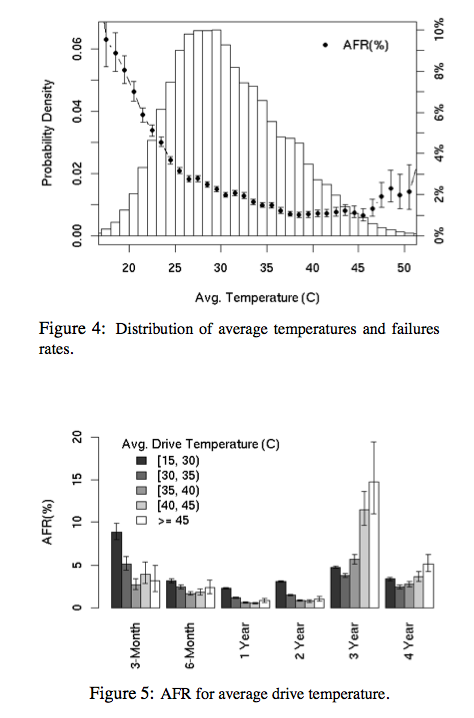
Google’s empirical study of disk failures has shown that between 40 and 45 C is ideal for prolonging drive life, so as long as things run in the fashion that I saw them run, it seems like drives shouldn’t fail due to excessive heat. That said, the airflow pattern in the Time Capsule seems odd—air is drawn in from the side, over and through the power supply, into the fan, then blown over half the drive, and hopefully exhausts through some small vents at the other side. Even with the fan spinning at maximum, it’s hard to really tell that any air is moving, and the only time you can even hear the fan is with it at maximum. The Time Capsule has a strong reputation for running warm, and I can definitely see why.
Upgrading the drive is simple enough. Transfer the four screws, rubber, foam, and the temperature sensor, and connect the SATA data and power cables. There’s also no need to preformat, as the airport utility has an auto formatting option as we’ll show later.
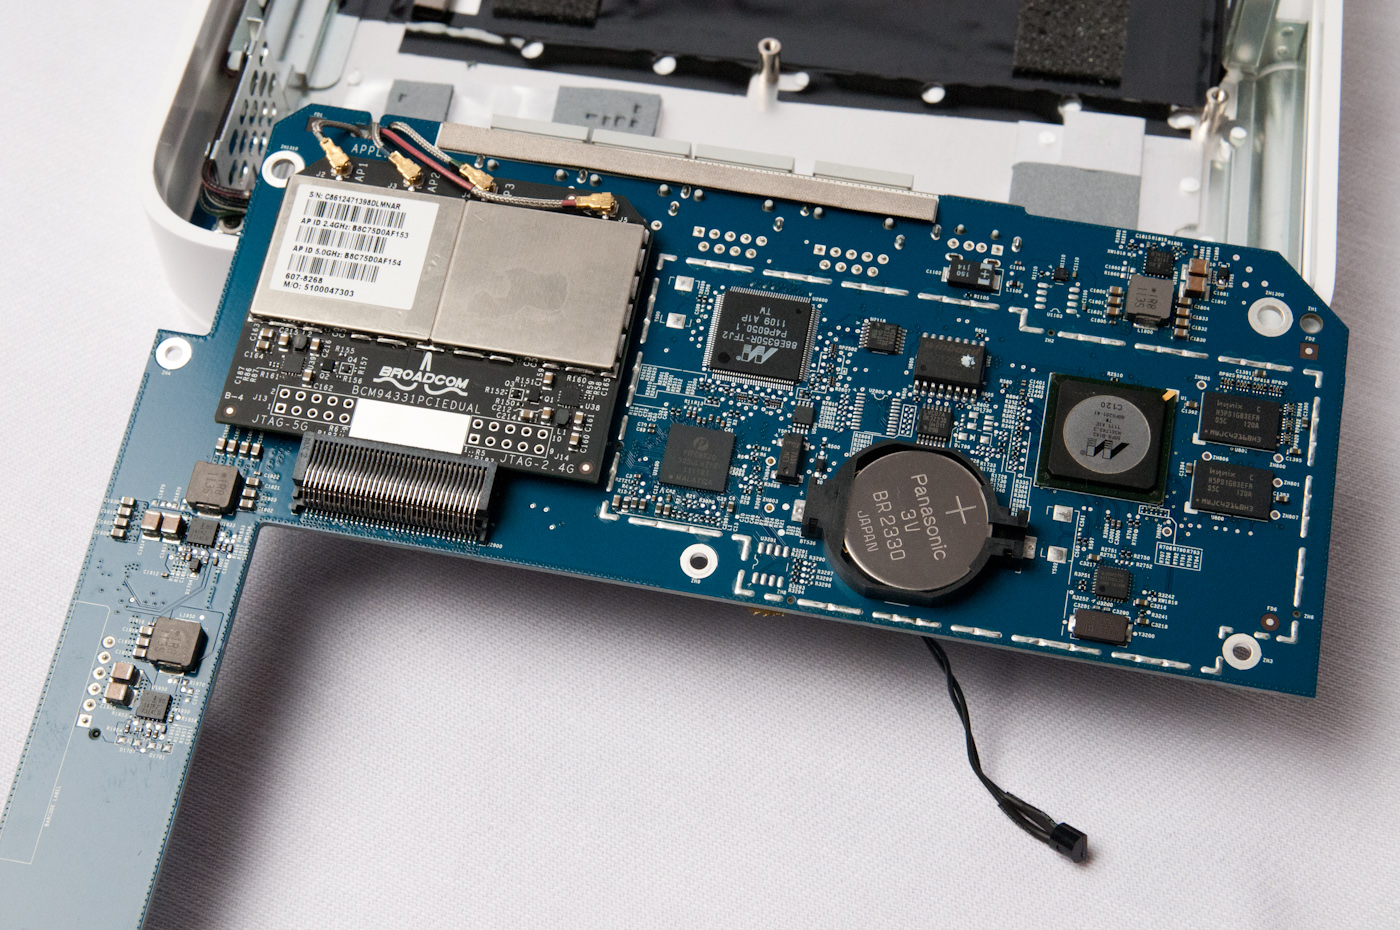
Disassembling the Time Capsule further shows some more interesting, if slightly expected details. On the reverse (top) side of the main PCB is the same Marvell SoC, switch, and flash module.
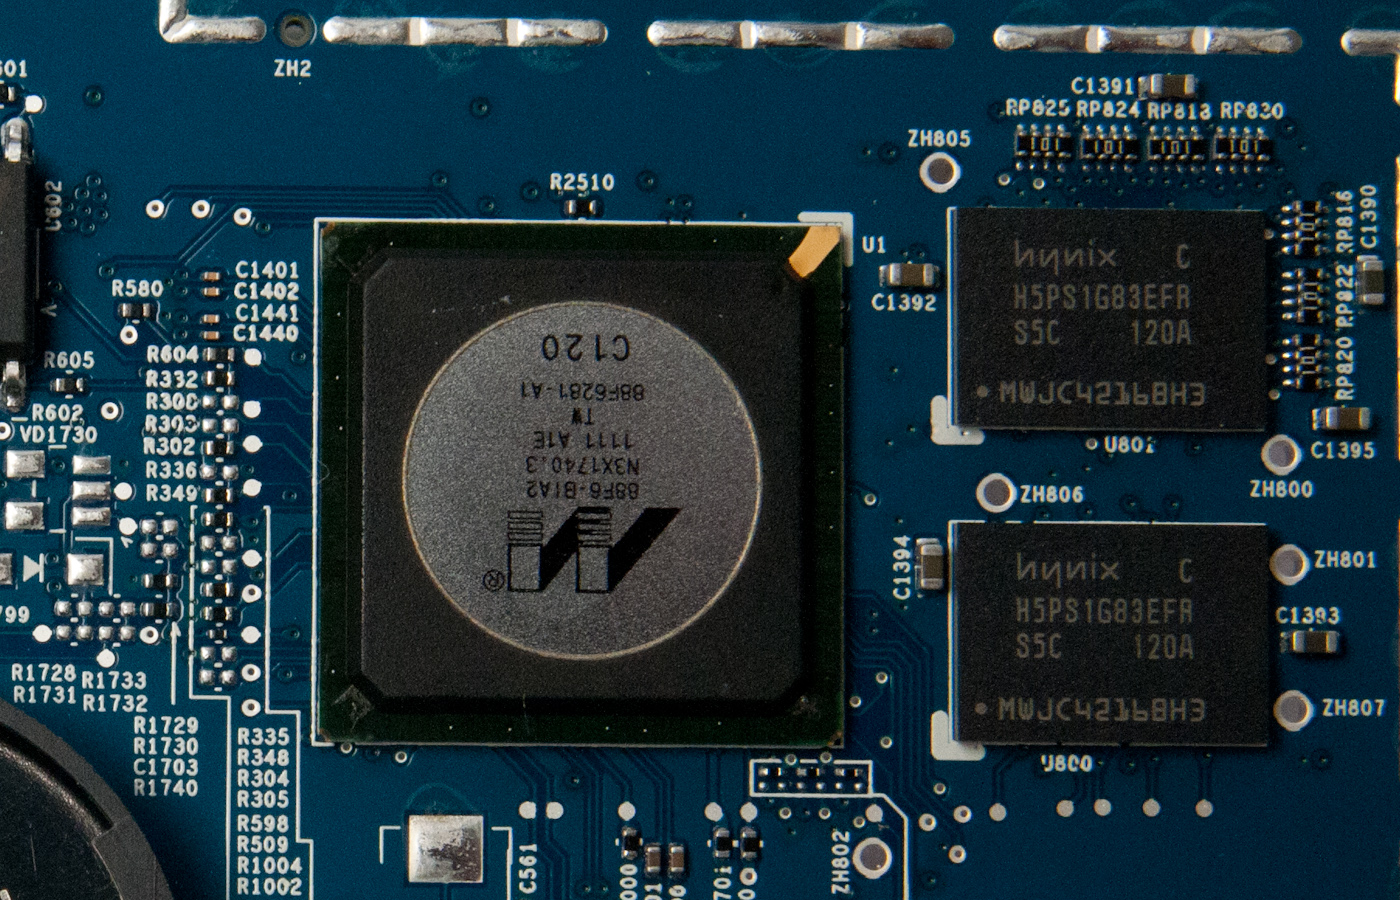
What’s different is that the Time Capsule gets double the RAM of the Airport Extreme—256MB of DDR2 instead of 128MB. Once again, we see the same dual BCM4331 based PCIe x1 WLAN card and four antenna connectors.


So there you have it, the main difference in both of Apple’s main WiFi AP products is the WLAN stack, which is a modern, more powerful BCM4331 based 3x3:3 solution. So, how has performance changed then?


90 Comments
View All Comments
bigrobsf - Friday, August 5, 2011 - link
Minor typo in AFS discussion paragraph in the "WiFi Throughput and Range - Improved page:"Airport Extreme makes a hue difference"
I'm guessing you wanted to write "huge" :-)
Brian Klug - Saturday, August 6, 2011 - link
Good catch, thanks, should be fixed!-Brian
iwod - Saturday, August 6, 2011 - link
I just wish they put out a Raid 1 2.5" HDD Time Capsule so i know my data is going to fairly safe. HDD failure are happening more often these days and with their huge capacity i just cant afford to lose some of my content.repoman27 - Saturday, August 6, 2011 - link
Just use one of these: http://www.icydock.com/goods.php?id=121Combine with a brace of Western Digital WD10JPVT or Samsung Spinpoint M8 HN-M101MBB and you'll have 1 TB of RAID 1 goodness.
Penti - Sunday, August 7, 2011 - link
Raid 1 doesn't really protect from bit rot, just pure 1 drive failure. However they should take reliability and data corruption seriously, but it's not enterprise hardware so you can't really expect it.jackwong - Sunday, August 14, 2011 - link
I will never go with TC unless they have a better backup solution of the TC itself.I have a Synology 1 bay NAS with a external USB to backup all the contents on it.
cheinonen - Saturday, August 6, 2011 - link
Though I imagine most people won't be confused, labeling it as "Smaller values are better" when all the values are negative could cause people to read the data incorrectly. Perhaps "Closer to 0 is better" or something else?Brian Klug - Saturday, August 6, 2011 - link
Totally agreed, edited those tables to make it more easy to follow.-Brian
jigglywiggly - Saturday, August 6, 2011 - link
time capsule wins an award for stealing your money.500$ for a wireless 3tb hd? Don't be sodding st00pid.
repoman27 - Saturday, August 6, 2011 - link
$300 for a $150 simultaneous dual-band, three-stream router with gigabit switch, on board SATA controller and an $80 HD, all in one compact little unit along with the PSU? Not a bad deal, really.Paying $200 (2/3) more for a $70 HD upgrade that only provides 50% more storage space? Questionable, but Apple knows that most people won't bother to upgrade themselves because they'd be out of pocket an additional $150 for the drive and then have to open a brand new device to make the swap.