Promise Pegasus R6 & Mac Thunderbolt Review
by Anand Lal Shimpi on July 8, 2011 2:01 AM ESTThe Pegasus: Software
The Pegasus ships fully functional from the factory, but you'll need to do a couple of things to your Mac before the first Thunderbolt device on the market will just work. First, the Pegasus (or any TB device) will only work on a 2011 MacBook Pro or 2011 iMac as those are the only two systems on the market today with an integrated Thunderbolt controller. Apple is widely expected to introduce a new Mac Pro and maybe even a new MacBook Air with Thunderbolt support, but for now you need a 2011 MBP or iMac.
![]()
If you have one of those two systems you'll need two software updates. The first is the Mac Thunderbolt Firmware Update and the second is Mac OS X 10.6.8 (or later, Lion is supported). With both software updates installed, simply plug in a Thunderbolt cable and you'll be greeted with a Promise RAID icon on your desktop.
The bundled Promise Utility gives you full control over the Pegasus including reporting on drive/array health:
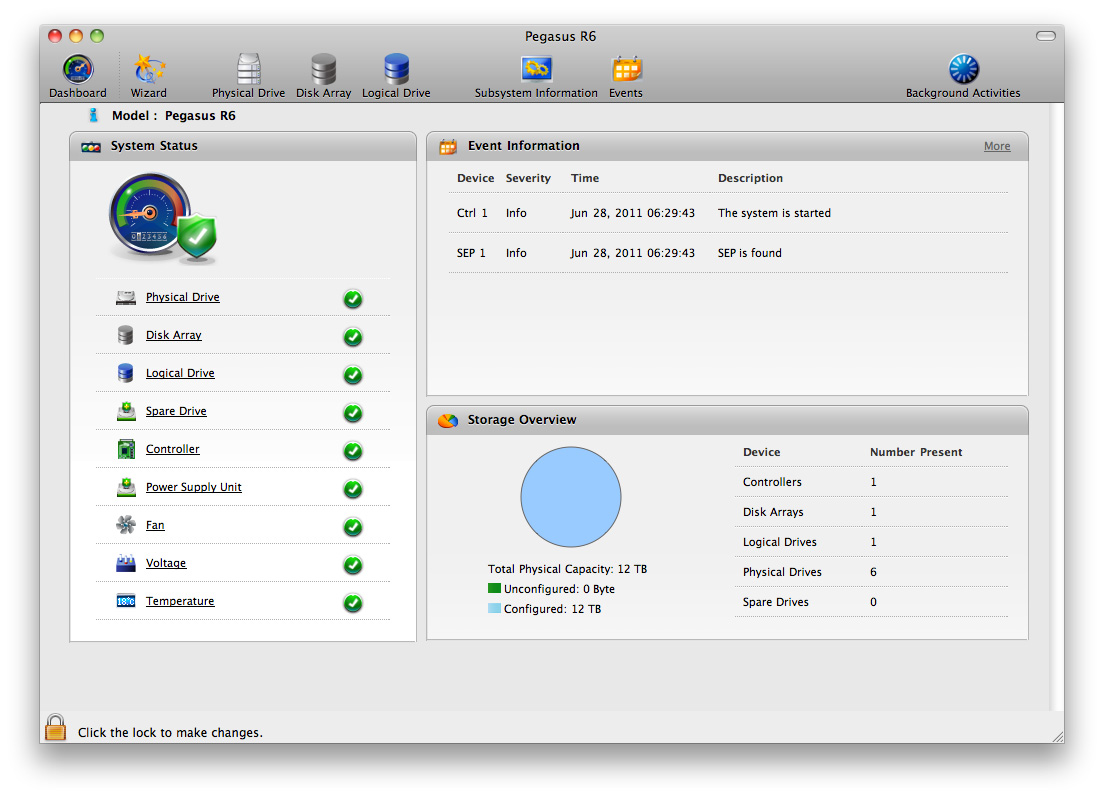
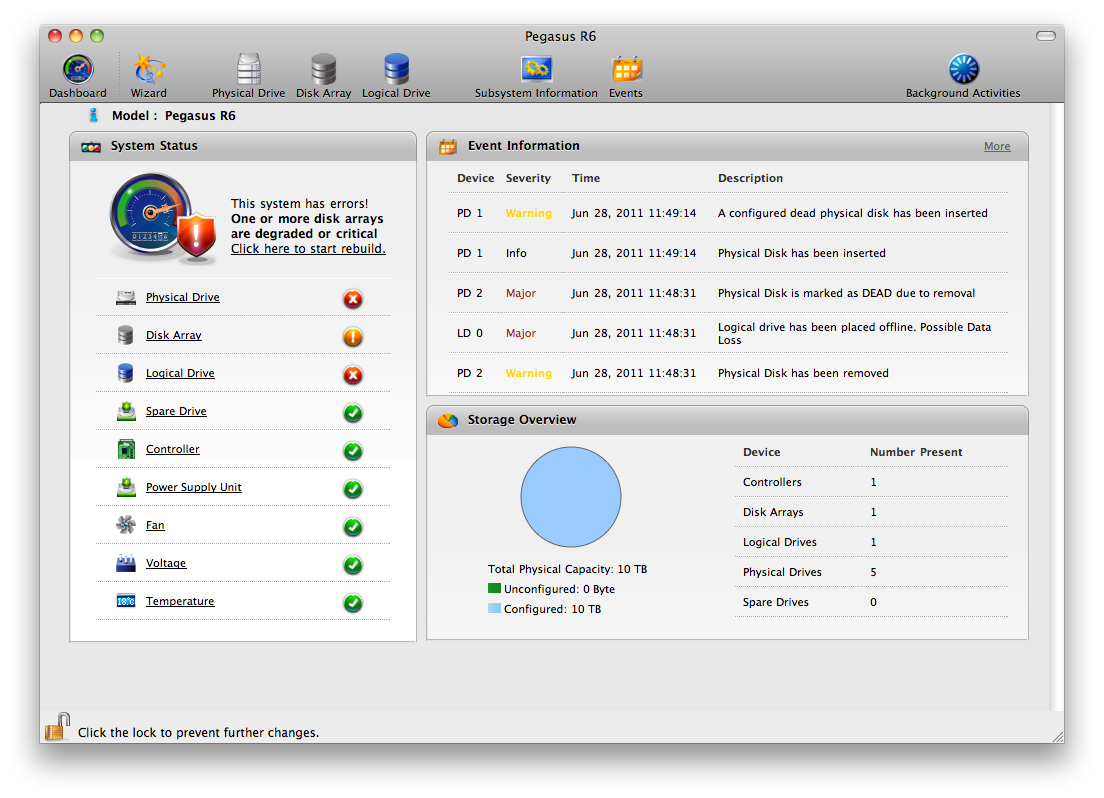
The major functions of the Promise Utility are pretty self explanatory. The Dashboard is the home screen of the application, it gives you a quick look at the current status of your drives/arrays (e.g. green for good, yellow for caution, red for major issue):


By default the Pegasus ships in a RAID-5 configuration with either 4 or 6 drives depending on whether you bought an R4 or R6 model. The RAID-5 array is configured with a 128KB stripe size and 512-byte sector size. This generally offers the best balance of redundancy and performance for most users, however if you'd like to delete it and start anew you can.
The wizard gives you one click array creation if you don't want to deal with adjusting things like stripe and sector sizes. There are varying levels of advanced array creation, or you can always go full manual.
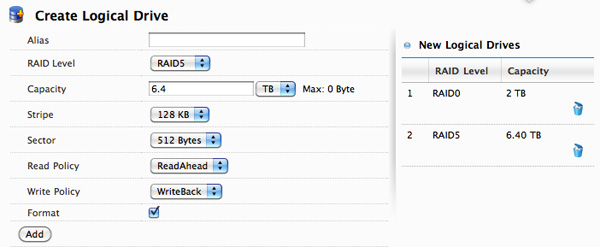
You can choose any combination of drives in the Pegasus to be included in a disk array. From there you can partition the aforementioned disk array into any valid RAID array(s) you'd like. For example, you can choose to include all 6 drives in an array and from there create a 2TB RAID-0 and use the remaining space as a 6.4TB RAID-5. Alternatively, you can use five drives in an array and use one as a hot spare. Finally you can choose to only use some of the drives in an array and leave the remaining drives in pass-through mode, accessible outside of any RAID arrays.
Any drives you don't include in the drive array can be set as spares.
The table below shows you the options you have when creating a custom drive array on the Pegasus (I've highlighted the defaults):
| Promise Pegasus Array Creation Options | ||||
| Item | Options | |||
| RAID Level | RAID0, RAID1E, RAID5, RAID6, RAID10, RAID50 | |||
| Stripe | 64KB, 128KB, 256KB, 512KB, 1MB | |||
| Sector | 512 Bytes, 1KB, 2KB, 4KB | |||
| Read Policy | ReadCache, ReadAhead, No Cache | |||
| Write Policy | WriteThru, WriteBack | |||
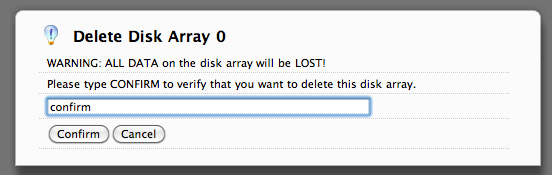
All major configuration changes require that you type the word "confirm" before proceeding, a nice way to ensure you don't accidentally delete something.
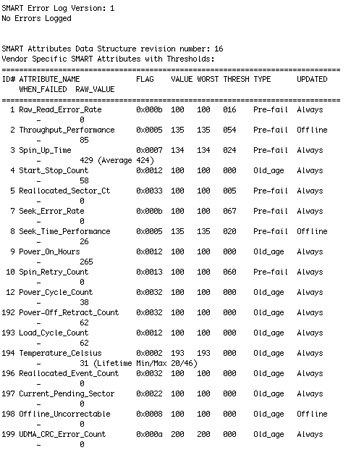
The Promise Utility reports on both array and drive level events. It'll tell you basic things like whether or not your current array is healthy or down a drive. At the drive level you do get basic SMART reporting including temperature and health status. You also have the option of dumping an advanced SMART log to a text file which includes the drive vendor specific SMART attributes and their current, worst and threshold values:
In the utility's physical drive list you can locate any drive in the Pegasus array. Hitting the locate button will cause the corresponding identify LED to blink on the Pegasus.
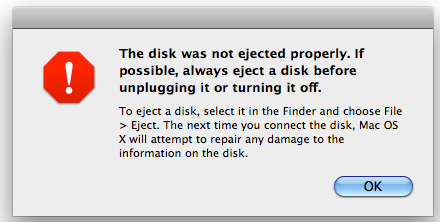
Like any other array under OS X, you do have to manually eject any volumes before unplugging the Thunderbolt cable or powering down the Pegasus. Failing to do so will give you this all-too-familiar error:


88 Comments
View All Comments
takumsawsherman - Saturday, July 9, 2011 - link
You mean like booting from a CD or USB flash drive and copying files to a very small, hideable storage container?Perfectly possible, and in fact I find myself doing this frequently (though copying the data in the other direction typically) when disinfecting PCs. I do this multiple times per week, removing data stealing trojans and rootkits.
Compare with Thunderbolt, where you will "sneak in with only a laptop and a cable and reboot and press T, and ZOMG yor datas are hax0red! Ha HA ha stupid Apple!!!111oneonewonwon"
Leaves obvious traces? Exactly what traces did the Boot CD leave?
Penti - Wednesday, July 13, 2011 - link
As you can password protect (which can be bypassed with physical access any way) the firmware it doesn't matter if it is Firewire/Thunderbolt-target or USB-stick/HDD that access and or copies the files or simply a CD that changes your password so you can just log in an access everything without any effort at all. If you don't have limits on the firmware/bios any way you can just set up whatever, and access anything without any effort, less so then using slow target disk mode, even through network boot is possible which might be on in a corporate/university environment any way.Just disable the good damn features you don't like, it don't make your computer safe but I'm sure it will quit you whining for nothing.
You will just access everything by running the system rescue tools on the install CD for OS X any how. Windows computers are essentially unprotected any way. So I really don't see how it's any worse then plugging in a USB stick to access everything or change the password (SAM) to blank/whateveryoulike. Screaming about a ten year old feature is just dumb. Just set up a firmware password and it stops people from simply booting a CD, USB-drive, HDD-drive, using target disk mode and network boot any way. It's simply not more vulnerable then PCs any way. It's quite easy to restore the firmware-password thus bypassing it on say an iMac any way, I could easily do it on older macs without taking the entire computer apart. And on a PC of course resetting CMOS password is often troubleless and manufacturers often has master passwords you get by calling the support any way. Later macs has got better protection from resetting the firmware password though. So just set the damn password.
Penti - Friday, July 8, 2011 - link
They are not driving the screen with a separate control-board. That's why target display is so awkward. You can expect third party stuff (and older macs) will work when Atlona has designed and released an Thunderbolt-compatible adapter/switch/converter/scaler though. It a integrated solution not a screen and a computer separate. The screen is when used normally connected directly to the ATi/AMD 6000M GPU. That's why you can't adjust the screen in Bootcamp/Windows without their software tool too.HW_mee - Friday, July 8, 2011 - link
That makes sense, not much you can do to separate the two things if the screen is "merged" with the computer. I expected the computer part and screen part was seperate and the display input could be used in the same way as with most multiple input screens.If that was the case, a simple power circuit could control the screen and computer separately.
youngjimmy - Friday, July 8, 2011 - link
'Failing to do so will give you this all-*to*-familiar error' (bottom, The Pegasus: Software)Kimbie - Friday, July 8, 2011 - link
You made mention about connecting up a monitor to the last port on the chain, by plugging in a thunderbolt cable into the imac and used it as a second screen.Does this still work if you use a mini-display port to DVI adaptor and into a bog standard DVI monitor?
Kimbie
Focher - Saturday, July 9, 2011 - link
Just to clarify, the last connection in the chain to a mini DisplayPort monitor does not require a Thunderbolt cable. You would just use a mini DP cable.André - Friday, July 8, 2011 - link
Does it support JBOD?Would be really great for us using ZFS+ arrays, although I would have preferred at least 8 bays.
Exodite - Friday, July 8, 2011 - link
The performance is impressive, though nothing like what you'd get transfering a large number of smaller files obviously.That said, for 2000 USD why wouldn't I simply build a high-end desktop /with/ 12TB of storage?
It'd still be cheaper and I could put the remainder towards a gilded sticker for the case saying 'cheap-ass NAS'.
André - Friday, July 8, 2011 - link
It would appear that is the solution for you, building your own NAS.This enclosure is, however, not a NAS.
It enable users that need high disk performance to get easy access to precisely that in a mobile package you can take on the road with you and edit in the field.
Think large Final Cut Pro (or any other NLE), Logic Studio and Photoshop projects.