Swiftech H2O-120 Compact and Corsair Nautilus 500: Is Water Better?
by Wesley Fink on September 17, 2007 6:00 AM EST- Posted in
- Cases/Cooling/PSUs
Corsair Nautilus 500
When the Corsair name is mentioned, enthusiast memory is the first thing that comes to mind. However, Corsair has branched into other product lines catering to the computer enthusiast. You can now buy Corsair power supplies and Corsair's spin on the simplified water cooling system.
The Nautilus 500 was first introduced last year, but it has proven itself to be an effective and reliable CPU cooling system. For that reason the Nautilus 500 is included in this look at simpler water cooling.
Corsair uses similar components to Swiftech in their simplified water cooler, but that is where the similarity ends. Corsair's vision of better water cooling is an external appliance-like water cooling box connected to an internal CPU water block. Corsair mounts the traditional water block inside, then connects the tubing with quick disconnects to a self-contained cooling box that sits on top of the computer. The black box contains the water pump, radiator, reservoir and fan - all preassembled for easy installation.
In fact, when Corsair first introduced the Nautilus 500 they claimed an eight minute install. For an experienced installer eight minutes is definitely possible, but a first-time water cooler installer might require 15 to 20 minutes. However you measure it, the Corsair is the easiest-to-install water cooler we are aware of that uses conventional water cooling parts. The self-contained coolers that look like air coolers are easier still - but they normally must compromise performance with their small size.
The large box containing the complete Nautilus 500 system is literally filled with every bit of information you might need to understand the Corsair water cooling system.
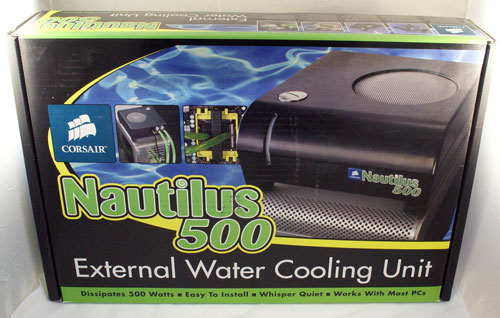
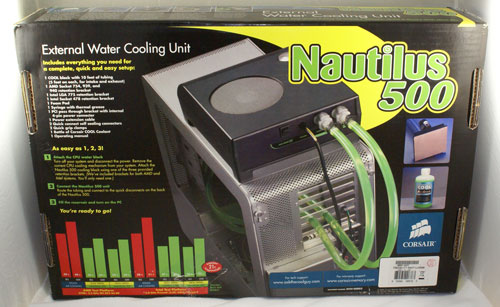
The package front shows the external box sitting on a tower case, while the rear provides a better idea of how the Nautilus 500 installs in a system and a litany of performance claims. Since the target market is likely first-time users of water cooling, it appears Corsair was very smart to provide as much info as possible about the water cooling system and how simple it is to install.
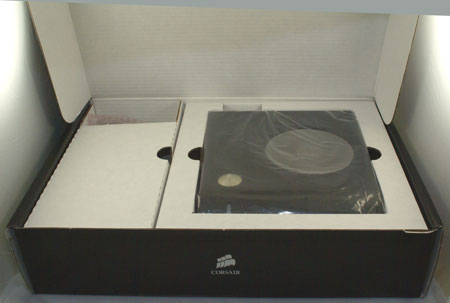
Opening the package you will find the "appliance-style" external cooler on one side and the mounting components under a large flip-up compartment on the other side. This is a first impression that emphasizes the simplicity of the Nautilus 500 compared to the complexity of most water systems.
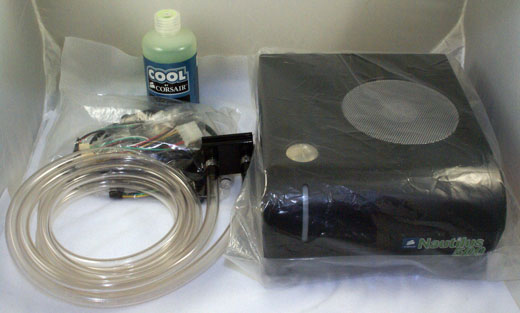
The main parts are the 8"x9"x3-3/4" (WxDxH) external cooling box and the tubing with an attached water block. The tubing is long enough for any install we tried, and it can be cut to length if you wish to shorten the tubing runs. A bottle of cooling concentrate and a bag of small parts complete the contents.
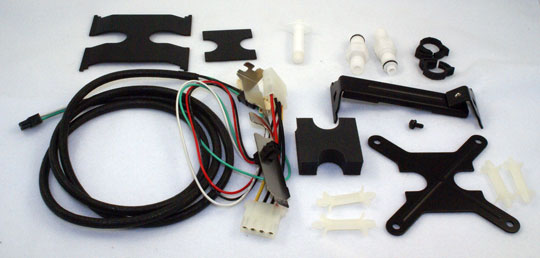
Mounting plates for either Intel or AMD are included. The parts allow installation on Intel Socket 775/478 or AMD 754/939/940. We also had no difficulty installing on Socket AM2. Quick disconnects to insert in the vinyl tubing, easy clamps, motherboard standoffs, thermal grease, a PCI slot cover for tubing and electrical pass-tough, and a power connector that plugs into the PCI slot cover and external cooling box are all contained in the small parts bag.
The fact that Corsair has already attached the vinyl tubing to the all-copper water block was impressive. Corsair also uses quick disconnects for the other end of the tubing which plugs into the external cooler. These thoughtful touches make installation a breeze, even for the first-time user who knows absolutely nothing about installing water cooling.
Installation
For Intel 775, there is no need to remove the mother board to install the water block. Begin by installing the four dual pushpins in the four holes for mounting coolers on a 775 board.
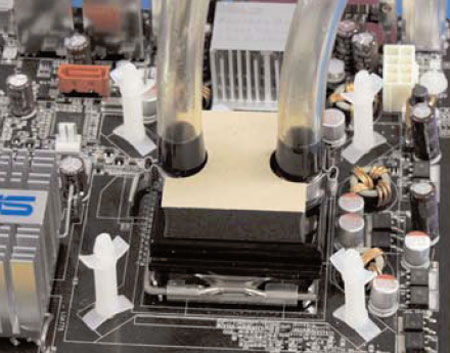
Make sure the post "legs" are in the marked area and are free from board components. Next apply the thermal paste, insert the custom cut foam block on top of the water block, and slide the 775 mounting plate in place above the compression foam.
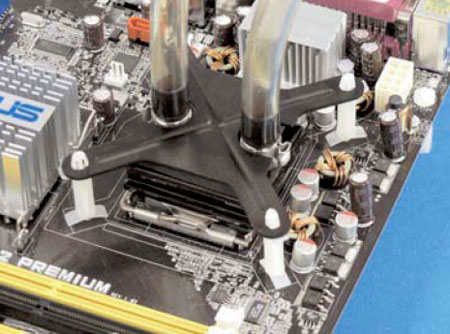
Then align the water block and push the top mounting plate onto the pushpins. If this sounds simple it's because it really is. The only real issue is the fragile pushpin posts. Make sure they are all snapped securely in place. If a pin seems loose you may need to spread the pop-though wings to make sure the pop-through clicks into place.

With the water block securely mounted the vinyl tubes are threaded though the PCI slot cover. It is easiest to place the tubes in the unmounted slot cover and adjust the tubing for your needs. Then attach the PCI slot cover to hold the tubes in place. Plug the Molex connector that is off the inside of the slot cover into a 4-pin Molex connector. This will power the external cooling system components.
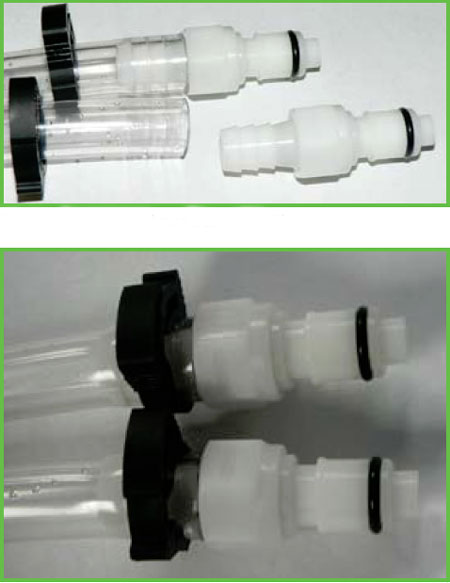
You may shorten the tubing if you wish, but consider future needs before cutting. The quick disconnects slide into the end of the vinyl tubing and are held tight by quick clamps. The finished disconnects then snap into the back of the external cooler. Plug the power cable into the outside connector on the PCI slot cover and the tiny socket on the back of the Nautilus 500.
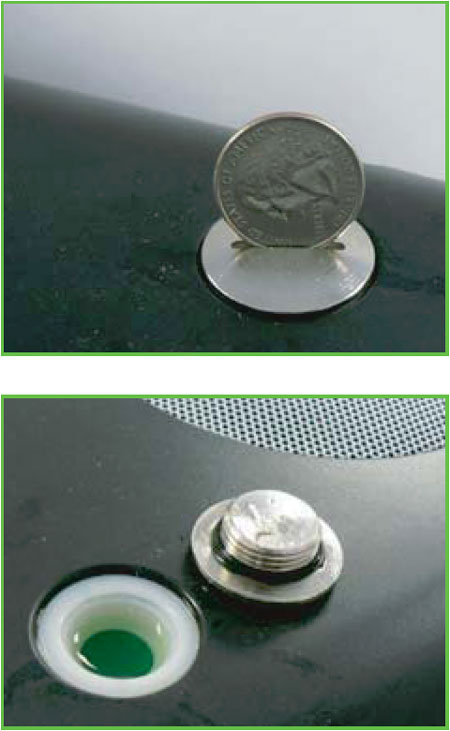
Unscrew the silver plug on top of the cooler with a coin, pour the bottle of concentrate into the cooler, and finish filling with distilled water. Turn on the computer with the plug open and let the air in the water system dissipate. Check for any leaks at the disconnects. Since the internal water block connections were made at the factory it is not absolutely necessary to check for leaks at the water block. Top off the fluid with distilled water. Since it is easy to overfill you should place a rag under the cooler box to catch any spills during the filling process. Finally, screw the plug back in with a coin.
This is really an easy install. It is much simpler, in fact, than air cooler installs where the motherboard must first be removed. However, if you move the Nautilus 500 to another system you will likely need to remove the motherboard to remove the CPU block standoffs. Yes, you can remove just the top plate by squeezing the top legs so they will release from the top plate. However, removing the posts themselves requires squeezing the pushpins from the rear of the motherboard.
Our only complaint about the whole system install is the pushpin posts, as already mentioned. They are too fragile and don't always click securely as is preferred. There is also the issue of the board dismount required for removal. While we don't have a wise suggestion for fixing this, we are confident Corsair can come up with a better 775 mount. So many parts of this system are well thought out and the push-posts appear the only shaky part of the product.
When the Corsair name is mentioned, enthusiast memory is the first thing that comes to mind. However, Corsair has branched into other product lines catering to the computer enthusiast. You can now buy Corsair power supplies and Corsair's spin on the simplified water cooling system.
The Nautilus 500 was first introduced last year, but it has proven itself to be an effective and reliable CPU cooling system. For that reason the Nautilus 500 is included in this look at simpler water cooling.
Corsair uses similar components to Swiftech in their simplified water cooler, but that is where the similarity ends. Corsair's vision of better water cooling is an external appliance-like water cooling box connected to an internal CPU water block. Corsair mounts the traditional water block inside, then connects the tubing with quick disconnects to a self-contained cooling box that sits on top of the computer. The black box contains the water pump, radiator, reservoir and fan - all preassembled for easy installation.
In fact, when Corsair first introduced the Nautilus 500 they claimed an eight minute install. For an experienced installer eight minutes is definitely possible, but a first-time water cooler installer might require 15 to 20 minutes. However you measure it, the Corsair is the easiest-to-install water cooler we are aware of that uses conventional water cooling parts. The self-contained coolers that look like air coolers are easier still - but they normally must compromise performance with their small size.
The large box containing the complete Nautilus 500 system is literally filled with every bit of information you might need to understand the Corsair water cooling system.
The package front shows the external box sitting on a tower case, while the rear provides a better idea of how the Nautilus 500 installs in a system and a litany of performance claims. Since the target market is likely first-time users of water cooling, it appears Corsair was very smart to provide as much info as possible about the water cooling system and how simple it is to install.
Opening the package you will find the "appliance-style" external cooler on one side and the mounting components under a large flip-up compartment on the other side. This is a first impression that emphasizes the simplicity of the Nautilus 500 compared to the complexity of most water systems.
The main parts are the 8"x9"x3-3/4" (WxDxH) external cooling box and the tubing with an attached water block. The tubing is long enough for any install we tried, and it can be cut to length if you wish to shorten the tubing runs. A bottle of cooling concentrate and a bag of small parts complete the contents.
Mounting plates for either Intel or AMD are included. The parts allow installation on Intel Socket 775/478 or AMD 754/939/940. We also had no difficulty installing on Socket AM2. Quick disconnects to insert in the vinyl tubing, easy clamps, motherboard standoffs, thermal grease, a PCI slot cover for tubing and electrical pass-tough, and a power connector that plugs into the PCI slot cover and external cooling box are all contained in the small parts bag.
The fact that Corsair has already attached the vinyl tubing to the all-copper water block was impressive. Corsair also uses quick disconnects for the other end of the tubing which plugs into the external cooler. These thoughtful touches make installation a breeze, even for the first-time user who knows absolutely nothing about installing water cooling.
Installation
For Intel 775, there is no need to remove the mother board to install the water block. Begin by installing the four dual pushpins in the four holes for mounting coolers on a 775 board.
Make sure the post "legs" are in the marked area and are free from board components. Next apply the thermal paste, insert the custom cut foam block on top of the water block, and slide the 775 mounting plate in place above the compression foam.
Then align the water block and push the top mounting plate onto the pushpins. If this sounds simple it's because it really is. The only real issue is the fragile pushpin posts. Make sure they are all snapped securely in place. If a pin seems loose you may need to spread the pop-though wings to make sure the pop-through clicks into place.
With the water block securely mounted the vinyl tubes are threaded though the PCI slot cover. It is easiest to place the tubes in the unmounted slot cover and adjust the tubing for your needs. Then attach the PCI slot cover to hold the tubes in place. Plug the Molex connector that is off the inside of the slot cover into a 4-pin Molex connector. This will power the external cooling system components.
You may shorten the tubing if you wish, but consider future needs before cutting. The quick disconnects slide into the end of the vinyl tubing and are held tight by quick clamps. The finished disconnects then snap into the back of the external cooler. Plug the power cable into the outside connector on the PCI slot cover and the tiny socket on the back of the Nautilus 500.
Unscrew the silver plug on top of the cooler with a coin, pour the bottle of concentrate into the cooler, and finish filling with distilled water. Turn on the computer with the plug open and let the air in the water system dissipate. Check for any leaks at the disconnects. Since the internal water block connections were made at the factory it is not absolutely necessary to check for leaks at the water block. Top off the fluid with distilled water. Since it is easy to overfill you should place a rag under the cooler box to catch any spills during the filling process. Finally, screw the plug back in with a coin.
This is really an easy install. It is much simpler, in fact, than air cooler installs where the motherboard must first be removed. However, if you move the Nautilus 500 to another system you will likely need to remove the motherboard to remove the CPU block standoffs. Yes, you can remove just the top plate by squeezing the top legs so they will release from the top plate. However, removing the posts themselves requires squeezing the pushpins from the rear of the motherboard.
Our only complaint about the whole system install is the pushpin posts, as already mentioned. They are too fragile and don't always click securely as is preferred. There is also the issue of the board dismount required for removal. While we don't have a wise suggestion for fixing this, we are confident Corsair can come up with a better 775 mount. So many parts of this system are well thought out and the push-posts appear the only shaky part of the product.


58 Comments
View All Comments
MercenaryForHire - Tuesday, September 18, 2007 - link
Folks, this is a review of off-the-shelf watercooling components. Not a customized, modded, build-it-yourself Hoover Dam setup. And the conclusions drawn I think are valid - if you want good results from watercooling, be prepared to fork over some significant coin, or source the parts yourselves and DIY.jebo - Tuesday, September 18, 2007 - link
Exactly. I find it interesting how all the water coolers are crying that AT said "Air is better than water". Well, the fact remains, that if you compare a $70 air cooler to a $150 water cooler, air is > water. You need to spend $300+ to get a h2o system that is better than a $70 air cooler. At that point, the cost concerns become prohibitive.psychotix11 - Tuesday, September 18, 2007 - link
Part of the problem with this review is that it's managed to convince novice users that it does require 300+, which is either a distortion of truth to make a point, or ignorance about basic water cooling.Pump - 65, apogee GT - 45, double rad - 50, misc crap (tubing, fittings, fans) - 20.
For exactly around 200 bucks you can construct a loop that will demolish any air cooling on the market. You could even toss another radiator into the swiftech kit and keep it under 200.
For 300 bucks you could toss in a 3x120mm rad, upgrade the CPU block, and liquid cool the NB and go even farther.
For a 300+ configuration the sky is the limit.
Also I've noticed the numbers they get don't match what other reviews have put out for a lot of the items used.
Nickel020 - Tuesday, September 18, 2007 - link
As aigormola stated, ~200$ watercooling setups will beat any air cooling. A dual radiator doubles the heat dissipation capacity and is like 10$ more than a single.And don't forget that you can keep you watercooling setup for like 5 years, while you usually get one 50-80$ heatsink and fan every time you upgrade your PC.
The review is fine, but the conclusion is the worst one I've seen in 5 years of reading reviews at AT. It's just plain wrong and will mislead a lot of people.
aigomorla - Monday, September 17, 2007 - link
First off, your picking the subject area which holds the most debate. Its a common ground fact that a 120x1 radiator will be lacking. Your test subjects were in fact both 120x1 radiators. One was made of ALU and the other Copper.Your looking at entry lvl water cooling and using it as a comparison of middle class custom setups.
If you look at the swiftech APEX 220 series, you'll see your statement at the end not hold true.
The direct drive released by swiftech on a 120x1 platform, as well as the corsair nautilus is not the best grounds to claim such statements. The reason is the lack of the radiator.
120x2 radiator setups such as the swiftech Apex220 setup will eat the two coolers you listed and also any air setup you could possible throw. This unit is also modestly a bit over 200 dollars. Last price checked at jab-tech showed it to be 209 dollars for the complete setup.
Also your making a lot of potential people who are interested in h2o migration think twice. Your passing more myths on watercooling then i can think of. If you feel i am wrong in any statement, i recomend you contact Gabe, owner of swiftech and tell him you would like to give the company a chance to prove how powerful h2o cooling can be by giving you a sample of there APEX 220 system. Im sure Gabe will be all over it.
Also, you need to retract your statement about the 300 dollar mark. 200-300 is considered mid tier water cooling and no air can match to that calibur.
@ the guy who was about to migrate to the MCR320. Go ahead, and dont look back. This review only proved the power of 120x1 radiator. Its very lacking, however the moment you step up to a beefier radiator, 120x2 or 120x3 in your case, you'll see all the air people left behind in your rear view mirror. 2x the cooling power for the 220, and 3x the cooling for the 320.
Lets not even get into the power of a thermochill PA120.3 Believe me, its a very very big margin once you get there.
I am the creator of the watercooling thread sticky over at anandtech forums, and i was VERY disappointed in this article. The members over at Xtremesystems think this is a joke. These are the guys who are the front run pioneers in h2o cooling.
I ask polietly that you remove that comment of the 300 dollar being topped by high end air until you've tested an APEX 220 unit. All you have done was test 2 low end units in h2o and based a final conclusion.
walltari - Tuesday, September 18, 2007 - link
Very interesting review a pretty tough discussion but everybody forget one thing. You look only on very expensive kits useally common in U.S. or western Europe. I live in Czech republic (Eastern Europe) and I see another choises. I have completly watercooled PC. Radiator 2x120, pump with expansion and filling tank, CPU blok, GPU blok, Chipset blok, 2x HDD blok a this kit i bought for 210$. In this price you coudn´t buy ale these aircoolers and have same results. (I bought it form company www.viscool.com). I hear, and that´s the problem, that everybody have, DVD-rom.In the review author hit the problem of the noise. Really the pump is the most noisest thing. I´m interested in building watercooled systems for three years and at first it is neceseary eliminate vibrations. The differnce is that my system and systems of this firm is waterpump included in watertank. This solutions lower noise to minimum level. They have 2 watertanks, one, included in kit, is smaller and second, which they made especially for me, because o my larger and more powerfull pump.
PS: Sorry for my english, I´m beginer
rotNdude - Monday, September 17, 2007 - link
Which direction was the fan blowing on the Swiftech kit? Since you mounted the rad off the back of the case and the fan appeared to be in the case, was it exhausting air or pulling ambient air?Also, how much fluid was actually added to each cooling loop?
Wesley Fink - Monday, September 17, 2007 - link
We used the existing case fan IN the case exhausting air. We also used the fan that came in the H2O-120 kit blowing air in the same direction. There is a 1-1/2" to 2" space created by the Radbox so air was being drawn in form the sides of the rad box.The pre-cut tubing in the Swiftech kit is about 10" long each. We used 12" tubes to reach the external RadBox mounted Readiator/Reservoir.
Jodiuh - Monday, September 17, 2007 - link
Thank you guys very much for using this universally accepted tool. I've always wondered why the temps for Thermalright's Ultra 120 Extreme were better than what I could achieve. There's 4 factors here:-ambient (20C-22C vs 24C-26C)
-temp monitor (NV vs core temp)
-fan (1600RPM vs 1200RPM)
-load app (farcry vs orthos blend) <--this might not matter
I'm currently loading an E6400@3500 between 62C-66C w/ 1.475 in bios (1.43 actual) when running orthos blend.
Thanks again! Maybe orthos blend could be used in future or even ran again on past coolers?
rochlin - Monday, September 17, 2007 - link
These results totally make sense if the laws of physics have anything to do with it.There are some advantages to water cooling vs air, but you have to take advantage of them:
Heat dissipation and the high specific heat of water: Because the dissipation of heat is separated from the CPU, you can have a bigger and more efficient heat sink than you can ever fit on top of a cpu.
Also, because the heat dissipation (heat sink) is outside of the case, you can use the presumably cooler air outside the case to cool the heatsink.
The point is, the water needs to be cooled. If the heat sink/fan setup cooling the water is no better than what you attach to your cpu, then the system will NOT cool your cpu any better. You will be recirculating relatively warm water back to the cpu.
A sensible approach would be to build a giant heat sink. It could be aluminum (cheap) and big enough so the WHOLE case could sit on top of it. A channel for the water would zig zag under it. This kind of heat exchanger (like used in solar water systems) would cool the water much much more than anything you could fit inside the case.
The relatively small heat exchangers in the two tested units just aren't going to outperform the terrific Themalright 120 Extreme heatexchanger unless your air temps inside the case get out of hand. The advantage of the heat transfer capability of water is WASTED unless you cool it down with a better heat exchanger outside the case.